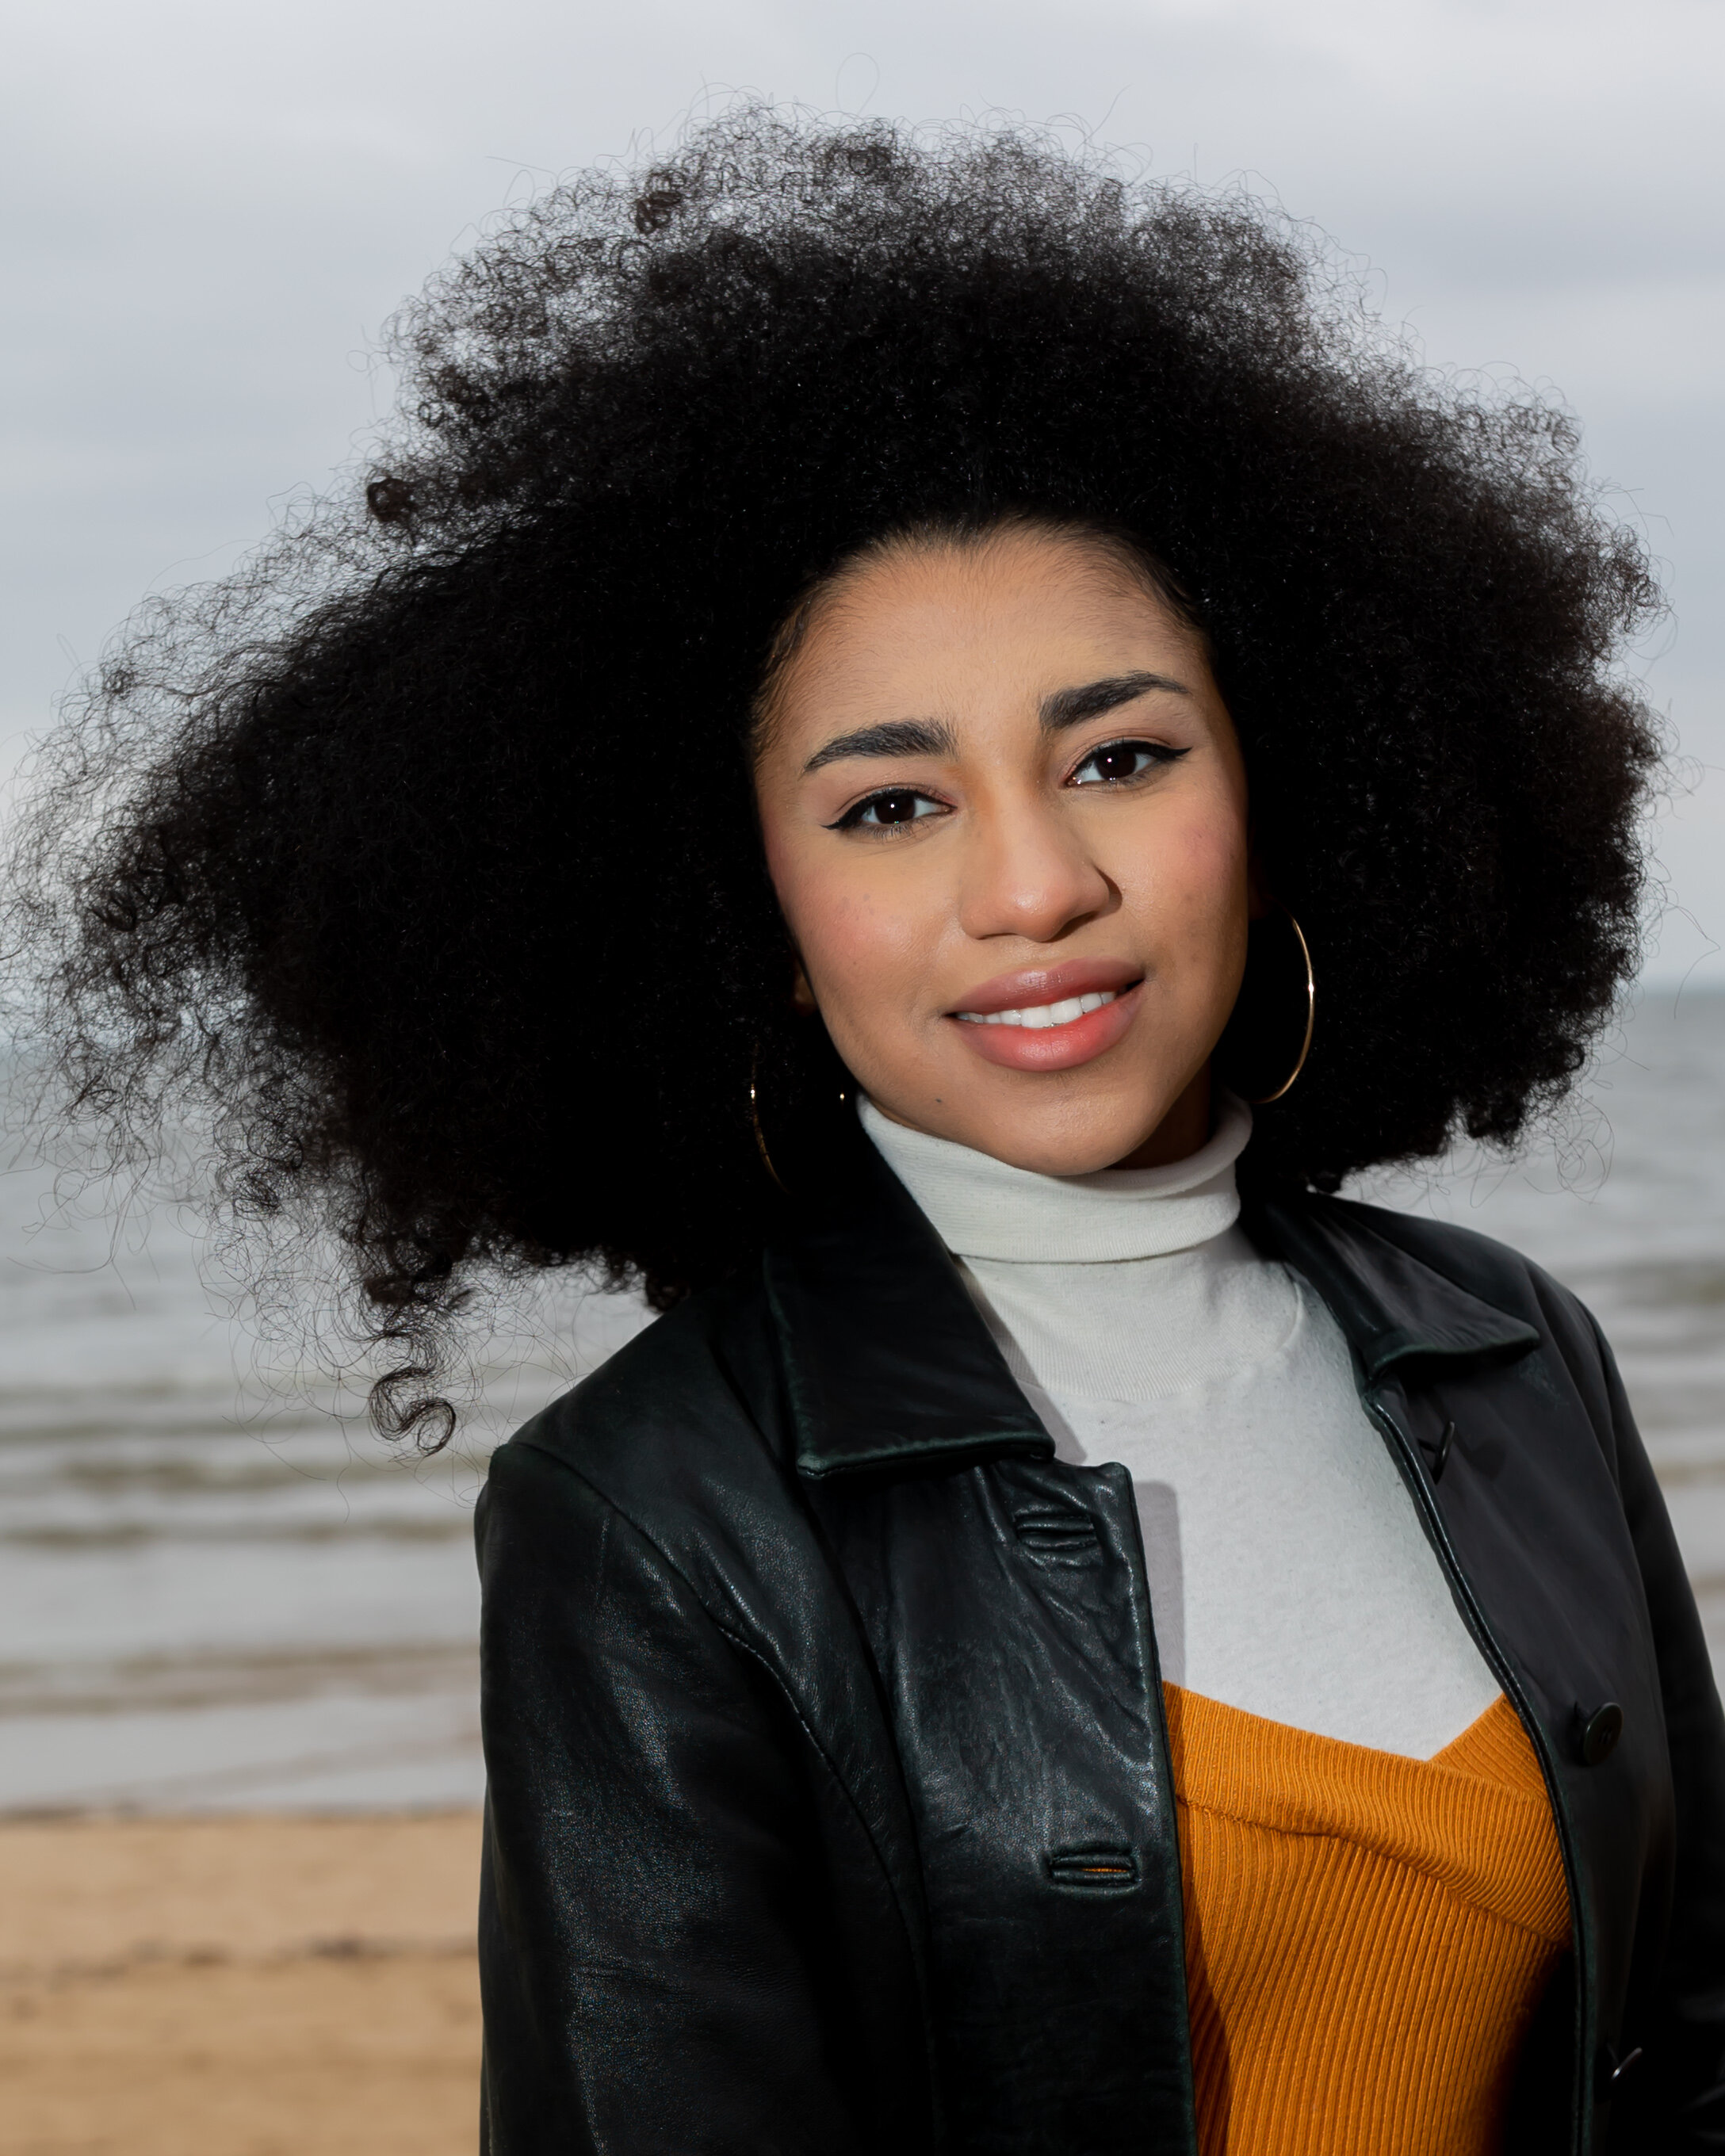
Posing doesn’t just have to be about head and shoulders. People have hands and don’t be afraid pose with hands too.


Posing doesn’t just have to be about head and shoulders. People have hands and don’t be afraid pose with hands too.


I am neck deep in processing work (a good problem to have as that means I am buried in work in a field I want to be in), so here are some photos from a test session that didn’t work out. Normally, I just post the stuff that I think is solid, but then I realized maybe that’s why all artists and photographers I aspire to be on the same level with always seem so much further out of my league: we never get to see their sessions that go wrong.
This started as a background test. With a dog. And bubbles. Now, I don’t know if you all have noticed but that dog is getting bigger. I suspect by this time next month he will be the size of a house. Well on the day I took these photos I neglected to consider his size and once I did, I was like “no problem, I will just crop it down in processing. Despite me wanting this to be quick that is a useful lesson:
Cropping only works if the subject is smaller than the area you want to crop down to.
For example, this dog is bigger than the background I wanted to crop down to. That means unless I want to pop open photoshop and slowly stitch together an extended background, there is simply no way to crop the photo down without cutting the poor puppy’s head and hind off. Thus, most of these pictures are cropped all the way down around his head.
The thing about that background, though, is that it is darker. Generally, I try to contrast my backgrounds. For example, if you have extremely pale skin, then you better believe we are breaking out darker colors for your background unless you have clothing that does that already. Which brings me to my point, this dog has very dark fur around his face. Putting a dark background behind him only made him darker to my camera’s sensor which made getting a focus on him a challenge. This was compounded by the fact that he is a puppy and puppies tend to move around a lot. Which brings me to another useful tip:
If you keep having issues during a photo session, you should stop and take a second to think and adjust.
At this point I should have rethought what was going wrong, what I was doing to prevent things from going right, and what could change to make things go better. I did not do this. It was at this point that the puppy decided he wanted to try and lick the bubbles. That made me chuckle and we wrapped up soon after that.
Finally, and I know this is repetitive at this point, but it always bears repeating:
If photographing pets, be nice to them and keep it fun regardless of how the session is going. They do not understand what you are doing but they are trying their best to make you happy, so you owe it to them to keep them happy.

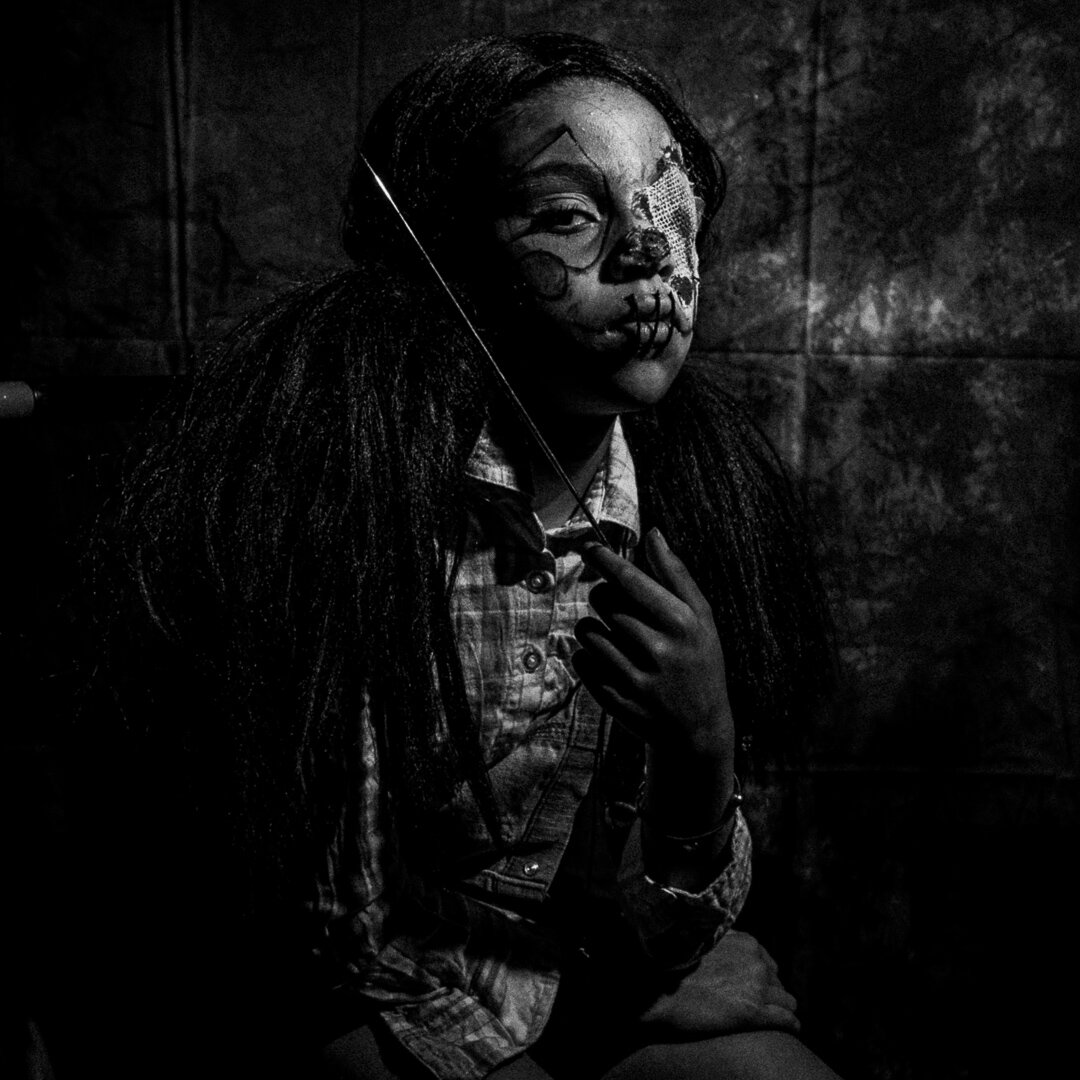


Or hopefully at least. My assistant and I had so much fun during October making monsters and horror scenes that we decided to make a new one every month.
I know for a fact this character took several changes and eventually morphed into this final character. That’s how the creative process works. On my end, I made sure to keep the tone of the concept in mind and keep a few ideas floating around to be ready for the final character. For this one, I wanted dark. Generally, people who walk around with their mouths sewn shut and carry giant sewing needles aren’t in cheery scenes. In processing, I tried to keep the contrast higher and the exposure darker. To add a little grittiness, I cranked up the clarity and texture. Finally, I added some grain just to add to tone.
Two things though:
1) Knowing what some of the less direct tools in the photo processing software I use really helped speed things along.
2) Even though I had a general idea of where I was going with processing, I did still try some other things just for the sake of experimenting.
On that second thing though, once again I can’t stress enough how important experimenting is. If you experiment a lot you will have lots of half idea fragments floating around in your head somewhere and your brain will be working to use those fragments when the time is right. Think of it as a library full of half ideas in your head that your brain uses to put together full ideas. If you fill it with a lot of fragments, your brain will have more to work with leading to more “AHA!” moments where an idea suddenly strikes you.
Lighting for this generally revolved around that strobe I have been testing out. The outdoor shots, of course, included the sun.

This past weekend I had the good fortune to do some actress headshots. I enjoy this type of photography as it guarantees two things:
1) I will be working with an artist.
2) I will be working with an artist who takes their craft seriously enough to consult a professional with this aspect of their career.
I enjoy working with other artists, even if they aren’t photographers. I usually pull inspiration for other ideas just being around them. I don’t fully understand what is going on there but that’s just what happens.
All that stated, actor headshots can’t just be done at random. If you have never done them before, then I highly recommend you do a lot of research into them before you try. The end results are for the casting director and your client needs that photo to jump out from all the other headshots the casting director is looking at. But it also has other parameters too, for example it must be a good representation of the actor or actress being portrayed without any of the usual photographer tricks. What the casting director sees is what the casting director wants when that person shows up, so no massive photo processing or edits.
Meanwhile, you must be able to pose the person in front of your camera with all those parameters in mind. Again, research is important, and I’d even go so far to say that you want to talk to some casting directors and ask what they are looking for. Remember, this is a process and there are various people along the way so taking the time to understand the process and the people involved will really help you give your clients the work they deserve and possibly the work that will get their foot through the door.
So, what I do for actor headshots is 2-fold: locations and poses. If the client has a location in mind, then I will work several areas in that location, so they get a variety of backgrounds. You would be surprised how much you can change the background by just moving 10 or 20 feet. I also try to throw in a portable studio setup just to get them that studio shot. If the client doesn’t have any locations in mind then I use a park I am familiar with (I am familiar with quite a few parks in Anne Arundel county, we got awesome parks). Likewise, if the client has looks they specifically need then I work with that, otherwise I go with “smiling” and “theatrical serious” and then a few others as the session goes on to give them options to match the part they are trying for.
But like I already stated, research is key as there are lots of small parts involved here that you need to understand.


We got hold of a new boom stand, so we did an overhead lighting session. Don’t worry, this isn’t a boom stand commercial, but I will say I never imagined being happy with quality metal stands. Seriously, the upgrades I’ve been happiest with usually have been when I have purchased or got hold of a higher quality light stand or other support equipment. I can get by with most any camera and lens but a quality support piece will save me time and give me one less thing to worry about during a photo session.
Anyway, once again we are using a random 3-yard piece of cloth. If you want your photos to have a different look or feel, then find some place that sells scrape cloth or cloth in small 3-yard pieces. Just throw them on in any way and you got something new going on. Just consider the thickness. Thinner pieces will need to be folded over so light does not travel through it. Unless you want light to travel through it.
Then we just threw in a skull, a cane, some fog and went to town.
Some of the shots have a second light, you will notice many of the shots we didn’t use that backlight you lose the model’s hair to the black background. That’s just something to keep in mind. It isn’t always bad but if you have anything that matches the color of your background and you want to bring it out then you will need to use a light to separate the two from each other.
We used a studio strobe with a boom stand and a softbox pointing down and a speedlight off to the side with a grid and a blue gel. The rest was just us having fun with the setup.


For these photos we used a white sheet, plexiglass, and a few photo processing tools. The first part of the trick was the setup. The set up was simple, two photography strobes with softboxes, a white sheet set low so it covered the floor (though I could have just as easily used two sheets for this), and a piece of plexiglass over the sheet on the floor. For the record, both Home Depot and Lowes have precut plexiglass for sell.
The second part of the trick is in the photo processing tools. I use Adobe Lightroom though the other options out there likely have similar software tools. So, I started off by making the typical processing adjustments; exposure, contrast, highlights, shadows, whites, blacks, dehaze, and vibrance.
Okay side knowledge here, in Lightroom there is vibrance and there is saturation. Vibrance is built to try and have minimal impact on skin tones whereas Saturation affects all colors. This difference is important because skin tones tend to include yellows, oranges, and even reds. It’s all weird. On the few occasions I’ve had to bring out the green in grass, I pretty much always start with YELLOW and usually that’s all I have to adjust. Same with skin tones. This just makes me think grass and humans are both share the trait of being weird.
Back to the post though, after I made all the usual adjustments, I then went to the Adjustment brush, set the feathering to 52, and set the exposure, highlights, shadow, blacks, and whites to 100. This would make all whites that brush touches extremely white while the feathering, for the most part, allowed the rest of the photo to remain untouched. Then I just applied it to the white areas while avoiding the reflection. And that’s it. No need for a massive studio or a painted white photo area. Just a little work and patience and it all works out well.


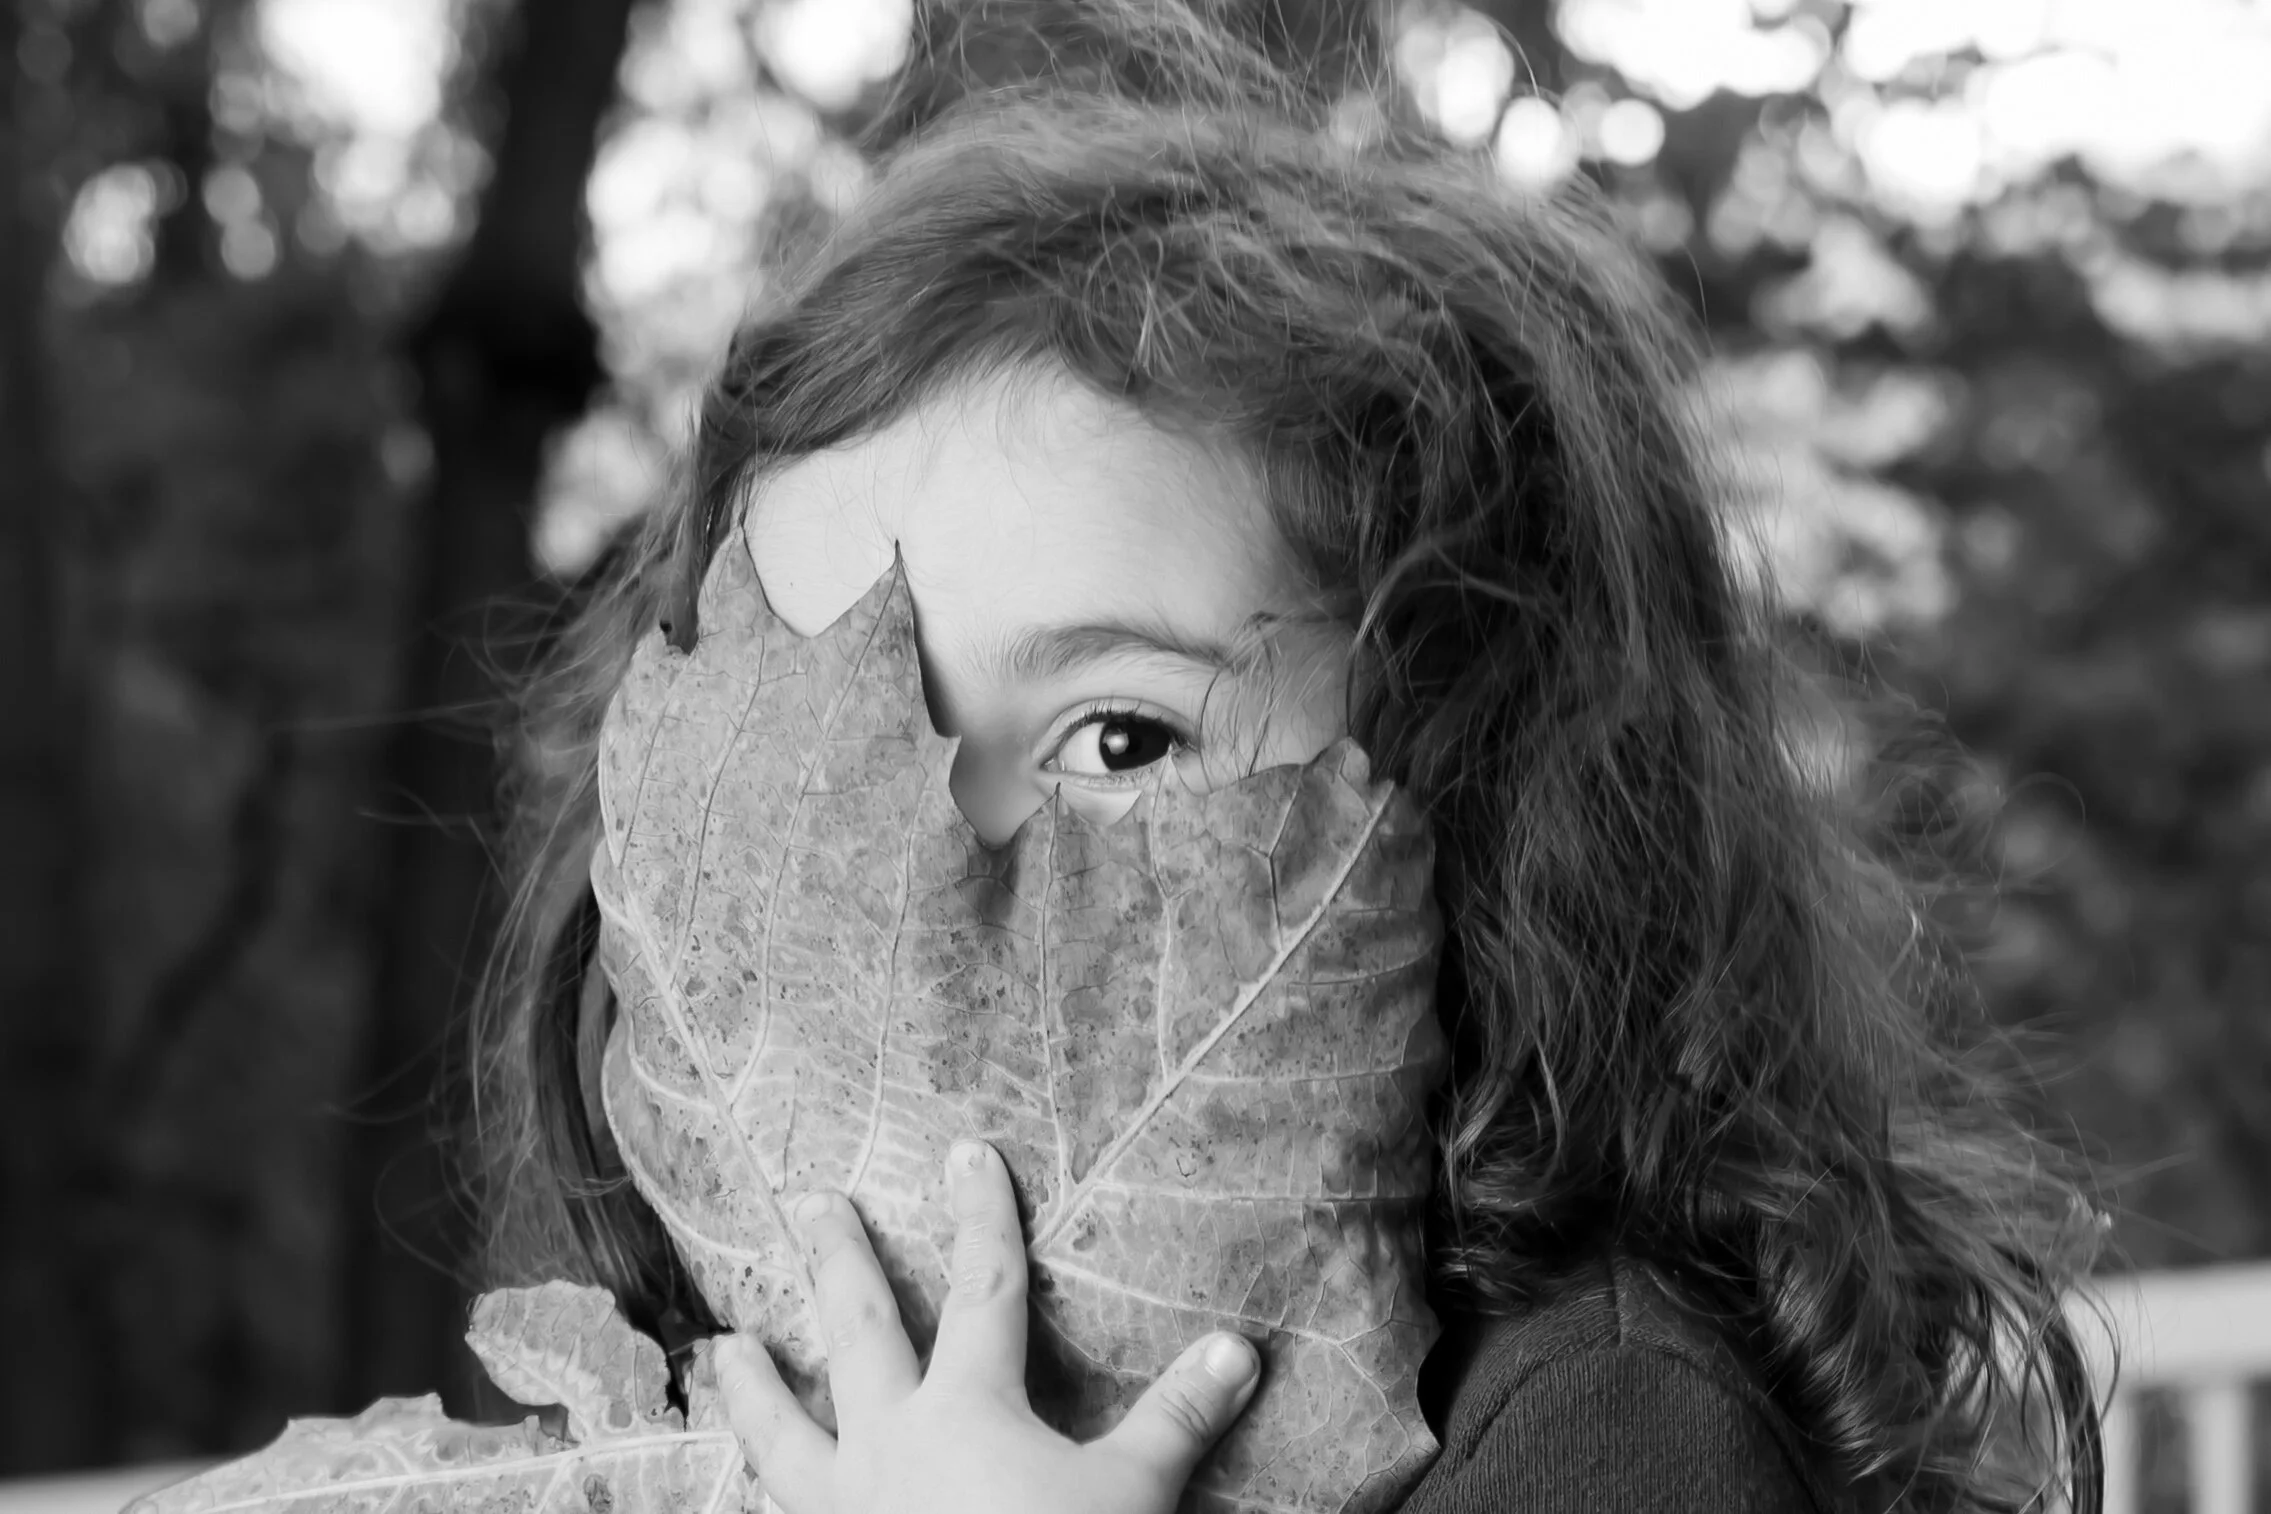
Leading lines can be useful in photo composition. Lines in the background and foreground can be used to guide the eye to the subject of the photo. These are leading lines. This can be useful if you have a busy part of the photo or simply want to have some influence over how others view your picture. Think of them as a way of telling the viewer to “hey look at this part of the photo!”
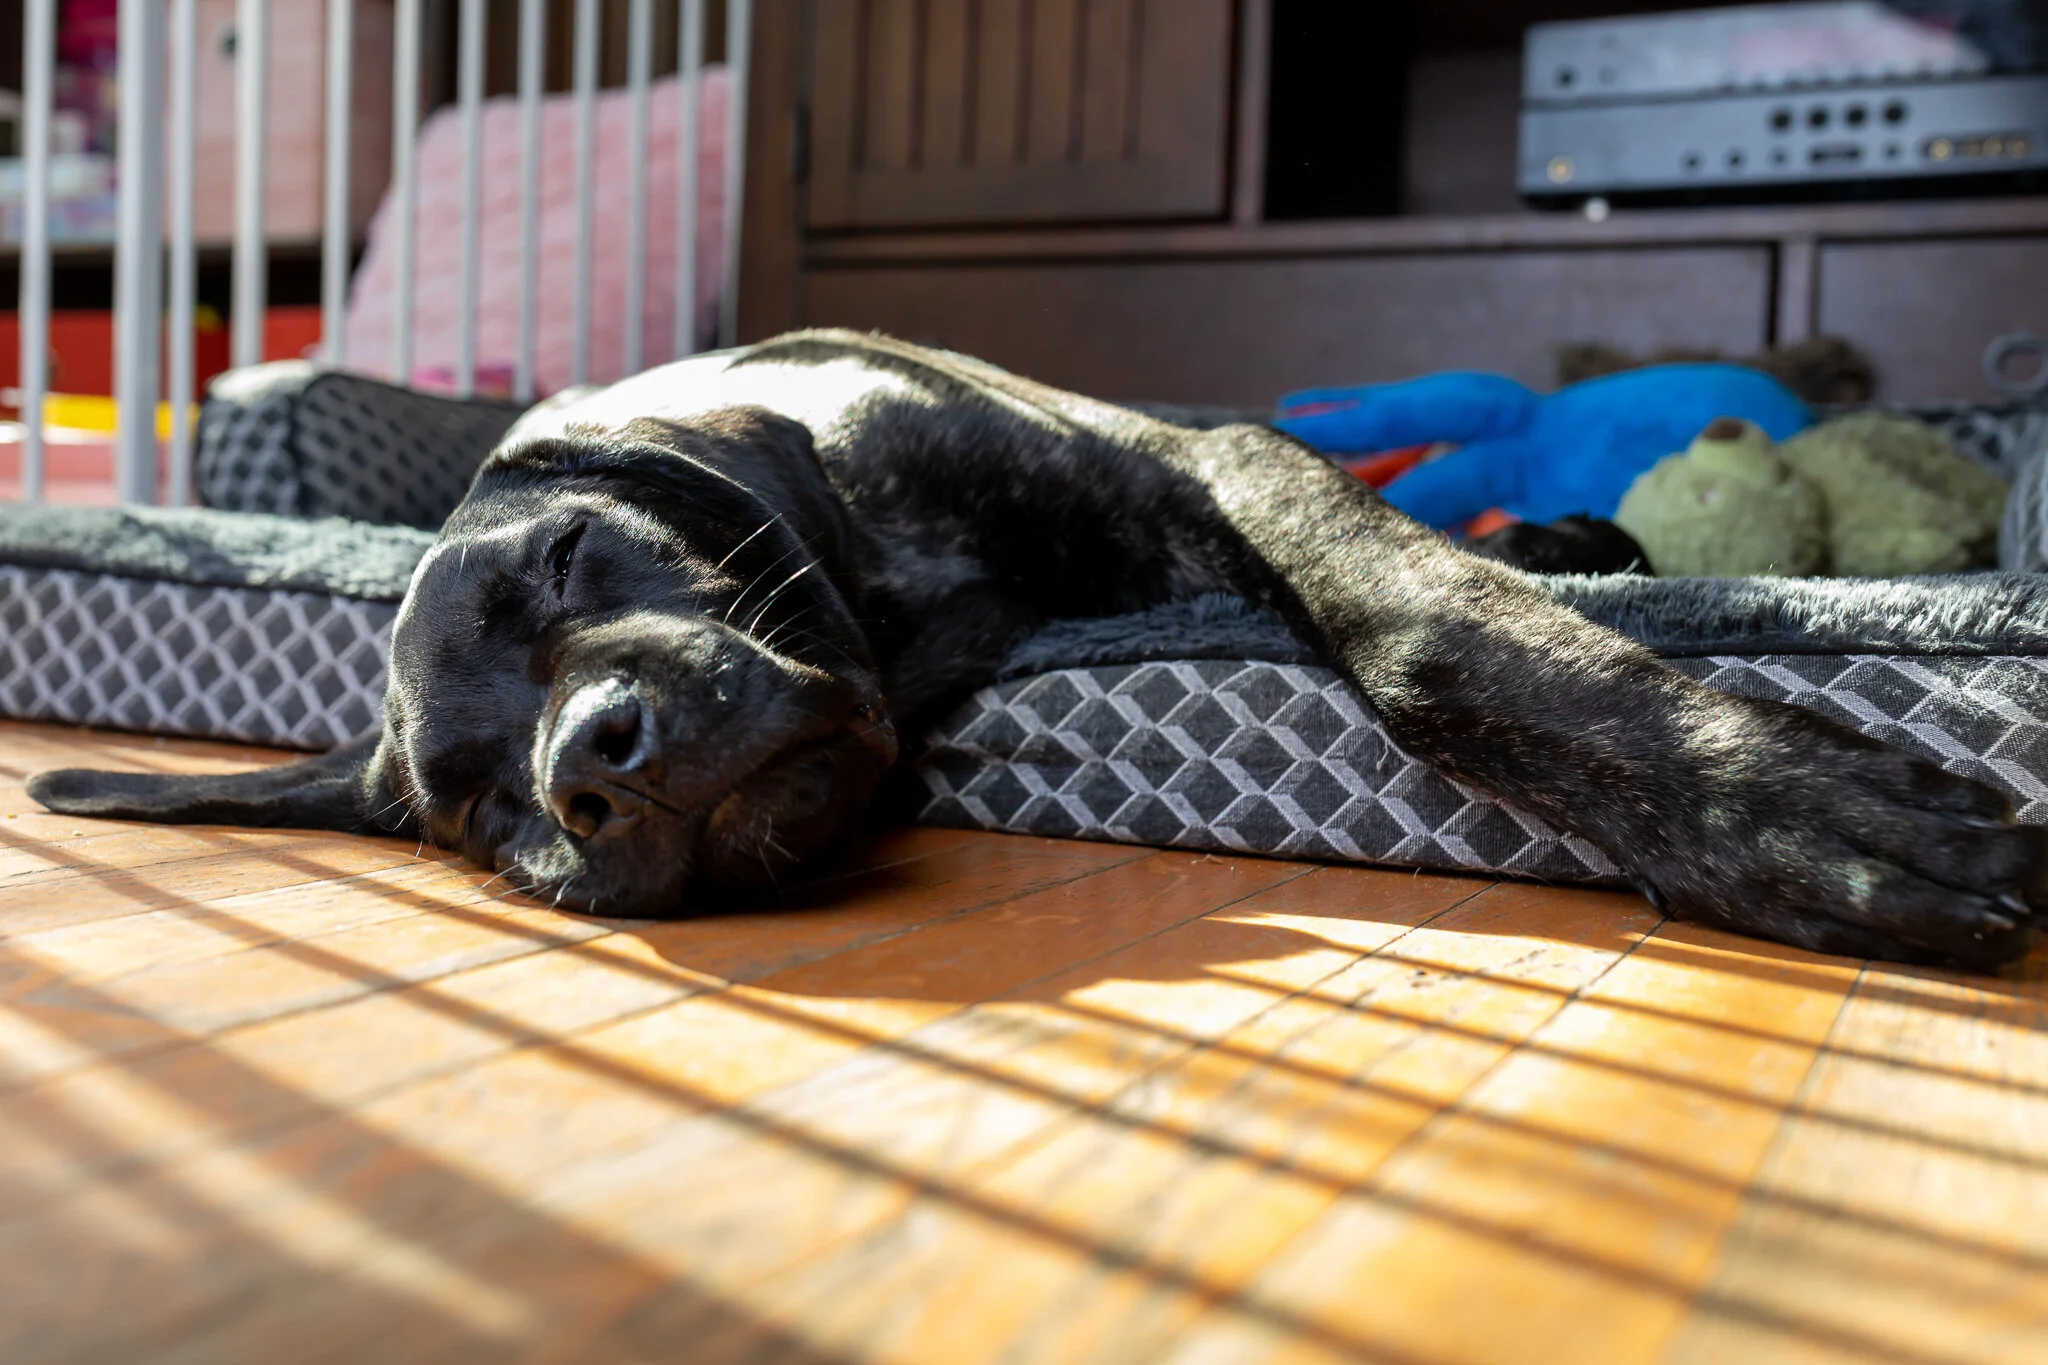
For most of these photos I used natural sunlight and a strobe light with a soft box. I caught the puppy as he was taking a nap or as best as one can take a nap with someone photographing them. When you photograph pets resting just keep your expectations within reason. Do not expect sudden action photos. You generally know you are going to get just resting photos and there are just so many angles you can capture that from.


More low-key lighting work this past weekend. Low-key lighting is wonderful on so many levels. For starters, you don’t need much to make it happen. Just a single light source and possibly a black sheet for the background but you can even get away without that. This makes this sort of photography is a great place to start if you only have a single speedlight or strobe, a small work space, or just don’t want to deal with a bunch of lights.
Also, low-key lighting just involves one light, but what you learn about a single light source carries over to multi light set ups. What I mean is that if you practice low-key lighting for months on end and then suddenly add a second light, everything you’ve learned still carries over. And since you just have a single light, it’s easy to adjust the setup and try that light at different angles, which again only helps you understand light better.
Finally, and this is a secret I’m giving away here – if I get the impression I got a client or model who mistakenly believes they don’t look good in pictures then I start with a low-key lighting “test” (I tether my camera to my laptop so they can see what the pictures look like in real time). It’s just a dramatic, cool style that makes everyone look great. So, it’s a good confidence booster for a nervous client. Not to mention the photos consistently tend to look good whether they are in color or black and white.
Black and white photography is one of my favorite styles. I enjoy the simplicity of the technique and how it really brings out the subject being photographed. On that note, usually you want to try and keep the background simple for this style of photography. If you have a busy background, your subject may get lost in the setup due to the lack of colors.
All that stated, a reason I don’t generally set out to make a black and white photo is that color photos force you to consider so much more. Developing a good eye for color photos helps improve your skill to manage the few shades of color in a black and white photo. Remember, any style of photography you work with can improve your skill in another area.

Meow, oink, and quack got this head tilt.
Now with October out of the way, we can get back to “regular” photos and what a month to do them. Now that the leaves are all changing colors and the days are getting noticeably shorter it is much easier to catch that golden hour and get a nice ambience outside. When working during the golden hour, you can really get your model looking sharp by just getting that sun behind them to create depth with the light and have a nice golden glow on them. I suggest having a light or reflector up front to fill in some shadows, but it isn’t mandatory, just a quality of life issue to save you a few minutes in processing.
As I always say when working with animals, keep it fun, be nice, and be patient. They just want to make you happy most of the time. For dogs, if you want to get that head tilt then give them a reason to do it. Make strange sounds. Here I was meowing like a cat and quacking like a duck. He eventually did the head tilt. He was low energy at the time, so we did laying on the ground shots. You generally do not get to decide what mode they are in. Sure, there are tricks you can do depending on the pet and the personality but at the end of the day they are going to set the tone. So just go along with it and it will make your life easier.
I used a photography strobe with a softbox for the front to fill in the shadows and the sun in the background – so a two-light set up. Once again, the sun is a wonderful gift. Learn to use it and never stop learning new ways to use it.

"I have stood knee deep in mud and bone and filled my lungs with mustard gas. I have seen two brothers fall. I have lain with holy wars and copulated with the autumnal fallout. I have dug trenches for the refugees; I have murdered dissidents where the ground never thaws and starved the masses into faith. A child's shadow burnt into the brickwork. A house of skulls in the jungle. The innocent, the innocent, Mandus, trod and bled and gassed and starved and beaten and murdered and enslaved. This is your coming century! They will eat them Mandus, they will make pigs of you all and they will bury their snouts into your ribs and they will eat your hearts!"
– Mandus, the man, the engineer, the machine – the only true degenerate that deserved to be fed to the machine, December 31st, 1899
I did not create this monster, Mandus came from “Amensia: A Machine for Pigs”, but I was inspired by his story to make this picture of him. A quick summary of the story:
Oswald Mandus was an idealist, a humanitarian, and father. He only wanted to make a better world for humanity and his twin boys. But when he was given a glimpse of what would happen in the next century, how his boys would die horrible deaths in World War I and the terrible atrocities humanity would commit against itself again and again, he lost his mind and came to believe that the only way to save humanity was to sacrifice it. He started by sacrificing his two boys and got to work on the rest of the humanity. He eventually built a machine that would turn the people he sacrificed into crazed half pig half person monstrosities who would then go and bring back more people to sacrifice to his machine. Fortunately, he was stopped by himself on the 31st of December 1899.
This whole project was just a ton of FUN. Fake hearts, fake blood, and fancy suits - what could go wrong?

For safety reasons, make sure you find a box that is the proper size for your head you wish to mail.
In the past, you would give someone your heart, but in this modern age it is all about the head and what is inside it, though. So here the model is sending her head off to someone she is interested in. Boy, will they be surprised when they open that box!
This is done in a manner similar to the UFO abduction picture we posted last week. Which I guess I didn’t explain. Well me explain the steps for this one:
1) Find the location you are going to use, set up the background, scenery, and lighting.
2) Find the angle you are going to photograph from (I recommend low angle for decapitation and floating effects).
3) Set your camera there and hook it up with either a wired or wireless remote (I did wireless)
4) DON’T MOVE THE CAMERA FROM THAT POINT ON.
5) Take a picture of just the scenery without anyone models on set. This shot makes it possible to “decapitate” the model.
6) Take a picture of the model holding the box (or a fake item stand in for a head if that’s what you are going for.
7) Have the model put her head in the box approximately where it was and at the same angle it was at in step 6 and take a picture.
8) Get all three shots over to photoshop or a photoshop equivalent.
9) Edit the shots together, taking great pains to get the minor details right.
10) Take pride that you managed to decapitate someone!
All in all, this was a fun setup to do. For the blood, we made it out of chocolate syrup, cocoa powder, light corn syrup, cornstarch, and red and crimson food coloring. Watch out for the clean up though. This stuff is STICKY so you need to be ready with a mop and several go overs. Still totally worth it.

One tip, when going for fear or terror, have your model(s) actually scream, it works out so much better.
Watch the skies! There are unidentified flying objects flying around. They have travelled a long way to get here and they don’t intend to leave alone. The trick to this photo involved a lot of careful positioning, angles, and some photoshop work. Also, a lot of fun!

People watch the left hand watching them when they should be watching her right.
It is October, which is a great excuse to get out of your norm and try and create strange, spooky, scary, and fun things. In doing so, hopefully, you learn something new along the way. The only way to do that though, is to try. So, imagine something crazy and try and bring it to life. Research the lighting and props you’ll need to make it happen within your budget and go for it. You’d be surprised how easy some of these things end up being.

Be flexible with them and treat them right - they are just trying to make you happy but they may not understand how.
Pets are wonderful subjects to photograph! And also they can be a challenge too. I’d recommend approaching them like toddlers. Sure, you might be able to give them some direction but at the end of the day they are going to do their own thing. So for the first tip:
Tip 1: Have patience and flexibility.
Pets can be taught to understand basic commands by your average pet owner, but at the end of the day they are just animals and they will do what animals do best: whatever they please. So be patient and be flexible. If your cat wants to nap, then photograph a cat nap. If your puppy wants to play, then photograph puppy play. However, when they are doing what you don’t want them to do then my second tip comes into play:
Tip 2: Don’t get angry, frustrated, or annoyed.
Your pet loves you. They just want you to be happy. They don’t understand what that weird thing in your hand that goes “click” does. They likely have no concept of photography. But if you lose your cool and get frustrated they will know it in a heartbeat even if you manage to not vocalize it. Animals are masters at reading body language. That’s kind of their shtick. So maintain your cool because if they think you are annoyed or frustrated then they will get upset and your whole photography plan will get that much more washed away. Worst case scenario is to stop and try again later.
Tip 3: Have fun.
You are happy when you have fun. Your pet is happy when you have fun. You are both happy when you both have fun. So try to keep it fun. Besides, by making your photo sessions fun, you will find your pet more available for photo sessions. That’s a win-win.
Tip 4: Bribe em if you have.
Look, your pets are smart. And if you add treats to your photo session they will not only cooperate better but they will also associate treats with photography and will be more willing to work next time you pull out your camera. This is especially useful for dogs, because dogs like to work and if they associate your photography sessions with work that will make them happier. But you must pay them if you are going to make them work.
Anyways, good luck, and have fun photographing your pets.

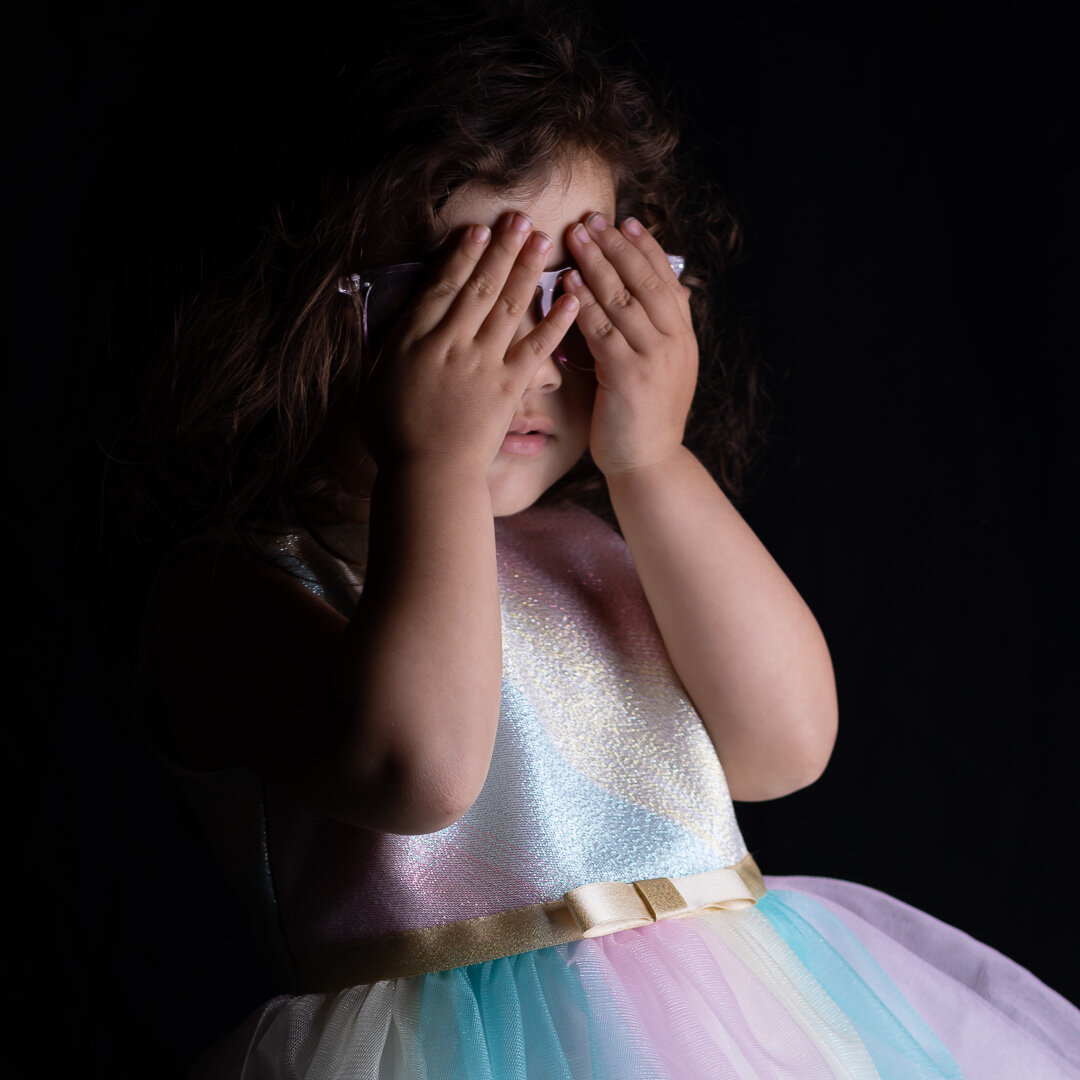
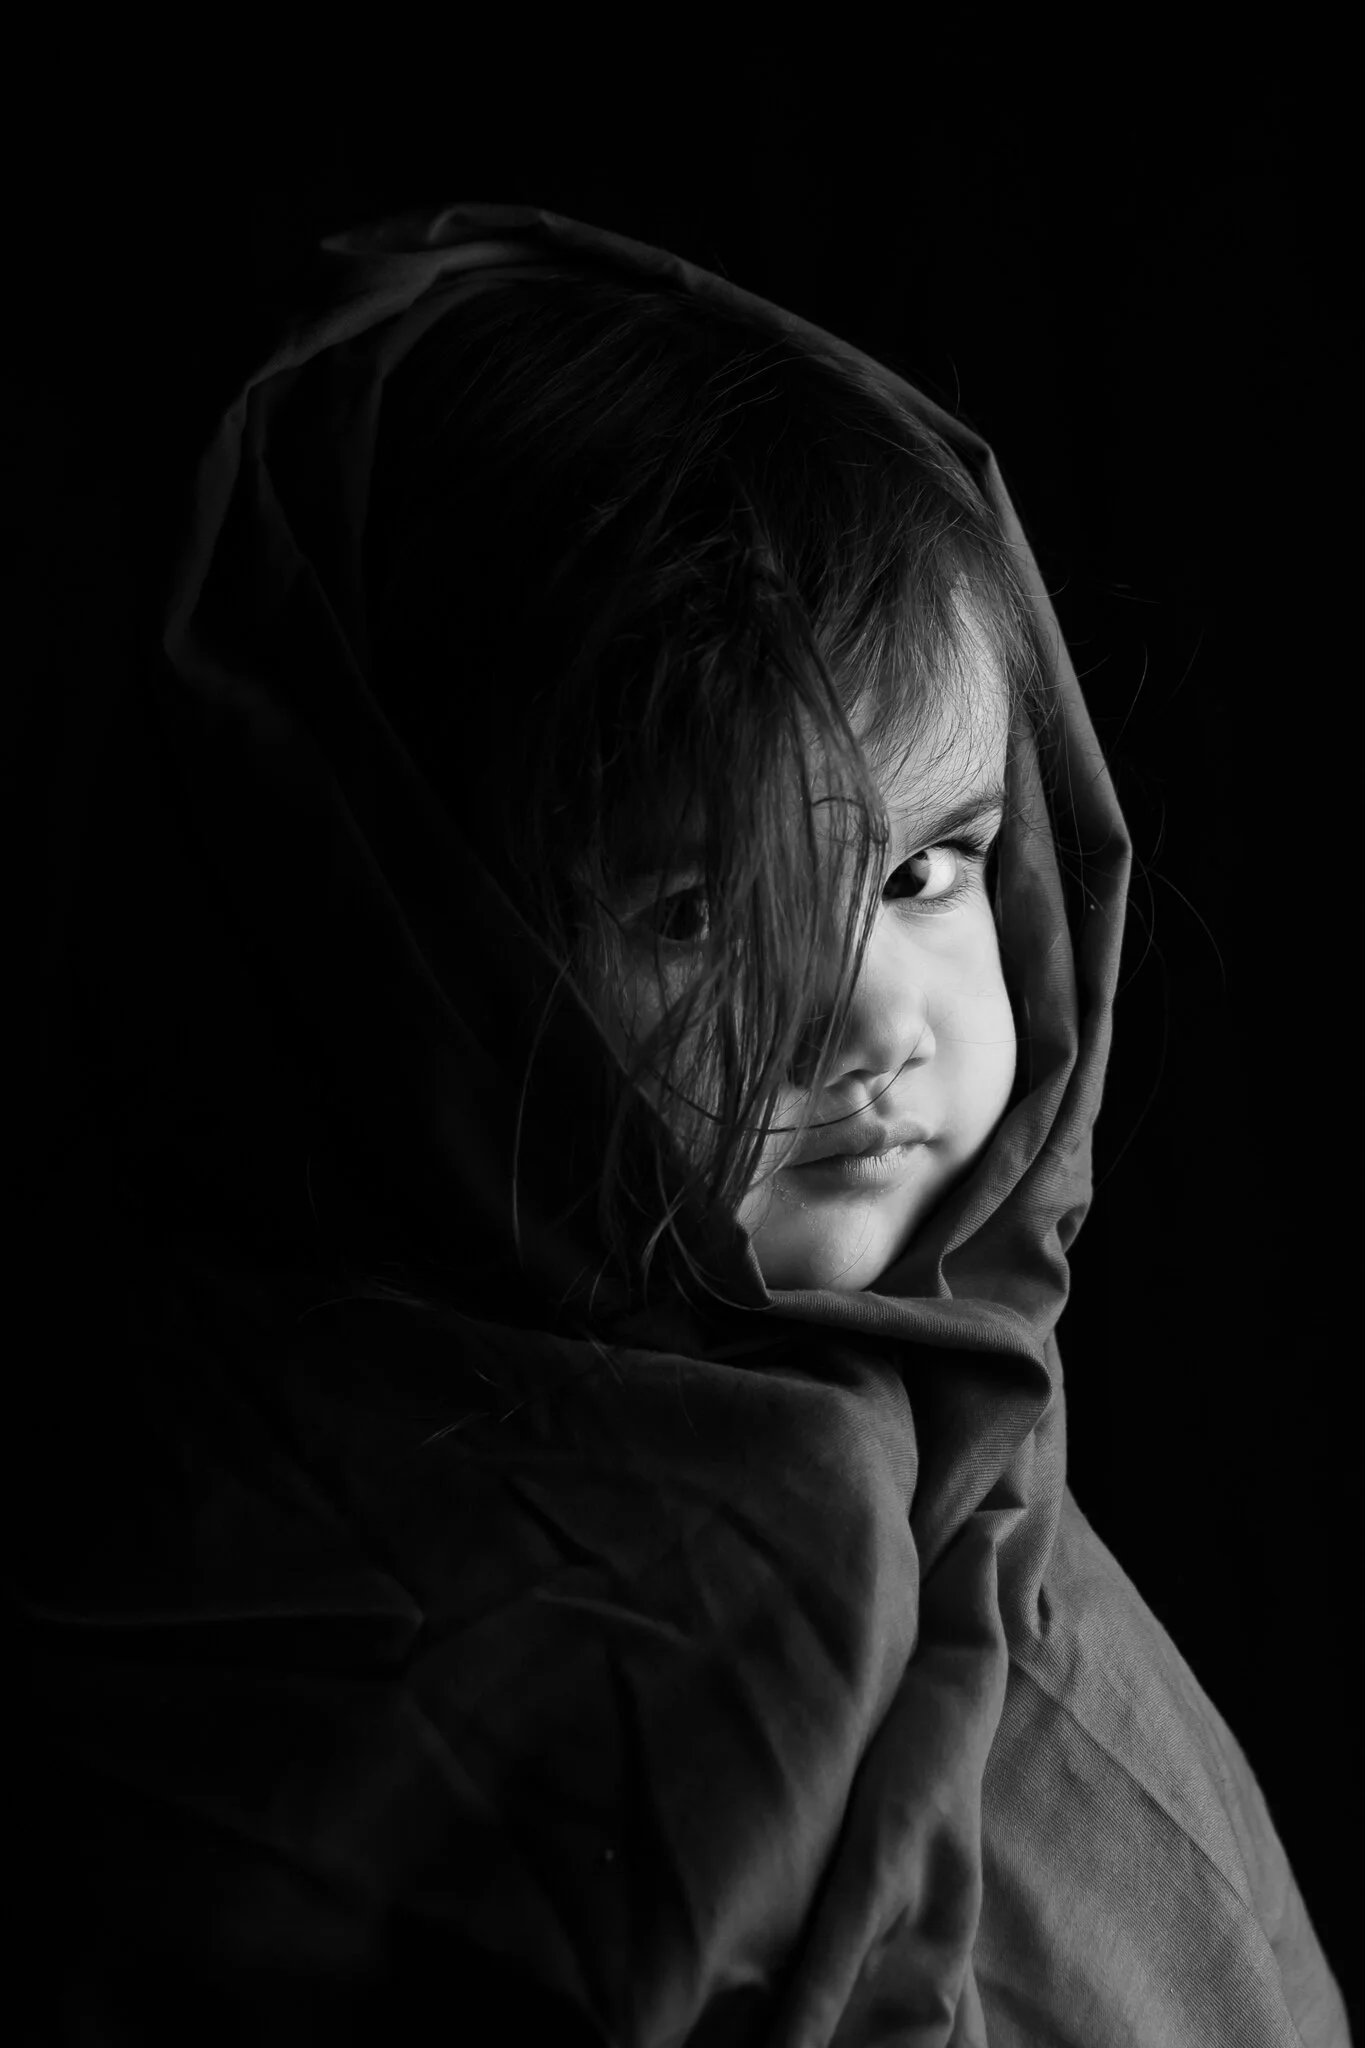
Negative space can add intrigue and even act as framing. Give it a try!
Negative space and shadows in a low key lighting setup can add intrigue. Take time to learn how to work with those shadows to really help make a photo pop. A few well done low key shots can also help bring a subject nervous about getting their picture taken out of their shell. If you find your subject defensive then start with defensive photos and work from there.

I generally have an order to the pictures I want to showcase here on this blog, but I don’t want to wait for this one. We had too much fun and the results were just so far beyond our expectations for a first attempt that I am just going to bump this one up to the front of the line. Not to mention we are using it in our new banner on the portfolio page so I might as well jump to this one now.
FLOUR!
Yes, flour. I’ve seen other artists use this for dramatic effect and after talking to my team we jumped right into it. Well no, that’s not true, we actually waited 3 weeks and then jumped into it. The first week I wanted to make sure I knew what I was doing first and did a bit of research and then it rained the next 2 weeks but we eventually had a nice enough evening to do it.
All I am doing is having the model throw flour in the air as she jumps or does a dance move. Then I have two unmodified speedlights off to the side and back a little to light up the flour – its along the same premise as lighting up fog from a fog machine. Light must bounce off that flour to make it really appear in the photo. I also had a strobe with a softbox facing the model near where I was photographing.
Which brings me to where I was photographing – I was AWAY. Flour and cameras don’t mix well. So, I put on my 85mm lens and got at least 12 feet back. Same with my strobe, except it was about 10 feet back. So, you might want to take a moment to brush up on the inverse square law of light. You do not need to do the math, just understand what is generally happening there and compensate as you see fit.
Then it is just a matter of catching the model in the air at just the right time when the flour is in just the right spot. It did take a few tries to get each pose we attempted right, but we eventually got it down and got a lot of pictures we were happy with.
Four things to keep in mind:
1) Do this outside. If we had to clean up the flour because we did this at an indoor location, we’d have gone insane.
2) I purchased 4 bags of flour for this. While we used all 4, I could have managed with just 2.
3) We did this on a humid night when the grass was sweating. Both the models had to keep taking breaks to pull of globs of dough off their feet.
4) Again, flour will go everywhere, so you might need to hose down the area when done so your neighbors aren’t left wondering what all that powdery whites stuff and goo globs that are all over your yard are.
Regardless, this was a very fun photo session, and everyone involved was very happy with the end results.

This picture here was done with a single light and a reflector. The more you learn to utilize less, the more you will be to do when you start adding lights later and the less you will need to set up when you chose not to add a light at all because you know how to get the effect with it.
Currently, we own 5 lights. However, rarely do I put all 5 into action. That doesn’t mean I can’t, but I don’t really need to because I have a general understanding as to how to use my lights. And that is always where I recommend photographers start when it comes to improving their ability in their craft. You don’t need 5 lights most of the time and a lot of the time you can get away with just one light so long as you understand how to manipulate that one light.
If you only have access to a single light, be it a speedlight or the sun then great. Get out a reflector and see what you can do. Learning to manipulate the light you have when you are lacking options to add light will only help you be that much stronger when the time comes when you do have more light options. If you can master a single light and really explore all the different ways you can utilize it then when you do go to add a light all that knowledge doubles over to that new light. In fact, every time you add a light after you learn something new with a single light you can utilize that knowledge on every light you add.
So, it pays off to learn how to utilize a single light in as many ways as you can.
Throw a sheet into things to add intrigue. We were doing some light tests, but I never like to have models just sitting bored, so I try to pull some poses out of our test sessions. Here we throw on a nice blanket and everything else sort of fell into place around it. It doesn’t take much to make a photo intriguing, just a bit of creativity on the part of those involved. Once we saw the first few photos we knew we were on to something and just kept going with it. When all was said and done, we got a lot more out of our test session then we expected.

Your attempts don’t have to be your normal amazing results, especially if you normally do other types of photography. The exercise itself is what is important here.
All photographers should try still life photography at some point and especially during one of those lulls work that happens every now and then. Still life photography first and foremost forces the photography to be creative. How are they are going to set up their still life? What items will they use? It forces you to think about composition.
So, you have set up your still life, now you need think about lighting it. Do you use natural light or artificial lights? Will you be using reflectors? The good things about doing still life is that you really get ot play around with lighting. Usually when I photograph people I already have the lights set up, but when doing still life you can move the lights around during the photo session as your inanimate objects don’t mind waiting.
Finally, if still life photography isn’t your usually style, then do it understanding that. You are not going to be doing your usual amazing work. That is important because you go back to look at your usual work you might appreciate your skill in that photography a little more and have a little confidence in what you normally do.
Give still life photography a try, you have so much to gain and so little to lose from doing it.