• Single-Handed Arts, LLC
    • Luis Rosa-Valentin (Fine Art)
    • Contact Luis
    • Oil Paintings
    • Graphite, Charcoal, Pastel
    • Military experience art
    • Exhibitions
    • Media
    • Photography
    • Photography Services
    • Photography Contact
    • Photography Projects
    • Photo Blog
Menu

Single-Handed Arts, LLC

Fine Arts and Photography Services
  • Single-Handed Arts, LLC
  • Luis Rosa-Valentin (Fine Art)
    • Luis Rosa-Valentin (Fine Art)
    • Contact Luis
    • Oil Paintings
    • Graphite, Charcoal, Pastel
    • Military experience art
    • Exhibitions
    • Media
  • Photography
    • Photography
    • Photography Services
    • Photography Contact
    • Photography Projects
    • Photo Blog
×

Photography Blog

Catch up on my latest work.


IG - March 14, 2022 Post-7.jpg
IG - March 14, 2022 Post-2.jpg
IG - March 14, 2022 Post-3.jpg
IG - March 14, 2022 Post-4.jpg
IG - March 14, 2022 Post-5.jpg
IG - March 14, 2022 Post-6.jpg
IG - March 14, 2022 Post.jpg
IG - March 14, 2022 Post-7.jpg IG - March 14, 2022 Post-2.jpg IG - March 14, 2022 Post-3.jpg IG - March 14, 2022 Post-4.jpg IG - March 14, 2022 Post-5.jpg IG - March 14, 2022 Post-6.jpg IG - March 14, 2022 Post.jpg

Ready for Spring

Joshua Hubbell March 14, 2022

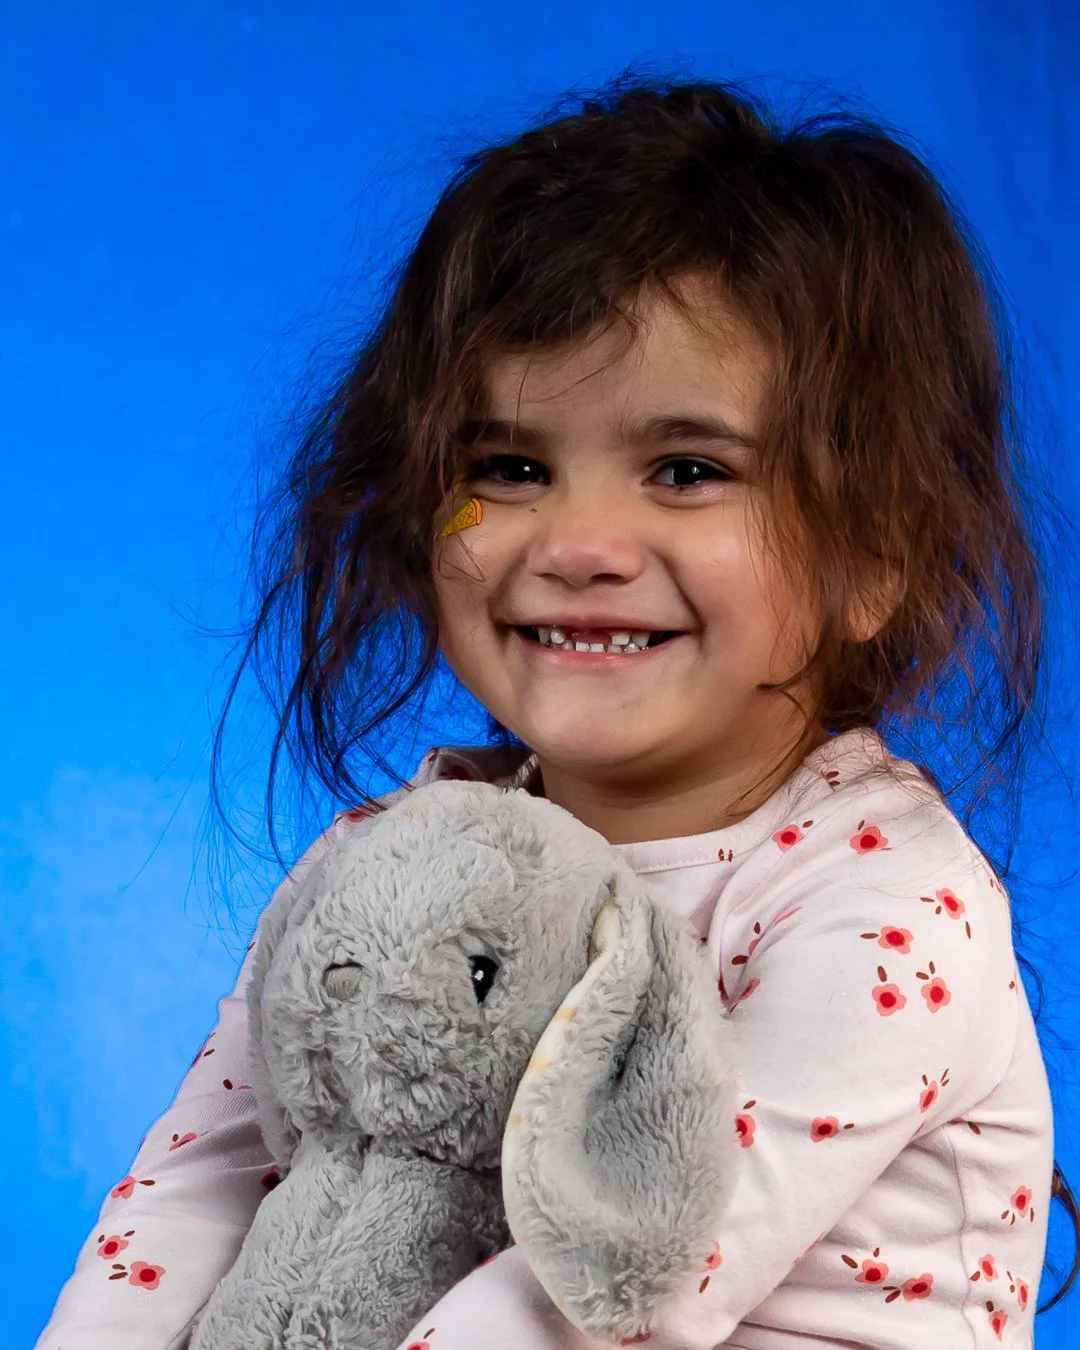
It’s been cold and miserable, so here is a photo of a little lady ready for spring to start. I coordinated with her mother by finding out the outfit of choice. Then I went with a white backdrop and flashed a strobe with a yellow gel on it giving a yellow background. We lucked out; she was in a very good mood at the time of the photo session so getting a smile was super easy. She was also very animated which always works great.


The last photo is the baby stand in for this photo session (or first or wherever the social media sites put it on – it’s the picture with the bunny). I can’t stress enough how important it is to have your setup ready before your subject is on set. Sometimes it happens, sometimes it doesn’t but the younger your subject the more you need to have things ready to go because the less certain you can be your subject will be in a cooperative mood. Thus, the stand in to test everything. Before this baby was on set everything was thoroughly tested. There was no waiting and just a few seconds for adjustments, just set her down and we start.


It's a three-light setup. The previously mentioned strobed aimed at the backdrop is one. The key light was a strobe with an octagon softbox. The fill light was a long softbox just off to the side of her. I also had her on a table because she’d be too short for even the smallest light tripod to hold the lights up. Obviously with help just off to the side.

Comment
IG - March 7, 2022 Post.jpg
IG - March 7, 2022 Post-2.jpg
IG - March 7, 2022 Post-3.jpg
IG - March 7, 2022 Post-4.jpg
IG - March 7, 2022 Post-5.jpg
IG - March 7, 2022 Post-6.jpg
IG - March 7, 2022 Post-7.jpg
IG - March 7, 2022 Post.jpg IG - March 7, 2022 Post-2.jpg IG - March 7, 2022 Post-3.jpg IG - March 7, 2022 Post-4.jpg IG - March 7, 2022 Post-5.jpg IG - March 7, 2022 Post-6.jpg IG - March 7, 2022 Post-7.jpg

Dog with a tie.

Joshua Hubbell March 7, 2022

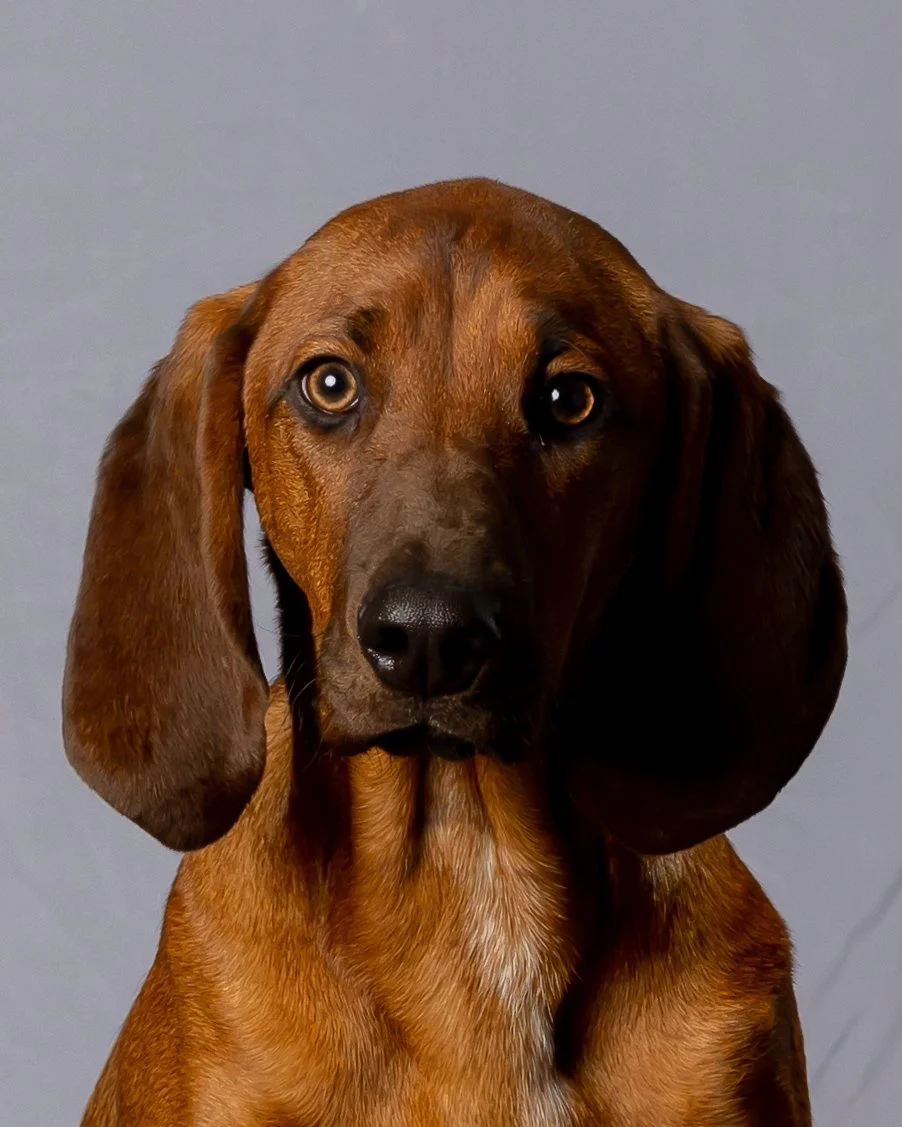
Still rather busy, so here is a picture of a dog wearing glasses and a tie plus a few other dog photos (including a very squirrely hound dog that only a lunatic would try putting glasses and a tie on).


Some more quick tips for pets. Do some of the same things you would do for a toddler, just in different areas. For example, do a face check, especially around the eyes as dogs tend to have dried tears there. The bigger or furrier the dog, the more likely there will be dried tears there. A quick wet paper towel wipe can solve that. You can go a step further and deal with any dander in the fur. Either way, look for stuff like that because it can be a real challenge to edit out in processing.


Remember, just because photo processing software exists it still takes time to manually go in and do those edits. If you don’t have to do those edits in the first place, then you save that time to use for something else and avoid a botched photo process edit job.


Finally, and this is the broken record part of all pet related photography posts: pets just want to make you happy. Keep your cool and keep things happy, they don’t know what a camera is or what you are trying to do.


This was a 3-light setup. One light overhead on the ceiling aimed down with a snoot, the key light up front with an octagon softbox, and a light in back with a long softbox. Also, I had a reflector up front on the other side of the dog with the white side reflecting light.

Comment
IG - March 2, 2022 Post-5.jpg
IG - March 2, 2022 Post-4.jpg
IG - March 2, 2022 Post-3.jpg
IG - March 2, 2022 Post.jpg
IG - March 2, 2022 Post-6.jpg
IG - March 2, 2022 Post-2.jpg
IG - March 2, 2022 Post-5.jpg IG - March 2, 2022 Post-4.jpg IG - March 2, 2022 Post-3.jpg IG - March 2, 2022 Post.jpg IG - March 2, 2022 Post-6.jpg IG - March 2, 2022 Post-2.jpg

Grayscale

Joshua Hubbell March 2, 2022

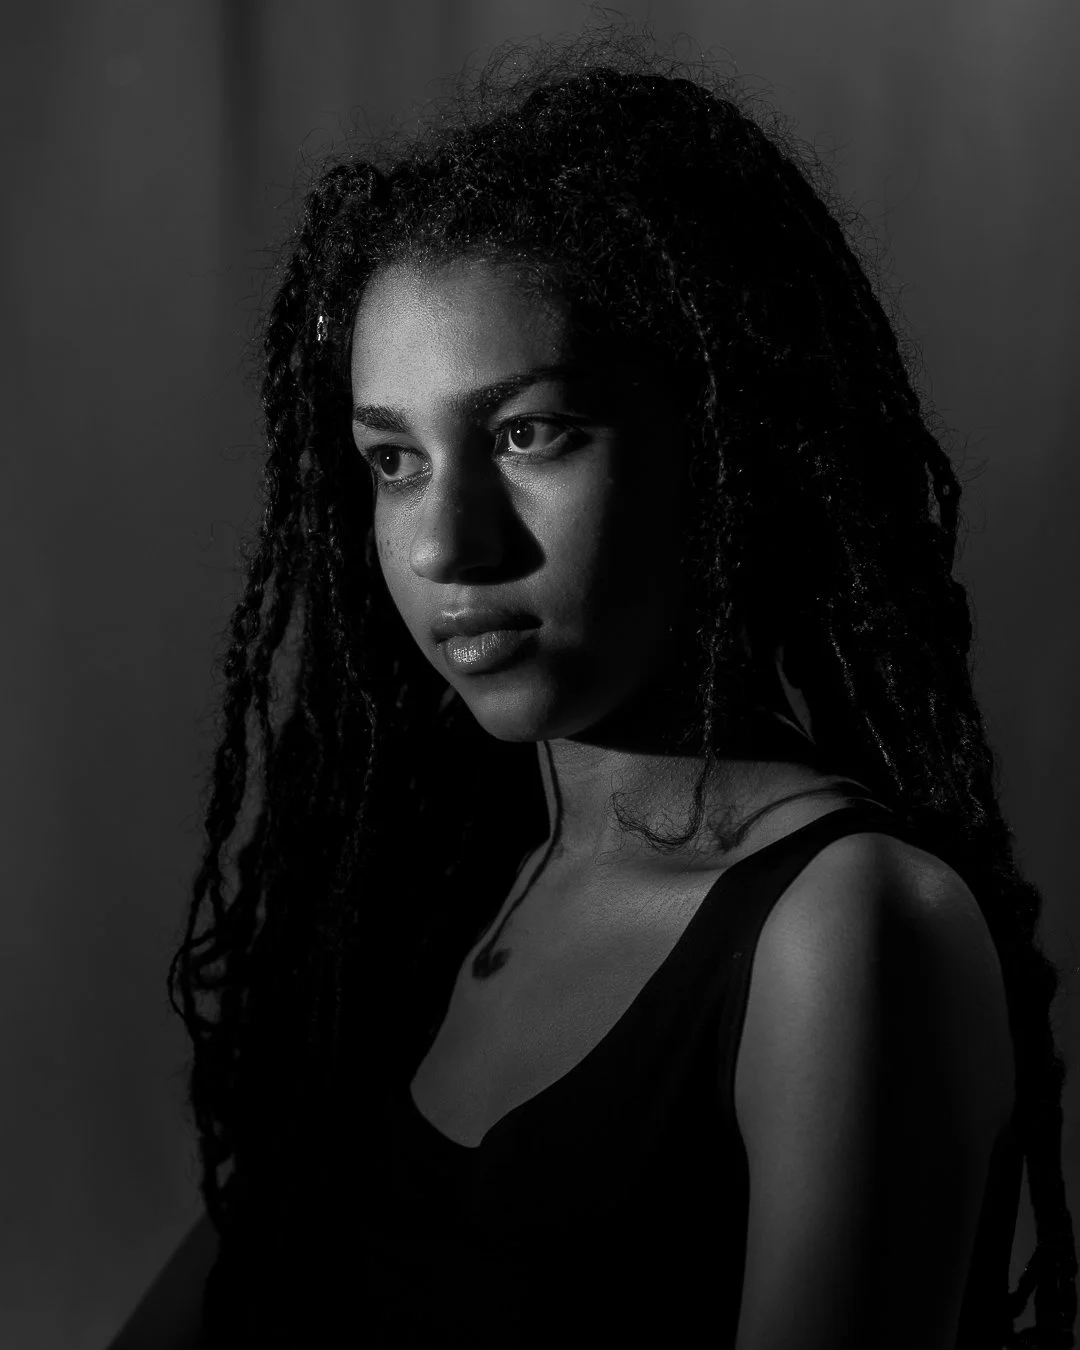
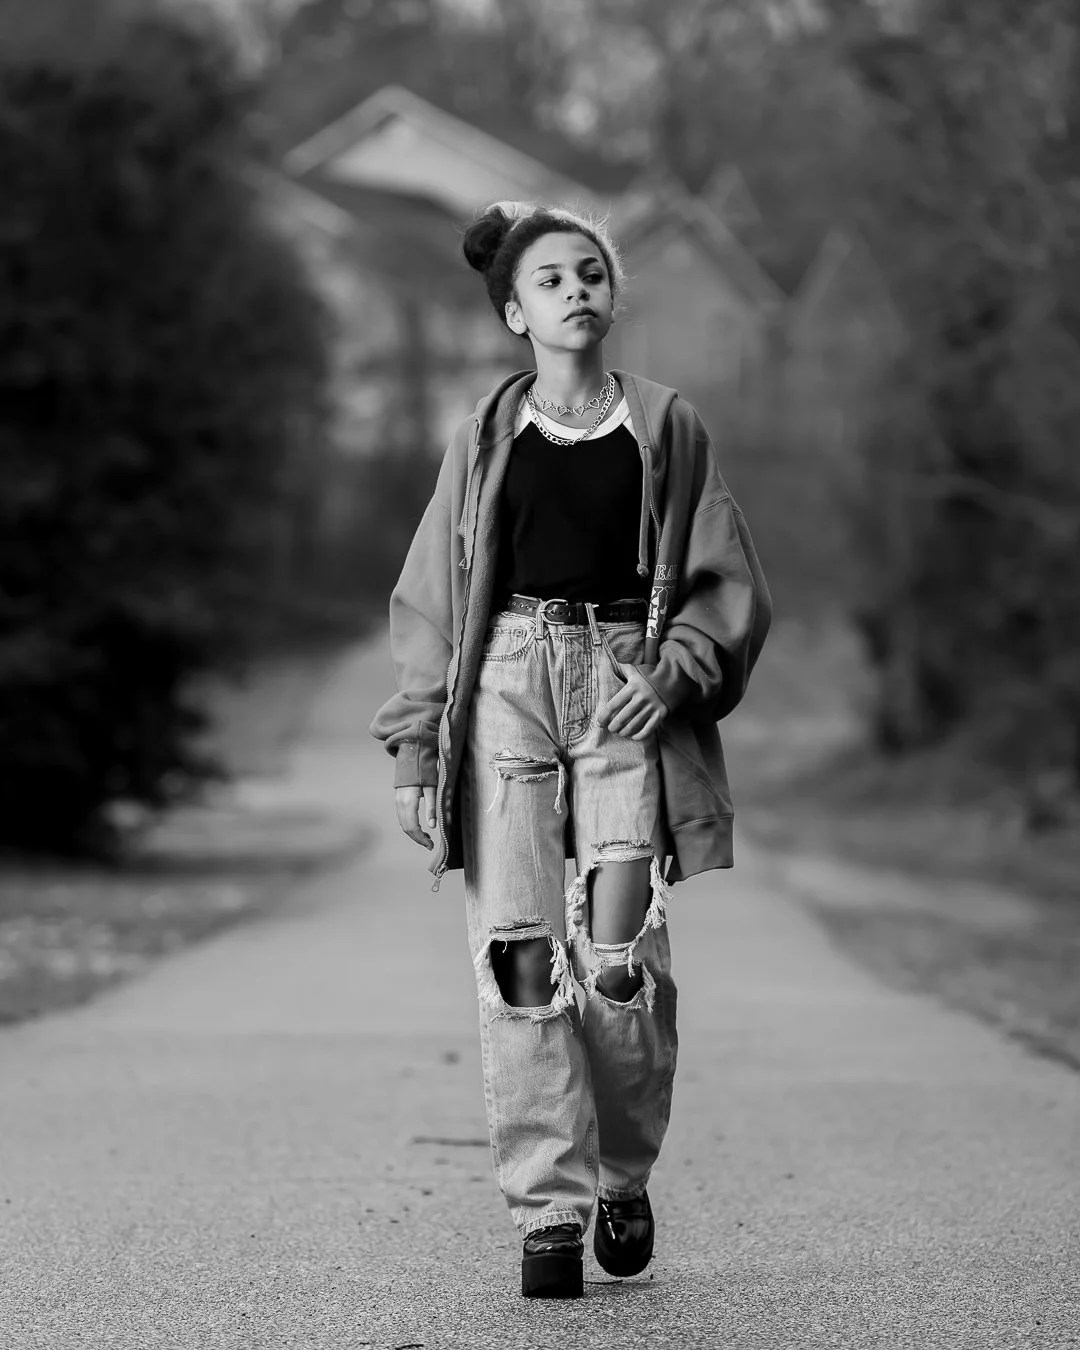
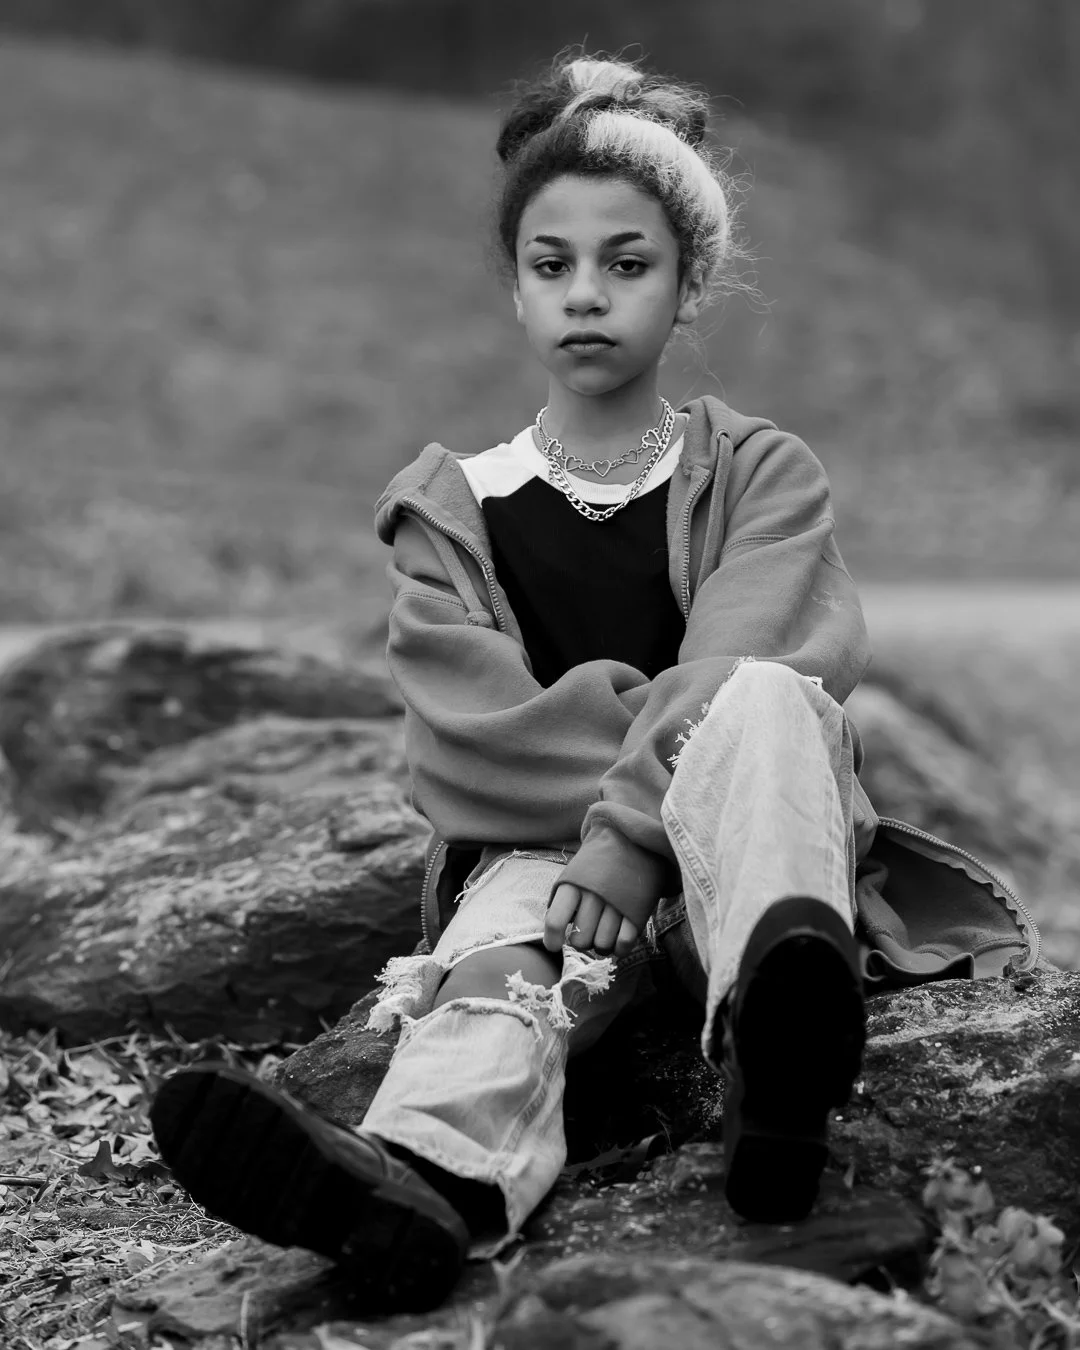
A quick post as I have a lot on my plate right now. When you can’t get a smile, or your subject is just moody that day, don’t be afraid to switch over to grayscale. This amplifies the look and strengthens the overall feel of the photo. Just remember that you are losing your color so don’t set up a colorful background if you know you are just going to grayscale all the photos. That stated, if you are photographing several subjects with one colorful setup and one of your subjects just isn’t into it you can always grayscale it and get a different look.

Comment
February 15, 2022 Selfie-1.jpg
February 15, 2022 Selfie BW-6.jpg
February 15, 2022 Selfie-3.jpg
February 15, 2022 Selfie BW-4.jpg
February 15, 2022 Selfie-7.jpg
February 15, 2022 Selfie BW-5.jpg
February 15, 2022 Selfie-1.jpg February 15, 2022 Selfie BW-6.jpg February 15, 2022 Selfie-3.jpg February 15, 2022 Selfie BW-4.jpg February 15, 2022 Selfie-7.jpg February 15, 2022 Selfie BW-5.jpg

Dealing with glasses.

Joshua Hubbell February 28, 2022

Sorry about the break. I was busy photographing a school dress rehearsal and then straight into backstage photos of the performance nights – one of my favorite types of photography especially when you get an amazing performance.


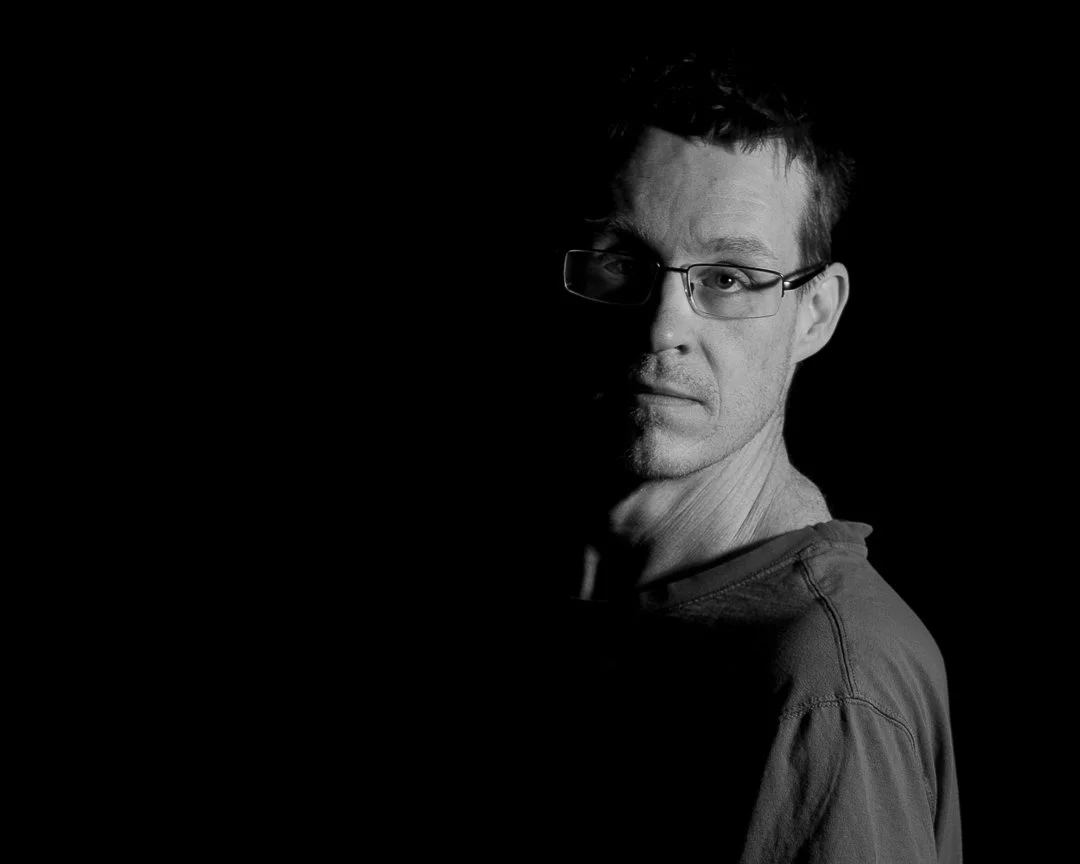
 Anyway, here are some low-key selfies. The aim here isn’t only to tell the world I should probably invest in new and better shirts, but also to talk about glasses. Glasses love to reflect flash. To be clear, sometimes you want that. I love that in low key shots, but sometimes you don’t want it at all. There are two immediate tricks to deal with glass reflections. One is demonstrated here and one I will tell you about and assume you can follow.


The first trick is simple: move the direction of the flash until it is out of the line of sight. At first this will take some adjustment but as time goes on you just get a feel for it. But notice as I adjusted my head for these photos the flash reflection moved around on my glasses. For the final shot there is no reflection. Of course, the obvious response is that only half my head has light on it – simply use a reflector for the other side or put another flash on the other side. The downside to this is that you lose that catch light in the eye (or the light reflection of the flash in your eyes). That brings us to the other solution.


The other solution, and one that is often used on TV and in movies, is to take the lenses out of your glasses.  Then you get “glasses,” a catch light in your eyes, and no light reflecting in glasses lenses. The problem here is that if your subject likes frameless lenses then that’s not really an option. But do try it and notice how well it works.


#Marylandphotographer #Annearundelphotographer #photographytips

Comment
IG - February 17, 2022 Post.jpg
IG - February 17, 2022 Post-2.jpg
IG - February 17, 2022 Post-3.jpg
IG - February 17, 2022 Post-4.jpg
IG - February 17, 2022 Post-5.jpg
IG - February 17, 2022 Post-6.jpg
IG - February 17, 2022 Post-7.jpg
IG - February 17, 2022 Post-8.jpg
IG - February 17, 2022 Post-9.jpg
IG - February 17, 2022 Post-10.jpg
IG - February 17, 2022 Post.jpg IG - February 17, 2022 Post-2.jpg IG - February 17, 2022 Post-3.jpg IG - February 17, 2022 Post-4.jpg IG - February 17, 2022 Post-5.jpg IG - February 17, 2022 Post-6.jpg IG - February 17, 2022 Post-7.jpg IG - February 17, 2022 Post-8.jpg IG - February 17, 2022 Post-9.jpg IG - February 17, 2022 Post-10.jpg

More Baby Sessions

Joshua Hubbell February 17, 2022

More two-light work.


This session was a two-light test.  More back light gel testing but also putting context. In this case, we put the baby in a winter outfit and put a blue light in back. Yes, sometimes you can make things that simple. The other light is up front and positioned to not only light the subject but attempt to make a good catch light.


When working with babies, it helps to have a family member nearby. They can pull out reactions that you may not be able to get alone. Remember, you are trying to get a baby to emote while also trying to juggle a camera. The baby is just trying to figure out what is going on. They’ve never seen a photography setup and probably have no concept of what you are doing because everything is new to them.


Also remember two other things. This isn’t too different from a session I did the other day. When working a craft, you need to be exploring techniques, but you also need to be sure you are picking up the techniques you are learning. So, you need to do research and experimentation, but also practice. It doesn’t matter if it leads to some massive, big thing every time, but more about having the awareness and experience of using the techniques you need when the time comes to bring them all together into a more complex project.

Comment
February 15, 2022 Post-7.jpg
February 15, 2022 Post.jpg
February 15, 2022 Post-2.jpg
February 15, 2022 Post-3.jpg
February 15, 2022 Post-4.jpg
February 15, 2022 Post-5.jpg
February 15, 2022 Post-6.jpg
February 15, 2022 Post-7.jpg February 15, 2022 Post.jpg February 15, 2022 Post-2.jpg February 15, 2022 Post-3.jpg February 15, 2022 Post-4.jpg February 15, 2022 Post-5.jpg February 15, 2022 Post-6.jpg

Mic Check

Joshua Hubbell February 15, 2022

We did a mic test for this one. She makes YouTube videos so for this photo session we used her microphone and went with a dramatic 2 light setup. Make no mistake, I’d still consider this a complex setup because it uses a boom stand which allows me to hang a light overhead. Boom stands are not cheap.


For this look I told her to rant about something and she went all in. Doing so got her to give some expressions with attitude. This just gets back to the same things I’ve been drumming on about for a while. Give your subject something to hold and something to do. This will get them to relax and get their body and facial features more in line with what you are trying to do.


Finally, her little sister popped in, so we did some big sister - litter sister shots. Two good tricks for siblings is “looking at each other” and “putting heads together.” Both of these tricks work well in getting a look you might be going for or at least getting into a general ballpark of what you want for these kinds of shots. Once you get to the right ballpark then it’s just a matter of tweaking the setup, but this will all come down to the personalities involved and the time you must dedicate to a session. In this case, a four-year-old isn’t very patient for long so we moved quick.

Comment
IG - February 9, 2022 Post.jpg
IG - February 9, 2022 Post-2.jpg
IG - February 9, 2022 Post-3.jpg
IG - February 9, 2022 Post-4.jpg
IG - February 9, 2022 Post-5.jpg
IG - February 9, 2022 Post-6.jpg
IG - February 9, 2022 Post-7.jpg
IG - February 9,  2022 BW Post.jpg
IG - February 9,  2022 BW Post-2.jpg
IG - February 9, 2022 Post.jpg IG - February 9, 2022 Post-2.jpg IG - February 9, 2022 Post-3.jpg IG - February 9, 2022 Post-4.jpg IG - February 9, 2022 Post-5.jpg IG - February 9, 2022 Post-6.jpg IG - February 9, 2022 Post-7.jpg IG - February 9,  2022 BW Post.jpg IG - February 9,  2022 BW Post-2.jpg

Another gel test and color theory.

Joshua Hubbell February 9, 2022

Another gel test. To be honest my strobes and speedlights are a mix of brands as I meander around with my studio lighting purchases. This time I was testing a gel system specifically made for two of my strobes. This means I now have gels for my speed lights and my strobes, which means I can now put different colors everywhere. My subject requested pink, so I set up a green in back to act as a complimentary color. We went with a low-key lighting setup. Just two lights, one back light and one bare strobe with a pink gel.


Understanding color theory isn’t mandatory, but it doesn’t hurt either. Plus, it gives you another way to view and discuss art. This is important because if you can understand what art works for you and you understand why it works for you, you can start going in that direction with the art you create. Or, more likely, if you can figure out what doesn’t work for you and why, you can avoid that. Understanding color theory, even a little bit, helps in that.


That stated, treat it like every other photography “rule”. Green isn’t an exact complimentary color to pink. Lime green would be. The rules and theories are there to give art creation direction, but it should never dictate it – the areas where you turn against the rules and theories are where you imprint yourself and your ideas into your work, which is the most important part of creating art.

Finally, the good thing about low-key lighting with gels is that you can convert it to grayscale and get awesome results. So if for some reason you go too far with your gels, you can always fall back with that.

Comment
IG - February 7, 2022 Post.jpg
IG - February 7, 2022 Post-2.jpg
IG - February 7, 2022 Post-3.jpg
IG - February 7, 2022 Post-4.jpg
IG - February 7, 2022 Post-6.jpg
IG - February 7, 2022 Post-8.jpg
IG - February 7, 2022 Post-10.jpg
IG - February 7, 2022 Post-11.jpg
IG - February 7, 2022 Post-12.jpg
IG - February 7, 2022 Post-13.jpg
IG - February 7, 2022 Post.jpg IG - February 7, 2022 Post-2.jpg IG - February 7, 2022 Post-3.jpg IG - February 7, 2022 Post-4.jpg IG - February 7, 2022 Post-6.jpg IG - February 7, 2022 Post-8.jpg IG - February 7, 2022 Post-10.jpg IG - February 7, 2022 Post-11.jpg IG - February 7, 2022 Post-12.jpg IG - February 7, 2022 Post-13.jpg

Joshua Hubbell February 7, 2022

Another quick post as I am in the middle of processing work.


To start and to be straight forward, this isn’t a cheap setup. This is a 4 light setup with 2 long softboxes with grids (fill lights), an octobox with a grid (key  light), and a back light. The two long softboxes were on either side of her and the octobox was just in front at an angle. The backlight was aimed at the backdrop. The aim here was to test the new longbox I got.


With that out of the way, this is a good reminder to bring in props, which might a light theme this week.  For these photos we used my rabbit assistant that I use to test lighting setups before I bring people in to photograph. She loved the idea of holding the stuffed rabbit, so we rolled with that. The cool thing about props is it makes giving directions easier. Hold it this way or look at it as you hold it. If all else fails, you can just take the prop and show them how to hold it. Trust me, props are the way to go.


Finally, when working with kids, keep it fun. Things go much more smoothly if the photo session is fun. Don’t get into an argument and learn to redirect. And always accept them as they are because that’s who they are best at being.


#Marylandphotographer #Annearundelphotographer #familyphotographer

Comment
IG - February 2, 2022 Post.jpg
IG - February 2, 2022 Post-6.jpg
IG - February 2, 2022 Post-3.jpg
IG - February 2, 2022 Post-2.jpg
IG - February 2, 2022 Post-5.jpg
IG - February 2, 2022 Post-4.jpg
IG - February 2, 2022 Post.jpg IG - February 2, 2022 Post-6.jpg IG - February 2, 2022 Post-3.jpg IG - February 2, 2022 Post-2.jpg IG - February 2, 2022 Post-5.jpg IG - February 2, 2022 Post-4.jpg

More Background Effects

Joshua Hubbell February 2, 2022

Another setup exploring what my lights can do to my backdrops. This time I have a red light and a blue light hitting that backdrop. The backdrop is black in this shot, but you can’t really tell because of the lights. Admittedly, you need a few things to pull this off. Lights, gels, and a backdrop. For this setup you’d need two lights, two different gels, and two systems to apply those gels because gels don’t just magically float in the air for you.


The lighting setup itself is more of a lowkey set up. That’s why the shadows are heavier and makes the images more moody then anything else. Then the cat waltzed in and that really livened up the session. I highly recommend trying out low-key lighting sessions for practice as they only actually require one light, and they will really help you understand working with shadow and light. Depending on where you have the light you will create shadows on the other side. That’s a rather simple concept but it takes practice to be able to visualize it without putting the light down.

Comment
IG - January 31, 2022 Post-6.jpg
IG - January 31, 2022 Post.jpg
IG - January 31, 2022 Post-2.jpg
IG - January 31, 2022 Post-3.jpg
IG - January 31, 2022 Post-4.jpg
IG - January 31, 2022 Post-5.jpg
IG - January 31, 2022 Post-6.jpg IG - January 31, 2022 Post.jpg IG - January 31, 2022 Post-2.jpg IG - January 31, 2022 Post-3.jpg IG - January 31, 2022 Post-4.jpg IG - January 31, 2022 Post-5.jpg

Babies and light trickery.

Joshua Hubbell January 31, 2022

I did some baby photos the other day and they turned out good, but I hated them. So, I redid them. This it worked out so much better.


There are two things going on here – a baby and light shenanigans. For starters, always talk with the parents when dealing with babies. This is key in coordinating an outfit of what you are going for. For these, I wanted a cool moody look and her mom delivered perfectly. After that, you are at the mercy of the baby. You can do every trick in the book to get that baby to smile but sometimes it just doesn’t pan out so take what you can get.


Now for lighting. This is a four-light set up. The key light is a studio strobe with an octagon softbox and the fill light is strobe with a snoot and grid on it. You can see these lights in her eyes by the way. The other two lights are where the fun is. There is a hair light on her that has an orange-ish gel on it. Then there is a speedlite directly behind her pointed towards that backdrop. The backdrop is black but the speedlite has a red gel on it so that back wall appears to be red.


Oh and yeah you see a hand holding her up. You don’t put a baby on a table and just hope she doesn’t fall off. That’s a recipe for disaster  

Comment
IG - January 28, 2022 Post-5.jpg
IG - January 28, 2022 Post-6.jpg
IG - January 28, 2022 Post-2.jpg
IG - January 28, 2022 Post.jpg
IG - January 28, 2022 Post-4.jpg
IG - January 28, 2022 Post-3.jpg
IG - January 28, 2022 Post-5.jpg IG - January 28, 2022 Post-6.jpg IG - January 28, 2022 Post-2.jpg IG - January 28, 2022 Post.jpg IG - January 28, 2022 Post-4.jpg IG - January 28, 2022 Post-3.jpg

You can make your own modifiers.

Joshua Hubbell January 28, 2022

I wanted to test some harsh lighting and low-key lighting techniques. Harsh lighting can make for dramatic shots or make them more intense. That’s also why people like to use harsh lighting in horror shots, except in those cases the lighting comes from below. And sometimes a 4-year-old sneaks on your set and into your shot without you even knowing it.


For these shots I just wanted to go back to modifying a snoot with two pieces of tape. I still haven’t quite got this technique down. It just seems off. However, it worked out a little better when I put a light in back and did the same to light up some of the background.


The point though is that you can build your own light modifications. In this case I used two pieces of gaffers tape, but I’ve made make shift soft boxes with cutup cloth and other light modifiers with cut cardboard. You just have to figure out what you are trying to do. One thing I like to do before I make a light modifier purchase is try and see if I can make a garbage homemade version to test the technique. If I really like it, I can always buy an actual quality version shortly after. For example, my first snoot was a pringles can that barely stayed on. I liked the effect so much I now have a professional grade snoot that I use often, probably too much.

Comment
IG - Jan 26, 2022 Post.jpg
IG - Jan 26, 2022 Post-2.jpg
IG - Jan 26, 2022 Post-4.jpg
IG - Jan 26, 2022 Post-7.jpg
IG - Jan 26, 2022 Post-9.jpg
IG - Jan 26, 2022 Post-10.jpg
IG - Jan 26, 2022 Post-11.jpg
IG - Jan 26, 2022 Post-13.jpg
IG - Jan 26, 2022 Post-14.jpg
IG - Jan 26, 2022 Post.jpg IG - Jan 26, 2022 Post-2.jpg IG - Jan 26, 2022 Post-4.jpg IG - Jan 26, 2022 Post-7.jpg IG - Jan 26, 2022 Post-9.jpg IG - Jan 26, 2022 Post-10.jpg IG - Jan 26, 2022 Post-11.jpg IG - Jan 26, 2022 Post-13.jpg IG - Jan 26, 2022 Post-14.jpg

On using strobes outside and getting permission.

Joshua Hubbell January 26, 2022

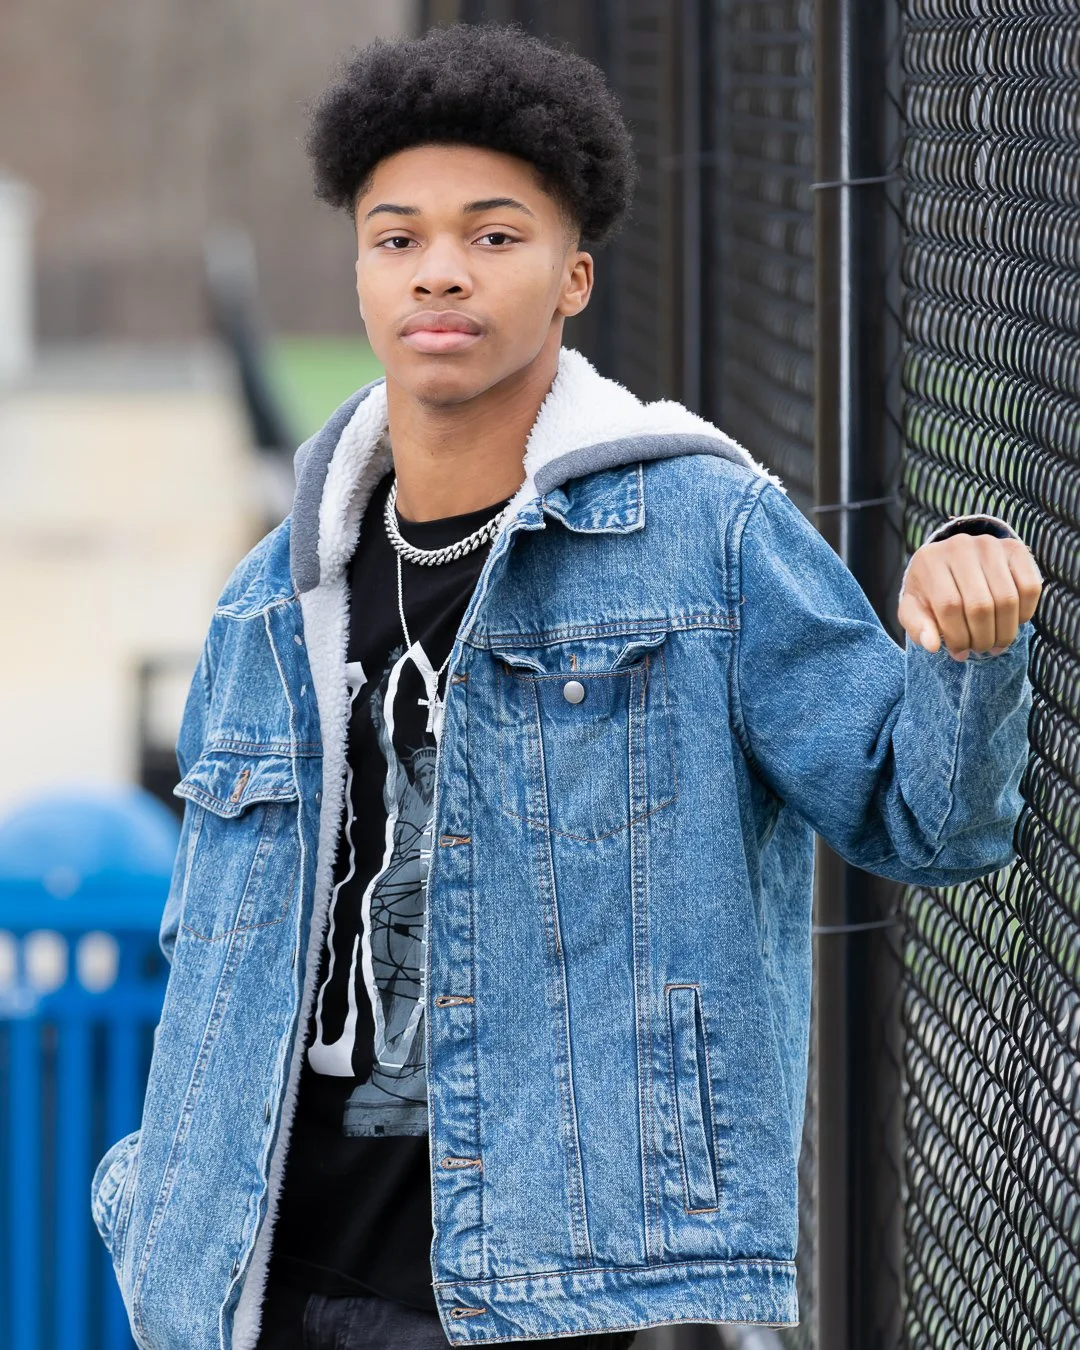
Here are some photos of a senior photo session I did the other week. Before the snow. For these shots I used a dance partner, my strobe with a softbox on it. If you do outdoor photography with a strobe two things I highly suggest:


1)      Make sure it has a portable power source. In this case it has a rechargeable battery pack. I do have a portable battery for my corded studio strobes but that just gets a little too heavy for my tastes. But you work with what you got

2)      Bring a photography sandbag to anchor you light stand or you may find your strobe on the ground because of the wind.


One other thing really quick, a lot of what I did here could be done without a strobe, especially given it was a cloudy day and that meant there was already a giant softbox overhead. I prefer to use a strobe because I am a total control freak with my light, but under no circumstances should you think you need a strobe. It helps but a solid understanding of your camera and how light works could get some similar effects here.


Anyway, another thing you want to consider if you plan to do photography professionally is asking permission. You want to ask permission to shoot on the properties you shoot on if you don’t own them. We shot this senior session at a private school, and I made sure to get permission before doing the session on their property. It’s generally a good idea to get permission to be some place if you don’t already have that permission if you are doing a paid gig. And this includes the park I recommend. Most places will tell you yes, but the easiest way to get a permanent no is to show up and start taking pictures.


And if you get told “no” be polite about it. It’s okay to be disappointed, but you never know who you are burning bridges with if you lose you cool over your disappointment and lambast someone verbally by phone or by email.

Comment
IG - Jan 24, 2022 Post.jpg
IG - Jan 24, 2022 Post-2.jpg
IG - Jan 24, 2022 Post-3.jpg
IG - Jan 24, 2022 Post-4.jpg
IG - Jan 24, 2022 Post-5.jpg
IG - Jan 24, 2022 Post-6.jpg
IG - Jan 24, 2022 Post.jpg IG - Jan 24, 2022 Post-2.jpg IG - Jan 24, 2022 Post-3.jpg IG - Jan 24, 2022 Post-4.jpg IG - Jan 24, 2022 Post-5.jpg IG - Jan 24, 2022 Post-6.jpg

More tips on working with children.

Joshua Hubbell January 24, 2022

There really wasn’t a plan with this photo session. She just really wanted the world to see her outfit and who am I to turn away someone who wants to get their picture taken?


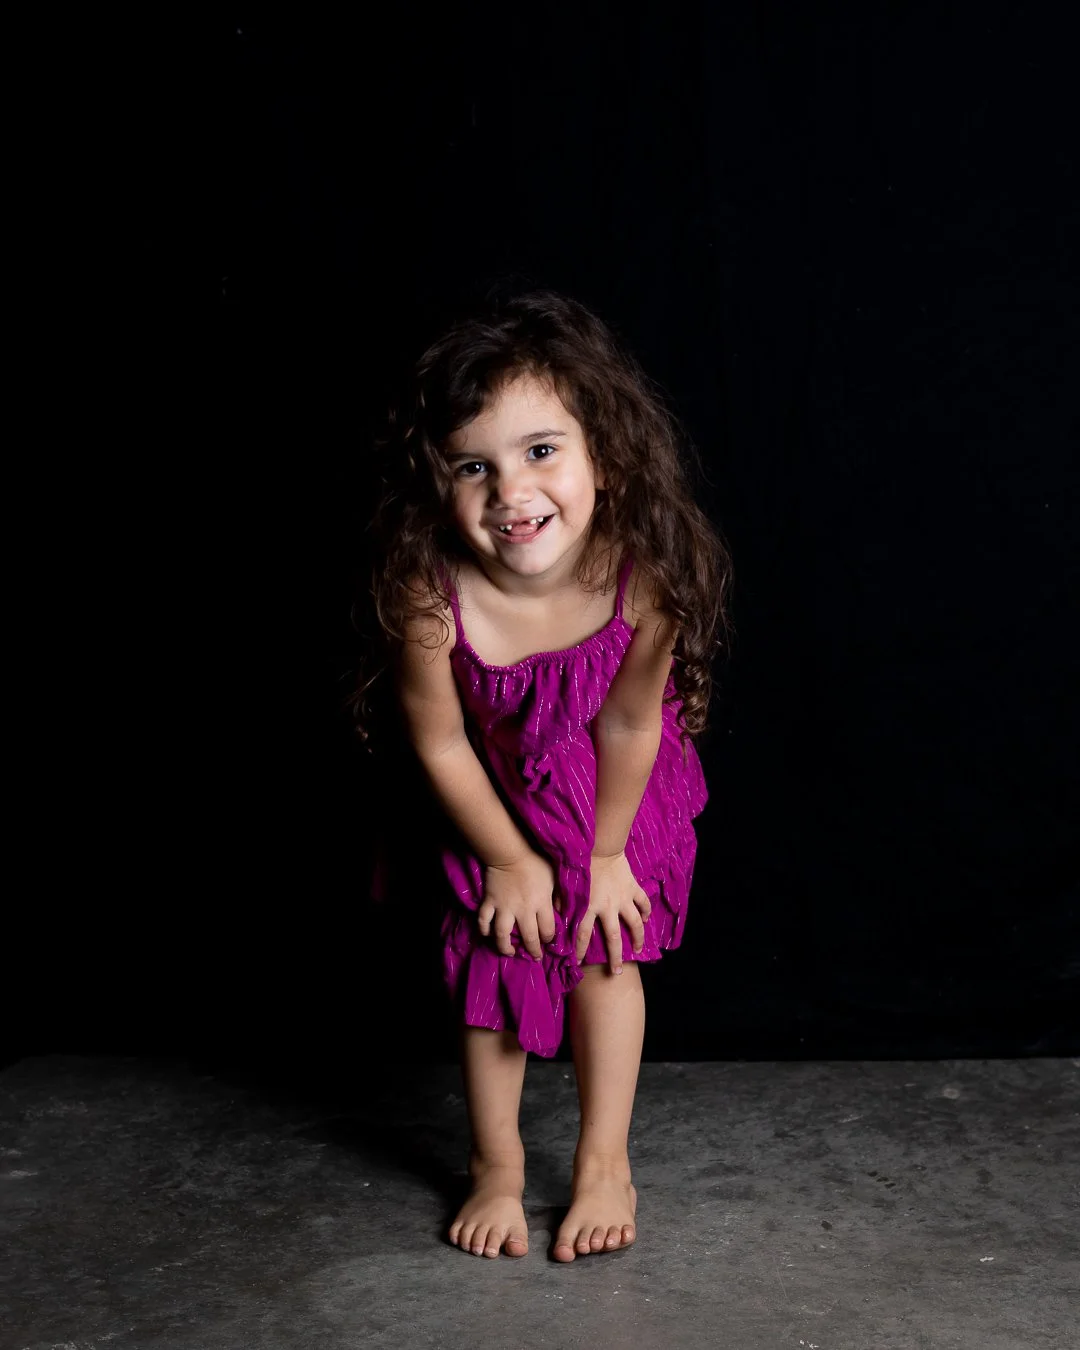
When working with young children, don’t be afraid to work with what ever mood they are in. In this case, she was in a silly mood, so I told her about silly invisible giraffes that were in the room with us. She loved that and of course this got her to do more happy movements which are easily caught. Occasionally, I’d ask her to throw me a serious look which she would do and then go back to giggling and laughing. I do this not only to get a few serious look photos (I don’t think people should shy away from serious looks) but it also helps ground the child a little when they are playing during a photo session. After all, it is still a photo session and there is still heavy equipment around – always remember that as the adult it’s your job to deliver everyone and everything to the end of the session safely.


For this session, I did a two-light setup. I’m trying to brainstorm some ideas for a few photo sessions I have coming up and when in doubt I go back to some basics. I had one light with a snoot acting as a hair light and my key was an octagon with a grid on.

Comment
IG - January 20, 2022 Post-3.jpg
IG - January 20, 2022 Post-6.jpg
IG - January 20, 2022 Post.jpg
IG - January 20, 2022 Post-2.jpg
IG - January 20, 2022 Post-4.jpg
IG - January 20, 2022 Post-3.jpg IG - January 20, 2022 Post-6.jpg IG - January 20, 2022 Post.jpg IG - January 20, 2022 Post-2.jpg IG - January 20, 2022 Post-4.jpg

Another boom stand test.

Joshua Hubbell January 20, 2022

More for that new location test and also, I am still working on processing work, so I need a short post again. For this test, I needed to be certain the boom stand would still work from all angles, so I ran a second setup that day. It worked and I think the location will work.


As always, a serious look can be just as good as a smile. In fact, sometimes starting with a serious look will lead to a smile when the time comes. Of course, a step ladder helps too because your subject can play with different heights.


Anyway, this was a two-light setup. One key light overhead and a second light up front as a fill light.

Comment
IG - January 18, 2022 Post.jpg
IG - January 18, 2022 Post-2.jpg
IG - January 18, 2022 Post-3.jpg
IG - January 18, 2022 Post-4.jpg
IG - January 18, 2022 Post-5.jpg
IG - January 18, 2022 Post-6.jpg
IG - January 18, 2022 Post.jpg IG - January 18, 2022 Post-2.jpg IG - January 18, 2022 Post-3.jpg IG - January 18, 2022 Post-4.jpg IG - January 18, 2022 Post-5.jpg IG - January 18, 2022 Post-6.jpg

Testing out a new workspace.

Joshua Hubbell January 18, 2022

Just a quick post because I have a lot of processing to do of a dance rehearsal I photographed and like a clown I figured I could do everything at once time rather than plan ahead accordingly and have posts ready. So, make that a free small business tip:


You can manage to accomplish a lot less then you think you can in a short time.


The flip side to this is that you can accomplish a lot more then you think you can in a long time.


Anyway, I have been allowed to operate my photography testing and practice in a different, much warmer place as opposed to the garage. So, my assistant and I were testing out the area and since the ceiling is slightly lower, I opted to test my boom stand to see if I can still do overhead lighting. And since my assistant has a performance coming up, she was practicing her vocals and that’s what we shot.


I was focusing on different angles and zooming in. The lighting set up was two lights. One overhead and one to the side with a softbox as a key light.

Comment
IG - January 14, 2022 Post-6.jpg
IG - January 14, 2022 Post.jpg
IG - January 14, 2022 Post-2.jpg
IG - January 14, 2022 Post-4.jpg
IG - January 14, 2022 Post-5.jpg
IG - January 14, 2022 Post-6.jpg IG - January 14, 2022 Post.jpg IG - January 14, 2022 Post-2.jpg IG - January 14, 2022 Post-4.jpg IG - January 14, 2022 Post-5.jpg

Test your ideas out.

Joshua Hubbell January 14, 2022

I have a dance rehearsal photo session coming up and I wanted to test a two-light set up I had in mind. It worked well but there were a few adjustments I had to make and even more ideas I came up with during the test session. And that’s the point here: test your ideas. You can get a good reality check on things while at the same time come up with some better ideas for set up.


For example, for this set up I realized the grid I was using wouldn’t make too much sense for this upcoming job. Not every performer will be doing a stationary pose and with just two lights I will want the light to spread out. But I also realized not every performer will be the same size and some will likely do poses close to the ground, so I would want one of my speed lights on a third small tripod that I could rotate in and out as needed. But this also has led to other ideas that I want to try out that might help me improve the results while also reducing time between performers pose shots.


The point is, by testing my plan out I get to go into the actual session knowing what issues and solutions will be in play and already have a strategy to put my plan best into action. Will the session be a roaring success? I hope so and that is what I aim for with every session, but I know I am in a better position now to make that happen then I was a 48 hours ago. And that’s why I am recommending testing things.


#Marylandphotographer #Annearundelphotographer #Dancephotography

Comment
IG - January 12, 2022 Post.jpg
IG - January 12, 2022 Post-2.jpg
IG - January 12, 2022 Post-3.jpg
IG - January 12, 2022 Post-4.jpg
IG - January 12, 2022 Post-5.jpg
IG - January 12, 2022 Post-6.jpg
IG - January 12, 2022 Post-7.jpg
IG - January 12, 2022 Post-8.jpg
IG - January 12, 2022 Post-9.jpg
IG - January 12, 2022 Post-10.jpg
IG - January 12, 2022 Post.jpg IG - January 12, 2022 Post-2.jpg IG - January 12, 2022 Post-3.jpg IG - January 12, 2022 Post-4.jpg IG - January 12, 2022 Post-5.jpg IG - January 12, 2022 Post-6.jpg IG - January 12, 2022 Post-7.jpg IG - January 12, 2022 Post-8.jpg IG - January 12, 2022 Post-9.jpg IG - January 12, 2022 Post-10.jpg

Joshua Hubbell January 12, 2022

The other day it snowed and of course I made sure I was somewhere to snap some pictures and by “made sure” I was luckily persuaded to be some place where pictures would work out.


One note, those batteries in your camera seem to run down faster on cold days because they do. They don’t function as well in cold weather and will run out quicker. Keep that in mind when using your camera in the snow or bring extra batteries to your cold weather shoot. Also, you can always line your camera with a plastic bag if you don’t have any weather covers to protect it from the snow. Alternatively, you can always just wait for it stop snowing.


Anyway, always keep in mind that a lot is usually going on when it snows. Kids go sledding, dogs get confused, and most wild animals become easier to spot (unless you are someplace with polar bears). You get some very unique behaviors going on so constantly be looking around to see who is doing what when you are on scene photographing. For sledding, I find waiting until the very last second you can get out of the way to get out of the way works well. For dogs the trick is still to get down to their level. For wild animals, well that’s not my primary photography focus so it’s still luck for me and honestly a telephoto lens does help there.

Also keep in mind that the snow will make your sensor all sorts of wacky. It really helps to have photo processing tools to fall back on or at least an understanding of how to work the white balance in your camera.

Comment
IG - January 10, 2022 Post-5.jpg
IG - January 10, 2022 Post.jpg
IG - January 10, 2022 Post-2.jpg
IG - January 10, 2022 Post-3.jpg
IG - January 10, 2022 Post-4.jpg
IG - January 10, 2022 Post-6.jpg
IG - January 10, 2022 Post-8.jpg
IG - January 10, 2022 Post-5.jpg IG - January 10, 2022 Post.jpg IG - January 10, 2022 Post-2.jpg IG - January 10, 2022 Post-3.jpg IG - January 10, 2022 Post-4.jpg IG - January 10, 2022 Post-6.jpg IG - January 10, 2022 Post-8.jpg

Posing

Joshua Hubbell January 10, 2022

Back from a week off. I needed that break to plan out the year. Anyway, to the topic at hand; posing.


Posing is a complex skill that plays by the same rules of pretty much any other skill – the more you practice it the better you get at it. If you never practice posing, then it will forever be an uphill battle for you.


Early on two things you want to work on is:


1)      Pose knowledge

2)      Communication skills


For pose knowledge I advise two things. First, simply research poses online. Start with learning basic poses and looking at photos with people posing in them and then figure out why those poses work. There are compositional reasons for those poses that make them work and understanding the bigger concepts can help you come up with poses that better fit the shot you are trying to compose. Second, practice poses on your own. It is a lot easier to remember poses if you have actively practiced them yourself in front of a camera or a mirror.


Next up is communication skills. You can have all the pose knowledge that has ever existed in human history, and it means squat if you can’t communicate that knowledge to your subject. This is another skill that you sort of just have to practice and self-reflect on, making note of what worked and what went horribly wrong. Also, keep in mind that these skills will shift based on the subject. For example, a 4-year-old takes directions in a different way from a 40-year-old. The more you work with each group the better you get at communicating with each group.


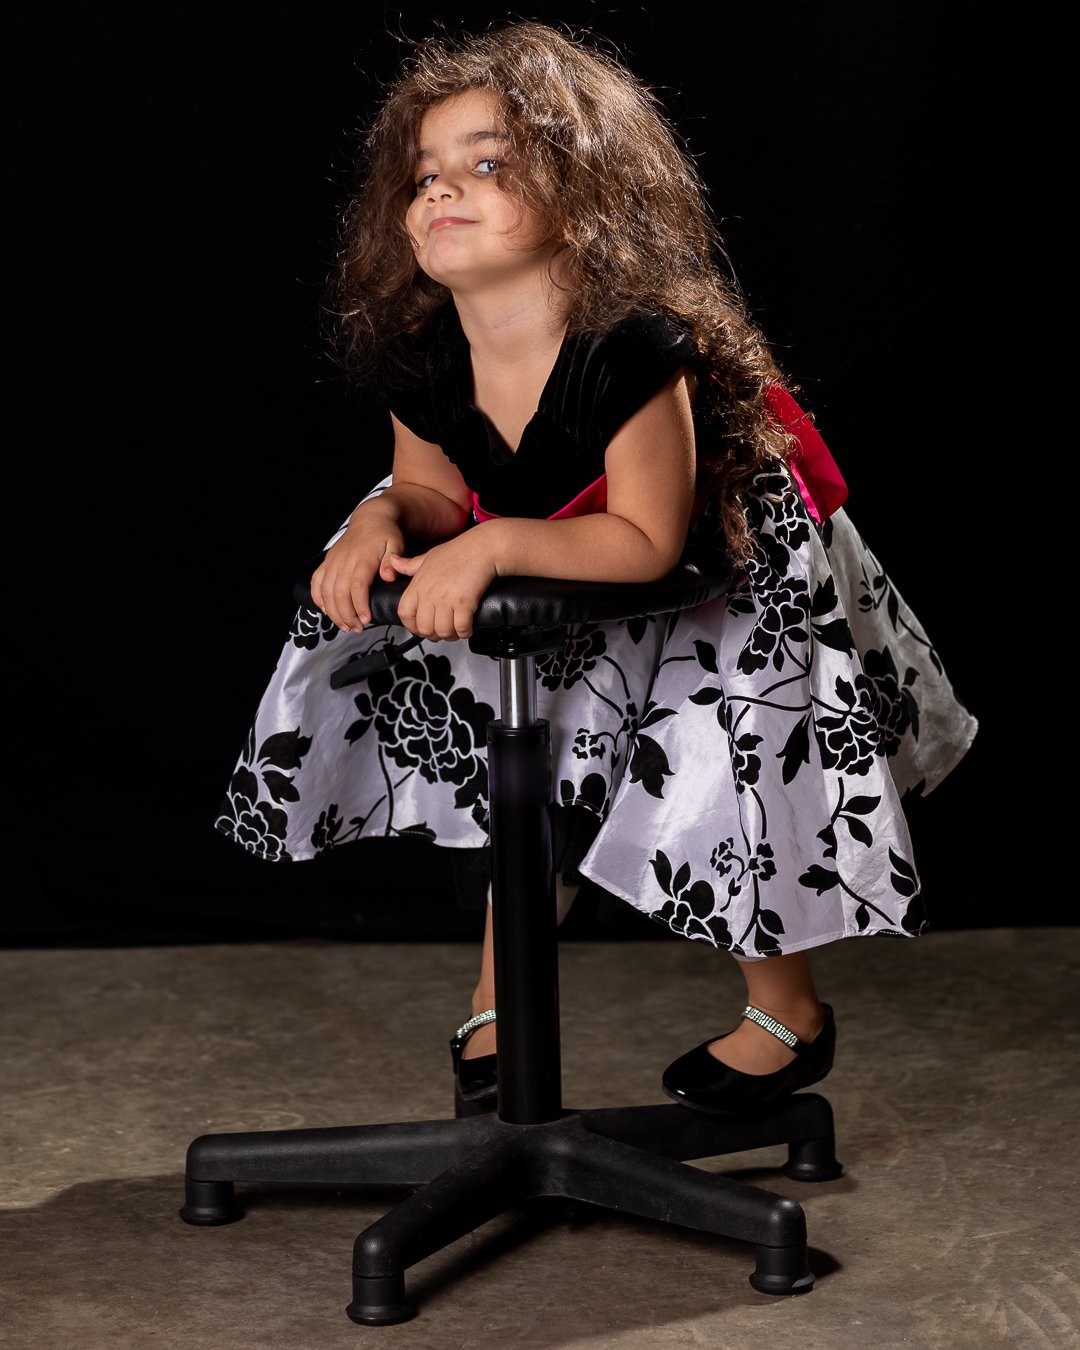
All these photos were done with a two-light setup. My subject here is perfectly capable of following pose directions but since she is four turning every direction into a game or a joke worked better. I find she really enjoys doing the exact opposite of “don’t do this!” and she usually does so with delight. I also knew she’d have fun on a stool that spins and would be willing to climb a step ladder.

Comment
December 31, 2021 Post.jpg
December 31, 2021 Post-2.jpg
December 31, 2021 Post-3.jpg
December 31, 2021 Post-4.jpg
December 31, 2021 Post-5.jpg
December 31, 2021 Post.jpg December 31, 2021 Post-2.jpg December 31, 2021 Post-3.jpg December 31, 2021 Post-4.jpg December 31, 2021 Post-5.jpg

Happy New Year!

Joshua Hubbell December 31, 2021

On to 2022 we go!

Comment
IG - December 29, 2021 Post.jpg
IG - December 29, 2021 Post-2.jpg
IG - December 29, 2021 Post-3.jpg
IG - December 29, 2021 Post-4.jpg
IG - December 29, 2021 Post-5.jpg
IG - December 29, 2021 Post-6.jpg
IG - December 29, 2021 Post-7.jpg
IG - December 29, 2021 Post-8.jpg
IG - December 29, 2021 Post-9.jpg
IG - December 29, 2021 Post.jpg IG - December 29, 2021 Post-2.jpg IG - December 29, 2021 Post-3.jpg IG - December 29, 2021 Post-4.jpg IG - December 29, 2021 Post-5.jpg IG - December 29, 2021 Post-6.jpg IG - December 29, 2021 Post-7.jpg IG - December 29, 2021 Post-8.jpg IG - December 29, 2021 Post-9.jpg

More strobe testing.

Joshua Hubbell December 29, 2021

Another strobe test. This time outside as the strobe in question is built to overpower outdoor light we went outside. I put it through its paces and even tested out the high speed sync. Keep in mind if you do get a speed light or a strobe and it doesn’t have a high speed sync mode you will be limited to a shutter speed to over 1/250. Otherwise, you will get light sync issues which means half or all of your picture will be a wall of black. You don’t need high speed sync in order to use strobes, I have two really strobes that lack this feature, but this is why I recommend you understand what type of photography you want to do before investing in strobes. If you know you what you are trying to do then you will have a better idea what strobe to get for the work you want to do.


Anyway, these photos were done on a cloudy day. Cloudy days are great because they act as a giant softbox, distributing the light even everywhere. As previously mentioned, I used a strobe but I attached a softbox so this would be a two light set up. I started by adjusting for the daylight and then zeroing in the strobe. All these shots were taken with whatever we found walking up a short road and back. It helps to have access to some amazing locations but you can still do decent photography out in the neighborhood.

Tags Strobe Test
Comment
← NewerOlder →

Search Posts

No results found
Post Archive
  • November 2025
  • October 2025
  • September 2025
  • May 2025
  • March 2025
  • January 2025
  • December 2024
  • July 2024
  • April 2024
  • March 2024
  • February 2024
  • January 2024
  • November 2023
  • October 2023
  • September 2023
  • August 2023
  • June 2023
  • May 2023
  • April 2023
  • March 2023
  • February 2023
  • January 2023
  • December 2022
  • November 2022
  • October 2022
  • September 2022
  • August 2022
  • July 2022
  • June 2022
  • May 2022
  • April 2022
  • March 2022
  • February 2022
  • January 2022
  • December 2021
  • November 2021
  • October 2021
  • September 2021
  • May 2021
  • April 2021
  • March 2021
  • February 2021
  • January 2021
  • December 2020
  • November 2020
  • October 2020
  • September 2020
  • August 2020
  • July 2020
  • May 2020
  • April 2020
  • January 2020
  • November 2019
  • October 2019
  • August 2019