• Graphite, Charcoal, Pastel
    • Oil Paintings
    • Military experience art
  • Artist Statement
    • Pets
    • Kid Photos
    • Family Photos
    • Couples
    • Travel and Nature
  • Photo Blog
  • Media
  • Contact
Menu

Single-Handed Arts, LLC

Fine Arts and Photography Services
  • Fine Art
    • Graphite, Charcoal, Pastel
    • Oil Paintings
    • Military experience art
  • Artist Statement
  • Photography
    • Pets
    • Kid Photos
    • Family Photos
    • Couples
    • Travel and Nature
  • Photo Blog
  • Media
  • Contact
×
May 22, 2022 Victoria with flower-3.jpg
May 22, 2022 Victoria with flower-4.jpg
May 22, 2022 Victoria with flower.jpg
May 22, 2022 Victoria with flower-2.jpg
May 22, 2022 Victoria with flower-7.jpg
May 22, 2022 Victoria with flower-9.jpg
May 22, 2022 Victoria with flower-6.jpg
May 22, 2022 Victoria with flower-10.jpg
May 22, 2022 Victoria with flower-11.jpg
May 22, 2022 Victoria with flower-3.jpg May 22, 2022 Victoria with flower-4.jpg May 22, 2022 Victoria with flower.jpg May 22, 2022 Victoria with flower-2.jpg May 22, 2022 Victoria with flower-7.jpg May 22, 2022 Victoria with flower-9.jpg May 22, 2022 Victoria with flower-6.jpg May 22, 2022 Victoria with flower-10.jpg May 22, 2022 Victoria with flower-11.jpg

Mid-Day Sun Tips

Joshua Hubbell May 24, 2022

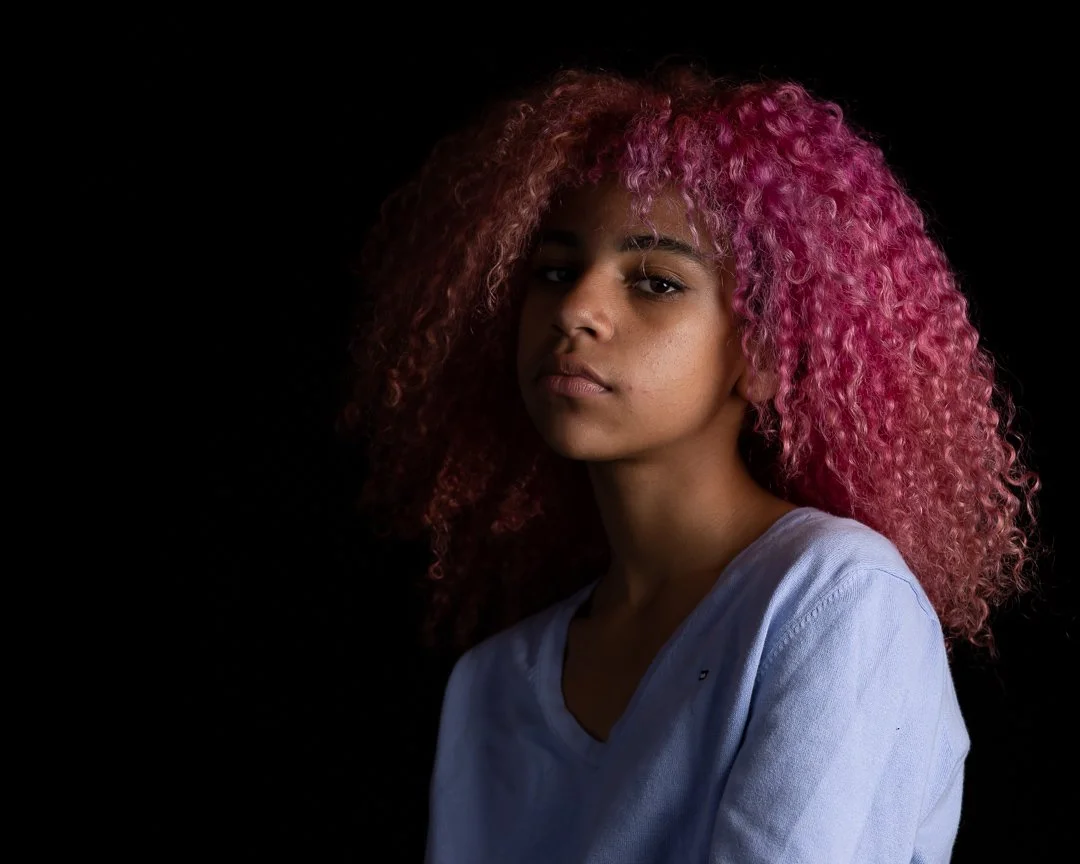
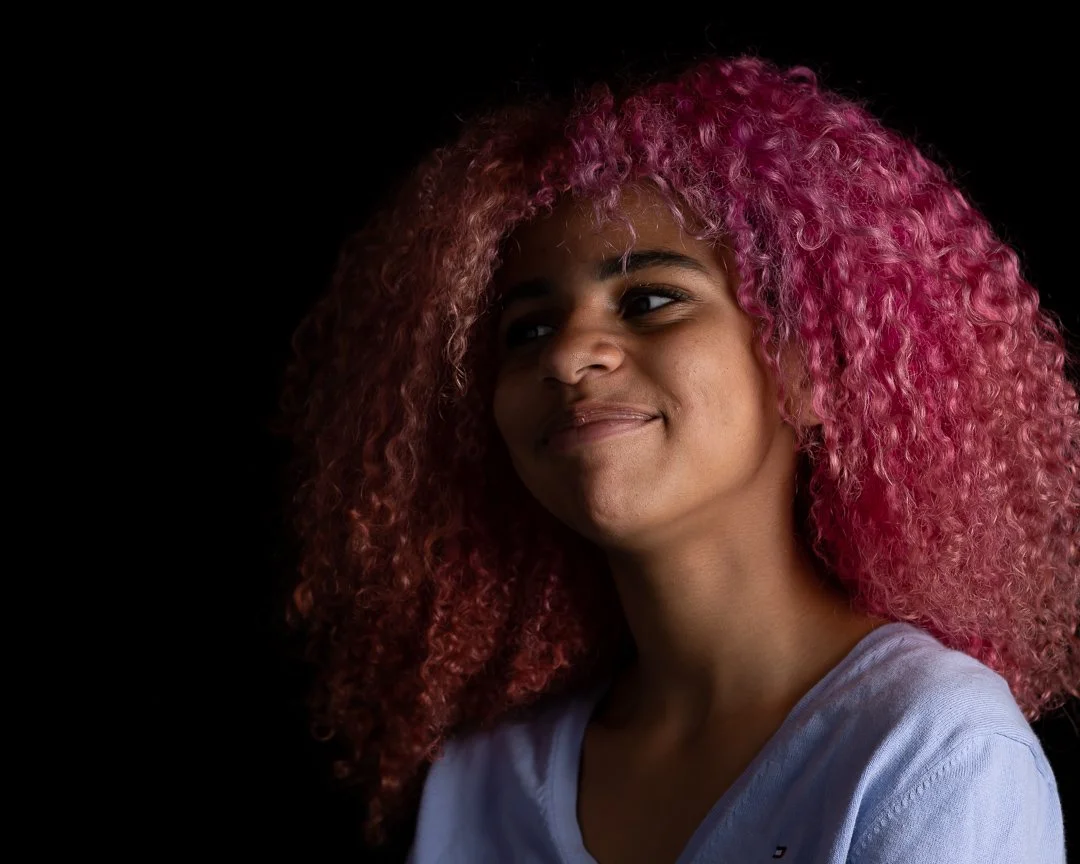
Midday photos can be tricky. The sun pouring down overhead makes for some very unflattering shadows and harsh light. To mitigate this, try finding some shade and shooting there. While in that shade that is a perfect time to pull out your flash to fill in some shadows. Alternatively, you can get a reflector and reflect some light onto your subject. In this case, we did all three. First, we found some shade, then I set up a strobe for the key lighting and, finally, that white sheet is acting as a reflector.

After that we set up a few more props – a basket, a vase, and some fake flowers, and then we let the baby be a baby. She first explored the immediate setup and then had fun tearing things apart. Keep that in mind; babies enjoy exploring and destruction so keep your props safe with that in mind. But this setup can work for pretty much anyone and if the shady area is thin enough you can use that harsh light as a back light to help bring your subjects out.

Comment
IG - May 17, 2022 Post.jpg
IG - May 17, 2022 Post-2.jpg
IG - May 17, 2022 Post-3.jpg
IG - May 17, 2022 Post-4.jpg
IG - May 17, 2022 Post-5.jpg
IG - May 17, 2022 Post-6.jpg
IG - May 17, 2022 Post.jpg IG - May 17, 2022 Post-2.jpg IG - May 17, 2022 Post-3.jpg IG - May 17, 2022 Post-4.jpg IG - May 17, 2022 Post-5.jpg IG - May 17, 2022 Post-6.jpg

Turn Things Around!

Joshua Hubbell May 17, 2022

So, I took the bench from the previous session, turned it around, and used it again. You can do this with chairs and especially with benches out in parks to give your photos a more dynamic look. In fact, you should try walking around the bench or chair and viewing it from different angles. Also notice that by doing it this way, we give their hands something to do – which is something I am always repeating myself on: give those hands something to do. And it didn’t take something fancy to give those hands something to do, we just changed the angle is all.


This time, we are demonstrating how to position heads when working with a family. There are two things that I like to include that work well. First, bring those heads together. You’ll get a smile at some point doing this and it shows closeness and family. Second, have one subject look at the other or even have the subjects look at each other. In this case, the baby is going to look where the baby looks. So, I had her older sister look at her and we ended up with some pretty good shots. That’s two easy things you can do for posing that tends to work really well with families.

Comment
IG - May 11, 2022 Post-6.jpg
IG - May 11, 2022 Post.jpg
IG - May 11, 2022 Post-2.jpg
IG - May 11, 2022 Post-3.jpg
IG - May 11, 2022 Post-4.jpg
IG - May 11, 2022 Post-5.jpg
IG - May 11, 2022 Post-6.jpg IG - May 11, 2022 Post.jpg IG - May 11, 2022 Post-2.jpg IG - May 11, 2022 Post-3.jpg IG - May 11, 2022 Post-4.jpg IG - May 11, 2022 Post-5.jpg

Two younger sisters sitting together.

Joshua Hubbell May 11, 2022

As always, when working with babies, they set the beat of the dance. If they want to look around, go with that. If you can get them to look at the camera and smile or laugh – great. If not, just go with what you can get and work from there. Just remember that everything is new to babies, and they will be looking around a lot as they take the photo session in. You just have to work through that. However, you can make things easier if you throw in another subject to work off them. Young or old, as long as that other subject interacts with the baby, things will work out.


When trying to work within the chaos, start with the eyes. If you can get both eyes, you will be helping yourself out. Getting both eyes of the baby better helps the person viewing the photo fill in what is going on. If you have to move over to get both eyes, then do that. Keep in mind that those eyes do not need to be looking at your camera. But if you can’t get both eyes for whatever reason, don’t worry too much and just get what you can.


Also keep in mind that babies do not usually sit still. So, expect lots of movement and expect to miss lots of shots. Don’t worry, they will keep moving around and you will get some shots. Just keep working at it and you will end up with something. Also, keep the session short because they don’t like to sit still usually. 30 minutes is a long time to a baby and they will get frustrated and have a melt down if you take too long.

Comment
IG - May 6, 2022 Post.jpg
IG - May 6, 2022 Post-2.jpg
IG - May 6, 2022 Post-3.jpg
IG - May 6, 2022 Post-4.jpg
IG - May 6, 2022 Post-6.jpg
IG - May 6, 2022 Post-7.jpg
IG - May 6, 2022 Post-5.jpg
IG - May 6, 2022 Post.jpg IG - May 6, 2022 Post-2.jpg IG - May 6, 2022 Post-3.jpg IG - May 6, 2022 Post-4.jpg IG - May 6, 2022 Post-6.jpg IG - May 6, 2022 Post-7.jpg IG - May 6, 2022 Post-5.jpg

Another quick post.

Joshua Hubbell May 6, 2022

I’m still working on processing so here is another quick post.


A lot of students out there are doing their preparation for their final exams, so we went with that. A few books, a notepad, a desk light, and a pair of glasses later and we had our session. The easiest part of this session is that no one is ever thrilled to study so serious looks abound. That left posing the hands to get a little variation. Remember, glasses don’t have to stay on your subject’s head and can be held or placed down in front of them.


This was done with 2 lights and a reflector. The key light was a strobe just off to the side and a reflector to fill the shadows. Since we had a lamp on the table, I put a light overhead aimed at the table with a snoot to make the lamp look like it was lighting the table. Of course, it would have helped if I removed the bulbed or turned the light on to complete the effect, but I failed to notice that. That is what this sort of practice is for though – so you can avoid mistakes like that later.

Comment
IG - May 3, 2022 Post.jpg
IG - May 3, 2022 Post-2.jpg
IG - May 3, 2022 Post-3.jpg
IG - May 3, 2022 Post-4.jpg
IG - May 3, 2022 Post-5.jpg
IG - May 3, 2022 Post-6.jpg
IG - May 3, 2022 Post-7.jpg
IG - May 3, 2022 Post.jpg IG - May 3, 2022 Post-2.jpg IG - May 3, 2022 Post-3.jpg IG - May 3, 2022 Post-4.jpg IG - May 3, 2022 Post-5.jpg IG - May 3, 2022 Post-6.jpg IG - May 3, 2022 Post-7.jpg

Single light and a reflector

Joshua Hubbell May 3, 2022

I know I mentioned in the previous post that I would go into how to photograph a tech and dress rehearsal but that takes a little more time than what I have currently, so instead here is a quick post about using a single flash and a reflector. In this scenario we are using a round reflector as a fill light and a strobe with an octagon softbox as the key light (though a speed light could have worked too).


Round reflectors come usually come with a reversible top. Usually there is a white and black side and a silver and gold side. Like 90% of the time, I use the white side and I did so here. The silver side and the gold side both reflect a lot of light back but usually it is too much for my taste – that doesn’t mean you shouldn’t utilize them. Just keep in mind that silver side and that gold side will reflect their respective colors a little. The black side is to make more shadows and reflect even less light.


The key light is just off to her side a little and the reflector is on the other side aimed at her as well. The thing to remember about reflectors is that they only reflect the light that reaches it. For this reason, I rarely use a grid when I am mixing a softbox and a reflector. In this scenario I usually want the light to go wherever because that is more light to bounce off the reflector.

Comment

This was with a two-light setup. One strobe with an octagon softbox and a grid and a speedlight. The speedlight is behind me giving me that rim light and the strobe is in front of me. We used the stage lights as a back light for this shot. I’ll go more into this next week when I write about tech and dress rehearsals.

Oh what a beutiful morning....

Joshua Hubbell April 29, 2022

My posting has switched back over to 2 a week as opposed to 3 a week. This is because I’ve been photographing tech rehearsals and dress rehearsals the last two weekends for Indian Creek School’ performance of Oklahoma!


If you have time today, Saturday, or Sunday, you should check out their performance – I promise it is a professional level. To get tickets go to https://indiancreekschool.ludus.com/index.php?show_id=17675


Or show up for a show on Friday at 7:00 PM, Saturday at 3:00 PM, or Sunday at 3:00 PM. You won’t be disappointed. The address is:


 Indian Creek School

1130 Anne Chambers Way

Crownsville, MD 21032


I’ll do a post next week giving a little more detail about how to photograph a dress rehearsal but for now, you should really check out this performance. You won’t be disappointed.

Comment
IG - April 26, 2022 Post-8.jpg
IG - April 26, 2022 Post.jpg
IG - April 26, 2022 Post-2.jpg
IG - April 26, 2022 Post-3.jpg
IG - April 26, 2022 Post-4.jpg
IG - April 26, 2022 Post-5.jpg
IG - April 26, 2022 Post-6.jpg
IG - April 26, 2022 Post-7.jpg
IG - April 26, 2022 Post-8.jpg IG - April 26, 2022 Post.jpg IG - April 26, 2022 Post-2.jpg IG - April 26, 2022 Post-3.jpg IG - April 26, 2022 Post-4.jpg IG - April 26, 2022 Post-5.jpg IG - April 26, 2022 Post-6.jpg IG - April 26, 2022 Post-7.jpg

Gray Scaling Photos

Joshua Hubbell April 26, 2022

Sometimes things don’t work out. I was testing out a technique to work with ambient light that I clearly had no handle on. That happens sometimes but fortunately processing tools come with cropping capabilities. Having the option to crop is awesome, but ideally you should try to not need it if possible. The less you have to crop during processing the more time you have to spend towards somewhere else.


Since my subject was showing a range of emotion, I just went with that. And since she had a flair for the dramatic, I went with grayscale for some of them. Gray scaling things reduces detail which amplifies the rest of the detail that is left behind. In this case, emotion is amplified. That stated, the busier a picture is the less effective gray scaling has on them.


For this set up I think it was just a single strobe with a softbox and grid on. I was waiting around before I headed off for a dress rehearsal, so I didn’t want to unpack all my gear. I kept it simple and attempted to work that previously mentioned ambient light technique. I’ll need to practice that more before I can go into it though.

Comment
IG - April 22, 2022 Post-3.jpg
IG - April 22, 2022 Post.jpg
IG - April 22, 2022 Post-2.jpg
IG - April 22, 2022 Post-5.jpg
IG - April 22, 2022 Post-7.jpg
IG - April 22, 2022 Post-8.jpg
IG - April 22, 2022 Post-10.jpg
IG - April 22, 2022 Post-3.jpg IG - April 22, 2022 Post.jpg IG - April 22, 2022 Post-2.jpg IG - April 22, 2022 Post-5.jpg IG - April 22, 2022 Post-7.jpg IG - April 22, 2022 Post-8.jpg IG - April 22, 2022 Post-10.jpg

1st birthday photo session

Joshua Hubbell April 22, 2022

A 1st birthday photo session. These are easier to setup for then you think. Most hobby stores will have everything you need for cheap. You might even be able to find some items for cheap at a dollar store. The trick is to keep the area simple but entertaining enough so that the baby will want to grab things. These interactions with the surrounding items makes the whole session a little more interesting but make sure it’s all 1 year old safe.


As always, you want at least one person the baby knows one set and preferably a person who can get the baby to smile. You also want someone else on set just to hold the baby if needed or grab items/set things up quickly because when dealing with babies you are on the baby’s clock. Finally, have a space for diaper changing emergencies as you never know when the baby will have a blowout.


For this setup I went with a little more complicated 1 strobe, 2 speed light setup. I utilized an octogon softbox for the strobe and used it as a key light and put a long softbox on the speed lights and used them as fill lights. I call it a complicated set up as getting a softbox, two long boxes, 2 speedlights, a stobe, and light stands for all three lights isn’t exactly stuff everyone has access to. I likely could have got a similar set up with just the strobe and the octogon softbox and utilized two reflectors in place of the longboxes but it would have taken some careful positioning.

Comment
IG - April 19, 2022 Post.jpg
IG - April 19, 2022 Post-2.jpg
IG - April 19, 2022 Post-3.jpg
IG - April 19, 2022 Post-4.jpg
IG - April 19, 2022 Post-5.jpg
IG - April 19, 2022 Post.jpg IG - April 19, 2022 Post-2.jpg IG - April 19, 2022 Post-3.jpg IG - April 19, 2022 Post-4.jpg IG - April 19, 2022 Post-5.jpg

Self-portraits

Joshua Hubbell April 19, 2022

Another round of practicing lighting by myself. This is an exercise I recommend all photographers do from time to time for various reasons but the most important of them is that you can better relate and connect with people who find their way in front of your camera. By putting yourself in front of your camera you are opening yourself up the vulnerability that everyone else experiences by having a picture taken of them. Experiencing this allows you to remember and better understand people going in front of your camera and will make it easier to alleviate those concerns that come up. Afterall, it’s easier to tell someone how to do something if you have done it yourself already.


Furthermore, you also learn a lot about your self by doing this exercise. For example, I know I like simple lighting setups that mix bright lights and heavy shadows. When in bind, that’s probably a technique I will fall back on. Knowing this allows me to do two things:

1) Work to refine my skill at this lighting setup

2) Work to avoid this technique and master other techniques.


Whichever route I go with, I have one clear idea of where I need to go with my craft.


Anyway, these photos were taken with just two lights. A strobe with an octagon softbox as the key light and a strobe with a general reflector as a fill light.

Comment
IG - April 14, 2022 Post-2.jpg
IG - April 14, 2022 Post.jpg
IG - April 14, 2022 Post-4.jpg
IG - April 14, 2022 Post-3.jpg
IG - April 14, 2022 Post-8.jpg
IG - April 14, 2022 Post-5.jpg
IG - April 14, 2022 Post-6.jpg
IG - April 14, 2022 Post-9.jpg
IG - April 14, 2022 Post-10.jpg
IG - April 14, 2022 Post-11.jpg
IG - April 14, 2022 Post-2.jpg IG - April 14, 2022 Post.jpg IG - April 14, 2022 Post-4.jpg IG - April 14, 2022 Post-3.jpg IG - April 14, 2022 Post-8.jpg IG - April 14, 2022 Post-5.jpg IG - April 14, 2022 Post-6.jpg IG - April 14, 2022 Post-9.jpg IG - April 14, 2022 Post-10.jpg IG - April 14, 2022 Post-11.jpg

A simple 2-Light setup

Joshua Hubbell April 14, 2022

She wanted to do twirls in her dress, so we went with that. I had a light overhead for a few of them so I had her peek up a few times and photographed that. Finally, I changed the lights up again and had her do some standing poses and one last twirl. This didn’t involve hours of prepping her or anything like that. She just came into my studio as she was, she worked with that, and we had a blast.


Yes, it helps if your subject spends time prepping for a photo session, but it doesn’t always have to be mandatory. One of the amazing things about the human experience is that we can look great after countless hours of preparation, and we can look great with only a few seconds of preparation. It really depends on the circumstances.


This lighting test had me moving things around. This was more of just playing with the lights a little bit but all of them involved just two strobes. In all cases one strobe had a standard reflector on it and the other had an octagon softbox – it was all a matter of where they were. In the first shots the octagon softbox is overhead and the standard reflector is acting as a rim light. For the last three the standard reflector is off to the side acting as a fill light while the octagon softbox acts as a key light. These two different setups do very different things with the light and shadow.

Comment
IG - April 12, 2022 Post.jpg
IG - April 12, 2022 Post-2.jpg
IG - April 12, 2022 Post-3.jpg
IG - April 12, 2022 Post-4.jpg
IG - April 12, 2022 Post-5.jpg
IG - April 12, 2022 Post-6.jpg
IG - April 12, 2022 Post-7.jpg
IG - April 12, 2022 Post-9.jpg
IG - April 12, 2022 Post.jpg IG - April 12, 2022 Post-2.jpg IG - April 12, 2022 Post-3.jpg IG - April 12, 2022 Post-4.jpg IG - April 12, 2022 Post-5.jpg IG - April 12, 2022 Post-6.jpg IG - April 12, 2022 Post-7.jpg IG - April 12, 2022 Post-9.jpg

A baby and a puppy in a box.

Joshua Hubbell April 12, 2022

For this project we got a baby and a puppy together in a box. Always make safety a consideration when mixing babies and puppies with your props. In this case I wanted to make sure that both the baby and the puppy were safe from any splinters that might break from the box. Just try to stay one step ahead of any concerns like that to keep your photography session safe. No photo session is worth sending any of your subjects on a trip too the emergency room.


Where do you get props for your photography project? Anywhere you can! This box came from my parent’s storage locker. I’ve raided other storage areas too. In fact, you’d be surprised how many amazing photography props you, your friends, and family probably have sitting around collecting dust right now. All you need to do is find it and get permission to use.


Finally, when mixing babies with animals, or even people with animals, make sure it is a match that can happen. You don’t want to discover someone is allergic to dogs during the photo session. However, you also want to make sure personalities mix. An animal that gets nervous around babies is not an animal you want to put next to a baby and vice versa. I always say don’t try to force emotions well don’t try to force relationships either. That never plays out well.

Comment
IG - April 7, 2022 Post-4.jpg
IG - April 7, 2022 Post.jpg
IG - April 7, 2022 Post-2.jpg
IG - April 7, 2022 Post-3.jpg
IG - April 7, 2022 Post-5.jpg
IG - April 7, 2022 Post-6.jpg
IG - April 7, 2022 Post-7.jpg
IG - April 7, 2022 Post-4.jpg IG - April 7, 2022 Post.jpg IG - April 7, 2022 Post-2.jpg IG - April 7, 2022 Post-3.jpg IG - April 7, 2022 Post-5.jpg IG - April 7, 2022 Post-6.jpg IG - April 7, 2022 Post-7.jpg

Quick tips for photography outside with dogs.

Joshua Hubbell April 7, 2022

Here are some dog photos outside so here is another quick review for the presumably good weather that is on the way, eventually, hopefully, at some point, in the near future. For starters, I cranked up my shutter speed. Dogs can move fast so a faster shutter speed is called for but if you can’t control your shutter speed – like in the case of phones or point and shoot camera, don’t worry. First check and see if you have a fast movement setting – I know most point and shoots these days have some sort of fast movement setting and even some smartphones do too, but odds are you should still come out with something solid even if your smartphone doesn’t. Just try to stay ahead of your subject and you will get the hang of it.


Next up, focus on the eyes. Those are going to help you stay ahead of the subject but also that’s how we humans connect with other living things (with rare exceptions, of course). The person viewing your photo will unconsciously be looking for and see the eyes first. But as previously stated, the eyes of the dog will give you an indication of where they are going next so you can be ready. It takes practice and depends on the dog but eventually you get the hang of it.


Finally, watch out of ID and personal information. Dog tags can have phone numbers, names, and even addresses. This is great for when a dog gets lost but if that picture you post to social media turns into click gold the person that owns the dog might get unwanted contact if you leave that information out there. When doing this stuff for clients you might want to consider having regular versions for printing and censored versions for posting to social media so everyone on social media isn’t calling them.  What I do is use my processing tools to tone the sharpness and clarity all the way down on that information.

Comment
IG - April 5, 2022 Post.jpg
IG - April 5, 2022 Post-2.jpg
IG - April 5, 2022 Post-3.jpg
IG - April 5, 2022 Post-4.jpg
IG - April 5, 2022 Post-5.jpg
IG - April 5, 2022 Post-6.jpg
IG - April 5, 2022 Post.jpg IG - April 5, 2022 Post-2.jpg IG - April 5, 2022 Post-3.jpg IG - April 5, 2022 Post-4.jpg IG - April 5, 2022 Post-5.jpg IG - April 5, 2022 Post-6.jpg

Outdoor tips review

Joshua Hubbell April 5, 2022

We are at the “some days warm, some days cold” part of the year so here are some outdoor shots I took, and this is a good opportunity to go over some basics. First of all, golden hour, which are the ideal times of the day for most photos to be taken outdoors on a sunny day as the sun looks best on our skin at these times of day. There are two each day – one in the morning and one in the afternoon and you will have to look them up online as they change both in terms of occurrence and in duration depending on the time of the year. The good news is you don’t have to be 100% just know the earlier the day or the later the day the closer to this period you are and the better the light is. The least ideal time is when the sun is directly overhead.


Next up, notice I am using that road again. Roads and sidewalks are great, especially straight ones as they create natural leading lines and give you something for your subject to do – walk up them or walk down them. Better yet, if you have your subject walking away you can have them stop and look over their shoulder. But that’s not all, you can find roads aligned with the sun or parallel and get different lighting effects. There is just so many cool affects you can pull out of roads.


Finally, mood. Sometimes you just have to settle for the mood your subject is in. Or I should say you have to do a cost benefit analysis and determine the mood they are in is just what you are going to go with. Think of it this way – sometimes the choice is you spend 55 minutes of your 60-minute session trying to get a smile from someone who doesn’t want to smile, or you can spend 55 minutes photographing moody looks from someone who is moody – which seems like a better use of time? Besides usually people come around and start smiling when they realize you aren’t there to fight their mood.


#Marylandphotographer #Annearundelphotographer #familyphotographer #photographytips

Comment
IG - March 31, 2022 Post.jpg
IG - March 31, 2022 Post-2.jpg
IG - March 31, 2022 Post-3.jpg
IG - March 31, 2022 Post-4.jpg
IG - March 31, 2022 Post-5.jpg
IG - March 31, 2022 Post-6.jpg
IG - March 31, 2022 Post-7.jpg
IG - March 31, 2022 Post.jpg IG - March 31, 2022 Post-2.jpg IG - March 31, 2022 Post-3.jpg IG - March 31, 2022 Post-4.jpg IG - March 31, 2022 Post-5.jpg IG - March 31, 2022 Post-6.jpg IG - March 31, 2022 Post-7.jpg

Another Puppy.

Joshua Hubbell March 31, 2022

I wanted to do this shot with this English Bulldog puppy in a basket, but she was too big for the basket I had so I went with what I could find – boxes and a sheet. Fortunately, she is pretty calm so setting her higher up wasn’t a big risk as she didn’t really move at all. She just pretty much sat there and looked confused which is all I needed for this session.


You also want to test before you do anything with pets to see if the flash scares them. If it does you might want to rethink how you approach your photo session. If this puppy was scared of the strobes, then I likely would of switched to an outdoor session and certainly would have dropped the height of the setup. As always, when working with animals be patient and nice. They don’t know what you are trying to do and they just want you to be happy. But since they don’t know what you are trying to do they don’t know how to make you happy in this scenario so give them a break and stay calm and nice.


As for the lighting setup, I used two lights. Once again, a strobe overhead but this time with a snoot aimed at the subject. My key light was an octagon softbox just in front of me aimed at the subject. I kept light low and made ample use of black to further reduce light.

Comment
IG - March 29, 2022 Post.jpg
IG - March 29, 2022 Post-2.jpg
IG - March 29, 2022 Post-3.jpg
IG - March 29, 2022 Post-4.jpg
IG - March 29, 2022 Post-5.jpg
IG - March 29, 2022 Post-6.jpg
IG - March 29, 2022 Post.jpg IG - March 29, 2022 Post-2.jpg IG - March 29, 2022 Post-3.jpg IG - March 29, 2022 Post-4.jpg IG - March 29, 2022 Post-5.jpg IG - March 29, 2022 Post-6.jpg

More testing.

Joshua Hubbell March 29, 2022

This is what a test session looks like.  I just wanted to mess around with an octagon softbox directly overhead. I’ve got a great boom stand, but before I really start using this setup, I want to be absolutely sure it works and holds. So, I tested it on myself. The key light was all over the place but that wasn’t my top concern this session.


Once again, you want to experiment with your gear. Even simple experiments like this one. Aside from getting affirmation about the stability of my gear, I also figured out some more stuff about my remote, my strobes, and my processing tools. Did I get paid to do this session? Of course not, no one is paying for pictures of me but the knowledge gained from this session will carry on to every other session including paid sessions.


One other point – if you aren’t willing to do it yourself, then you probably shouldn’t get others to do it either. I now know my boom stand will hold, but I would have hated to find out it wouldn’t with someone else sitting under it. Now I feel confident using an overhead octagon softbox should the need arise.


Finally, for this set up, I used an octagon soft box overhead and essentially a white sock over the key light. In addition to testing the overhead setup I wanted to see just how lazy I could be with the key light. This sounds awful but keep in mind that you never know when and what will fail but at some point everything fails. Maybe you stay ahead of the failures or maybe you have to improvise on the spot. That is why I occasionally try out what I consider to be lazy setups.

Comment
IG - March 25, 2022 Post-8.jpg
IG - March 25, 2022 Post-2.jpg
IG - March 25, 2022 Post-3.jpg
IG - March 25, 2022 Post-4.jpg
IG - March 25, 2022 Post-5.jpg
IG - March 25, 2022 Post-6.jpg
IG - March 25, 2022 Post-7.jpg
IG - March 25, 2022 Post-8.jpg IG - March 25, 2022 Post-2.jpg IG - March 25, 2022 Post-3.jpg IG - March 25, 2022 Post-4.jpg IG - March 25, 2022 Post-5.jpg IG - March 25, 2022 Post-6.jpg IG - March 25, 2022 Post-7.jpg

The eyes set up quite a bit.

Joshua Hubbell March 25, 2022

No, this isn’t promoting cannibalism, but it is reiterating using what you have and using it in different ways. Using the same pots I used in the previous post, I flipped them proper and put a baby in the big put. I also brought the light up and added a sheet to the table.


Once again, her mom was on set to help get her to the look the proper direction, but it is okay if she didn’t look the right way. One thing I try to do when dealing with babies is obviously have a parent on set, but I also try to be strategic about parent positioning. In one of these photos she is looking directly at her mom – but since I put her mom in a specific shot when she looks at her mom we can still see both eyes.


This is basic photography but it’s worth reminding because it is so important to the human experience – the eyes are our first major point of contact with other humans. So, it stands to reason what you are doing with the eyes in a photograph that has a person will set up quite a bit of the tone and theme of everything else in the picture. When I am photographing a baby, I try to make sure both eyes are in the shot, even if those eyes aren’t looking at the camera.


For this shot, it was one back light with a blue gel. A key light with an octobox and a fill light with a longbox off to the side.

Comment
IG - March 23, 2022 Post-3.jpg
IG - March 23, 2022 Post-4.jpg
IG - March 23, 2022 Post-5.jpg
IG - March 23, 2022 Post-6.jpg
IG - March 23, 2022 Post-7.jpg
IG - March 23, 2022 Post-8.jpg
IG - March 23, 2022 Post-9.jpg
IG - March 23, 2022 Post-10.jpg
IG - March 23, 2022 Post-3.jpg IG - March 23, 2022 Post-4.jpg IG - March 23, 2022 Post-5.jpg IG - March 23, 2022 Post-6.jpg IG - March 23, 2022 Post-7.jpg IG - March 23, 2022 Post-8.jpg IG - March 23, 2022 Post-9.jpg IG - March 23, 2022 Post-10.jpg

Drumming to fun.

Joshua Hubbell March 23, 2022

Setting up something different doesn’t have to be a hassle. You can always go with a cliché especially with kids and it tends to work out well, especially if it is fun. In this case, I took some old pots I had and setup a drum set. She didn’t quite understand at first until I showed her what I had in mind and then she started gently. Then I told her no, hit the pots harder and make some noise and suddenly she was all into it.


Granted, I have all sorts of fancy stuff going on here because I wanted a rockstar feel, but this could have just as easily worked with window light and a few pots in the kitchen. It might even give it a different context that you could run with and explore. But the point is, props and a photo session for those props are all over your house, you just have to look for them.


Anyway, for lighting, I have 4 lights involved. One light over head with a snoot aimed down. Two lights to either side of her, one with a red gel and one with a blue gel. Finally, a light a ways off to the front of her with a octagon softbox. I’ve been gravitating towards octogon softboxes as of late as a key light because I like the shape of the catch light it creates in the eyes. This is purely a personal preference and I wager 90% of the people who look at professional photos could care less what shape the catch light is in the eyes. Just wanted to include that tidbit so no one is out there thinking they are stuck with whatever light they have – those are fine too. Embrace them, learn to use them, use them well, and you will go far with what you have.  

Comment
IG - March 21, 2022 Post.jpg
IG - March 21, 2022 Post-2.jpg
IG - March 21, 2022 Post-3.jpg
IG - March 21, 2022 Post-4.jpg
IG - March 21, 2022 Post-5.jpg
IG - March 21, 2022 Post-6.jpg
IG - March 21, 2022 Post-7.jpg
IG - March 21, 2022 Post.jpg IG - March 21, 2022 Post-2.jpg IG - March 21, 2022 Post-3.jpg IG - March 21, 2022 Post-4.jpg IG - March 21, 2022 Post-5.jpg IG - March 21, 2022 Post-6.jpg IG - March 21, 2022 Post-7.jpg

Pink Hair

Joshua Hubbell March 21, 2022

My assistant has pink hair now, so we did a fun photo session with it. This is another example of just how little you need to make a photo session work. I do recommend props for the hands, but if you can’t or if props just wouldn’t fit the session, then make the hands the props. We have her hands doing different things in these photos and they all vib with the overall set. This doesn’t mean her looks are blank – she’s working different emotes for sure but that all falls into place more often after you figure out what the hands are doing.


Think of it this way; we humans are social creatures, even the less social of us are still defined quite a bit by social standards in some way, shape, or form. What we are doing defines a lot for us and our hands are key in that. Put a shovel in someone’s hands and they will have some since in their brain that they are there to dig holes. Put a broom in someone’s hands and they are there to sweep the floor. Our hands lead us more then we realize so by utilizing the hands in your photo session it can be a lot easier to set the expectations for facial emotes.


Anyway, for this setup, nothing too fancy. It was a basic three light setup. One strobe overhead with an octagon softbox as the key light. One strobe of to the side with a long softbox as a fill light. One strobe in back with beauty dish and a pink gel aimed at the backdrop as a back light.

Comment
IG - March 18, 2022 Post.jpg
IG - March 18, 2022 Post-2.jpg
IG - March 18, 2022 Post-3.jpg
IG - March 18, 2022 Post-4.jpg
IG - March 18, 2022 Post-5.jpg
IG - March 18, 2022 Post-6.jpg
IG - March 18, 2022 Post extra-2.jpg
IG - March 18, 2022 Post extra-3.jpg
IG - March 18, 2022 Post.jpg IG - March 18, 2022 Post-2.jpg IG - March 18, 2022 Post-3.jpg IG - March 18, 2022 Post-4.jpg IG - March 18, 2022 Post-5.jpg IG - March 18, 2022 Post-6.jpg IG - March 18, 2022 Post extra-2.jpg IG - March 18, 2022 Post extra-3.jpg

Like father, like daughter.

Joshua Hubbell March 18, 2022

My subject here is utilizing items that represent her dad. He had a long military career and now he is delving into art. So she’s wearing his military jacket, a military helmet, holding his paint brush and a canvas, and is standing next to a military ammo box full of the rest of his paint brushes. We quietly borrowed a few items around her house for this session. We started off and slowly adjusted the poses until we ended with two looks we liked.


For setup, I had one light overhead with no mods, I also had an octobox as the key light just off to the front of her and a long box just off to the side to add a little fill light.


The final two photos are once again my stand in. Instead of measuring the subject I just had her stand next to an extra light stand and made it her height. This allowed me to set up the lights to her height and then I got the stuffed bunny stand in on top and just like that the light test dummy is good to go. I started with getting the light over head on the boom stand up and then added the other lights (then I strung the cord overhead and out of sight).  


I suppose this is as good a time as any to mention to keep safety in mind. I can have cords hanging from the ceiling when I am photographing a stuffed animal stand in. However, you want to have those cords organized by the time you have a live subject in front of your camera. It just isn’t safe to have cords all over and it makes you look unprofessional if you do have them out. You don’t want someone tripping on a cord and taking the whole set with them.

Comment
IG - March 14, 2022 Post-7.jpg
IG - March 14, 2022 Post-2.jpg
IG - March 14, 2022 Post-3.jpg
IG - March 14, 2022 Post-4.jpg
IG - March 14, 2022 Post-5.jpg
IG - March 14, 2022 Post-6.jpg
IG - March 14, 2022 Post.jpg
IG - March 14, 2022 Post-7.jpg IG - March 14, 2022 Post-2.jpg IG - March 14, 2022 Post-3.jpg IG - March 14, 2022 Post-4.jpg IG - March 14, 2022 Post-5.jpg IG - March 14, 2022 Post-6.jpg IG - March 14, 2022 Post.jpg

Ready for Spring

Joshua Hubbell March 14, 2022

It’s been cold and miserable, so here is a photo of a little lady ready for spring to start. I coordinated with her mother by finding out the outfit of choice. Then I went with a white backdrop and flashed a strobe with a yellow gel on it giving a yellow background. We lucked out; she was in a very good mood at the time of the photo session so getting a smile was super easy. She was also very animated which always works great.


The last photo is the baby stand in for this photo session (or first or wherever the social media sites put it on – it’s the picture with the bunny). I can’t stress enough how important it is to have your setup ready before your subject is on set. Sometimes it happens, sometimes it doesn’t but the younger your subject the more you need to have things ready to go because the less certain you can be your subject will be in a cooperative mood. Thus, the stand in to test everything. Before this baby was on set everything was thoroughly tested. There was no waiting and just a few seconds for adjustments, just set her down and we start.


It's a three-light setup. The previously mentioned strobed aimed at the backdrop is one. The key light was a strobe with an octagon softbox. The fill light was a long softbox just off to the side of her. I also had her on a table because she’d be too short for even the smallest light tripod to hold the lights up. Obviously with help just off to the side.

Comment
← NewerOlder →

Search Posts

Powered by Squarespace