And may the upcoming year be as good, if not better, then this past year!


And may the upcoming year be as good, if not better, then this past year!


May you be surrounded by good friends and good family today!
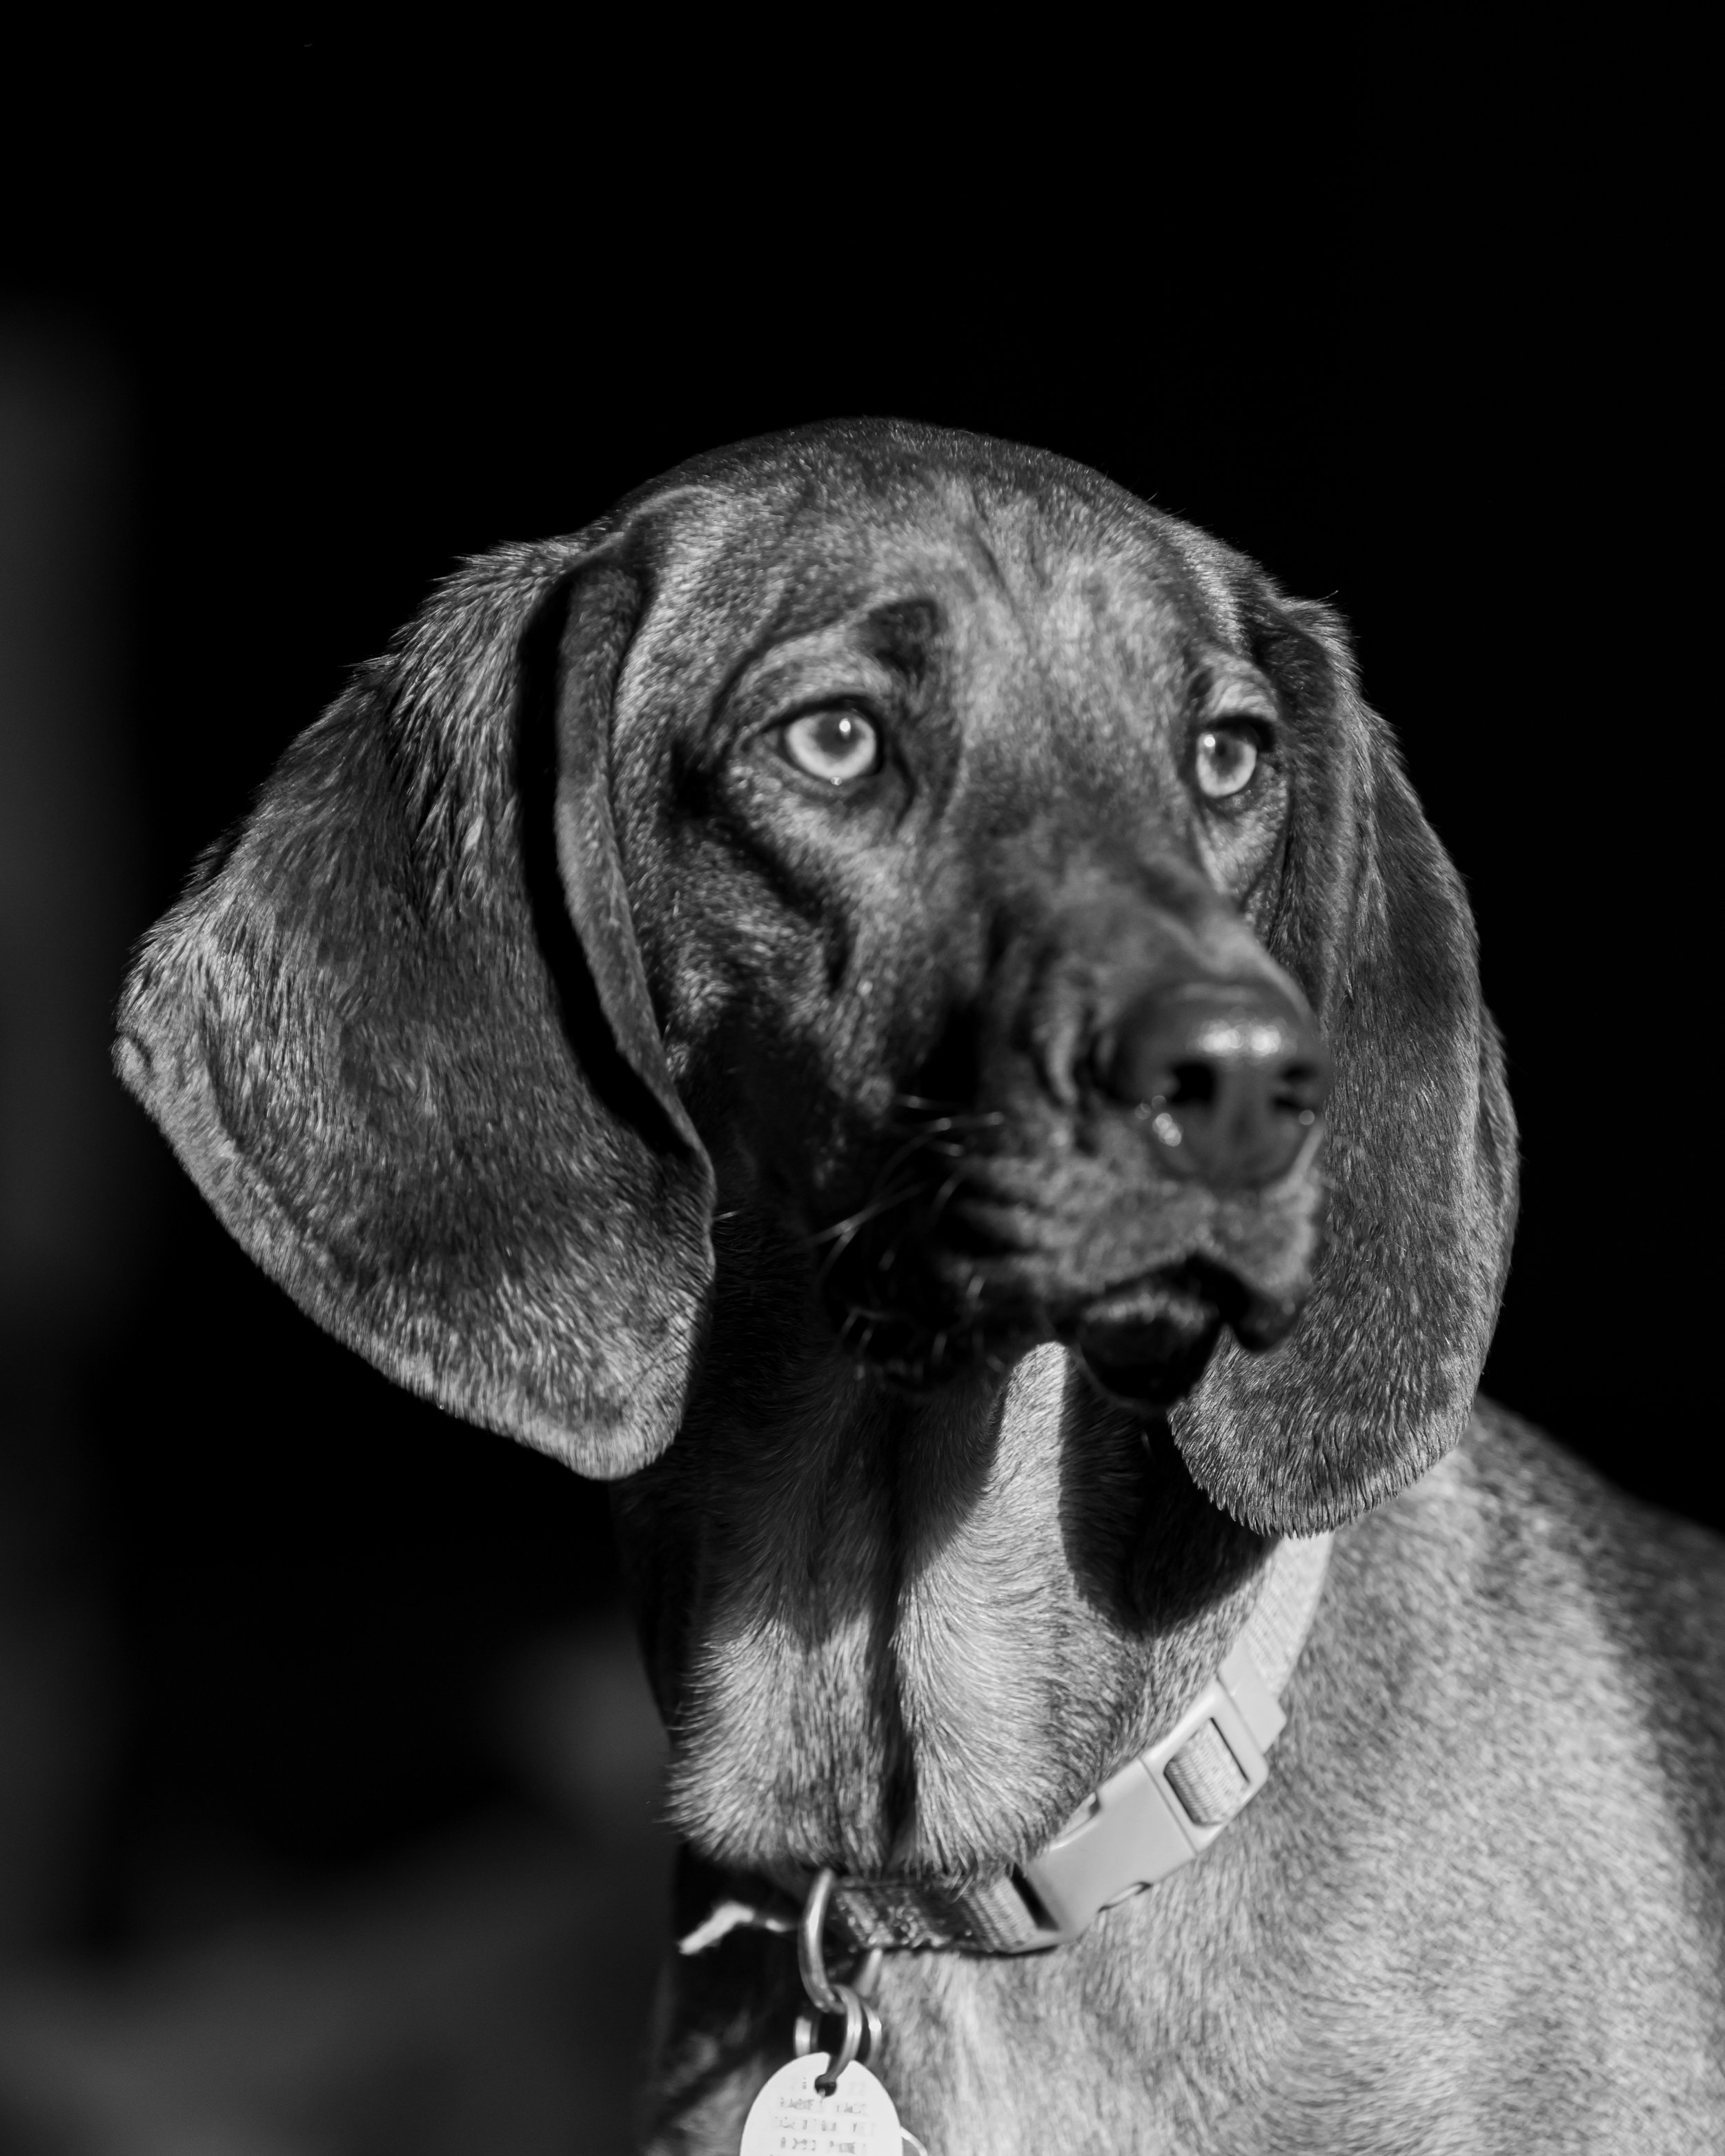
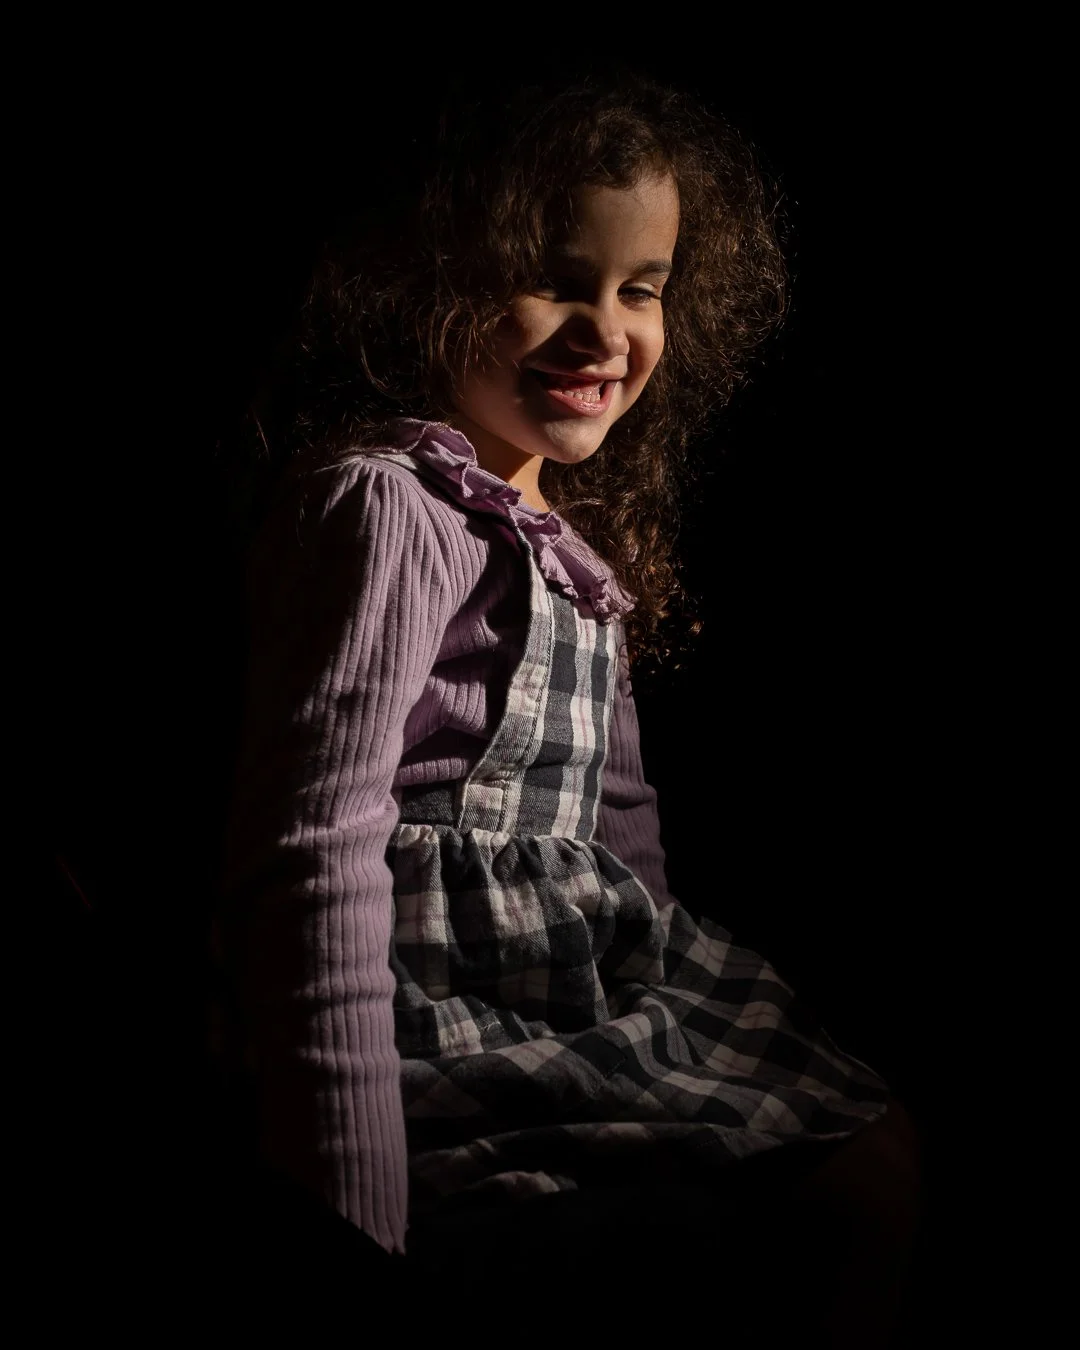
Also, it was a two light setup. Two softboxes, octagon, on two strobes. Each on either side of the subject. I prefer octagon softboxes because I like the shape it makes in the eyes and frankly it comes down to a personal taste choice on that one.
Anyway, merry Christmas!
Deep inside Santa’s Workshop is one room where no elf dares to go for it is here it is said that Santa has placed the heads of his worst enemies he was forced to slay. Just before Christmas, Santa goes to this room and can be heard performing strange rituals and talking to these heads, some have even heard things talking back to Santa. What could Santa possibly want to know from such evil beings? He asks who their friends are, monsters love to boast about their friends as it makes them feel powerful and important, even dead monsters. At which point, Santa writes down every name on his naughty list.
Walk an honest path and choose your friends wisely.
#Nightmarebeforechristmas
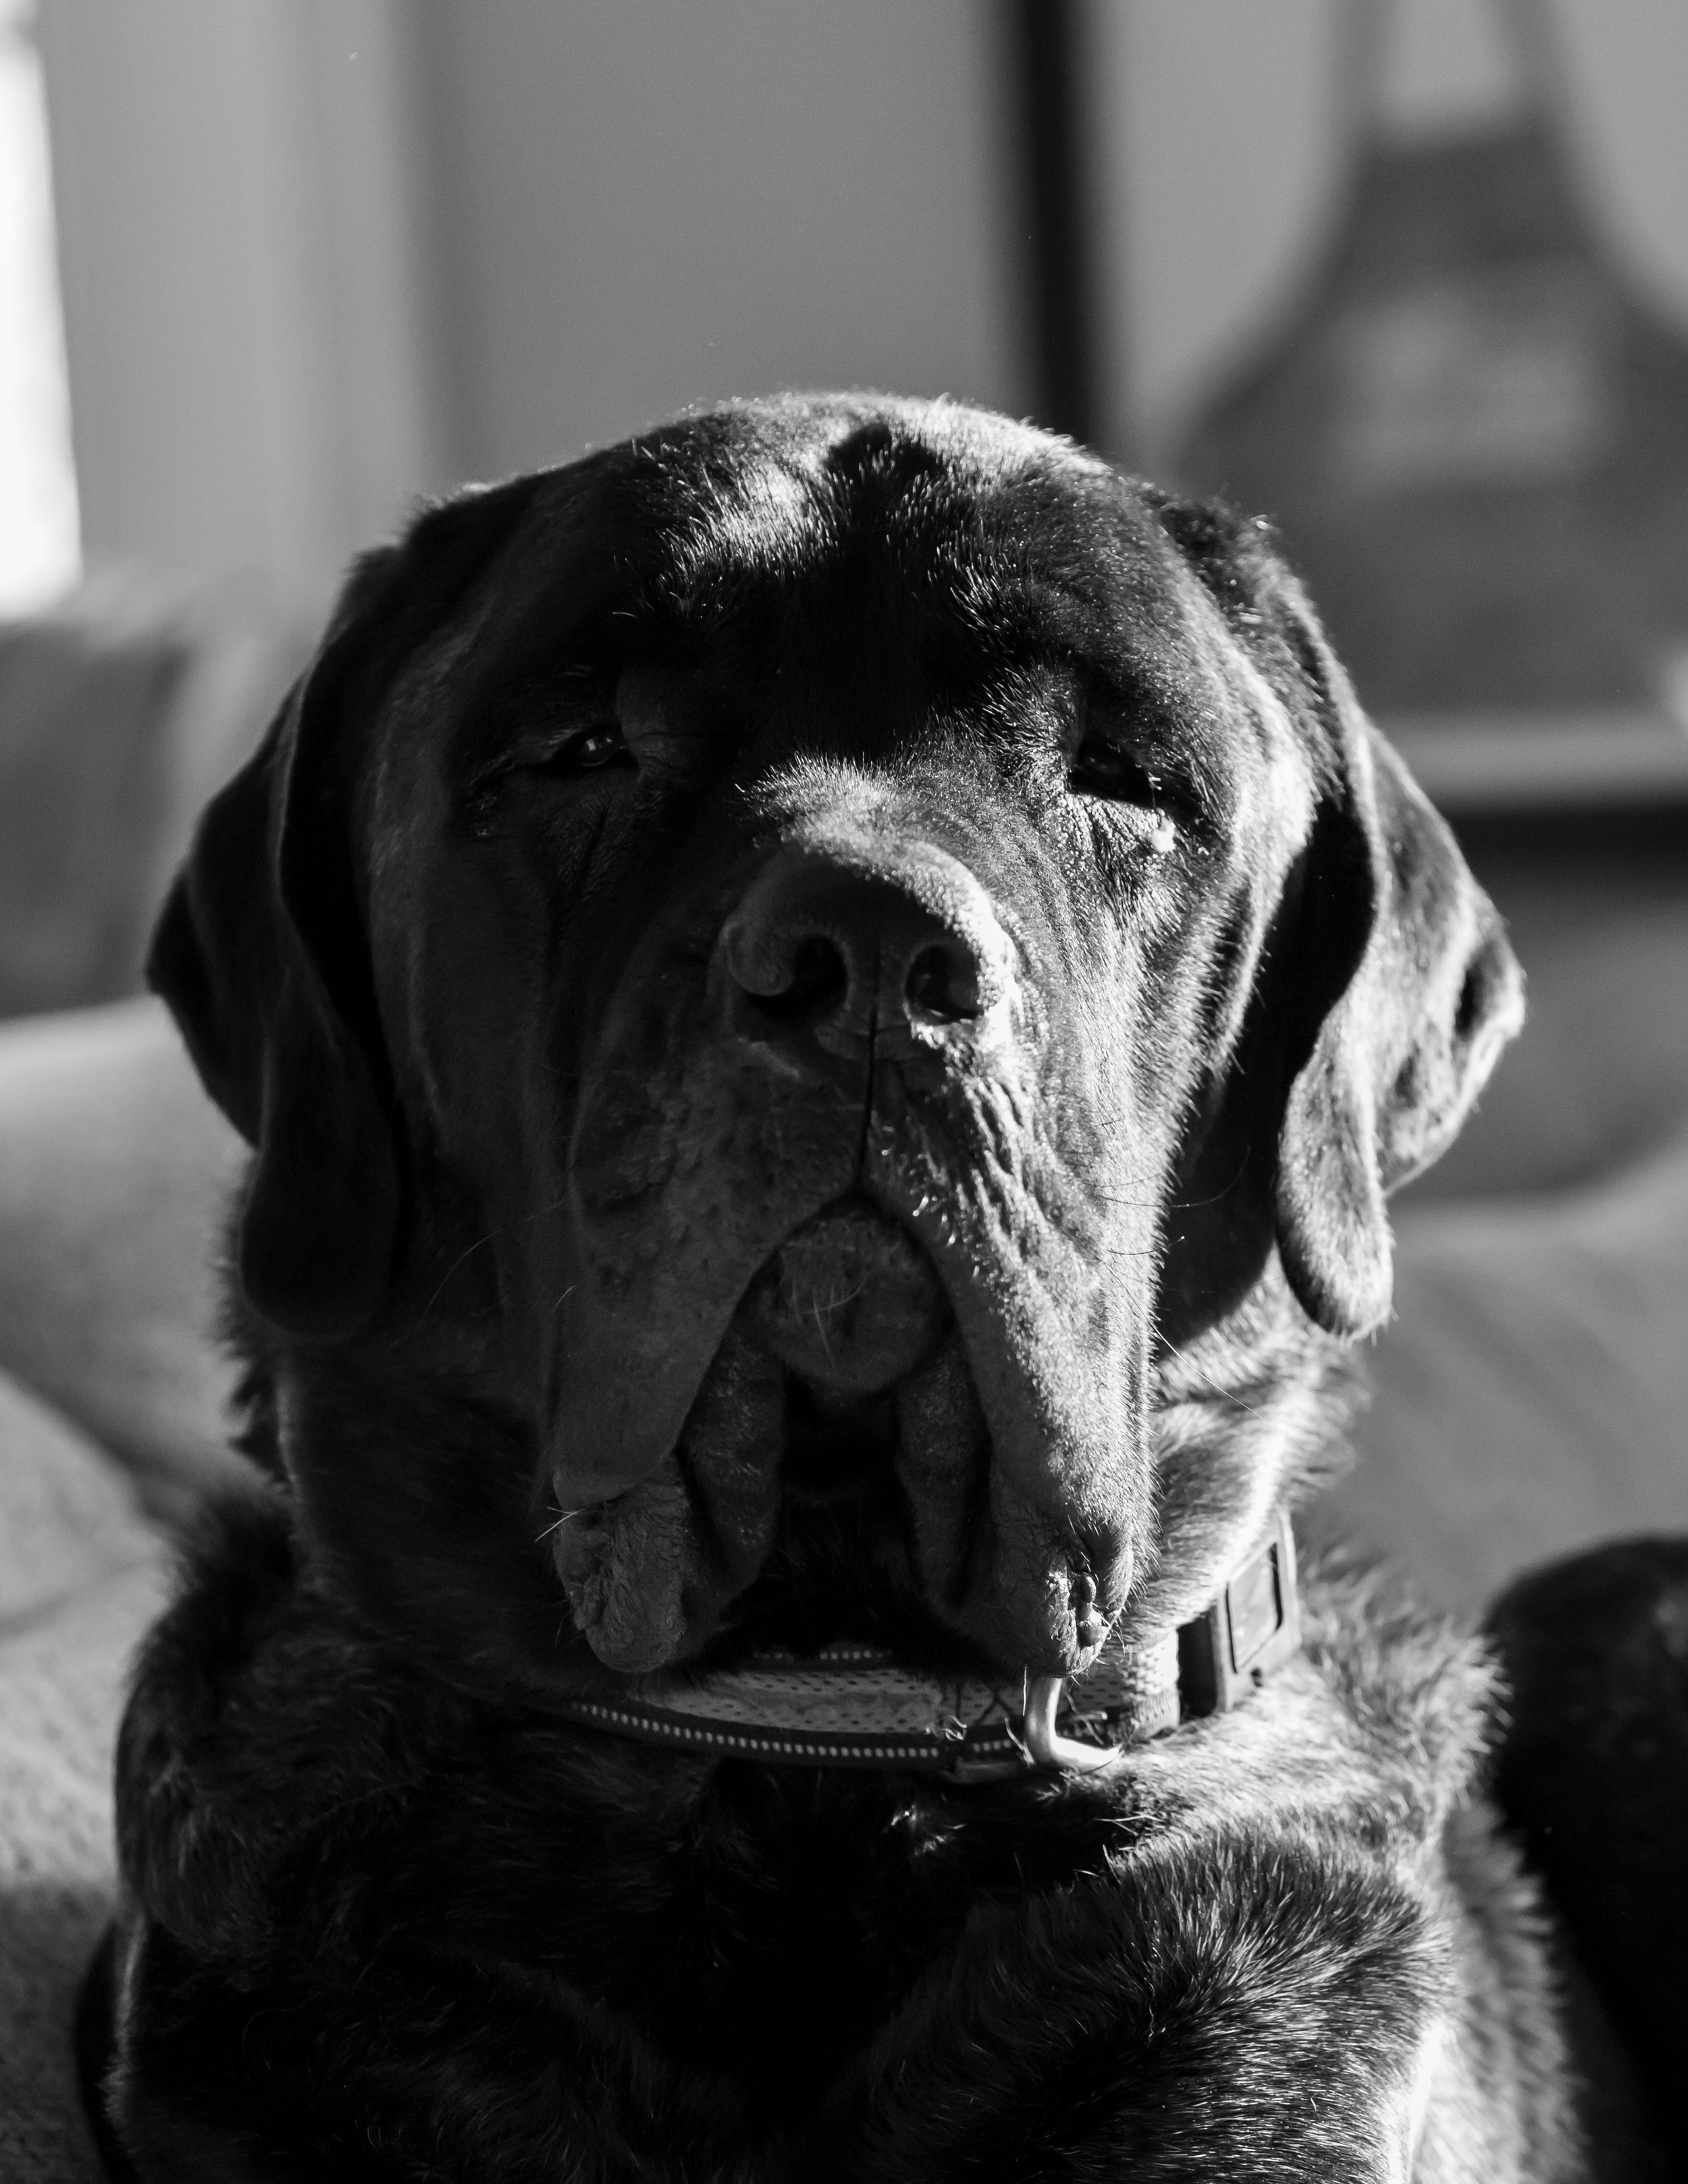
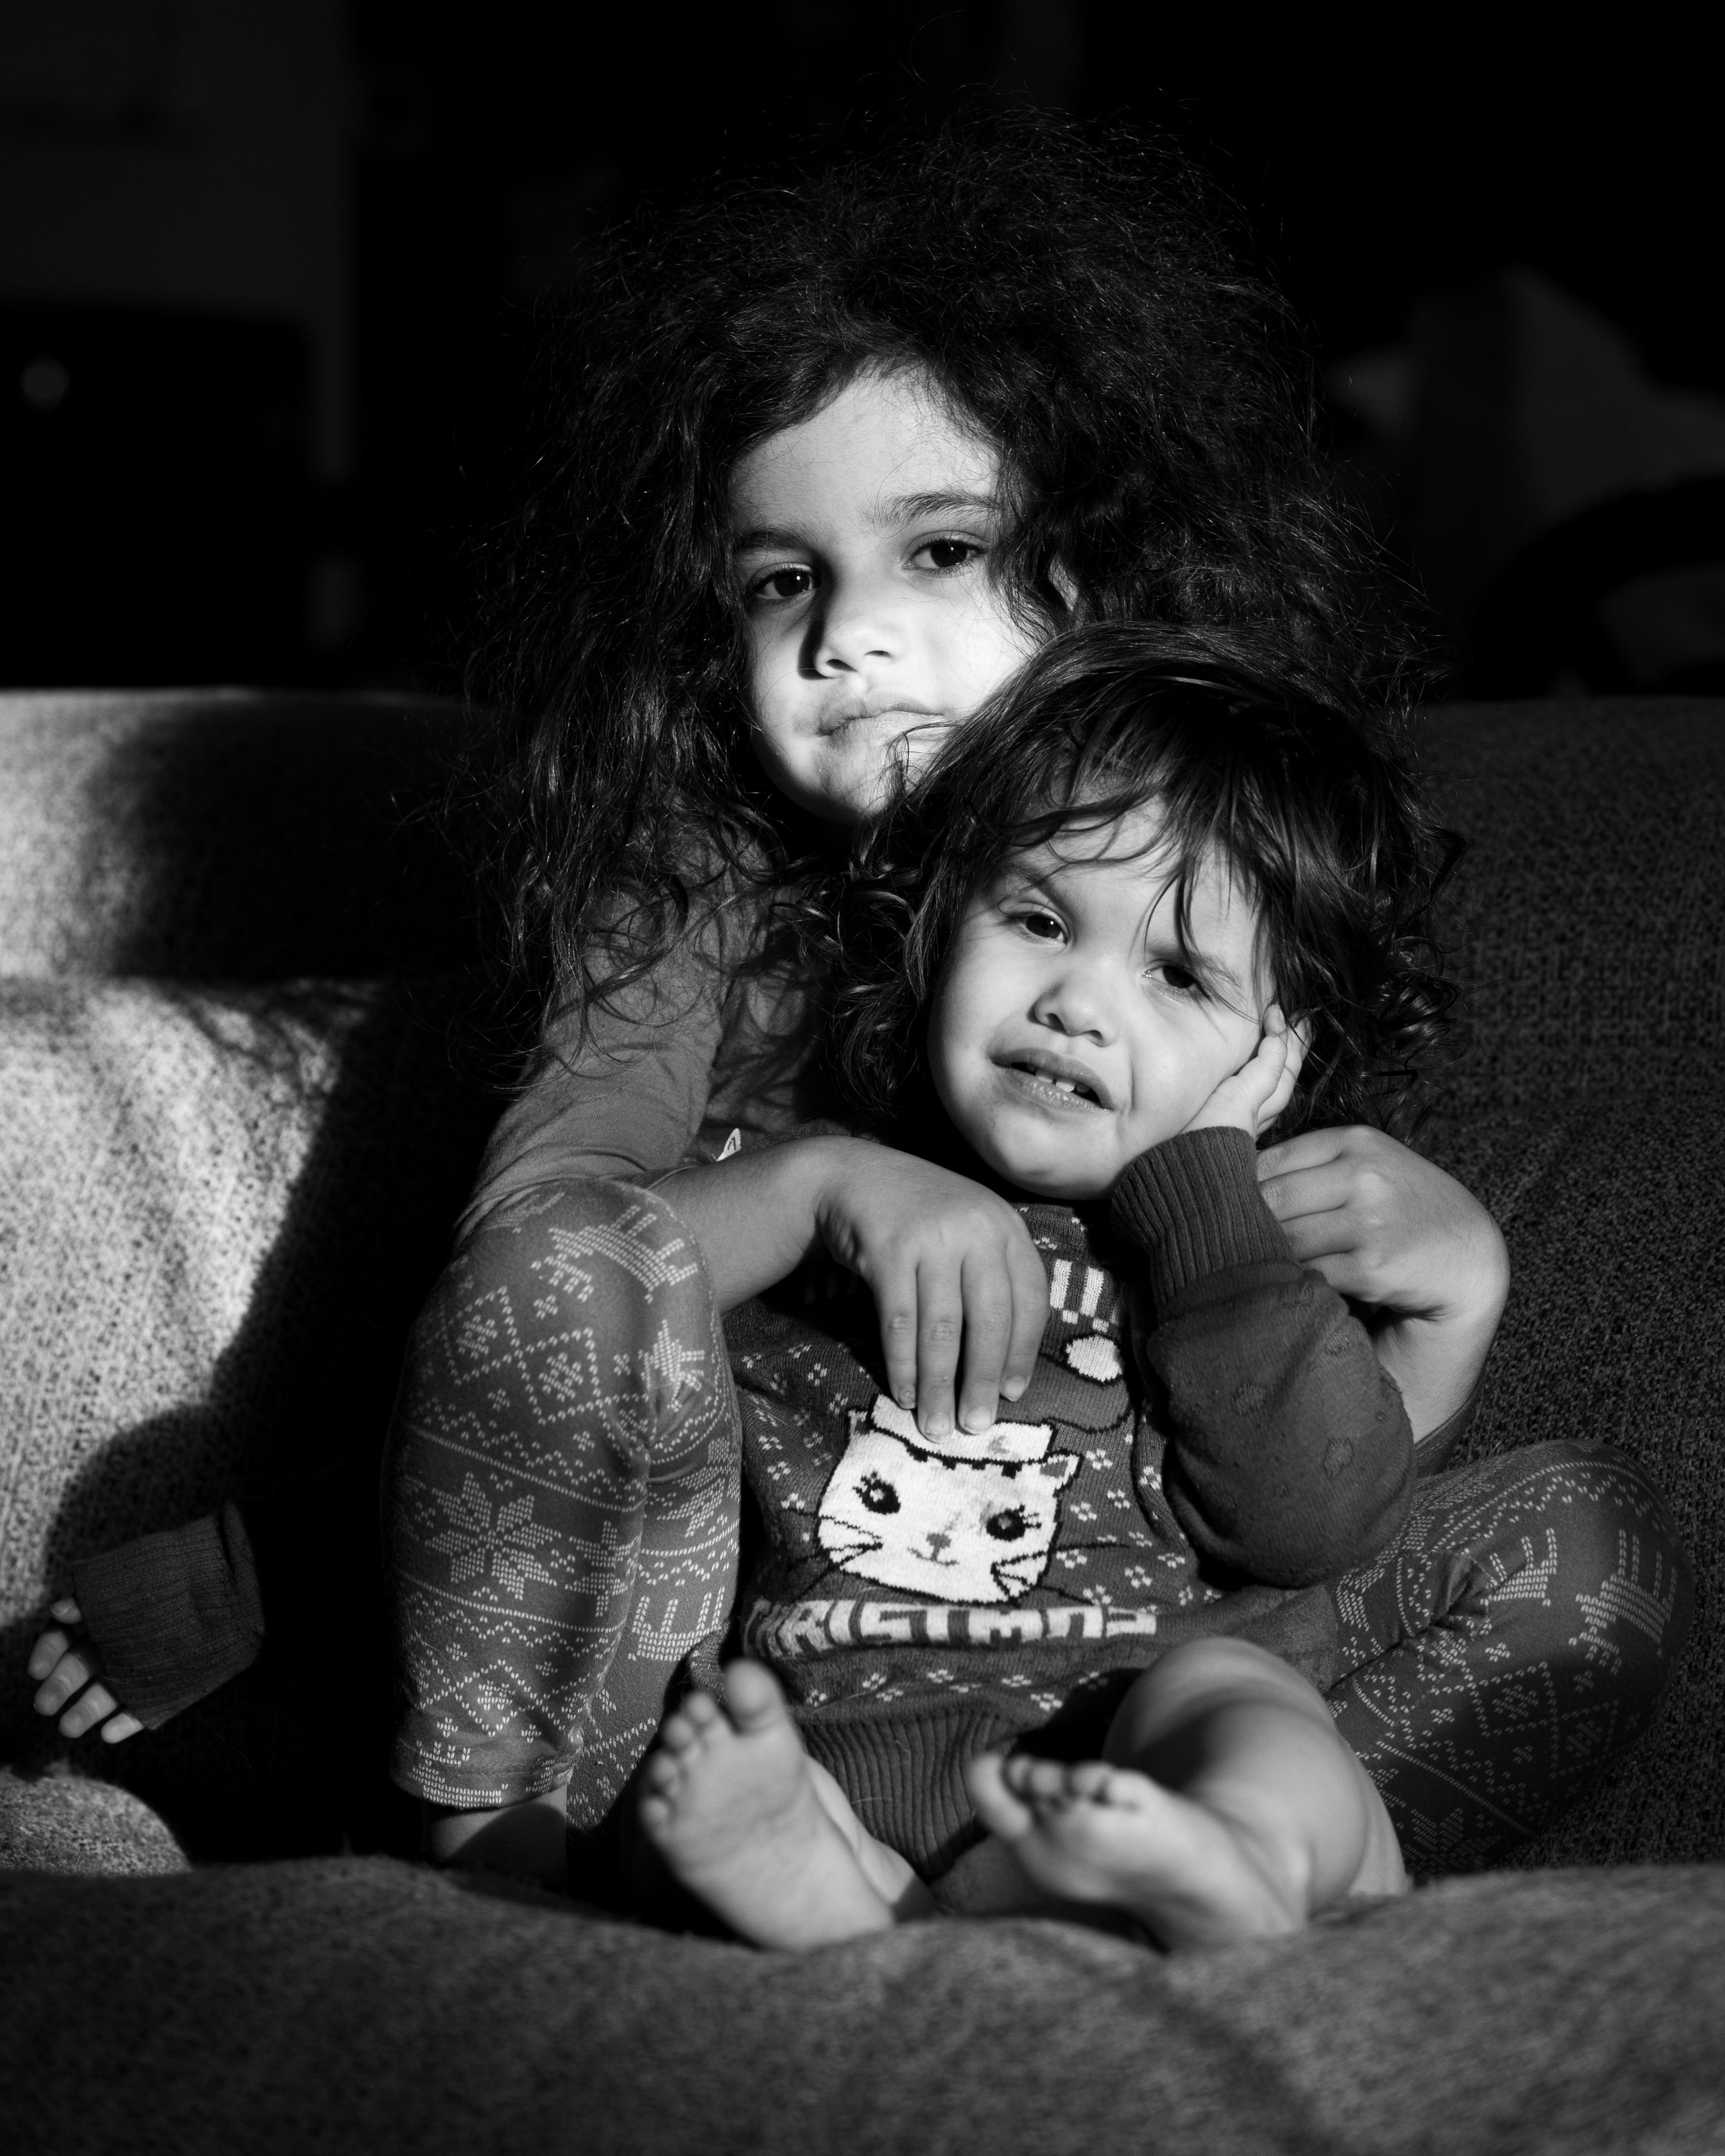
When you convert a photo to black and white aside from taking away the color you can do a few things to up the moodiness of it with your photo processing software. For starters, mess with the shadows and the lights. Obviously those two contrast with each other and you can really kick things up a notch by playing around with those two sliders. Next, and more related to this post, explore any options you have that affect texture and clarity. That is, you want to increase the texture quite a bit and clarity a tad. Doing so will make people look more worn and dogs more… dog? It’s easier to show then to explain. In the first photo with this post is a picture of a mastiff just grayscaled. The photo after it is the same photo except texture has been kicked up a lot. Notice how it affects the fur and wrinkles. The next few photos are further examples of texture increased as well as one of two kids (the little one was due for a nap at the time this photo was taken so we went with moody for these photos).
I got out to the Clayville Outdoor Train Garden this past weekend. Here are some photos from that adventure. If you are in Maryland and near Pasadena, I suggest checking it out. If you do check it out, they are collecting money to help two families, each of which has a little girl with cancer, so please go and donate if you can.
And on to some photography tips. For starters, you need to find out if photography is even allowed. This is as easy as simply asking. Most places have email or social media, or you can even ask at the location like I did. Regardless of how you ask, I recommend asking to avoid being asked to leave. Often, places want you to photograph anyway but some places don’t so ask.
As for what lens to bring, do your research and consider your goals as well as what conditions the location itself might create. In this case, I didn’t want to be changing lenses as it was outdoors and was going to be relatively crowded so I opted to take just one lens. Since we were dealing with hobby trains, I opted to go with a lens that could zoom in, so I took my telephoto lens.
Finally, for settings consider your conditions and go in with a plan to save time. For this, I knew I would be outside, I knew I’d be in a crowded area, I knew it would be nighttime with some lights and I knew the trains would be moving. This all tells me I’d be photographing moving objects in a low light area where I might only have a few seconds for some shots. My ISO would be high (4000 to 6000), my shutter speed was about 1/350 – 1/500 depending on what I could get away with and my aperture was as a low F-stop number. I like to select my focus point and keep it to one point however for this I did not move it so I always knew where it was for faster for focusing.
It was really cool, and you should check it out.
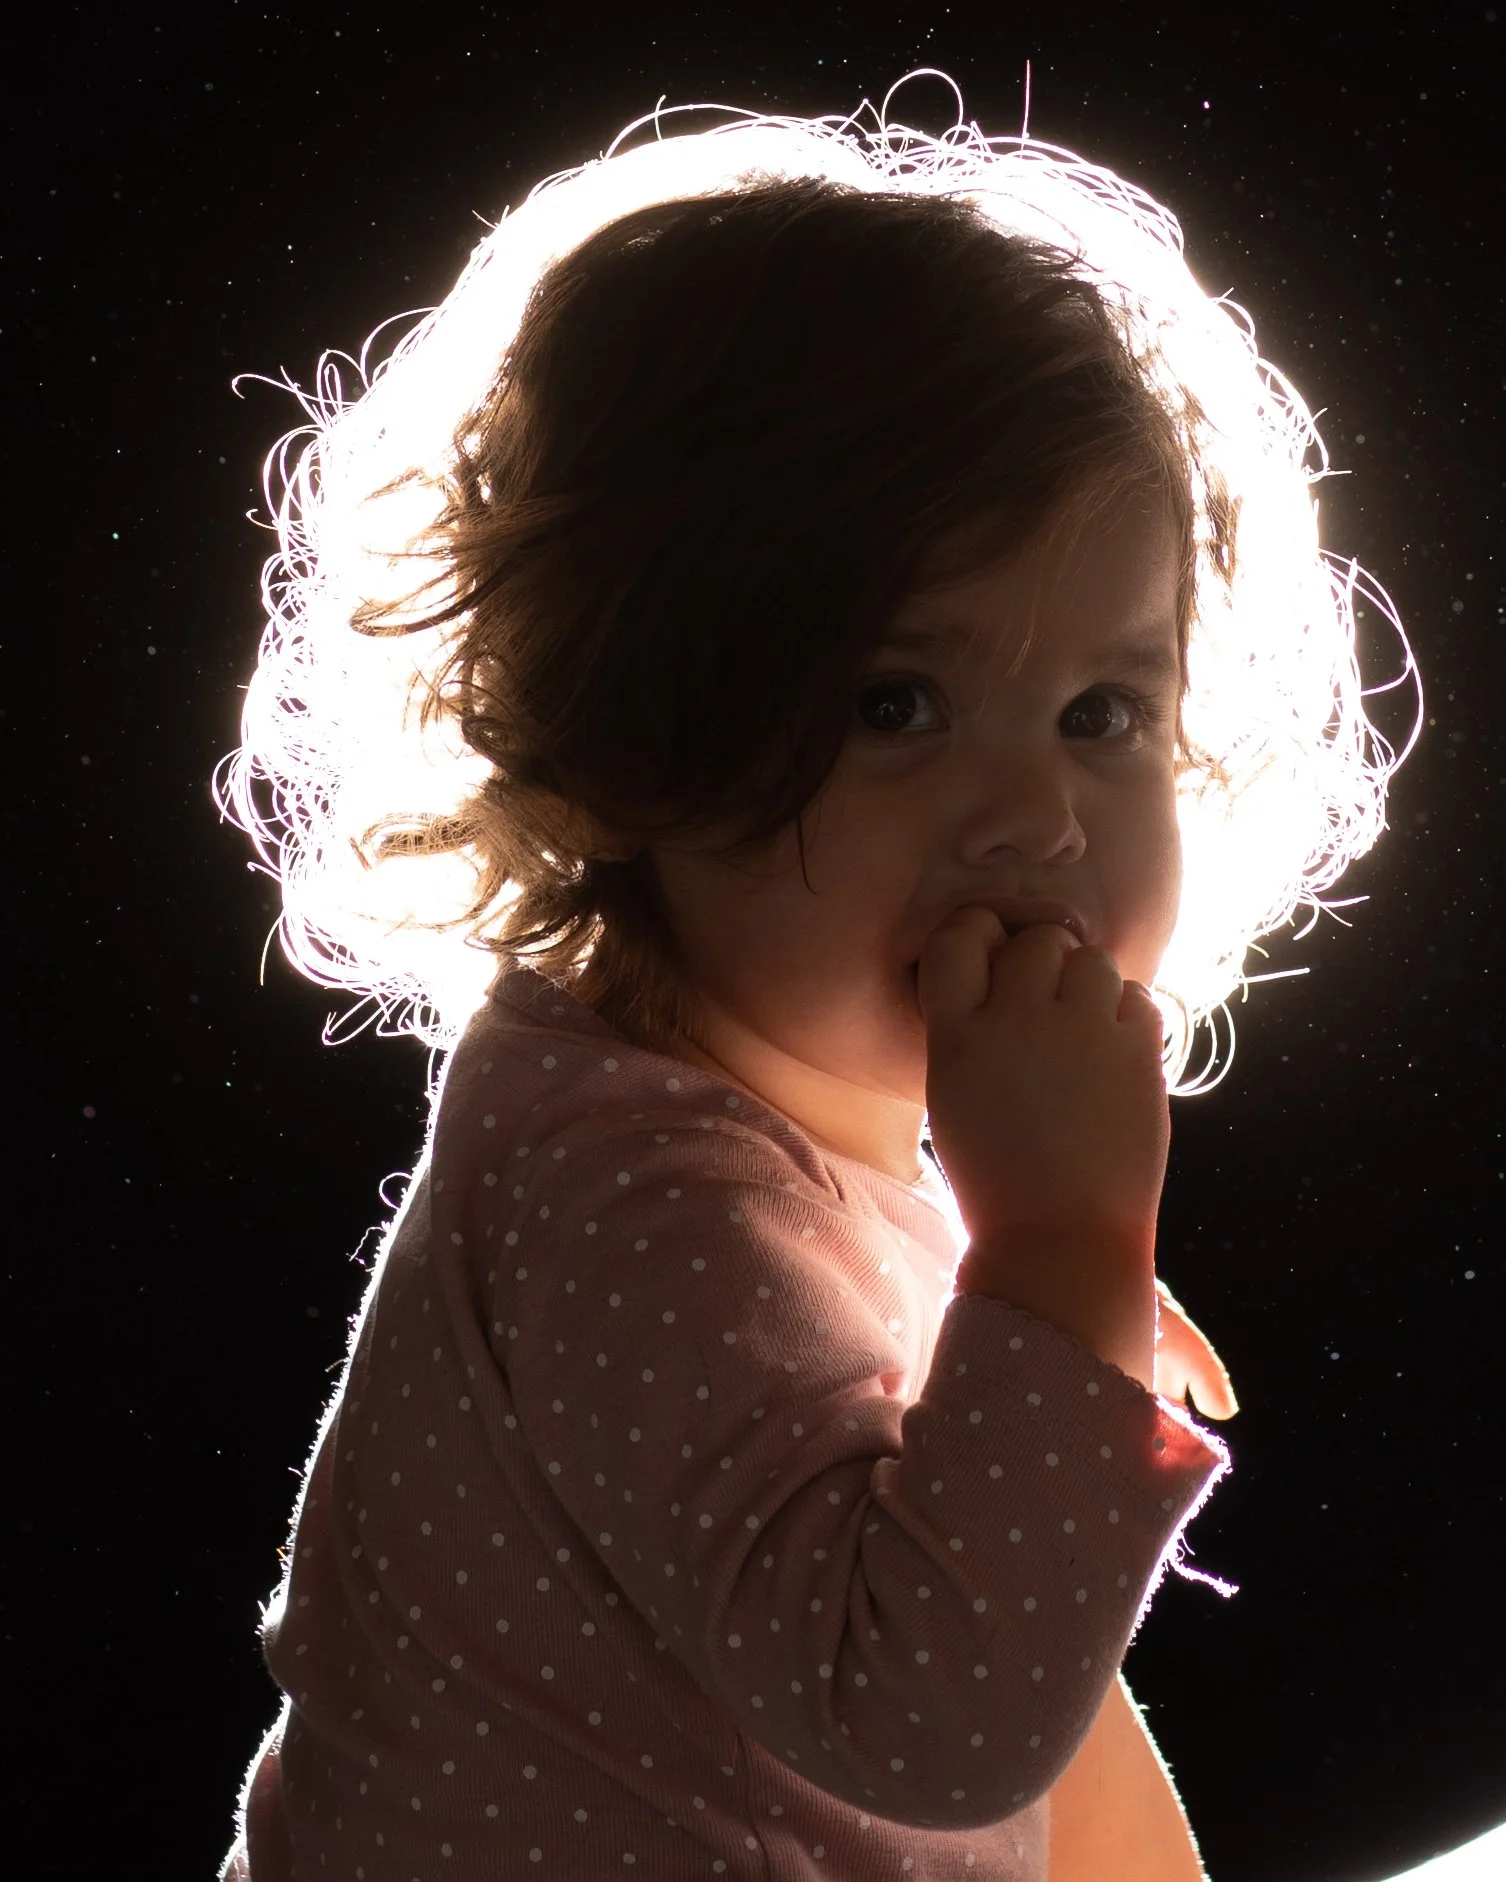
Here is another single light session with emphasis on the back light. I set the light behind my subject so that they would eclipse the light. This created a light silhouette on them and by setting it high enough I could get a light spill over to light them up ever so slightly. The main thing to keep in mind with this sort of technique is that your subjects understand or have someone who understands that a bright flash is on one side of them – you don’t want to blind them. The other thing to keep in mind is that they are eclipsing the bring flash and if they don’t a bright flash will be coming your direction.
When working with babies, have a parent around to make things run more smoothly or at least have an assistant. It is tricky to operate a camera and watch a baby at the same time and you don’t want something to happen to the baby while you are distracted so get an assistant. In this case, I had her mother hold her on the stool and interact with her. Go figure, babies like their parents and parents can get a good reaction out of their babies.
When processing photos like these consider carefully what you have as these sorts of photos tend to lend for some creative cropping and temperature adjusting as well as lending well to gray scale. If your subject is looking into negative space, emphasis that. Change the mood by adjusting the temperature more towards blue or red depending on what you are going for. Finally, these always tend to look well as grayscale.
Here is another set of photos with a single light, not unlike the setup from the previous post I did. The only major difference is that I included a reflector and used it as a fill light by bouncing light back into my subject’s face. In this case I am using the white side of the reflector to bounce strobe light into her face. Keep in mind reflectors often come with a silver side on back and tend to be reversable having a gold and black side. Each side has it’s uses but do keep in mind that the silver and gold sides add those respective color.
For the subject herself, I did a “take her as she currently is” approach and sometimes that’s worth it. Kids get messy, go with it sometimes because those messes tell stories. For posing, her mother was on set and of course she responds to her name. Obviously, with a one-year-old you aren’t getting advanced poses most of the time so give them things to long around at and go with that.
#marylandphotographer #annearundelphotographer #photographytips
Another round of low-key photos. I am figuring out a lighting setup I want to use for an upcoming photo session plus with the weather getting cold I am inside more, and low-key is just fun to do.
This time I put the light source (a photography strobe with an octagon soft box) above her and to an angle. Obviously, I have her turned in the direction so some of the light hits her face and then starts to fade off. When doing this sort of stuff just think how the moon phases operate and work from there.
I also did some processing trickery by editing out the softbox for most of these. The closer your light source the harsher your shadows and harsher shadows is something you want in low-key lighting. So I put my softbox very close to my subject to the point where it is in the photo. Well, it isn’t in any of these photos because it I removed them. The thing to remember, if you do this, is that it is easier to remove if the background is consistent – in low-key photos the background is usually black – and if your light source doesn’t overlap with your subject in any way.
For posing, I let my subject bring a toy in. This kept her happy and made it easier to give posing direction. She can actually hold something to her chest or look at something in her hands. Don’t discount the uses of toys with younger subjects. Also, for the last photo, it was just out of focus but I liked the pose so I grayscaled it, which is something you can do something in attempts to save a blurry photo.
I’ve been working long hours so here is another quick post and a quick session. The beautiful thing about low key lighting is that it is easy to do as it can be done with just one light. That’s also why I recommend those just getting started with lighting to dive right into it because there is a lot of room for error. Even if you fail to get the shot you want, you will likely get something decent out of it. Any session where you have a good chance of walking away with something, even if it isn’t what you had in mind, is a good session for beginners.
That stated, for this one I had a speedlight and a snoot. The snoot turned the light into more of a narrow beam closer to a spotlight which in turn creates a quicker light falloff. Since it is a single light, you can set your F-stop down to reduce the other ambient light sources. Would you believe this hallway had the normal hallway lights? Yeah, the settings washed those out easily, so the room looks dark. I was also going for speed, so this session actually only took 15 minutes to do. That includes setup and dismantle.
For poses, any look can work but thankfully lowkey lighting works great for sad, concerned, or frustrated, but also can work for most other emotions. This makes for a really nice photo session because you can often start with that apprehensive feeling a lot of people have regarding getting photographed, immediately show them how cool you can make them with just that feeling, and then easily get them to relax and show other, happier emotions. It’s just a really cool photo style and worth understanding.
These are from a quick photo session or more like “hmm I’ve wasted a holiday week and should really do SOMETHING!” sort of photo session. So here are some quick tips so you can do that too.
First, get a hat. Baseball hats are okay, but fancy hats are better and more fun. And I am not just talking about kids, adults you can do this too. Everyone has at least thought once or twice “wow I’d look cool in fancy hat” and everyone would be correct. Get a fancy hat, where something casual and watch the works happen.
Second, try for golden hour with one caveat: golden hour is only good if you have a decent location. If you surround yourself with buildings and block out any horizon, then golden hour kind of becomes pointless. So how do you find a good golden hour location? Easy – about 30 minutes before golden hour for a nice relaxing walk with the intent of finding a good location for golden hour. Pay attention to where the sun, what the horizon looks like, and what the lights and shadow looks like. It sounds complicated but when you go for the walk and find the spot it will all make sense. Don’t forget to look up when golden hour is as it changes depending on the time of the year. You learn to appreciate the summer and winter solstices.
Third, ask for attitudes. Everyone has them and if you know which attitude your subject is leaning towards then veer into it. Often that will take them off guard and get them to lighten up a little. After that, getting other emotions gets easier and if it doesn’t then go with the attitude and get good shots of that instead.
One goal you need to be constantly working towards is figuring out how to use the light you have to bring out your subjects. Two key areas are filling in shadows on the subject and bringing the subject out from the background. Both are very vague as they will depend on what you are trying to do but
An easy way to get the hang of bringing your subject out from the background is get a black sheet, have your subject wear black, and have at it with your lights. After a little frustration you will get the hang of it and have the basics ready for you next photo session. The reason I recommend black is that black absorbs light, making this whole exercise a bit more challenging.
As for dealing with shadows, we are in the key and fill light territory. In that area you just need practice. However, you might want to jump into low-key lighting which deals with heavy shadows to really get an understanding what is going on with your shadows on a larger scale. Alternatively, you could try Rembrandt lighting, which is just another form of low-key lighting.
Anyway, this was a two-light setup. There was an overhead light that was creating a backlight cone which helped to separate the subject from the background and a light just up front with an octagon softbox and a grid. If I didn’t use a grid, then the light would washout the backlight and defeat the point of it.
Often, candlelight is too dark to use when you are using other sources of light. This means you can either work with them in processing or you can do some fun lighting hijinks if you have the lights and gels to make it happen. For this post I’ll explain how to use your lights and gels to make a lantern look like it has a bright candle in it. Please note, this is just one piece of a bigger puzzle, presumably you’d have more in your photo then just a lit lantern, but this explains how to get the lantern part of it down.
By no means is this the only method.
Anyway, for this trick you want a lantern, a speedlight, a gel, and someway to affix the speedlight behind the lantern. For this setup here, I went with the easy chair setup but with proper placement you could have someone holding the lantern. I put the lantern down on the chair and placed the speed light behind it. Without a gel you get a bright white light. At this point you should experiment with how bright you want it and how high up you want it, understanding that if you put it too high you might have to edit out the speed light.
After that I added a warmer gel color and eventually added a candle. You can play around with this setup and really tweak it to where you want to get it. If you have a person holding the lantern you might want to have a light on them with a gel that has a similar color to the gel you are using aimed at them to make it look like the candle lighting their face some.
It is another neat little trick that is worth practicing because you can do so much with it.
#marylandphotographer #annearundelphotographer #photographytips

Get this sort of shot by stitching together two shots with processing tools.

With a tripod, start with the shot with a subject. Use auto-focus to get the subject into focus and then turn your focusing to manual.

With your camera on a tripod and the focusing set to manual AND with it already auto-focused from when you photographed your subject: now take a picture without the subject in the picture. You should now be set to do the work you need to do with your processing tools.
A quick and easy update because I will be back from a photo session over the weekend. More on that later if I can get the permission to post about it.
Anyway, I’ve a seen a lot of “people coming out of picture frames” or “climbing out of a picture frame into our reality or whatever you call it” photos lately. They are relatively easy to make and are similar to the floating photos I’ve done in the past but are even easier to make then those. It is a four-step process, but you need to use a tripod for these and have access to a PC with photo processing tools that can do layers:
1) Photograph the location without the subject.
2) Photograph the location with the subject holding the picture frame.
3) In your processing tools, take the two photos and stack the one with the subject on a layer over the one without.
4) Erase the parts of the subject you want out of the photo. In this case, I erased almost everything except her upper body.
You may want to do minor details, like have your subject hold the from the inside to help with the illusion and maybe even work in a different background for the inside of the picture frame (though that does make lining things up more difficult. Also be mindful of where you want shadows – if you want shadows.
Bonus tip 1: Start with the subject and let auto-focus set your focus for your, then turn it off and DO NOT MOVE THE TRIPOD. Then photograph the area without the subject with your focus already set since you switched it to manual.
Bonus tip 2: Try and take a classy photo, that way if you mess something up you still end up with usable photos.
All in all, this is a good photography project to try as it shows you some photo processing basics, basic storytelling, and focusing tricks you can carry on to other photography projects.
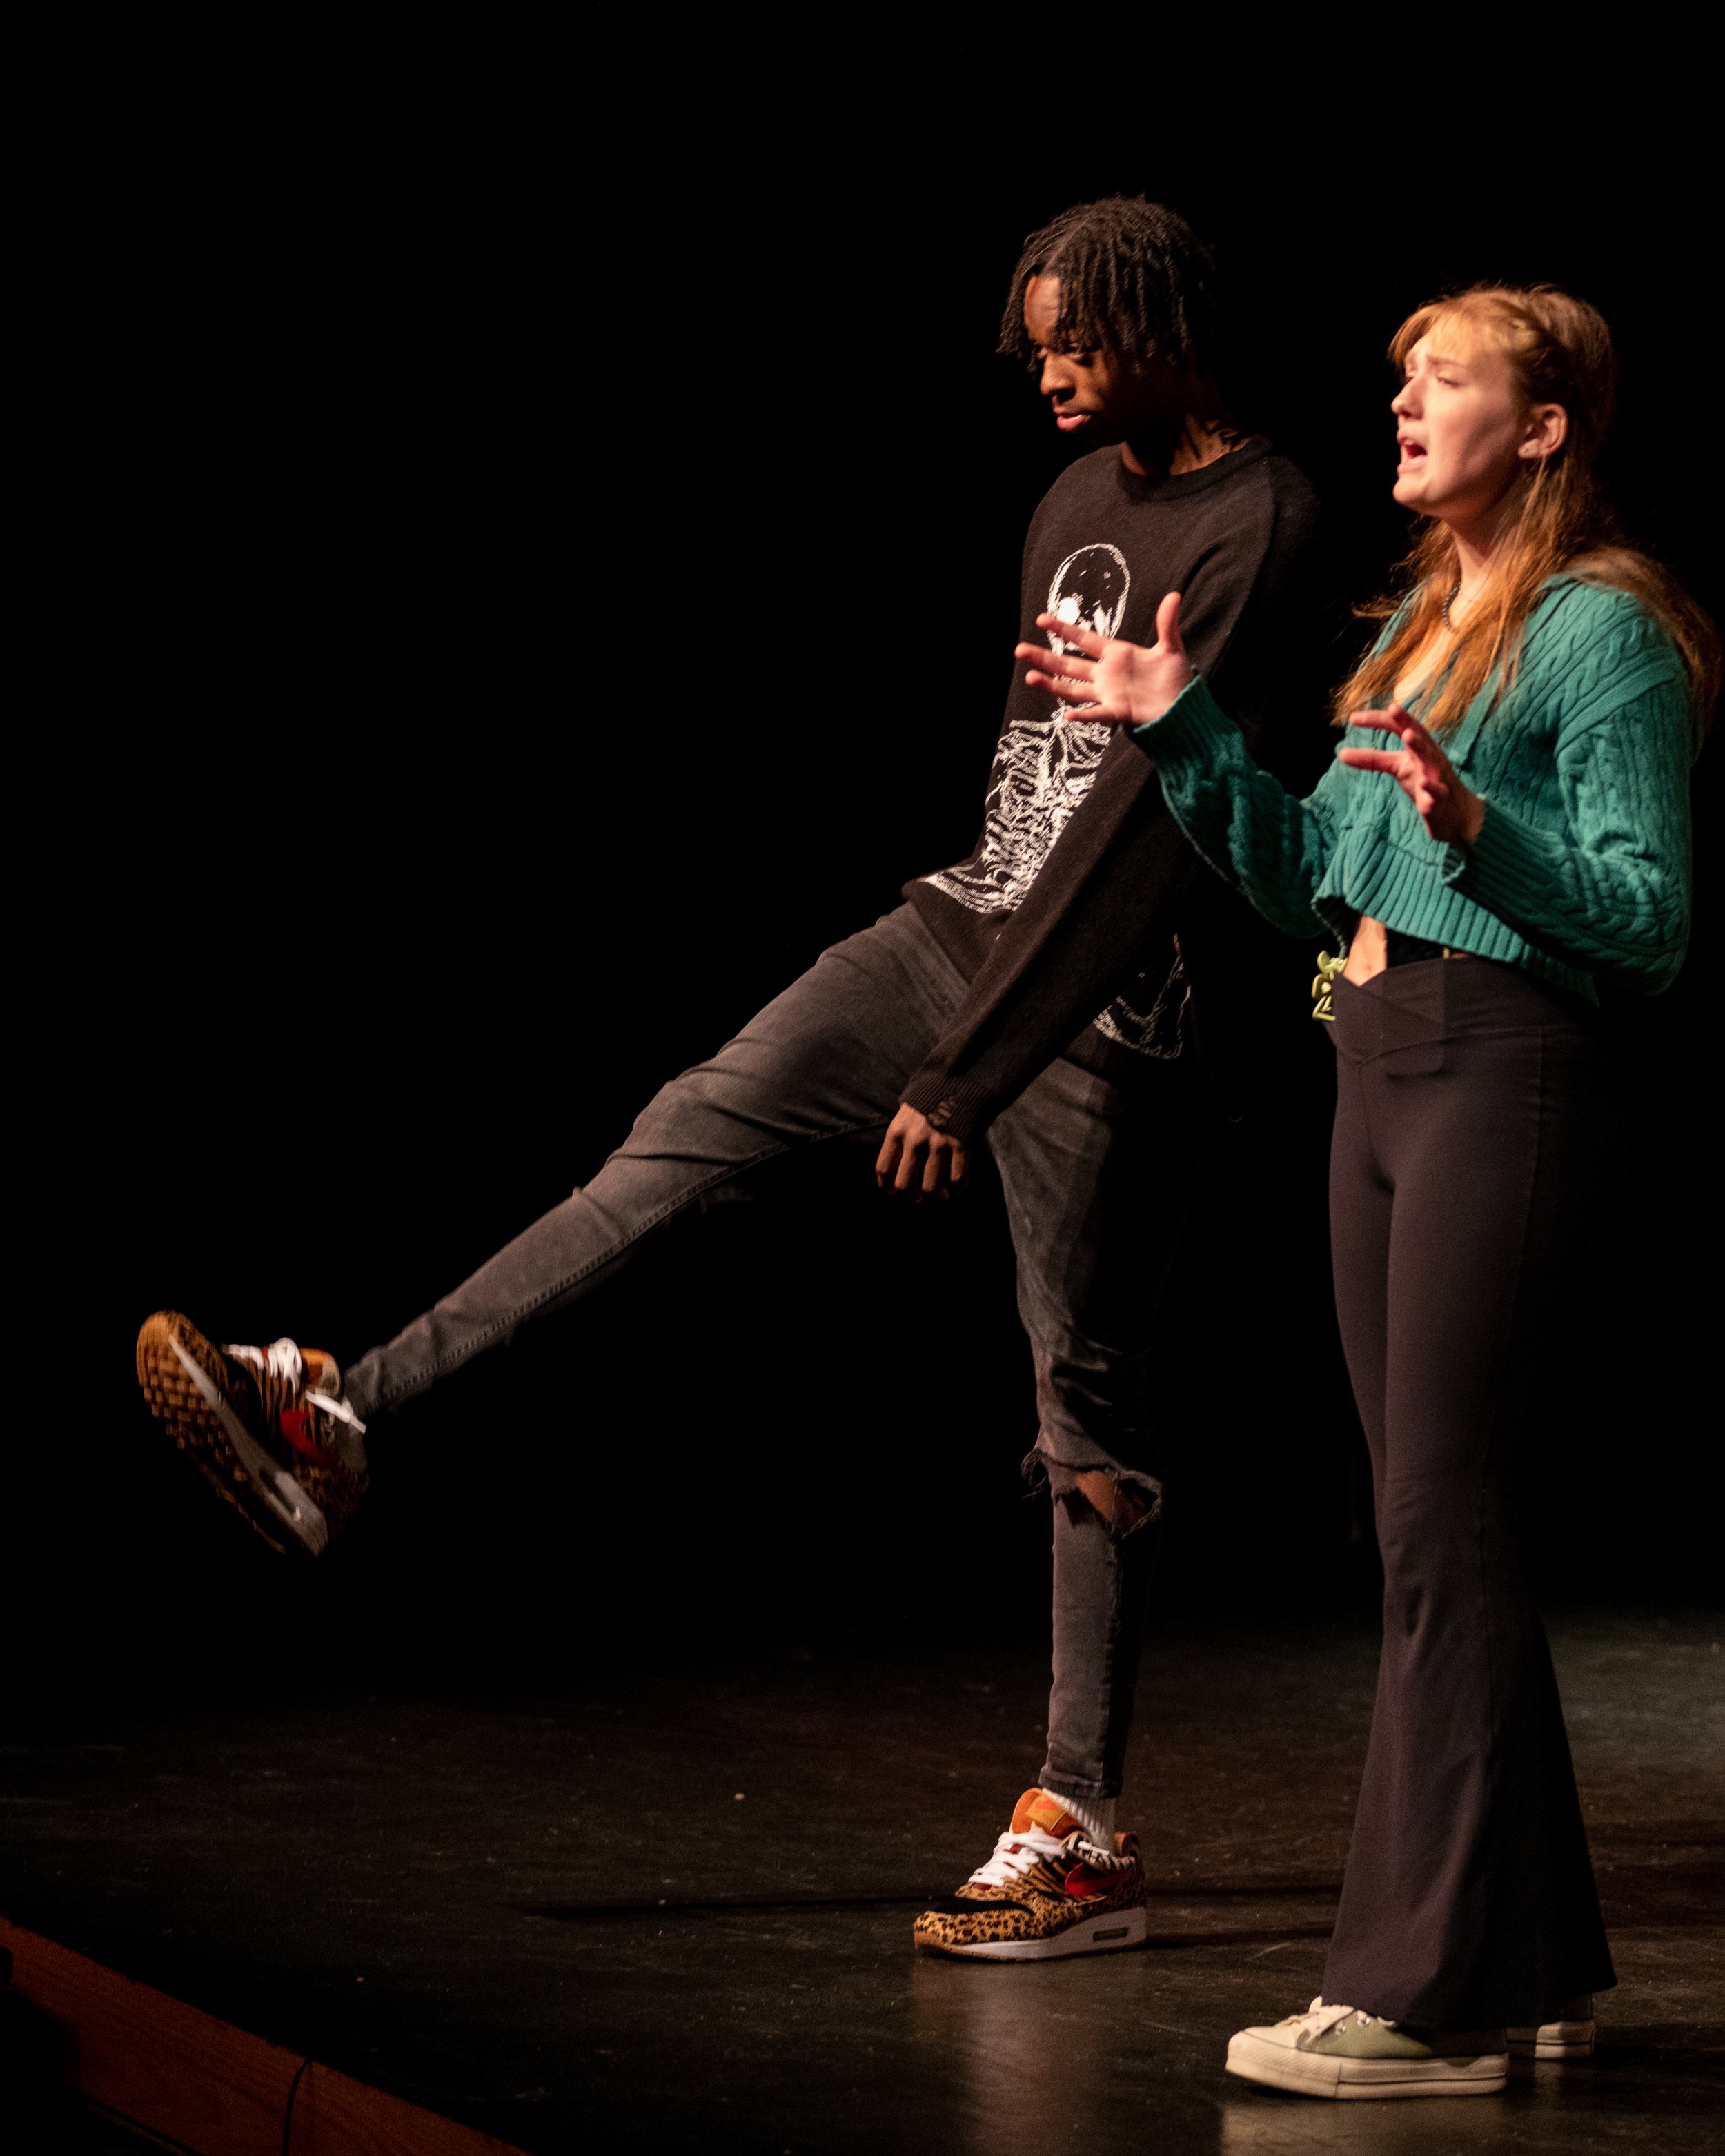
Here are a few of the headshots I did from the dress rehearsals of Indian Creek School’s Brainstorm production. They are performing the show November 11, 12, and 13. If you are looking for something to do this weekend I recommend checking it as it is a wonderful show that has a lot of interesting things to say. It also helps that the shows the school produces are always at a professional level of production and this show sticks to that high standard. For more information or to buy tickets check out this link:
https://www.indiancreekschool.org/arts/upcoming-performances
So on to the topic at hand. My advice for both is pretty much the same for both headshots and group shots – you need to understand the production you are photographing and the people who performing the production. If you have at least a general idea of what the play is about and have at least read a little about the people producing the play you should start to get a general idea of how you want to approach this.
For example, Brainstorm is unique in that the people performing the show have an active hand in the script for the show and it is tailored to their experiences and their personalities. That means the show is personalized by them and by proxy it will always be “modern” whenever it is performed. So, for this setup I went with a 3-light setup. A key light and a fill light with softboxes. I used gels to color the backlight, but I allowed each performer to pick a color they wanted for their background so they could have some personalized input into the photos.
As for the group shot, it is pretty much always going to be on stage if I can get it there. That’s were a lot of fun can happen because you have access to many of the props and scenery that are already on the stage. Furthermore, the performers tend to draw a lot of confidence from the stage itself so getting decent poses tends to be easier up on stage. I do recommend at least two nice strobes with good sized soft boxes for lighting. More or less as needed but you have to position them, so they aren’t in your shot. You can’t do a 3 light shot with one light in the center because then it will be in your shot.
Anyway, check out Brainstorm this weekend at Indian Creek School, especially if you have a teenager. You won’t regret it.


Quick Post to close things out from Halloween.
Our fine friend here was dressed up as Holden Caulfield for Halloween. The narrator and main character of the Catch in the Rye.
Congratulations to those who deduced accurately or those who figured out what words to web search the answer. We will try again next year.
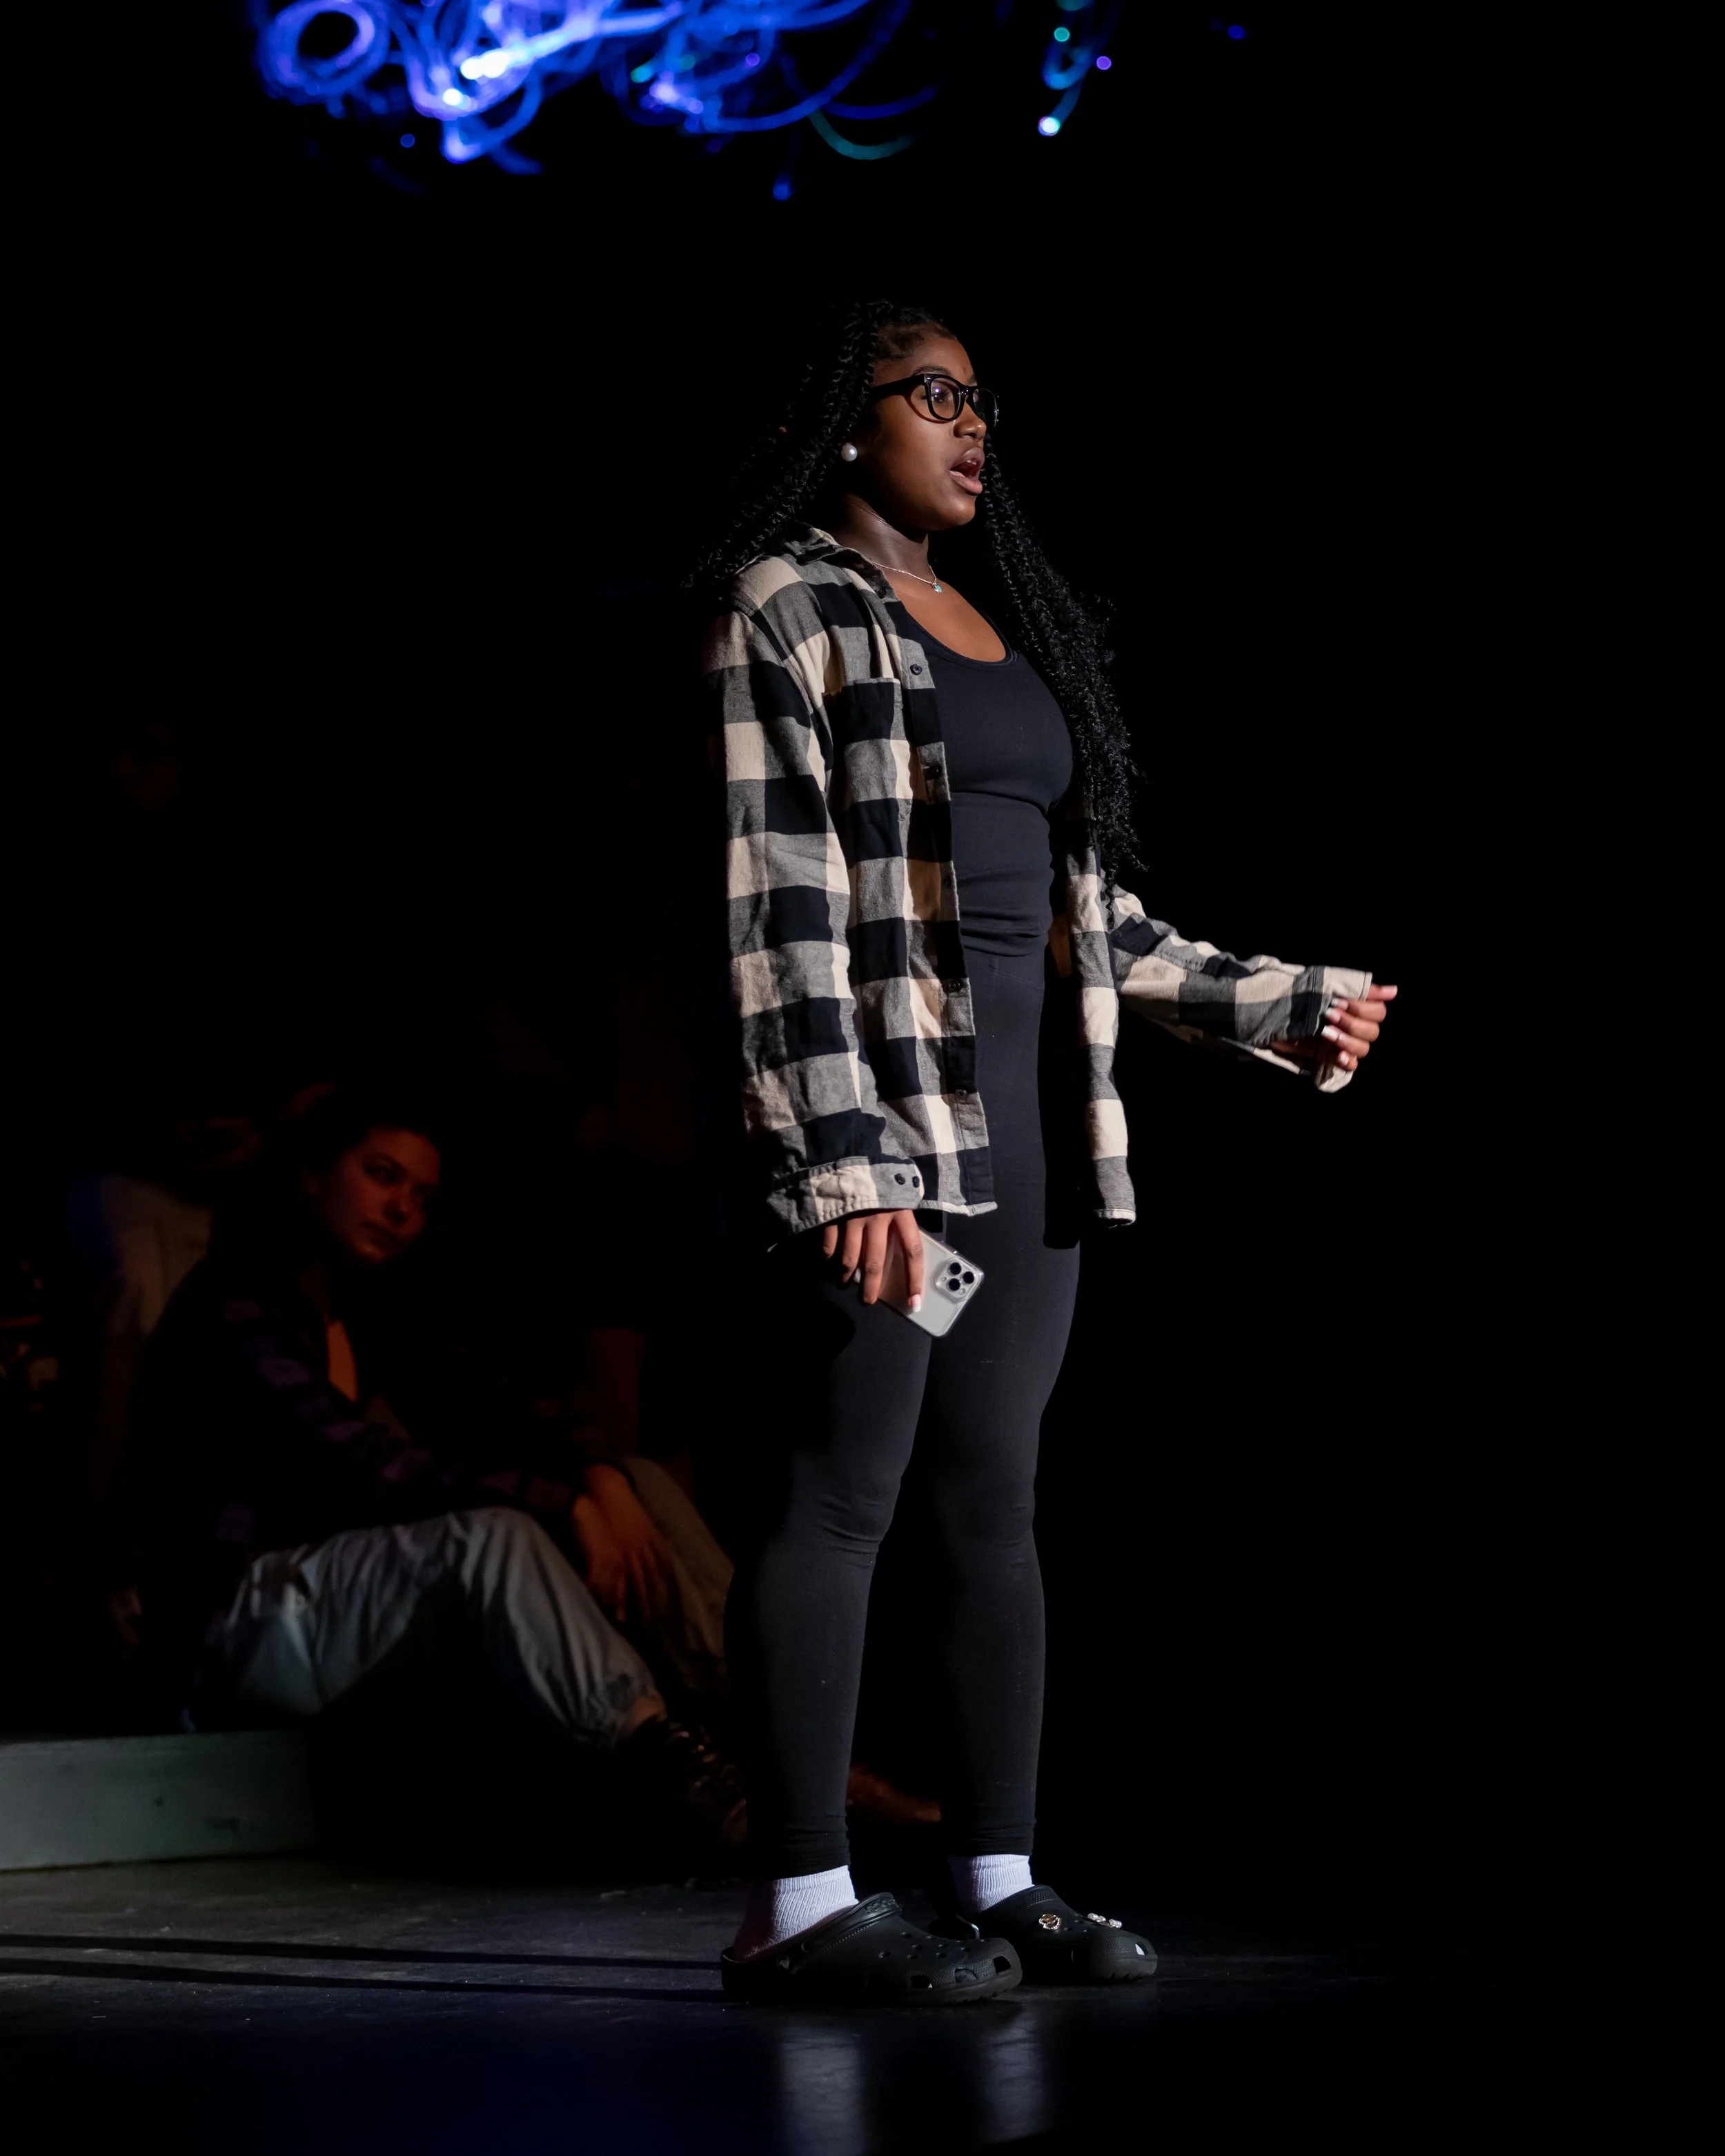
Alright, I got permission so here is a post on the dress rehearsals I photographed the other week. These are all from the dress rehearsal of Brainstorm which will be performed at Indian Creek School this Friday, Saturday, and Sunday of this coming weekend. I recommend you check it out as their stage productions are always of professional grade and you won’t regret it. For more information check out https://indiancreekschool.ludus.com/show_page.php?show_id=22139
When I do these, I have three different objectives:
1) Candid shots of the rehearsal.
2) Cast Headshots.
3) Group shots.
I’ll cover headshots and group shots on Thursday as I still have a few more actors to photograph and haven’t done the group shot.
So, for candid shots, understand that flash is out of the question. You don’t want to be the photographer that blinds a performer on stage and risk making them fall off the stage. Inspect the stage and see just how high it is. Which brings me to my next point, before you take any pictures, find out where you can go. Some places want you in just certain areas, other places give you open access to the entire stage and seating area – learn where you can go as this isn’t an ask forgiveness situation. You are working with fellow artists and you need to grant them that extra level of respect.
Next up, understand you are in a low light situation. It’s better then zero light, but it isn’t as bright as you think it is. That stated, you want a solid shutter speed because they still move, so at least 1/250 or even 1/360th or even faster. The sacrifice you will want to make is with Aperture or ISO. Keep in mind, if you are trying to get several performers on stage you will want an Aperture of 4.0 or higher but if it is just one person you can go lower. As for ISO, I usually go somewhere between 2000 and even get as high as 8000 depending on the situation. This sounds awful for noise but keep in mind it is dark and when you process to recapture and balance that darkness you will make a lot of that noise unnoticeable or even disappear.
For extra gear I go with a camera sling (that’s a personal choice), 2 cameras (though my other is getting serviced at the moment so it was just one this time), 6 batteries with a 2 battery holder belt attached on my belt, and a step stool I can get higher up. For lens I went with 70-200mm but other lens types can work well too. Particularly prime lens. I’ve switch off my first day lens between the 70-200mm, an 85mm lens, and a 50mm lens. The advantage of those prime lenses is that they can get a lower aperture number and have less parts, so they focus faster. So don’t discount prime lenses.
In all honesty, there is so much more to write on this, but text limits prevent anything. Maybe next time I will dedicate a few days to this.
Anyway, check out the show – you won’t be disappointed. Also, if you are viewing this on Instagram, check out my Facebook page or my business page for more photos.
#Marylandphotographer #Annearudelphotographer #Photographytips
And back from a short break. Had an amazing weekend of back-to-back photo sessions in a volunteer capacity so it was great.
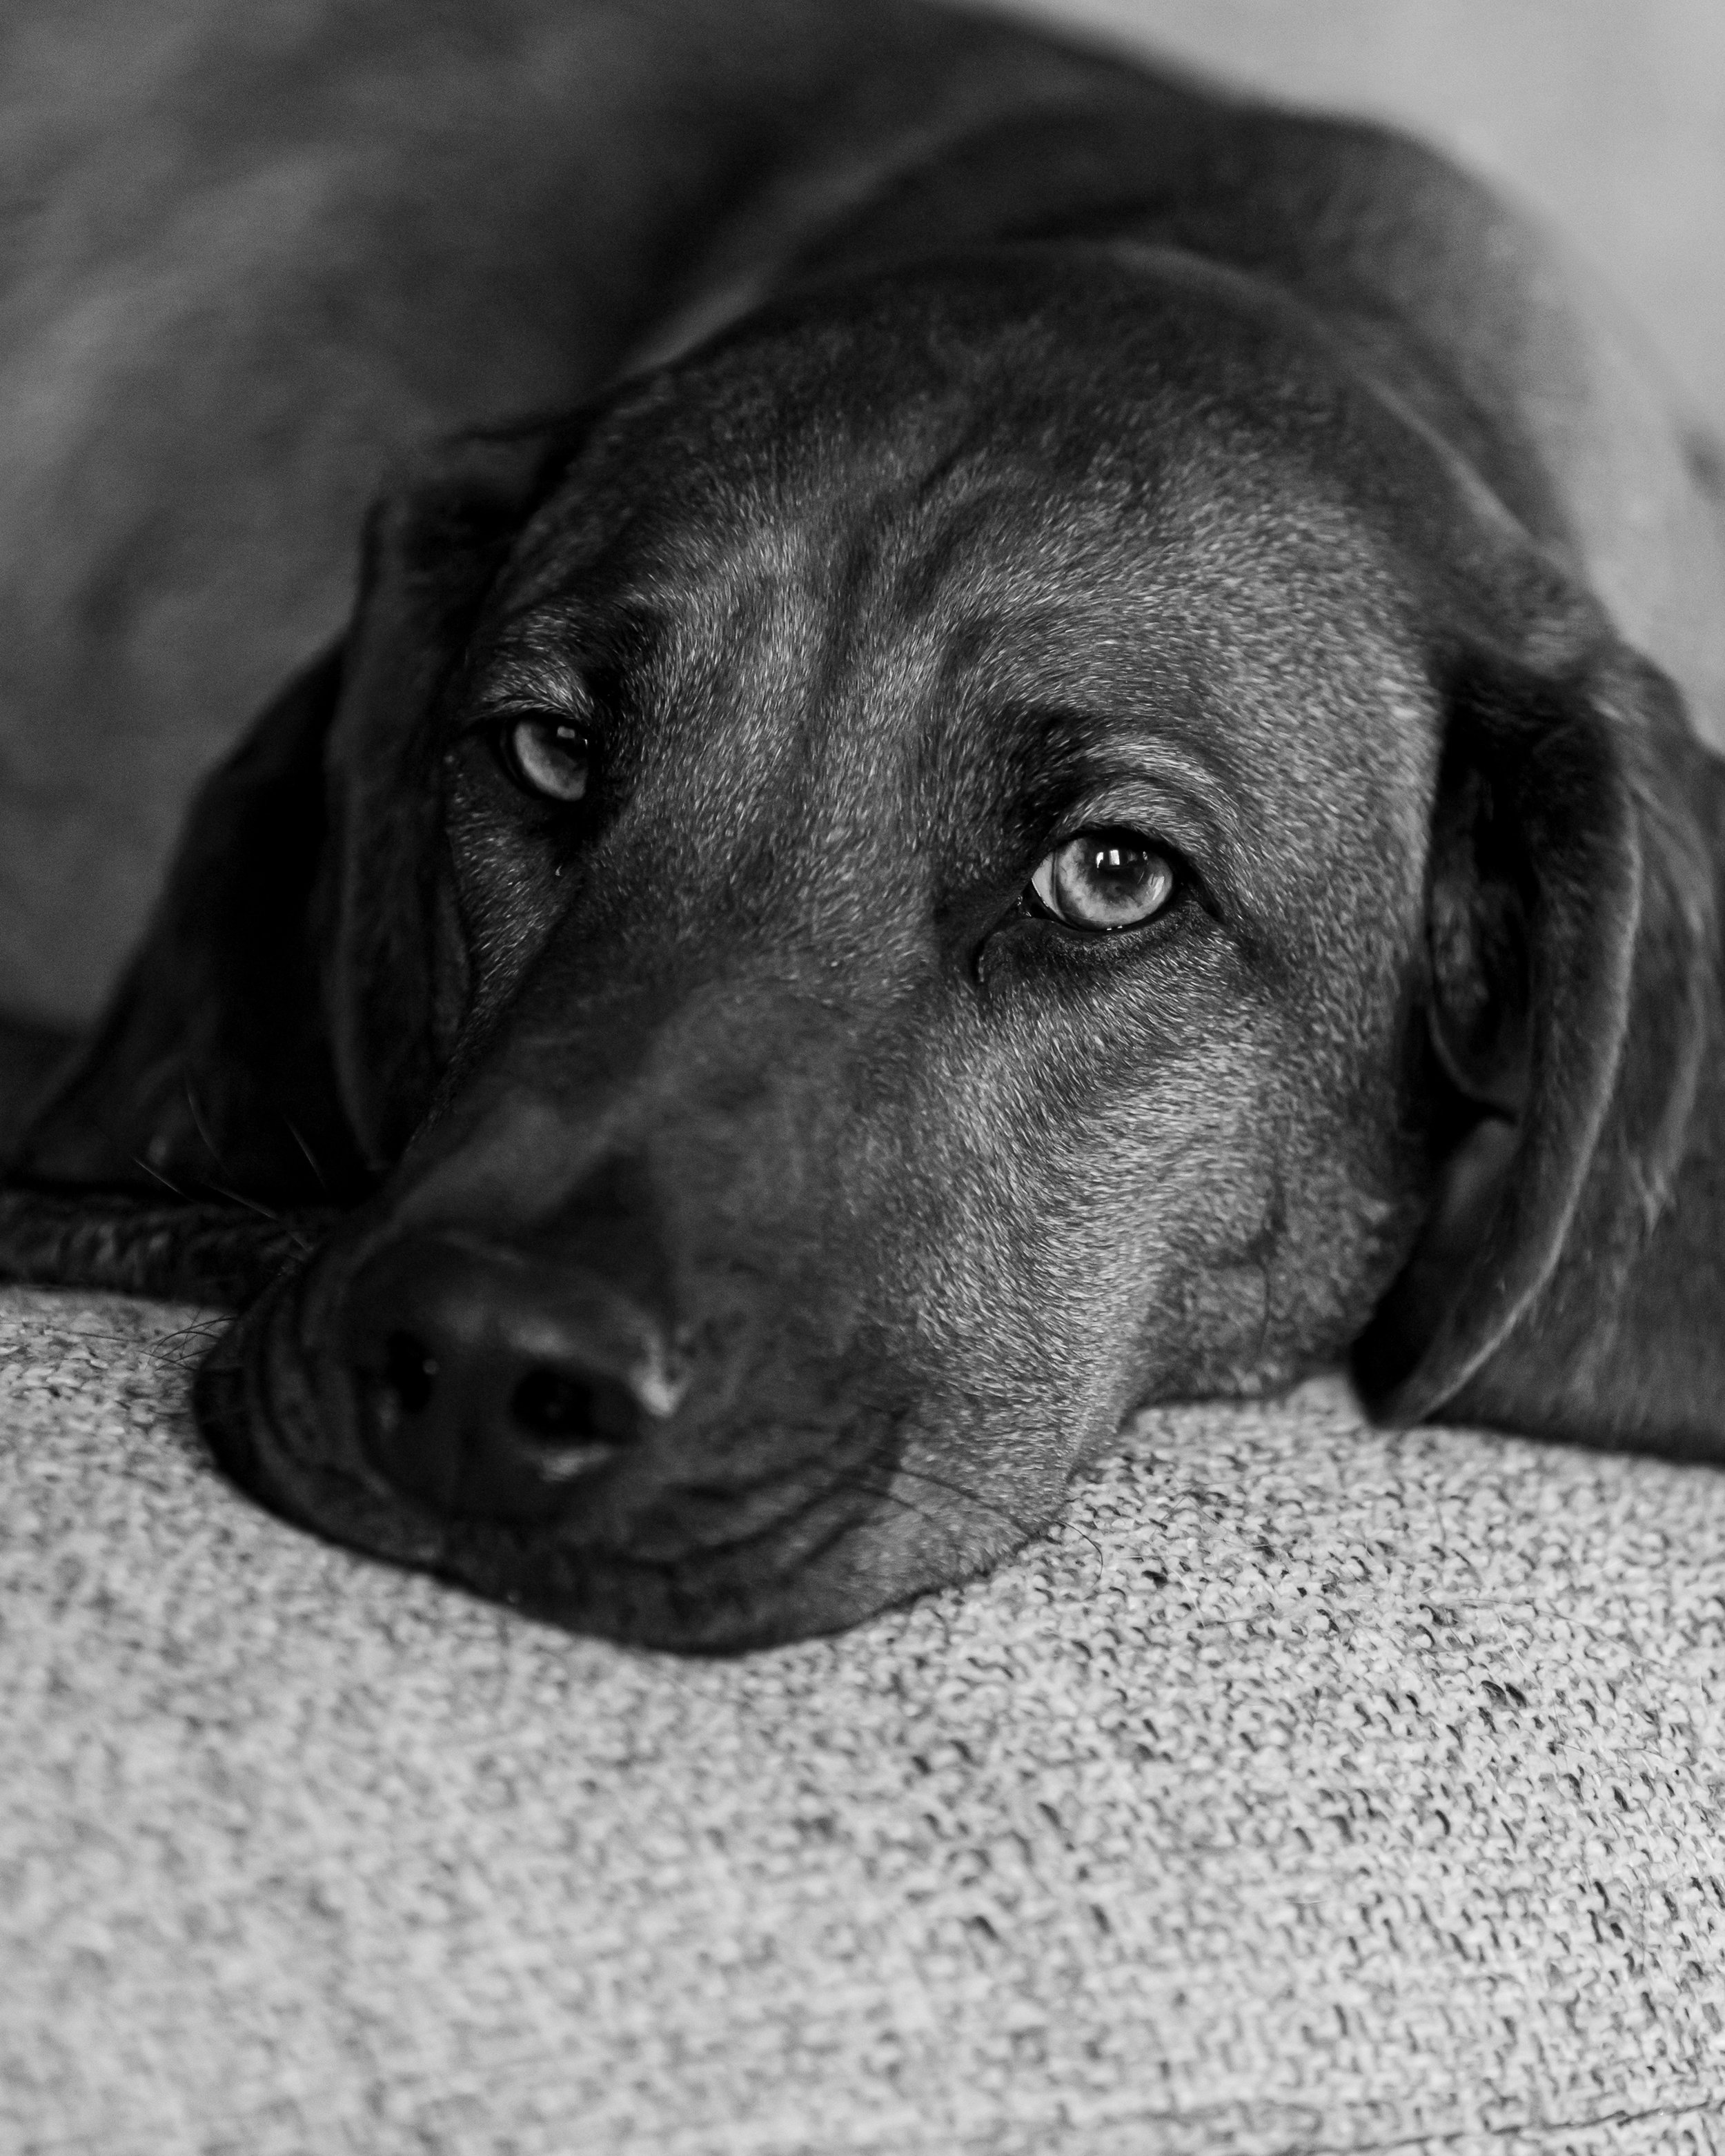
Anyway, here are some in studio dog photos. As always, the first step with pets is to be patient. They don’t know what a camera is and they probably have no idea what a picture is, all they know is that they want to make you happy and they just don’t know how, so be patient and try to return the favor by trying to make them happy and trying to keep your photo session good for them.
And in the case of these photos, it wasn’t hard at all. This was a very quick photo session. I brought her on set, let her look around and then took off set and let her be. Sometimes that it all you need to do.
One thing I do recommend knowing before you even start the photo session is if the pet is afraid of lightening. Lightning, no thunder, one is seen with the eyes, and one is heard. If you know the pet is afraid of lightning, then you may want to skip the flash. In the case of my dog, she isn’t afraid of lightning, so a 3 light setup was fine.
Finally, try and focus on the eyes.
A quick post because I am prepping for a big set of sessions the day this post goes up.
Here we have cookie monster and sleeping beauty. When working with kids, especially young kids, you have to be patient and you have to keep positive. Kids will pick up on frustration and negativity and will shut down if you do that. Also try to keep things fun. Fortunately, Cookie Monster there really enjoyed sitting in the chair for some reason. Sometimes you just luck out like that. As for Sleeping Beauty, I gave her a stuffed rabbit and told her to pretend to fall asleep.
The lighting setup for this was a three-light setup. As far as lighting goes you may have noticed I tend to go with either a two-light setup or a three-light setup. These tend to work well with one or two subjects. While I think you can do great photography with any setup, if you are just talking lights, I’d recommend working up to two and then eventually three. This is easier than it sounds as there is lots of gear out there on eBay and other resale sites. There are some good deals out there, but you have to look for them. Or you can go full price and buy brand new, but I’d recommend only spending what you can afford to spend and only when you are ready.
All that stated, I want to reiterate, when it comes to lights the first recommendation, I have is only work up to what you are ready for. My first speed light did nothing for a long time because I was still learning my camera and I wasn’t ready to comprehend just what awesome stuff that could be done with even a single speedlight.

Hopefully you can figure out who this good boy is dressed as, you wouldn’t want him to think you are a phony, after all.
EMAIL or MESSAGE ME via Facebook with the name of the character our furry friend is planning to dress up as this Halloween. Remember, the book is not the name of the character!
Hint: That’s a deer shooting hat.
I’ll check back but the first person to guess this character (based off time stamps) will win a free one-hour photo session. The next 10 people who guessed correctly will win a 40% off their next session. All prizes are valid for use between now and December 30, 2023 (that’s December of NEXT year). All sessions must occur in the state of Maryland.
This session was relatively easy and much easier than I anticipated. Thankfully, they make dog treats that look roughly the same size as cigarettes when paired with this dog (English mastiff). Since he wanted the treat getting him to stay in the sitting position was easy. On the other hand, he is a big boy and he kept eating the treats in one bite or two bites. So even though we only needed 1 picture, it took like 3 or 4 tries to get the treat just right in his mouth but at least he made out like a bandit with the dog treats.
Obviously, an assistant helped while I photographed. The lighting was a 3-light setup. 2 strobes on either side of him with octagon softboxes on and a light up high aiming at his head with snoot on. The goal was to get a side view of him to match one of the numerous book covers I’ve seen for this title. As for the lit part of his “cigarette” and the smoke – teaching a dog to go to the gas station, buy a pack of smokes, and then smoke is a time consuming and unethical endeavor so that is all photoshop trickery. The smoke and the lit part are not real. The “cigarette” is just a dog treat.
Anyway, good luck!
#Marylandphotographer #Annearundelphotographer #Photographytips #oldackleydoesntapprove
GUESS THAT CHARACTER contest tomorrow at 7:00 AM though I think my business website page is set for 6:59 AM. First person to figure out who the character of tomorrow’s photo is and either EMAILS me the name or MESSAGES me the name wins a free 1-hour photo session. The next 10 people who guessed correctly will win a 40% off their next session. All prizes are valid for use between now and December 30, 2023 (that’s December of NEXT year). All sessions must occur in the state of Maryland.
It will be a character from a book but for those who don’t read books there will be one hint in the actual post and one hint in the hashtags which you can use to web search and deduce your way to an answer if you are quick.
Don’t expect me to immediately get back to anyone as I have some work to take care of around that time but expect my to get back to everyone by the evening.
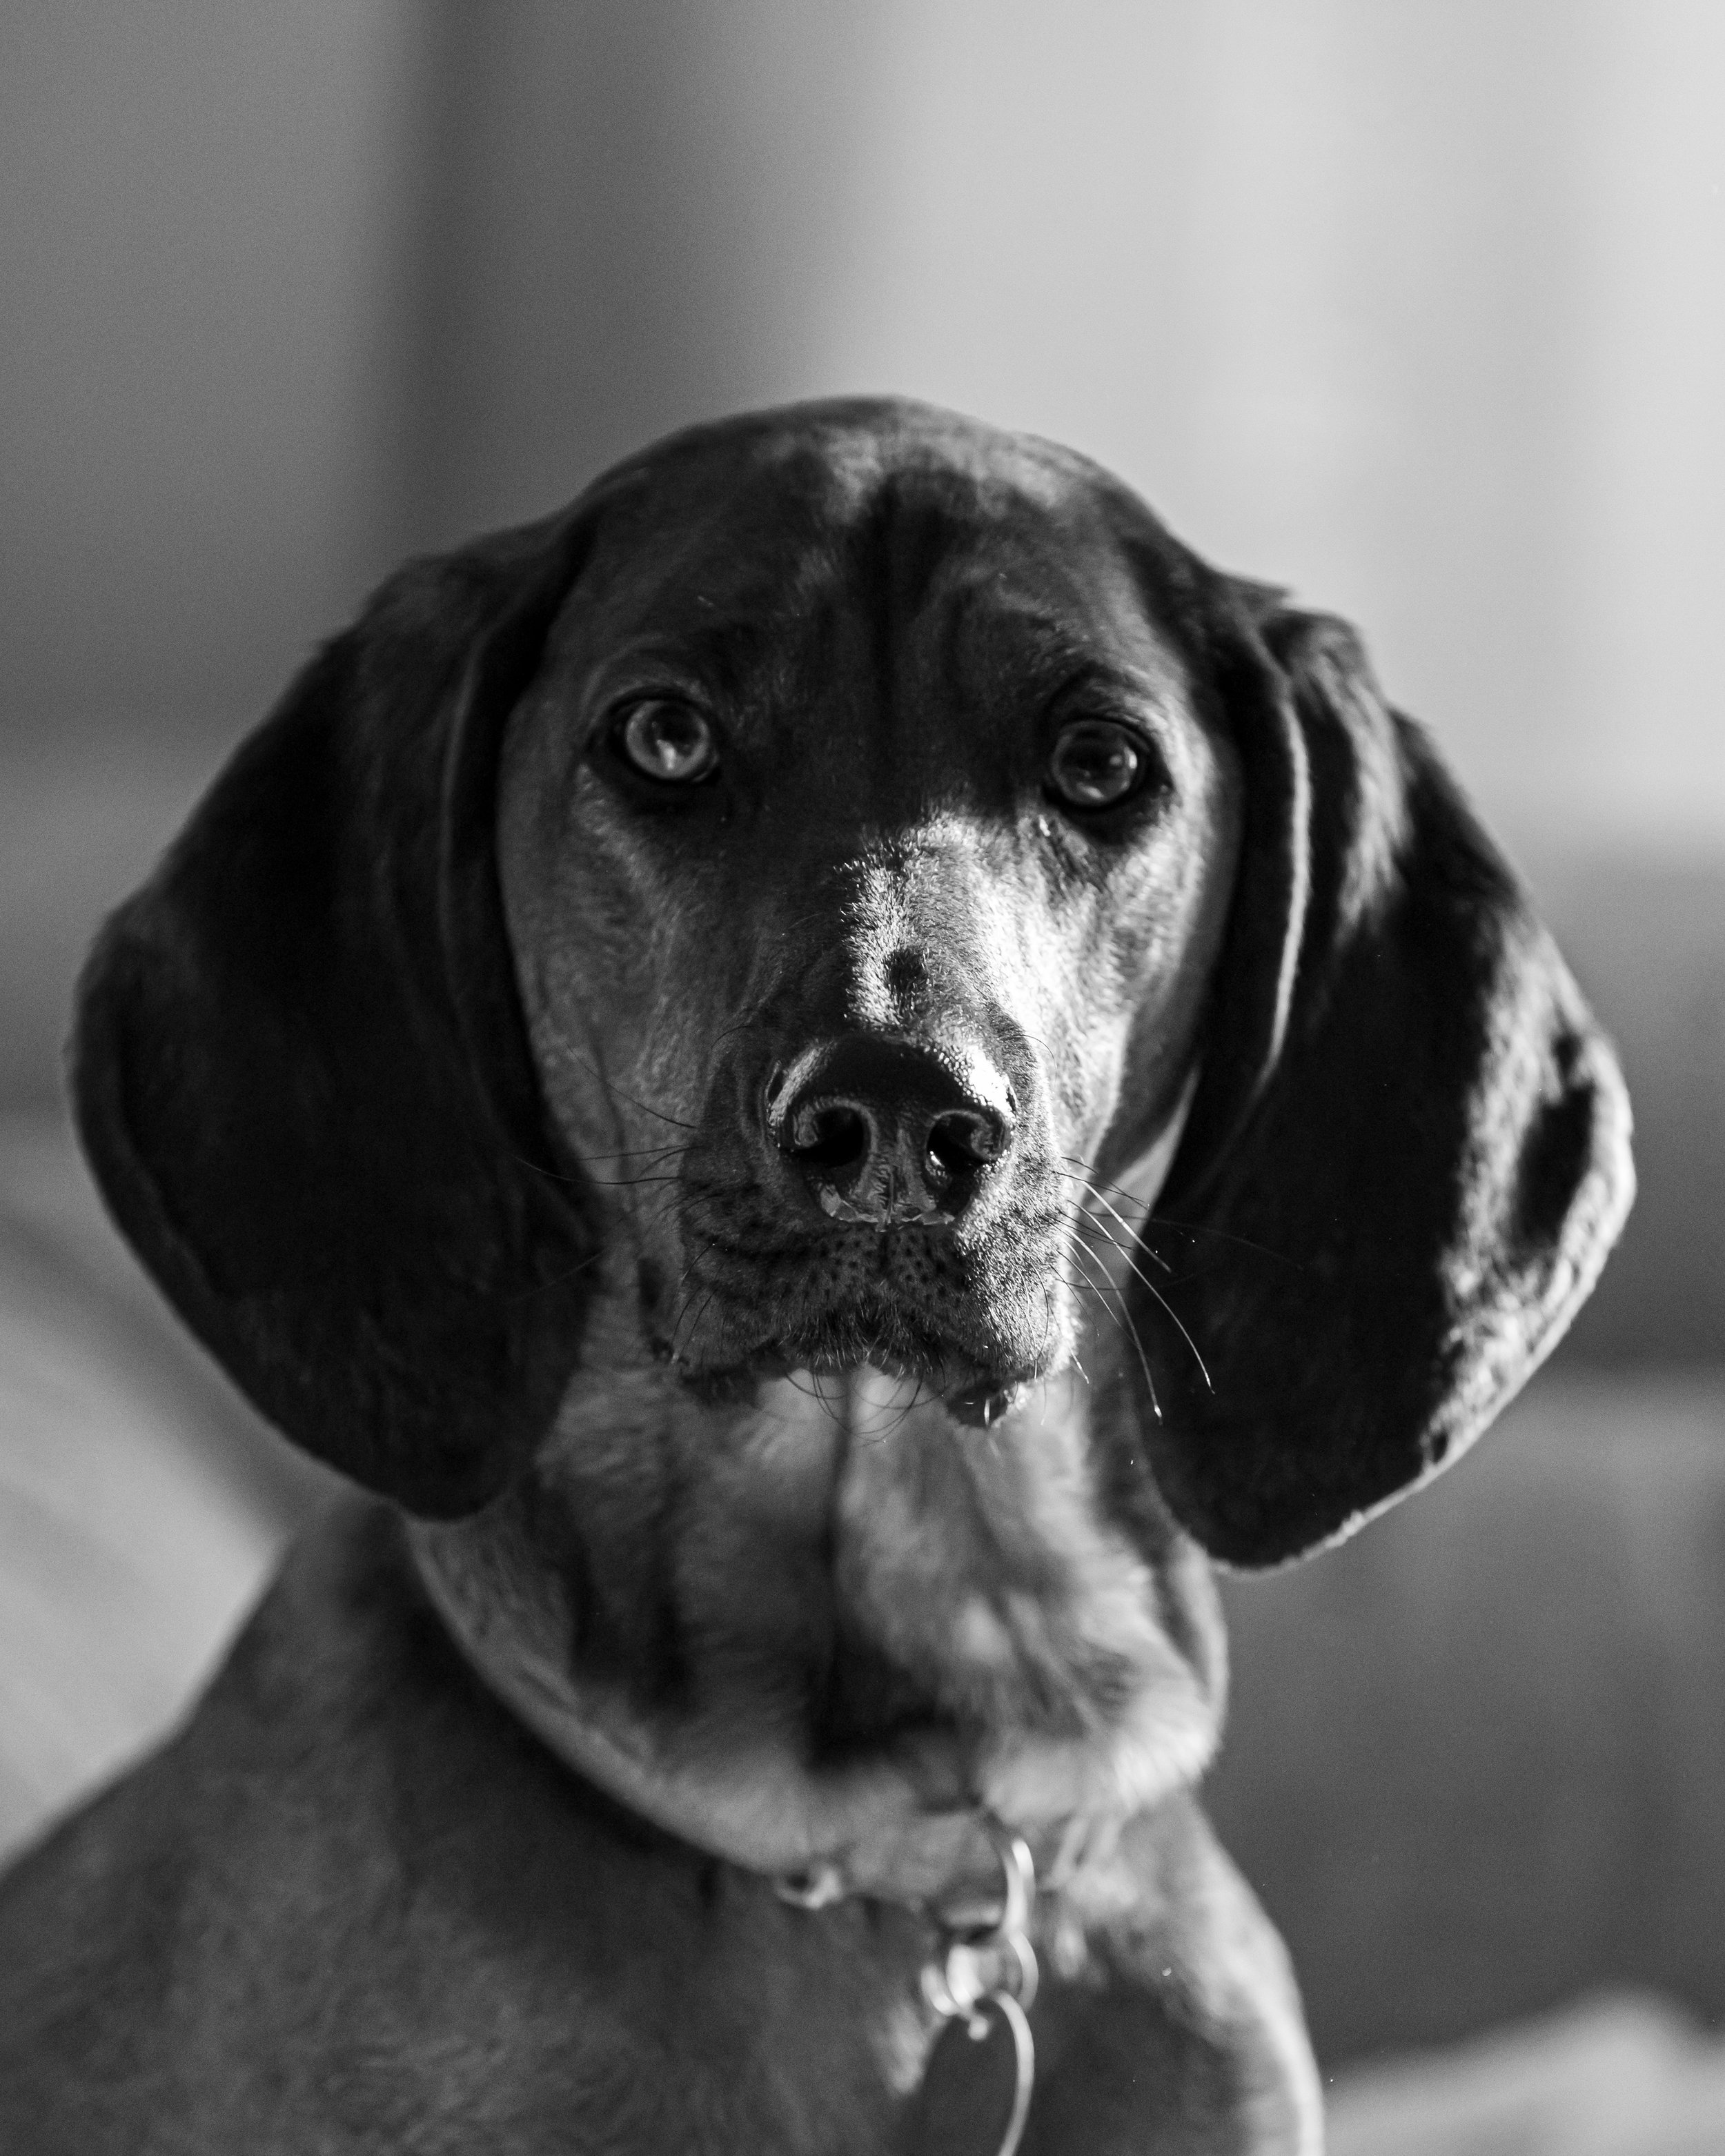
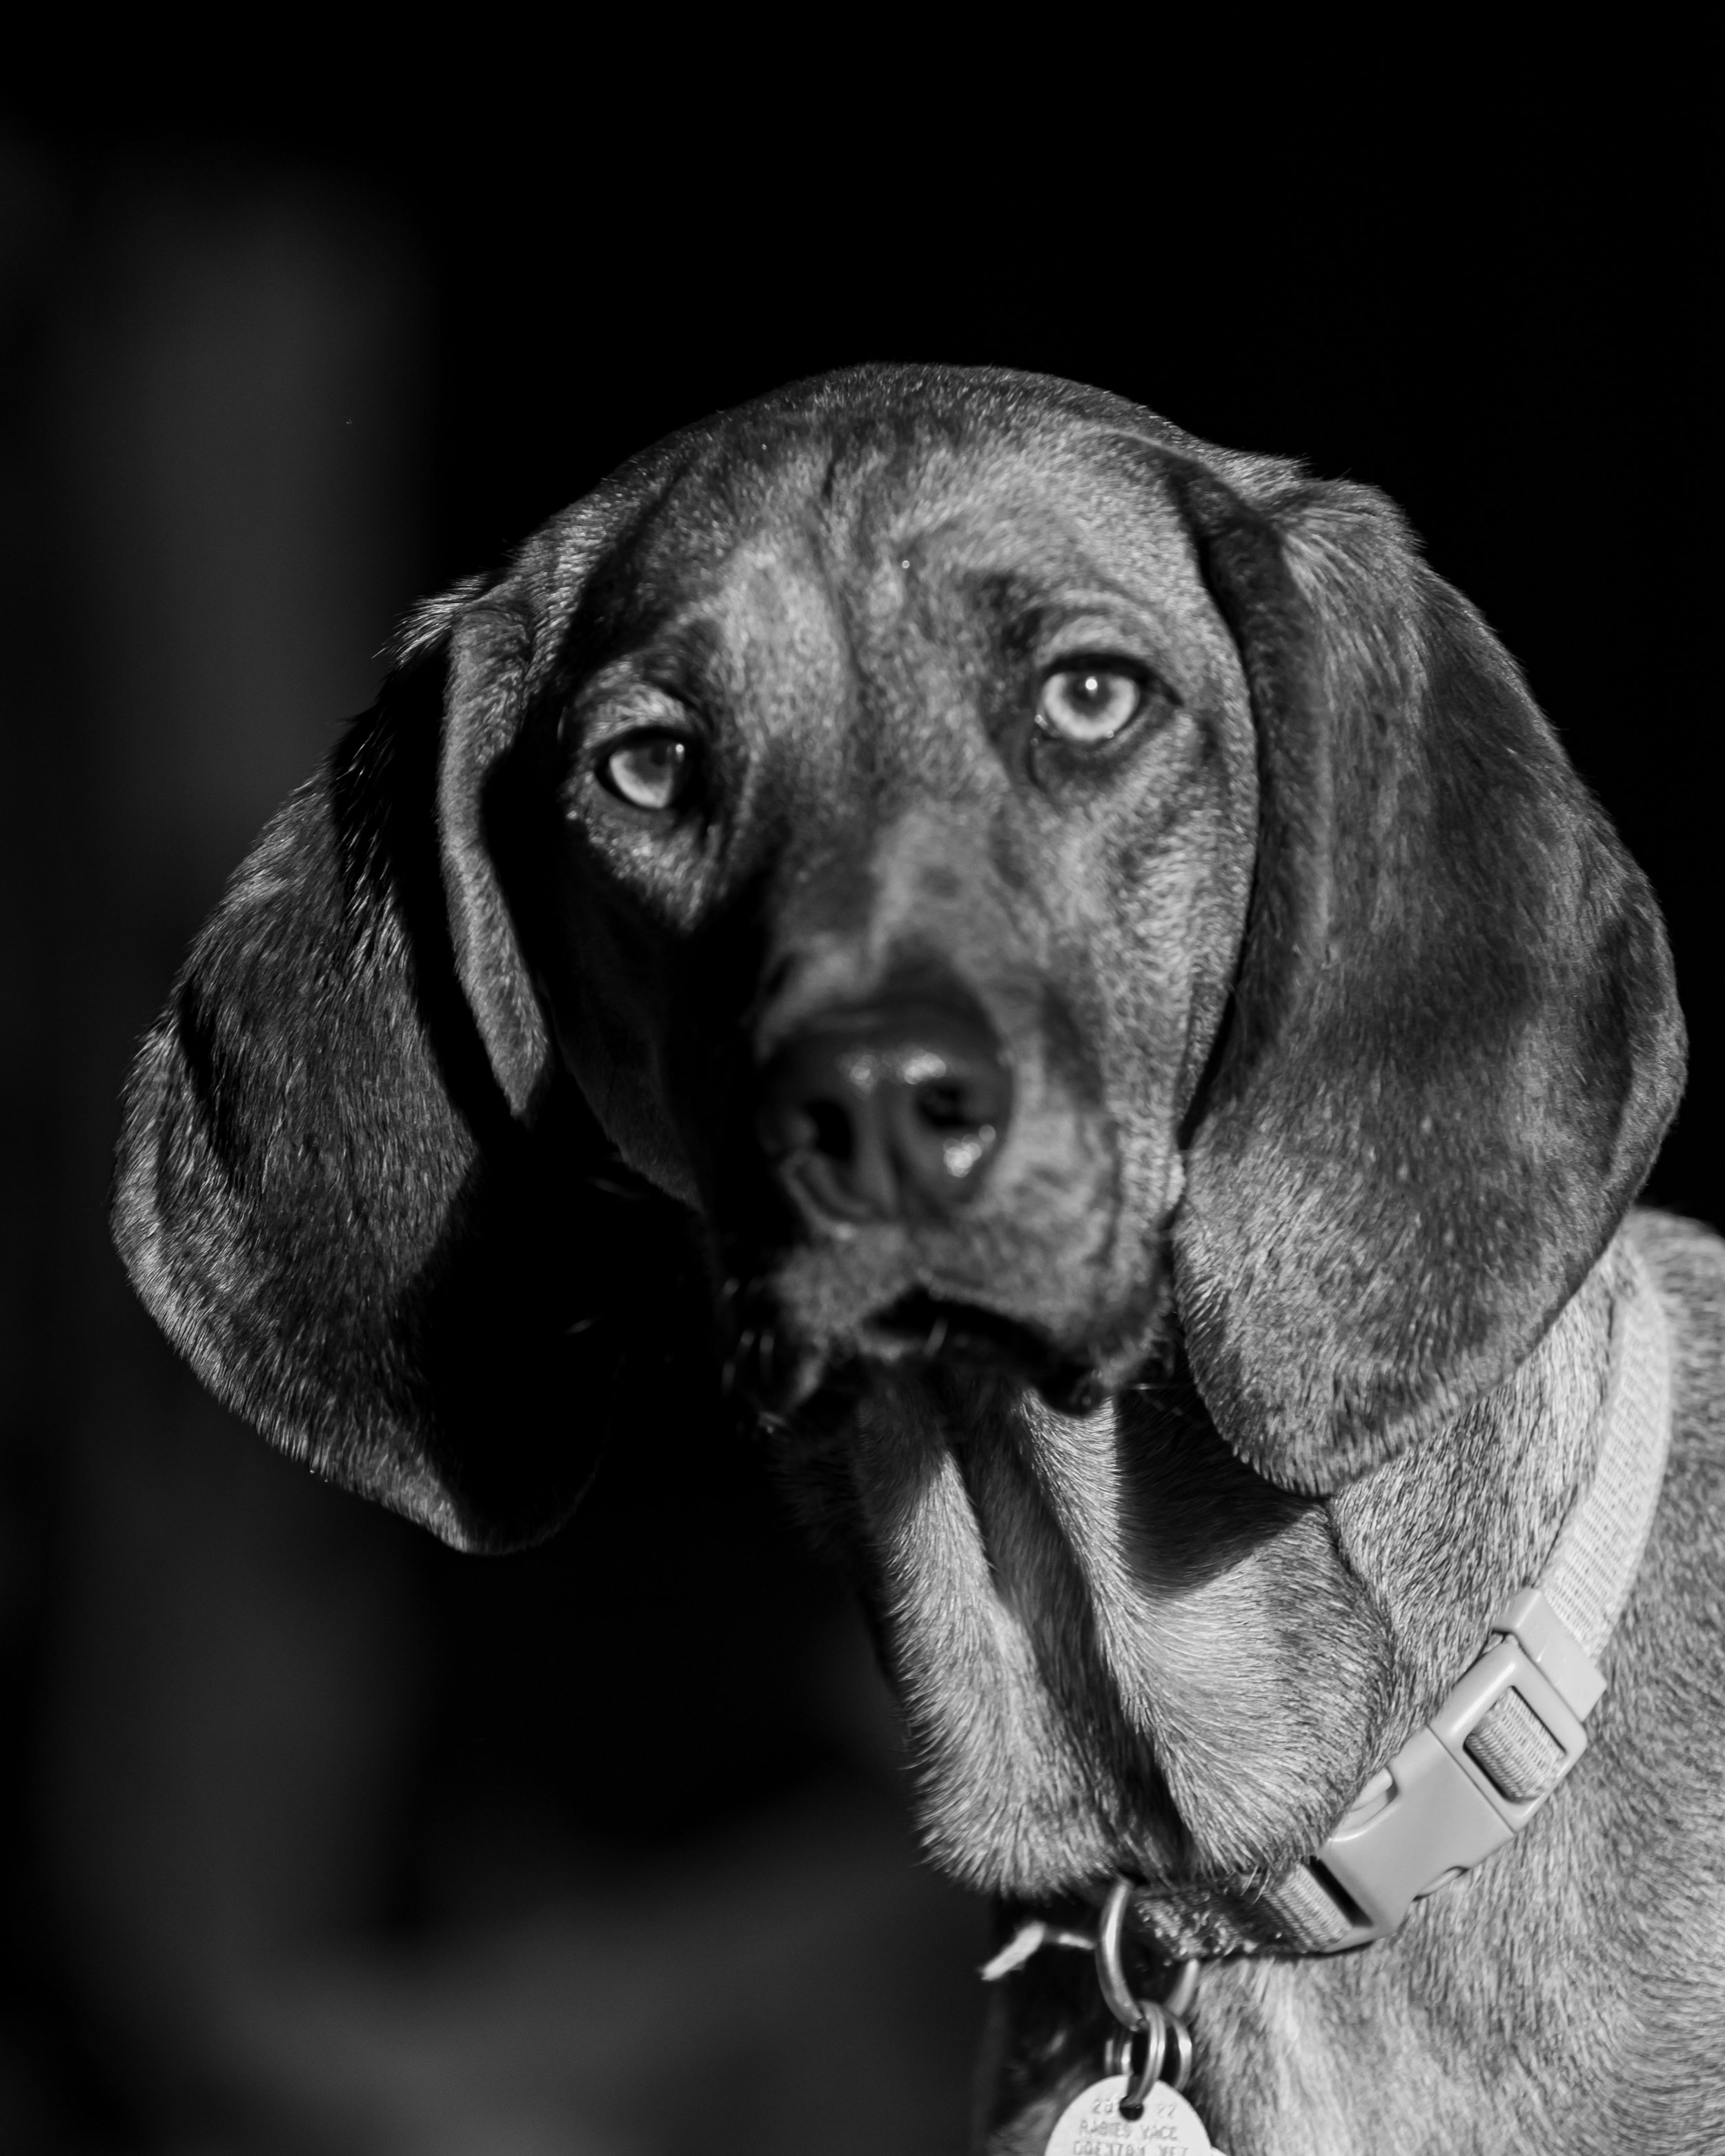
That’s for tomorrow though, the included photos here are unrelated. These were from a light test with a totally uninterested subject.