• Graphite, Charcoal, Pastel
    • Oil Paintings
    • Military experience art
  • Artist Statement
    • Pets
    • Kid Photos
    • Family Photos
    • Couples
    • Travel and Nature
  • Photo Blog
  • Media
  • Contact
Menu

Single-Handed Arts, LLC

Fine Arts and Photography Services
  • Fine Art
    • Graphite, Charcoal, Pastel
    • Oil Paintings
    • Military experience art
  • Artist Statement
  • Photography
    • Pets
    • Kid Photos
    • Family Photos
    • Couples
    • Travel and Nature
  • Photo Blog
  • Media
  • Contact
×
April 11, 2023 Post-2.jpg
April 11, 2023 Post-3.jpg
April 11, 2023 Post-4.jpg
April 11, 2023 Post-5.jpg
April 11, 2023 Post-6.jpg
April 11, 2023 Post-7.jpg
April 11, 2023 Post-2.jpg April 11, 2023 Post-3.jpg April 11, 2023 Post-4.jpg April 11, 2023 Post-5.jpg April 11, 2023 Post-6.jpg April 11, 2023 Post-7.jpg

Photography research and recreation

Joshua Hubbell April 11, 2023

I saw this setup online and since it involved gels and I enjoy overusing gels I decided to try it. That stated, you should always be researching photos. If you stumble upon an effect you like you should try to recreate it. This will force you to look at photography with a more critical eye regarding not only the work of others but your work as well. Furthermore, it actively helps you better understand photography techniques. Finally, practice is more worthwhile when you know what you skill you are trying to get.


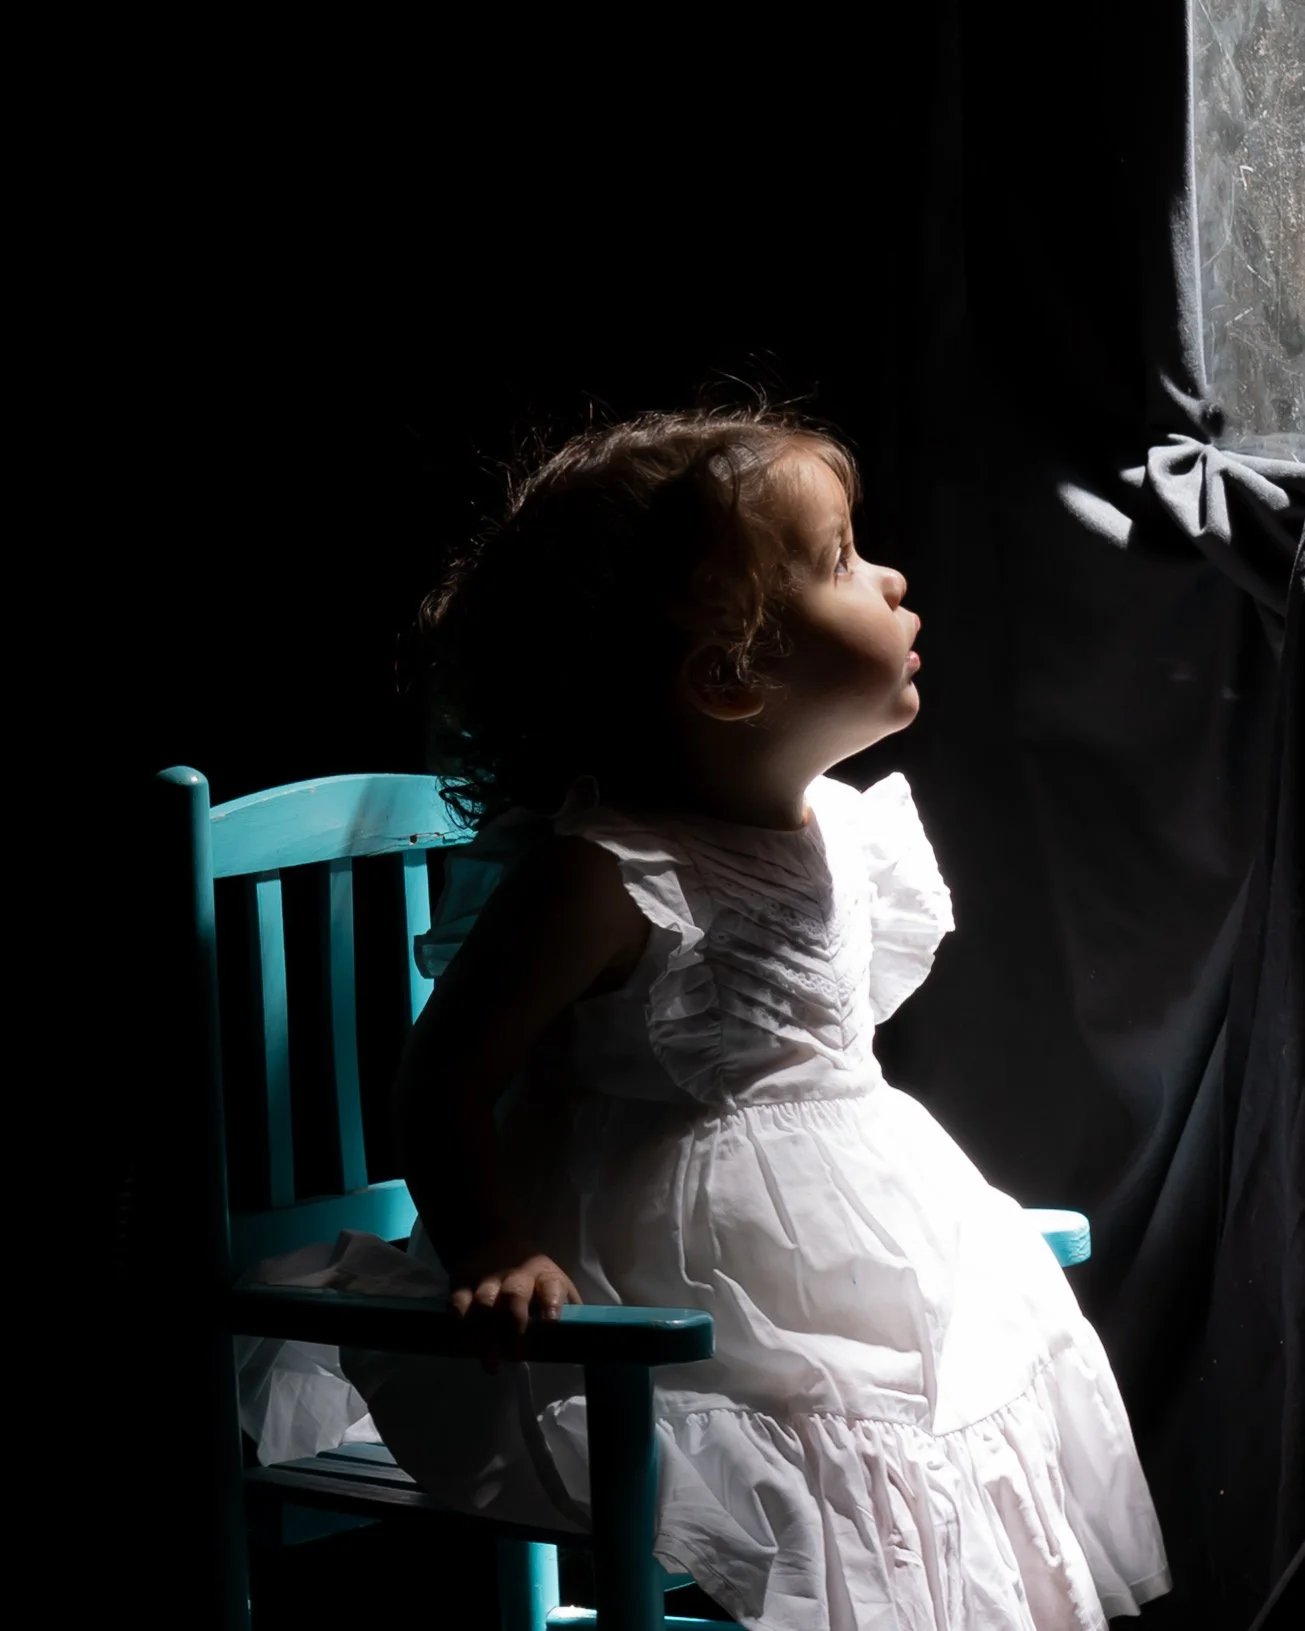
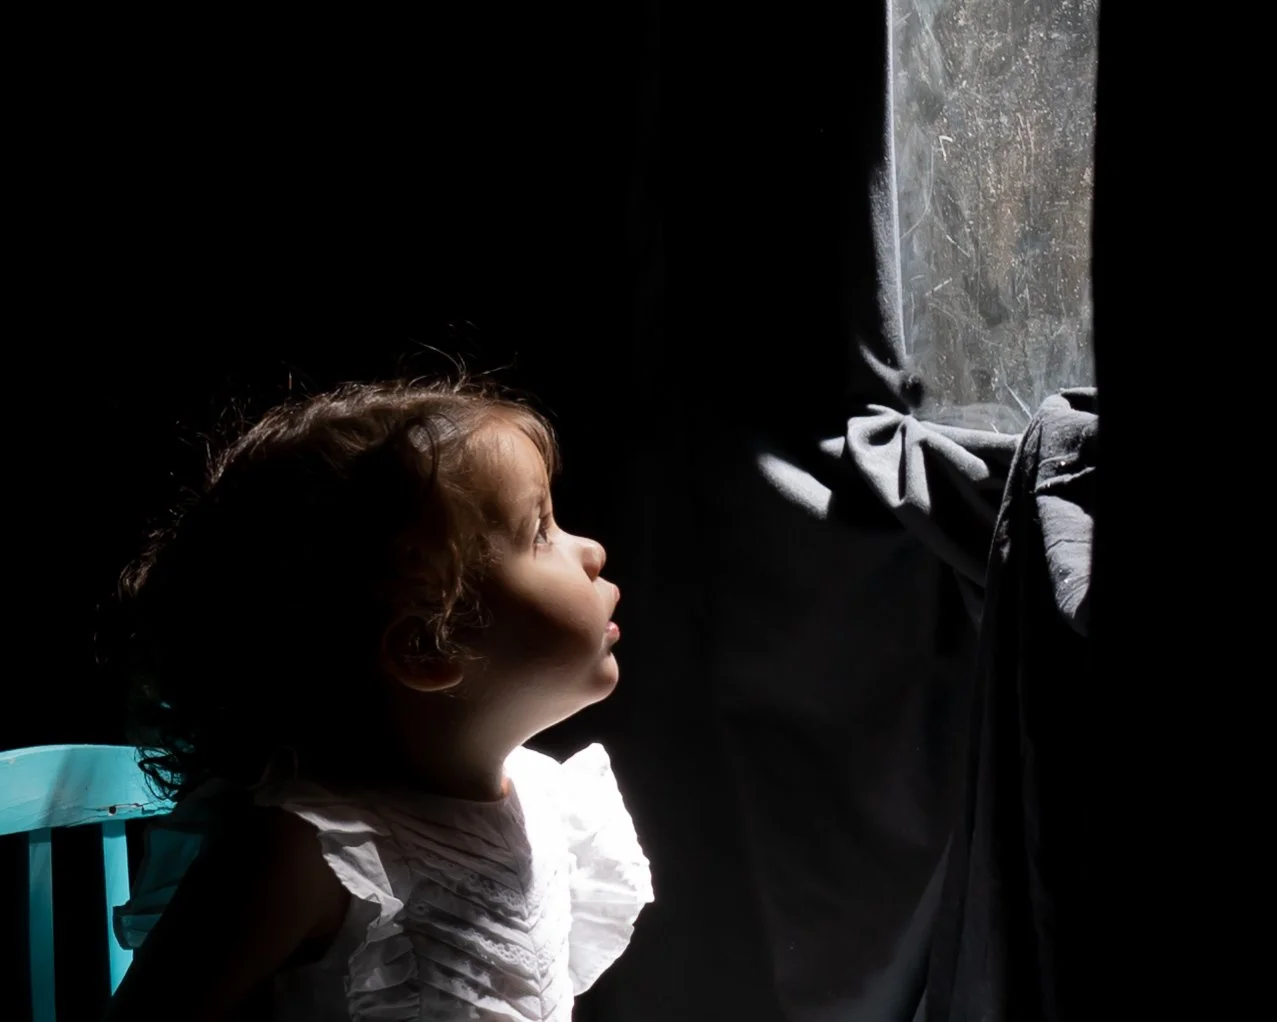
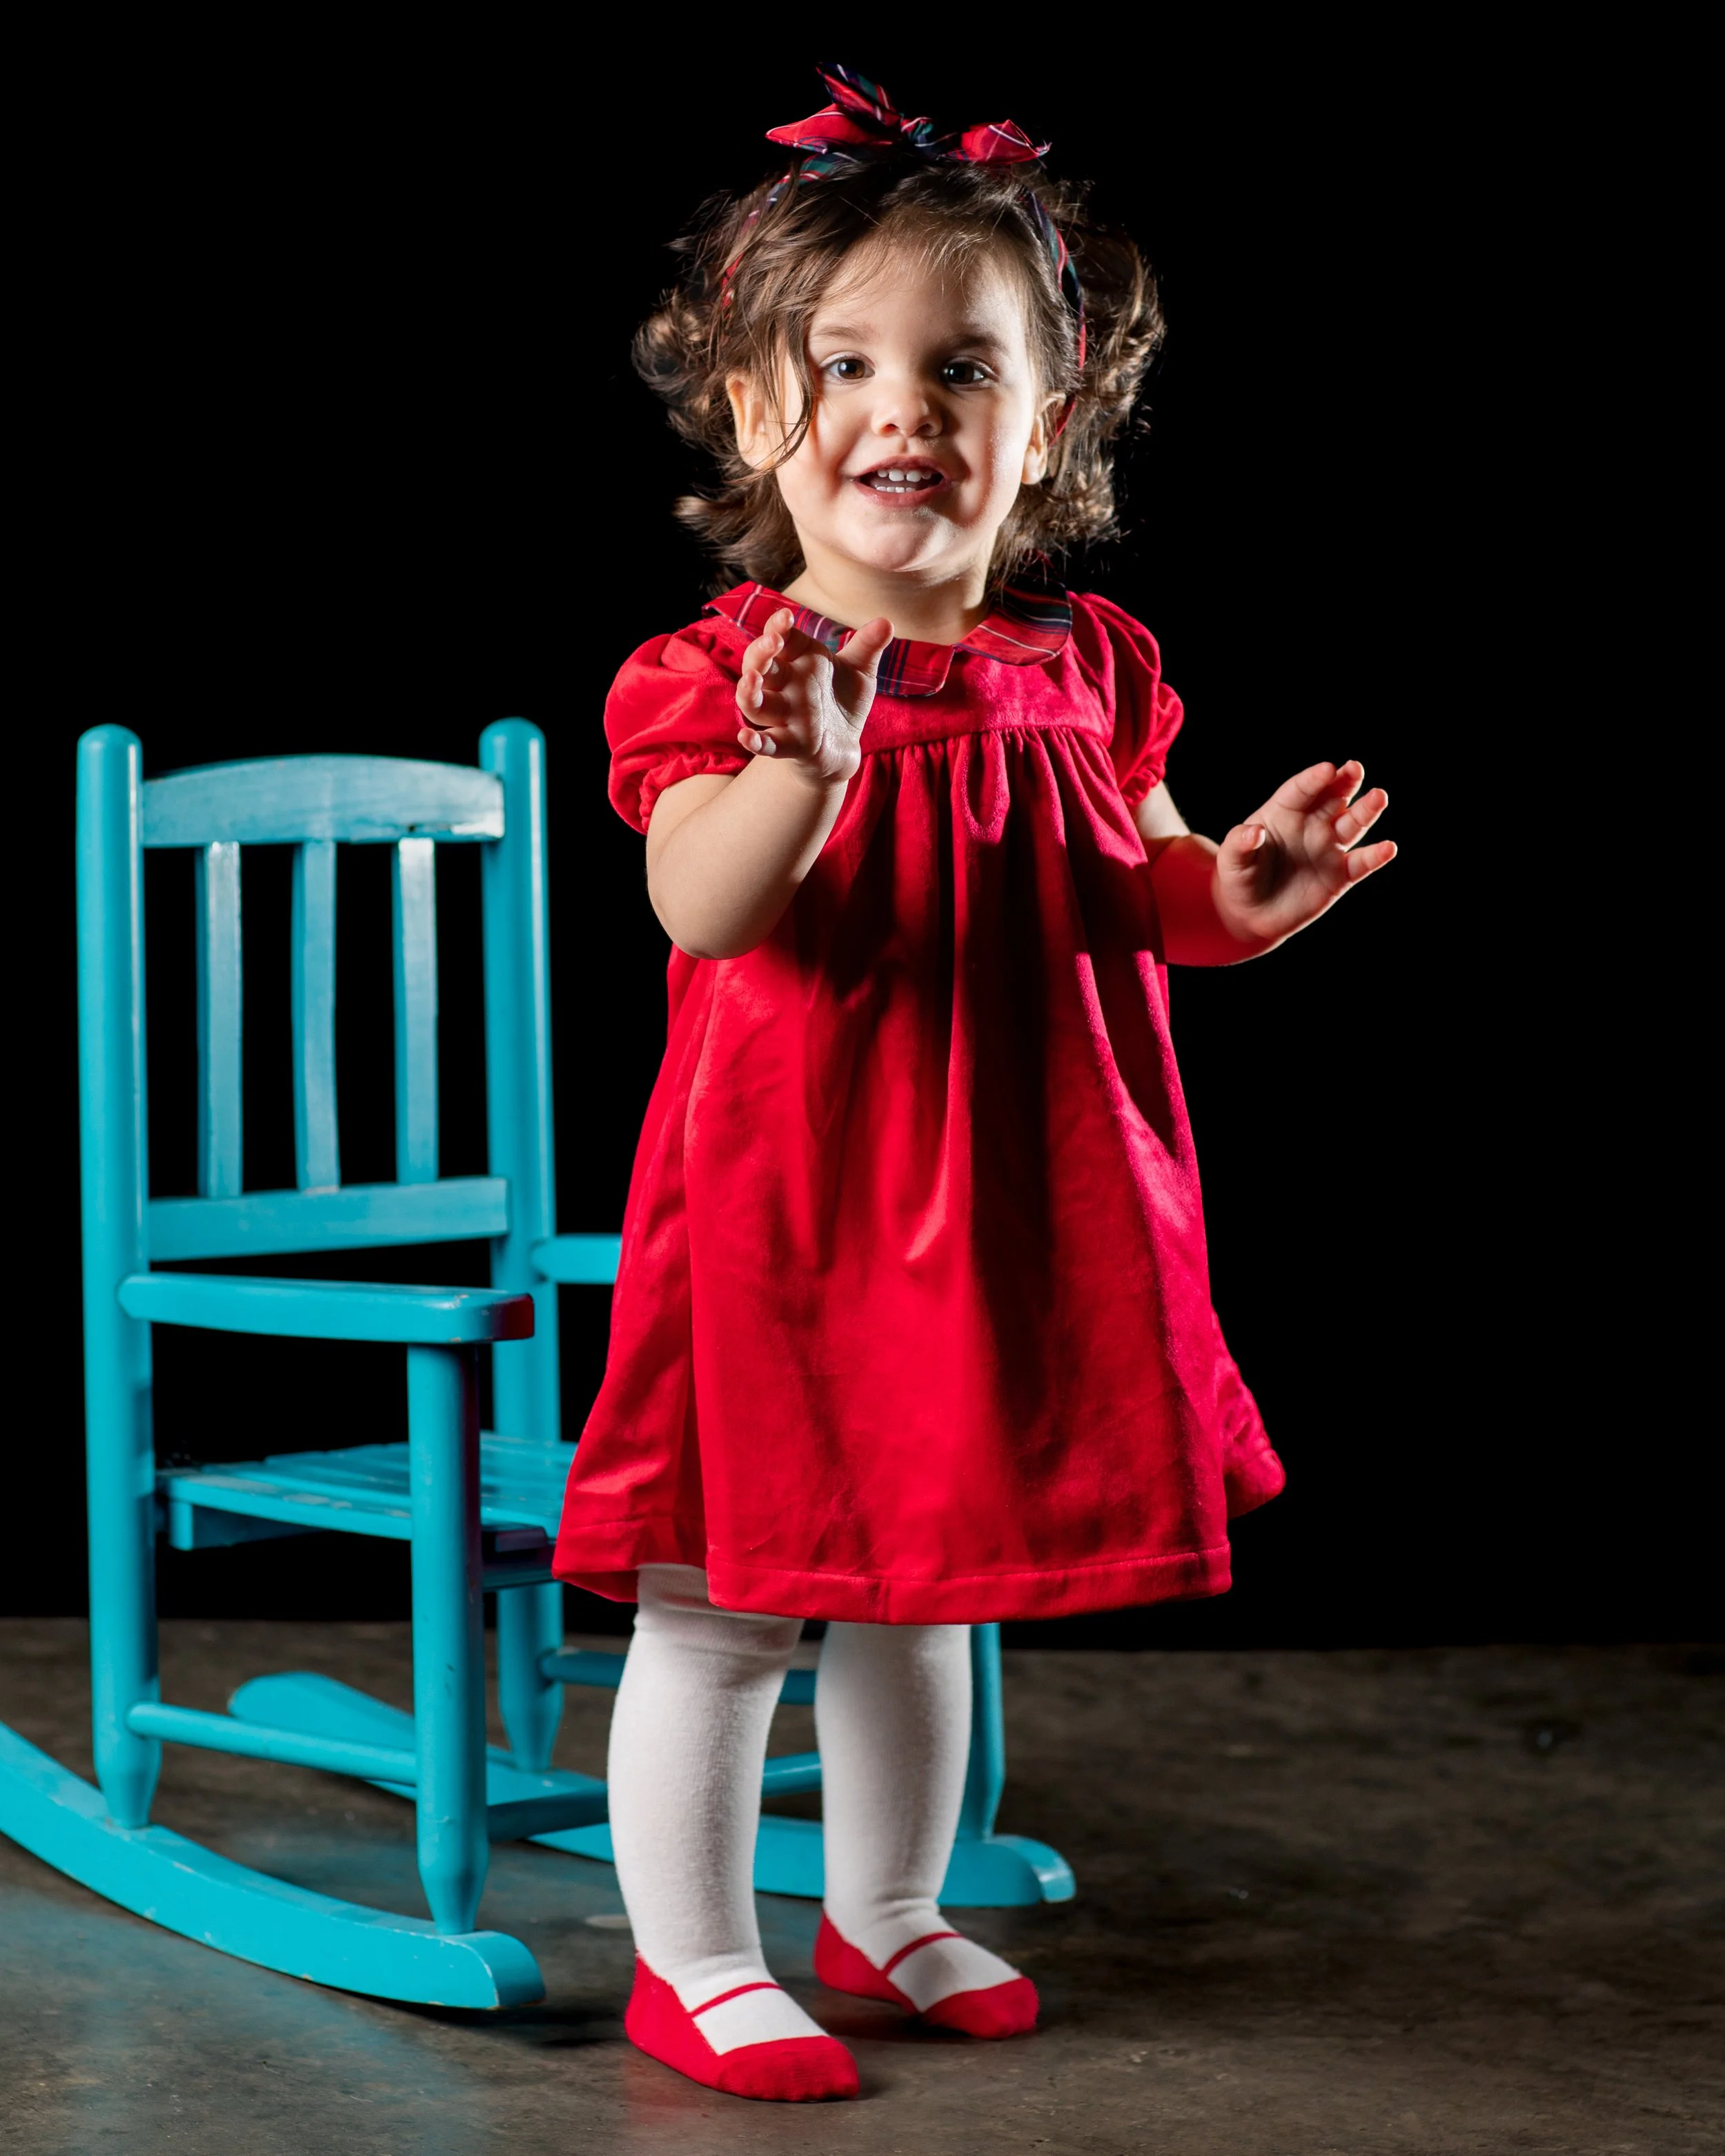
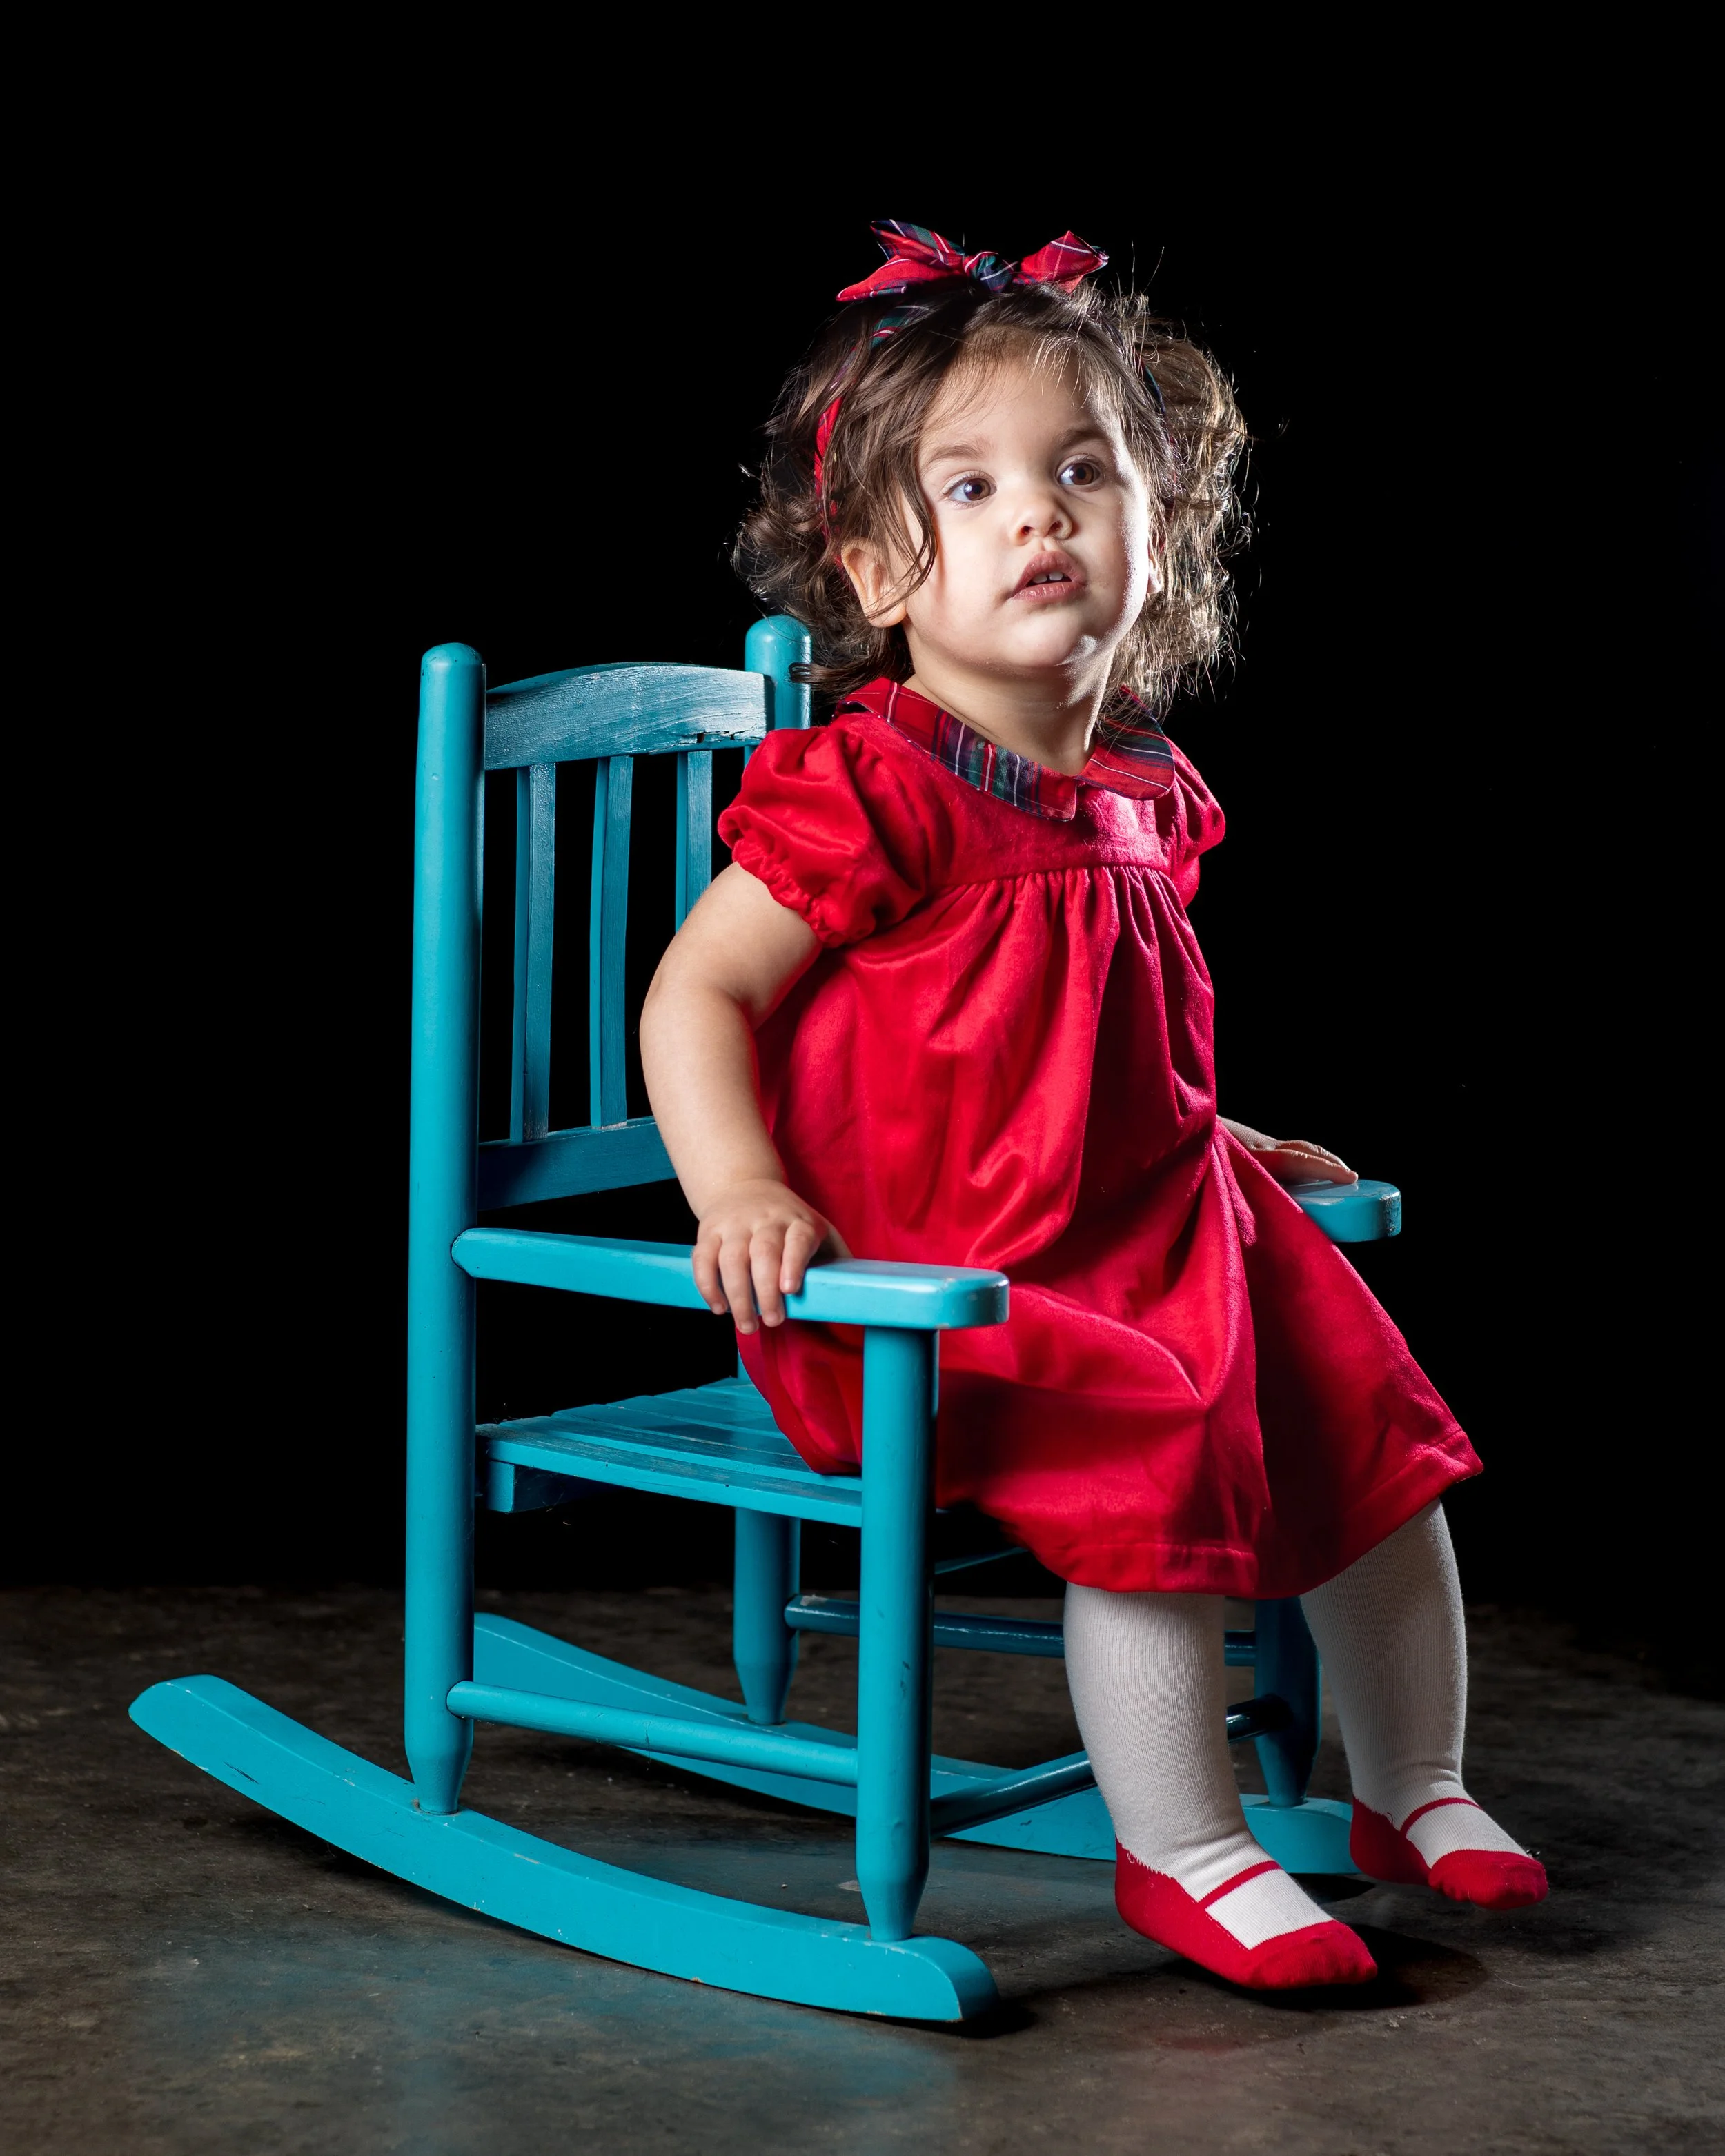
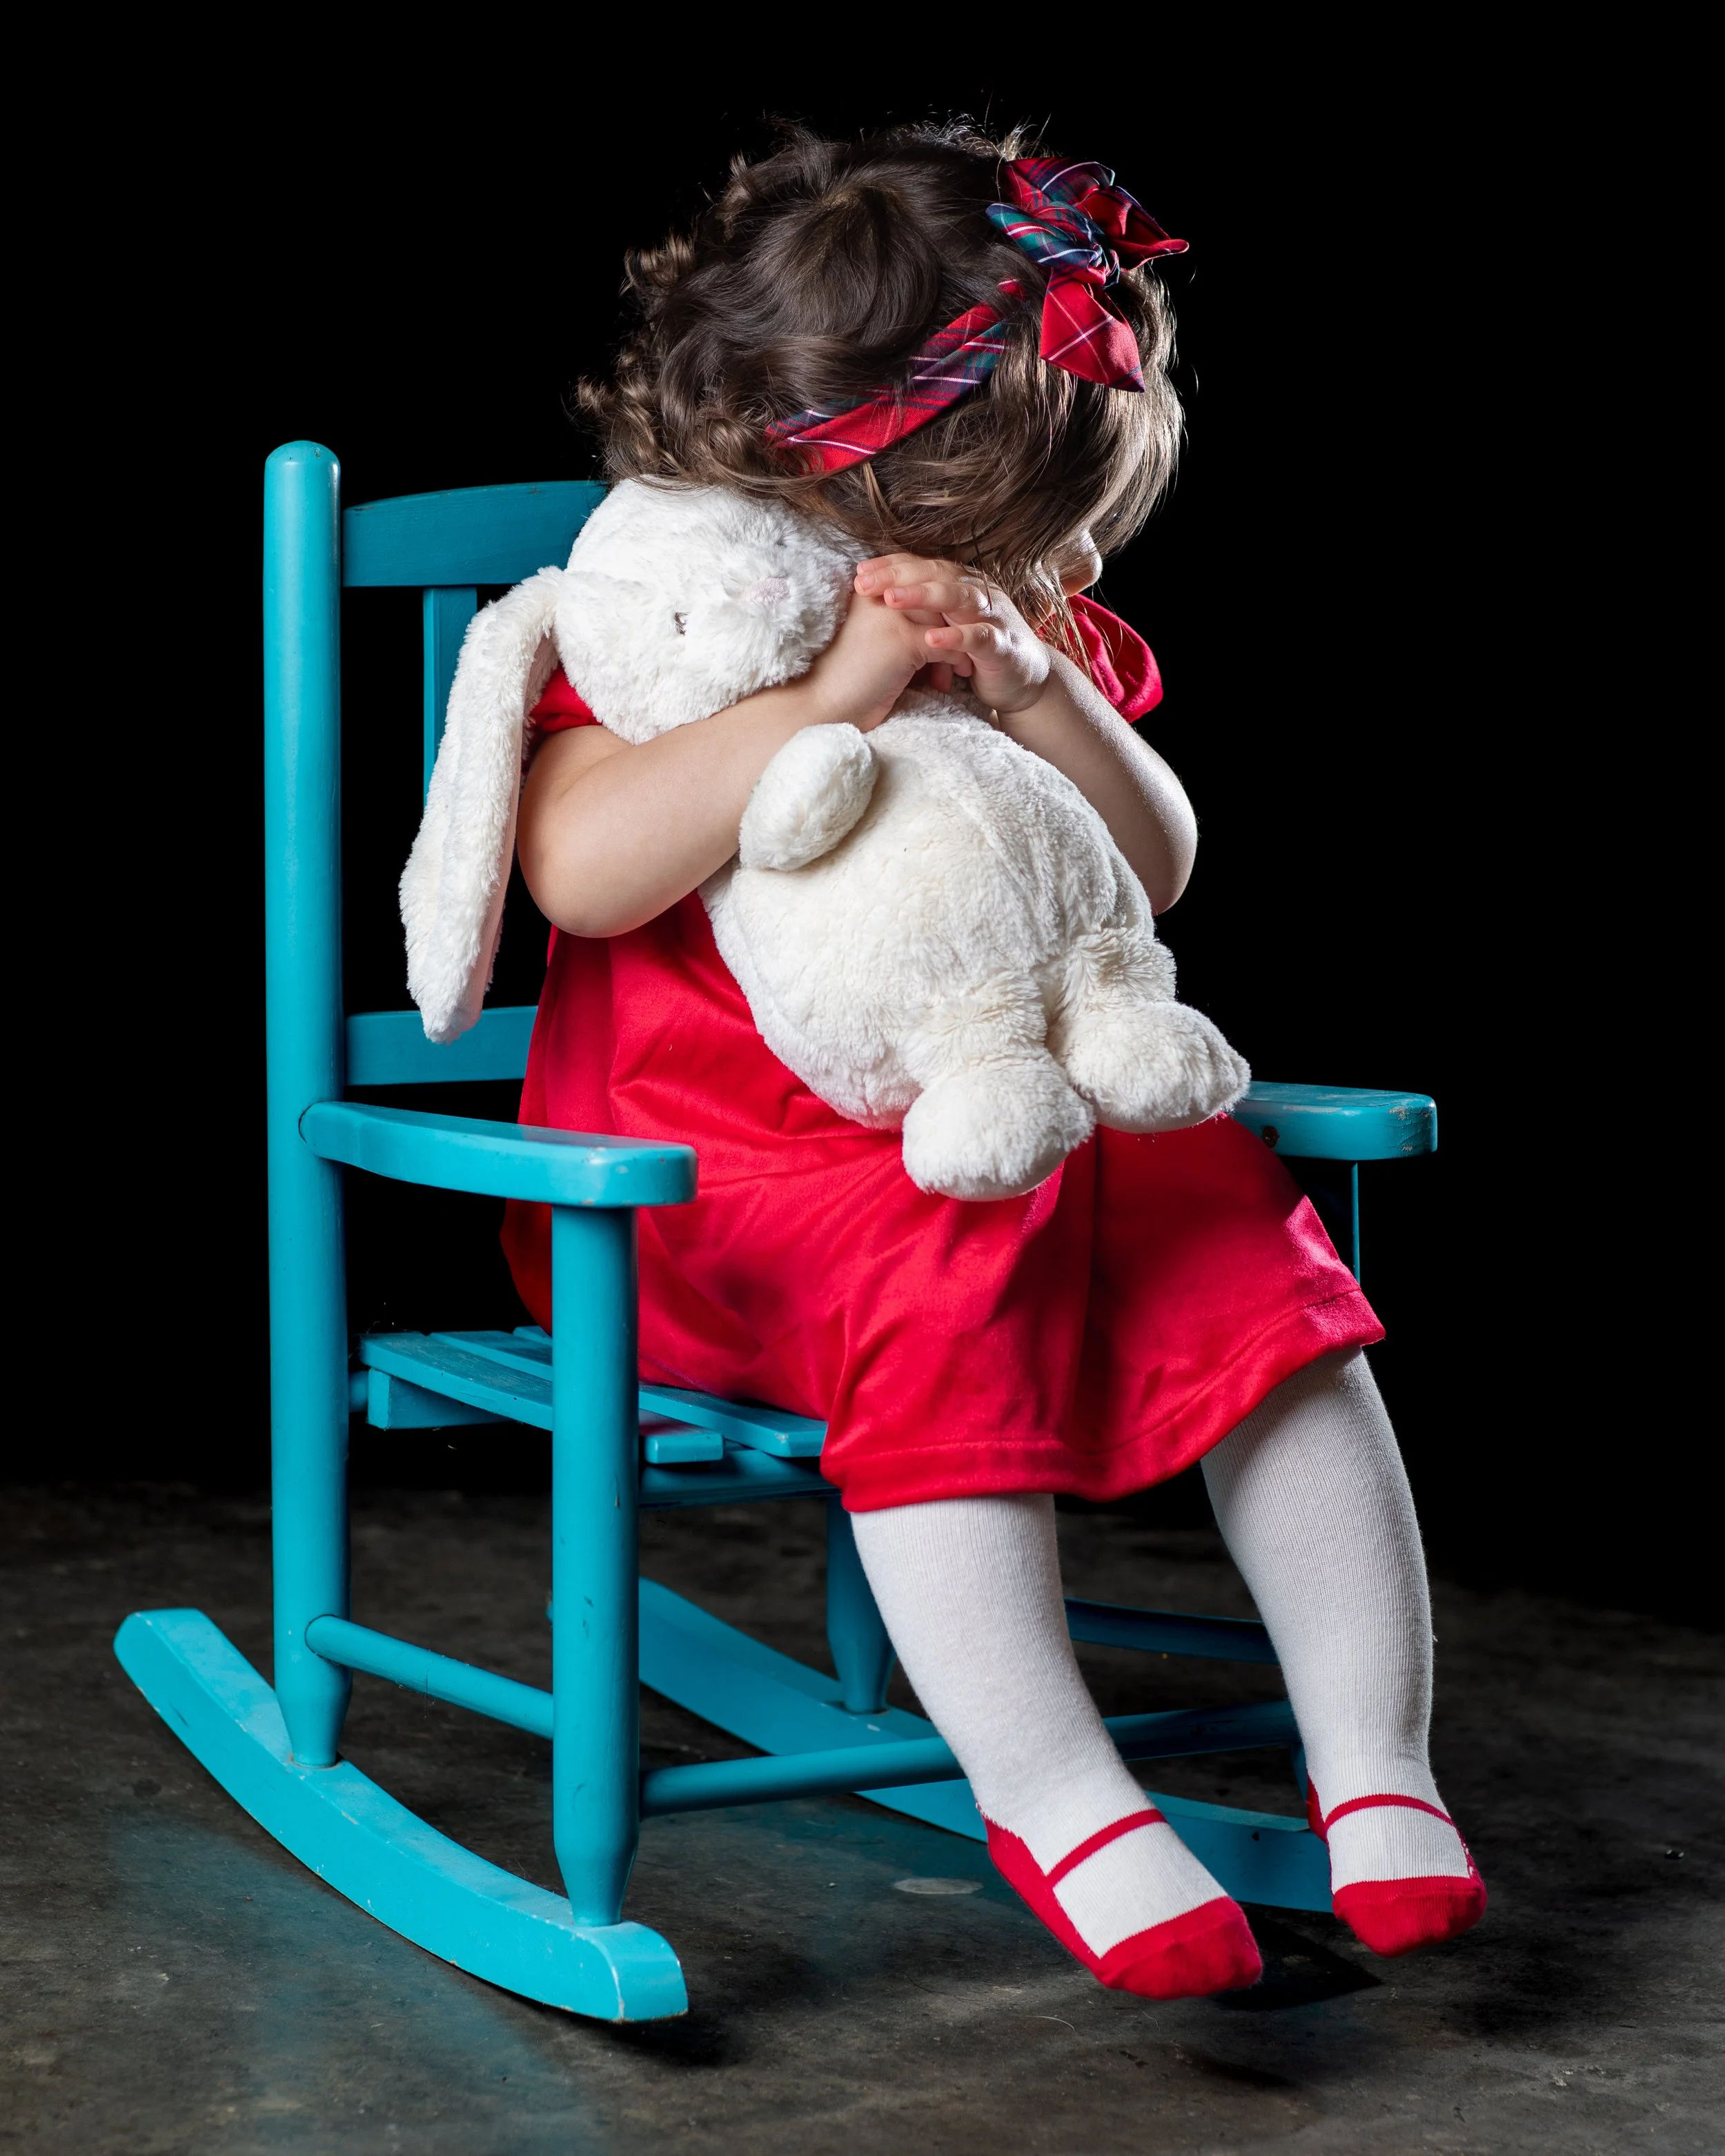
Moving on to something a little more concrete – posing. When posing a subject and working with just a single key light without a fill light, make sure you consider where that light is and what it will do with your poses. Single lights work best at understanding this effect and it may seem like “well duh” when you read it here it is easy to forget during the photo session and that is, the light only lights up what is facing it. In other words, if your subject turns away from the light, they will have shadows. If the subject turns towards the light, they will light up. It is not enough to know poses in a studio setting; you also need to know what the light and shadows are doing to those poses.


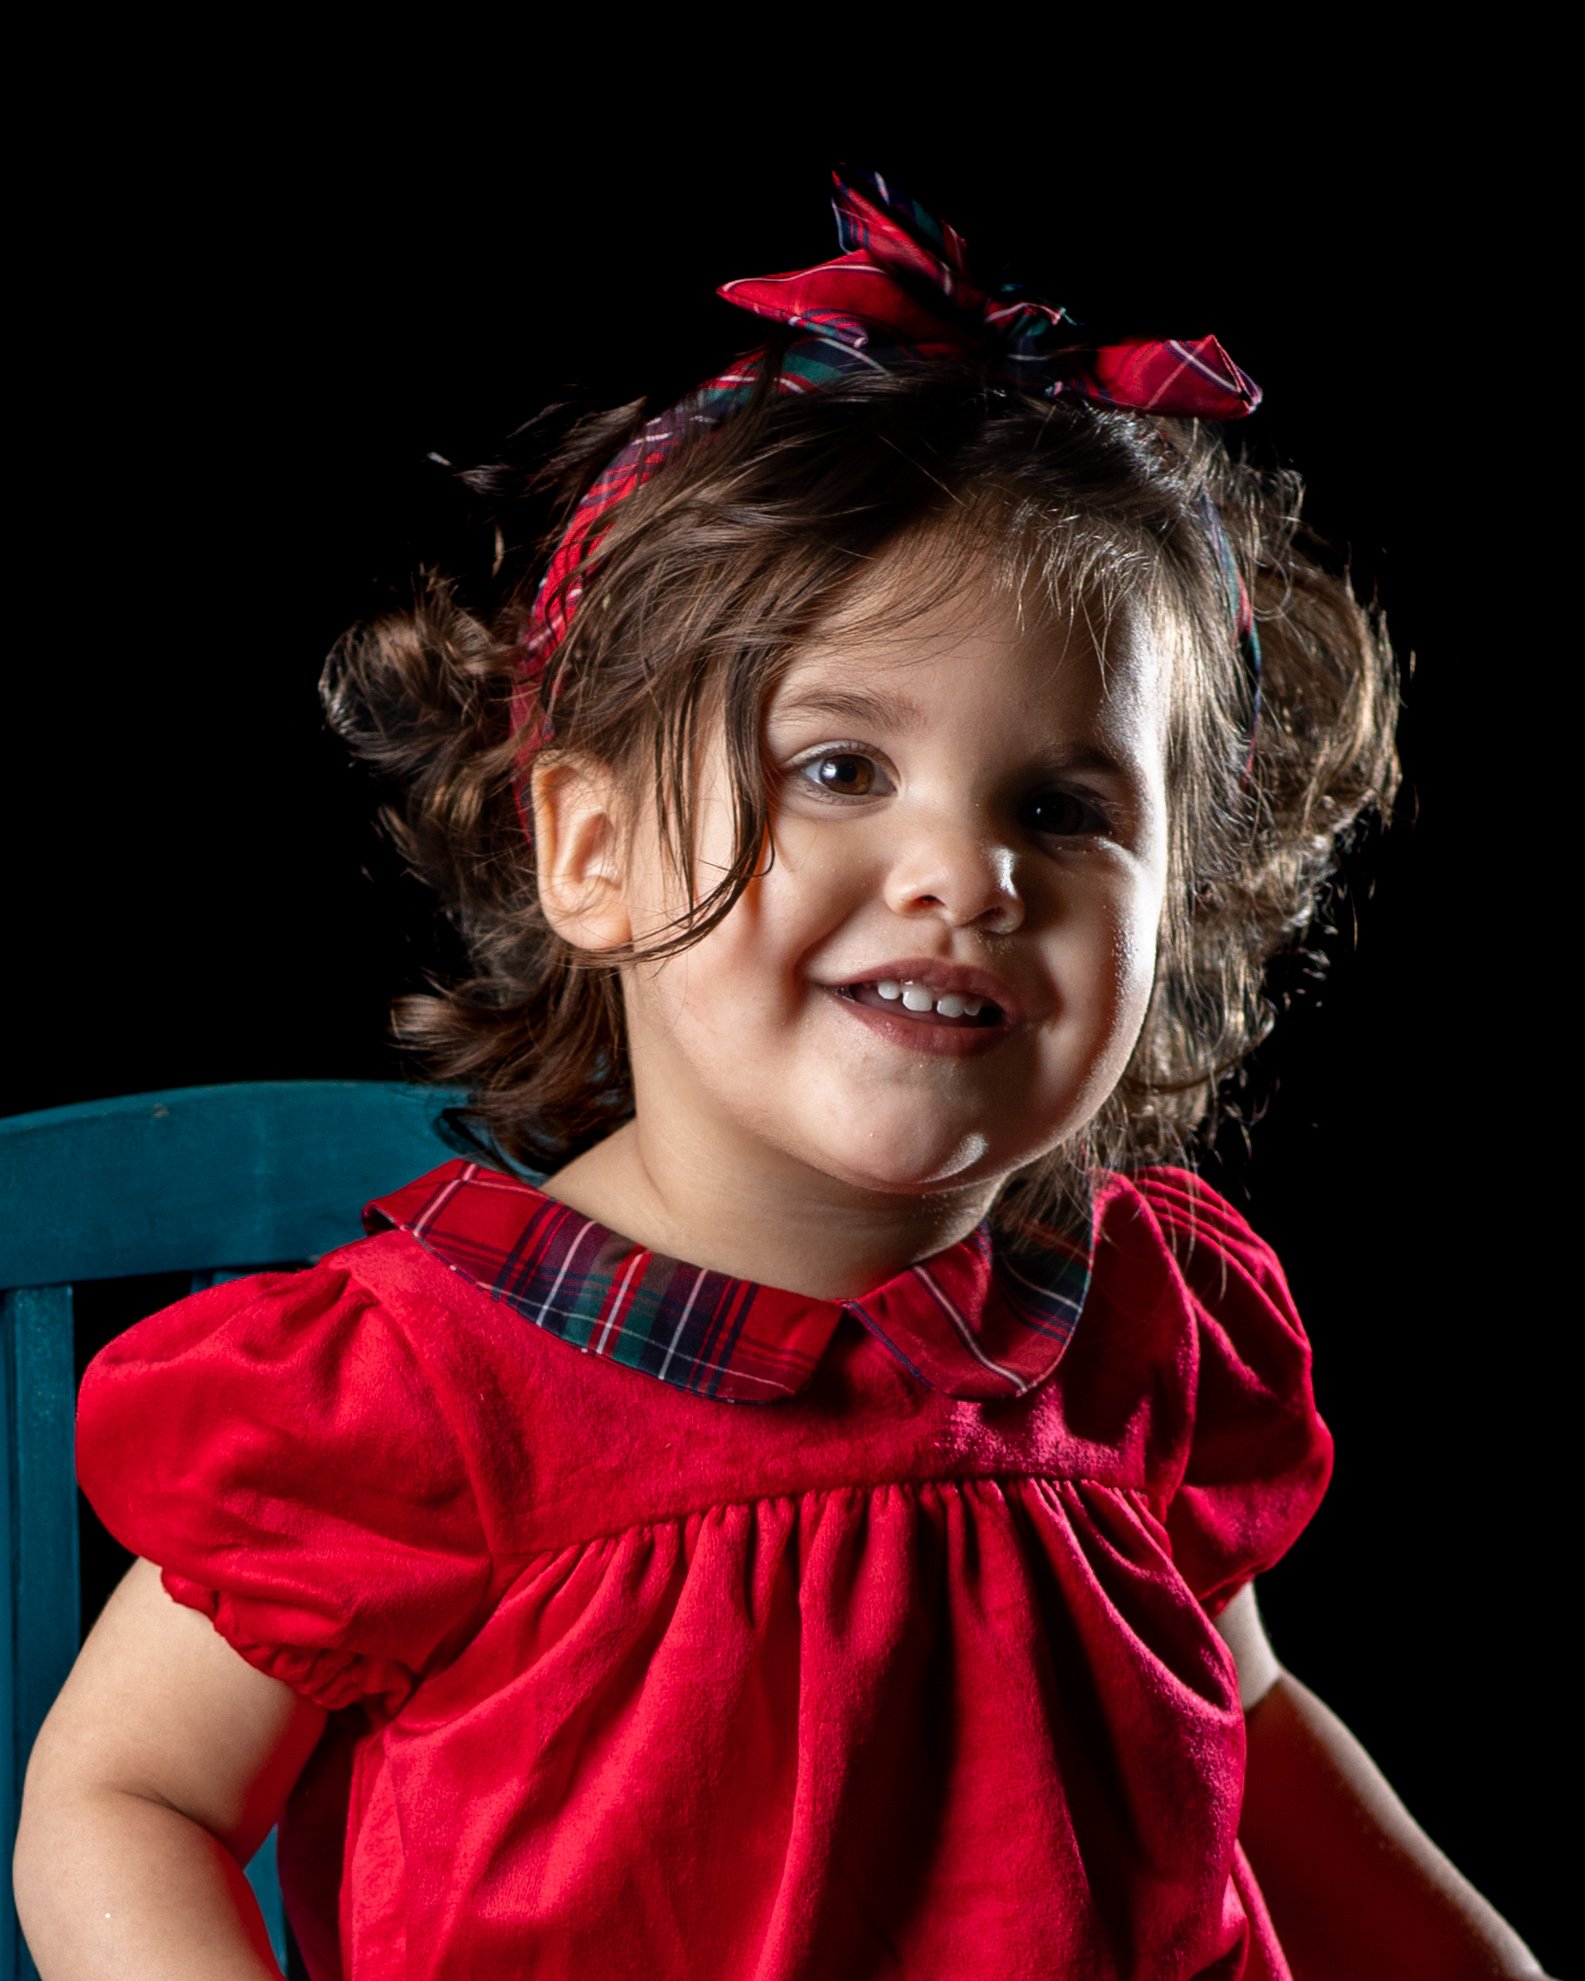
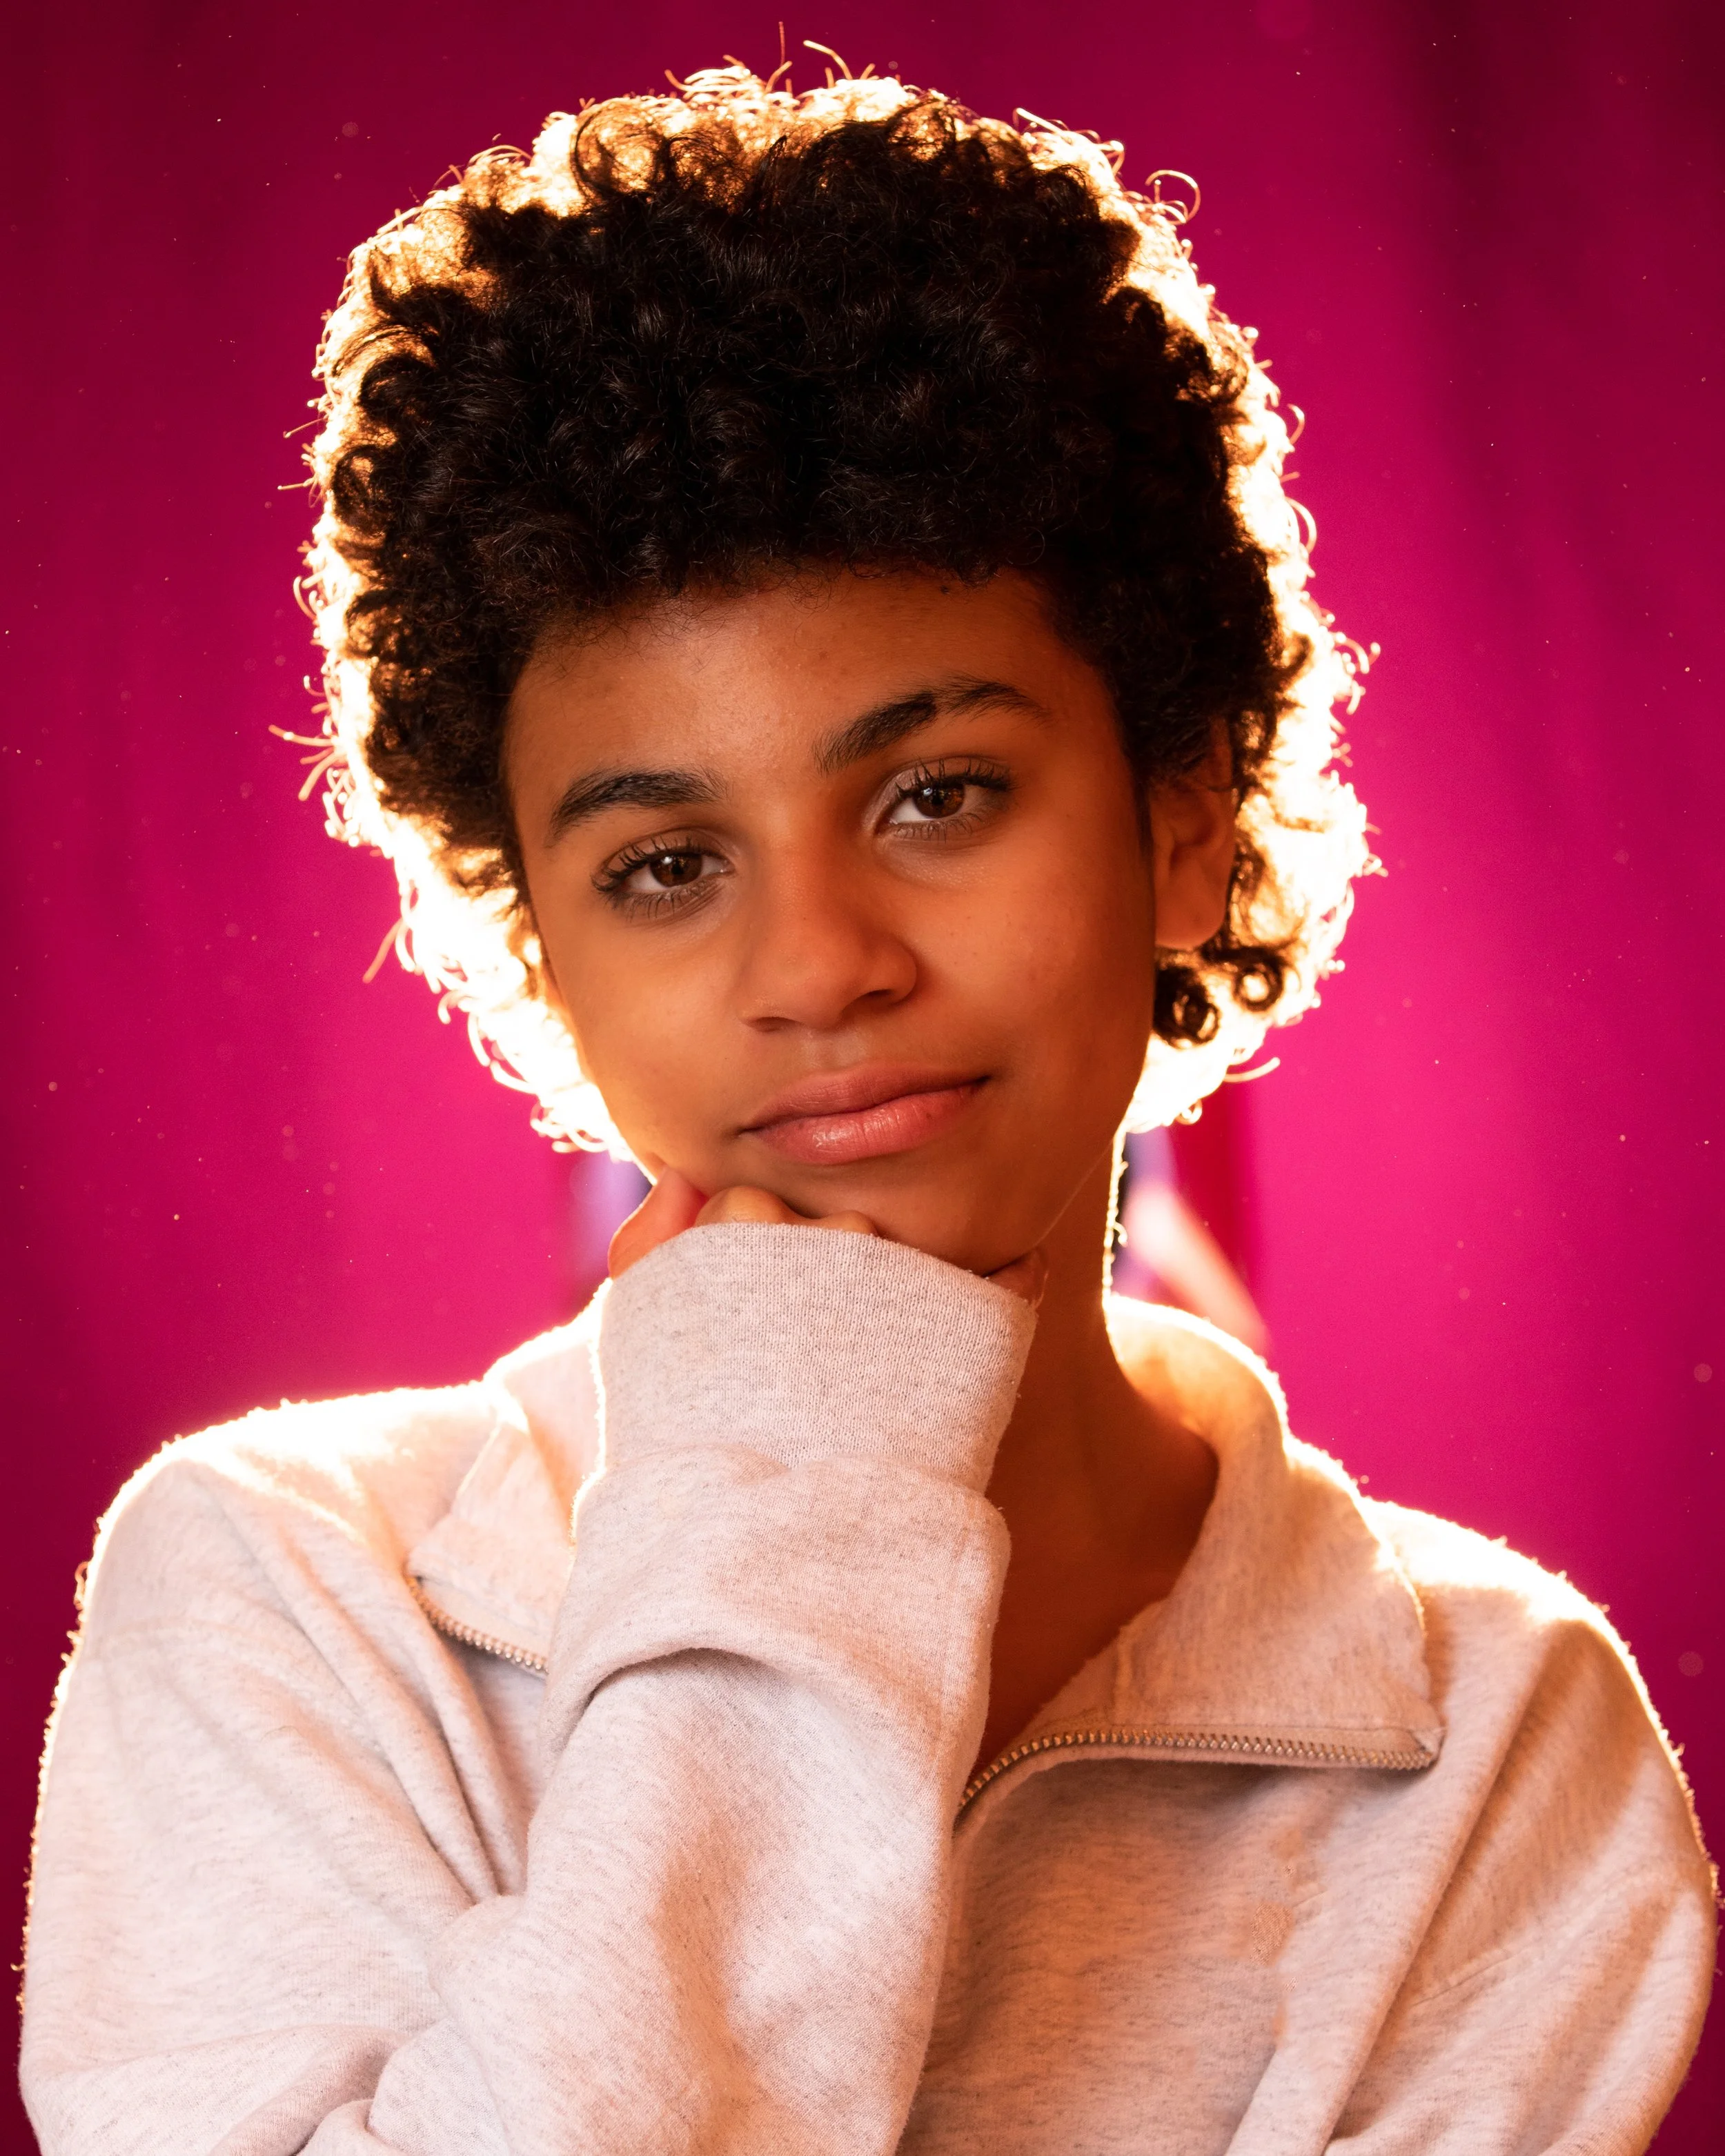
This setup involves 3 lights. The key light is a speedlight with an octagon softbox and a grid. The other two lights are stobes directly behind the subject. One light is pointed at the subject and has an orange gel and the other light is pointed away and has a red gel.

Comment
April 6, 2023 Post-3.jpg
April 6, 2023 Post.jpg
April 6, 2023 Post-2.jpg
April 6, 2023 Post-4.jpg
April 6, 2023 Post-3.jpg April 6, 2023 Post.jpg April 6, 2023 Post-2.jpg April 6, 2023 Post-4.jpg

Catch lights

Joshua Hubbell April 6, 2023

These photos demonstrate what a catch light is. You see the light reflection in her eyes? That’s the catch light. It helps add to your photos when used properly. The good news is that it is difficult to screw up. The better news is that you have numerous ways to impact catch lights.


You can impact the size and shape of the light by changing the size and shape of your light. For example, if you use a large soft box the catch lights will be large. If you use a rectangular softbox the catch lights will be rectangle in shape. Or if you have an octagon softbox, they will be an octagon or circular in shape.


You can also change the angle of your light or the distance. Moving the light closer or further will change the size. Changing the angle will warp the shape of the catch light.


In all honesty, this is really something you want to play around with and practice to better understand and get a strong command of. Knowing something exists and knowing how to use that something are two different things. Being able to use catch lights can help you improve your photography and make better photos.

Comment

The Moon

Joshua Hubbell April 4, 2023

In case you missed it tonight. Have a good evening.

Comment
April 4, 2023 Post-6.jpg
April 4, 2023 Post-2.jpg
April 4, 2023 Post-4.jpg
April 4, 2023 Post-3.jpg
April 4, 2023 Post.jpg
April 4, 2023 Post-5.jpg
April 4, 2023 Post-10.jpg
April 4, 2023 Post-9.jpg
April 4, 2023 Post-7.jpg
April 4, 2023 Post-8.jpg
April 4, 2023 Post-6.jpg April 4, 2023 Post-2.jpg April 4, 2023 Post-4.jpg April 4, 2023 Post-3.jpg April 4, 2023 Post.jpg April 4, 2023 Post-5.jpg April 4, 2023 Post-10.jpg April 4, 2023 Post-9.jpg April 4, 2023 Post-7.jpg April 4, 2023 Post-8.jpg

Negative Space Photography Technique

Joshua Hubbell April 4, 2023

Looking at the works of others is something I like to do in my spare time, and I tend to be drawn to negative space. Negative space is kind of what it sounds like; a whole lot of emptiness that emphasizes your subject. It doesn’t have to be darkness like in these photos, it could be water surrounding your subject or mountains, but it does tend to create a sort of void that becomes its own sort of subject that compares or compliments your actual subject. It comes in handy with theater photography, among other session types.


For this session, I wanted an isolated window, which I don’t have, so I made one in the basement. That’s just plexiglass held up by clamps and tripods with black backdrops around them. The light is just a speedlight on the other side of the window. To get the right reaction, I went with a toddler because a toddler is going to be fascinated with what the heck this window is doing there. Then she pulled a chair up and got a ball, so it worked out.


This was just a single light, a speedlight, with no modifiers besides the plexiglass. There really wasn’t much more to this.

Comment
March 29, 2023 Post.jpg
March 29, 2023 Post-2.jpg
March 29, 2023 Post-5.jpg
March 29, 2023 Post-9.jpg
March 29, 2023 Post-12.jpg
March 29, 2023 Post-13.jpg
March 29, 2023 Post-16.jpg
March 29, 2023 Post-19.jpg
March 29, 2023 Post-20.jpg
March 29, 2023 Post-8.jpg
March 29, 2023 Post.jpg March 29, 2023 Post-2.jpg March 29, 2023 Post-5.jpg March 29, 2023 Post-9.jpg March 29, 2023 Post-12.jpg March 29, 2023 Post-13.jpg March 29, 2023 Post-16.jpg March 29, 2023 Post-19.jpg March 29, 2023 Post-20.jpg March 29, 2023 Post-8.jpg

Grayscale photos

Joshua Hubbell March 29, 2023

I did another session outside during golden hour. Things didn’t quick work out the way I had in mind, but the photos were salvaged by grayscaling them. While I do try to use this approach as a crutch to save some photos that’d otherwise not work out, by no means does this mean anything is wrong with grayscaled photos. There is an art to doing it and not every photo will work grayscaled.


For starters, taking away the color means the subject or subjects within the photo become an even bigger focus. The less detail you have the easier it becomes to focus on the details you leave behind. This means you generally want photos that lack a busy background. A busy background might work in color but it tends to turn into a jumbled mess when you take away the color that lets you see the layers in the detail.


As for me, two things I love to do with grayscaled photos is utilize older glass panes, the messier and scratchier the better, and also do lots of framing. Grayscaling tents to make both photography scenarios more appealing to my eye. The glass adds to the drama in the photo and the framing adds to the focus of the photo. But that’s just a tiny slither of the surface of it, grayscaled photos are their own ocean of art and there are vast depths to that area of the craft.

Comment
March 27, 2023 Post.jpg
March 27, 2023 Post-2.jpg
March 27, 2023 Post-3.jpg
March 27, 2023 Post-4.jpg
March 27, 2023 Post-7.jpg
March 27, 2023 Post.jpg March 27, 2023 Post-2.jpg March 27, 2023 Post-3.jpg March 27, 2023 Post-4.jpg March 27, 2023 Post-7.jpg

Light Feathering

Joshua Hubbell March 27, 2023

Here are some self portraits again. As always, I recommend attempting self portraits every now and then particularly if you photograph people so you and better relate with your subjects. This sort of exercise also helps you better understand posing and makes it easier to give directions in posing. Afterall, it is a lot easier to tell someone to get into the pose you have in mind if you have already practiced that pose yourself.


Anyway, I utilized light feathering in this photo session. That is, I placed the light in such a way that the primary light hitting me was just light spill over. The light in question was a photography strobe with an octagon softbox. No grid this time because I needed the light spill over. From there, I lined up the edge of the softbox with my head. Doing this casts a very clear shadow line on my face when I face the camera, so I turned to face the light more. Again, the soft box was mostly past me, so the light I do have is mostly spill over meaning less light and weaker light.


Light feathering is a great tool for low key lighting but also in scenarios where you need a weaker light, but can’t take your light down much further or just want a larger spread of the light. Practicing with it on a single light will help you not only understand how to utilize it better but also understand better how your light is spilling over when you use multiple lights.

Comment
March 21, 2023 Post.jpg
March 21, 2023 Post-2.jpg
March 21, 2023 Post-3.jpg
March 21, 2023 Post-4.jpg
March 21, 2023 Post-5.jpg
March 21, 2023 Post-6.jpg
March 21, 2023 Post.jpg March 21, 2023 Post-2.jpg March 21, 2023 Post-3.jpg March 21, 2023 Post-4.jpg March 21, 2023 Post-5.jpg March 21, 2023 Post-6.jpg

A quick post because this week has been very busy.

Joshua Hubbell March 22, 2023

This little lady got hold of some tap shoes and wanted pictures of her dancing with them. It was about at golden hour, so I turned her away from the sun. Having her face, the sun would make for brighter pictures but also lots of squinting because the sun would be in her eyes. Besides, I love when light comes through hair so her back to the sun was the best option for this situation. Also, since movement is fast for tap, I set my shutter sped up high to about 1/400th.


Now for more general advice. When you are processing photos there are lots of things you can do with the software you have access to. The thing is you need to be clear with your clients how far is far enough. The picture of her with the dog makes for several examples. You will notice she has a tiny scare on her nose, kids get scratches all the time, but do the parents want it edited out or left in? And are you going to charge for that (I generally don’t but it depends on how the requests add up). Or the dog, do I spruce up the dog or leave it be.


Another question you need to ask yourself when considering this stuff is this: is this edit issue something that could have been avoided had you wiped your subjects down with a wet paper towel? Alternatively, was the situation where that was even an option? For example, photographing a wedding you can’t exactly run around wiping down all the party guests all the time. Another question worth asking is: how much time will take to do all these edits? Processing is already a time-consuming step but throw in a ton of edits and your processing time could take a lot longer. These are things you need to consider if you are going to charge for photography and things you need to be straight forward with your clients before you take the pictures.


#marylandphotographer #photographytips #annearundelphotographer

Comment
March 17, 2023 Post.jpg
March 17, 2023 Post-2.jpg
March 17, 2023 Post-3.jpg
March 17, 2023 Post.jpg March 17, 2023 Post-2.jpg March 17, 2023 Post-3.jpg

Happy Saint Patrick's Day!

Joshua Hubbell March 17, 2023
Comment
March 16, 2023 Post-3.jpg
March 16, 2023 Post-2.jpg
March 16, 2023 Post-4.jpg
March 16, 2023 Post-5.jpg
March 16, 2023 Post-6.jpg
March 16, 2023 Post-7.jpg
March 16, 2023 Post-3.jpg March 16, 2023 Post-2.jpg March 16, 2023 Post-4.jpg March 16, 2023 Post-5.jpg March 16, 2023 Post-6.jpg March 16, 2023 Post-7.jpg

4 Light Setup

Joshua Hubbell March 16, 2023

I am about back to 100%, so lets take a minute to review a solid lighting strategy that will work for any situation using multiple lights. This example uses 4 but it could be used for 2 or 600 or how many ever lights you want to have.


This setup involved 4 lights. 2 speedlights, 2 strobes. The key light was a strobe with an octagon softbox just over head. The fill light was to the subject’s right and was a rectangular soft box. Both softboxes had grids equipped. The hair light was an open speedlight and there is a back light with a green gel aimed at the back drop.


So, to get this to work, go through each light individually starting with the light that will need to be worked around the most – usually the backlight. For this one, it would be easier to adjust all other lights around the backlight so I started there. Then I turned it off and set up the hair light. Then I turned that off and set the fill light. Finally, I set up the key light and brought them all together.


Obviously, I had a stand in to have it setup before my young subject arrived. You may still need to make an adjustment or two after your subject arrives but a minor adjustment is a lot less time consuming for them then a full light setup after they arrive.

Comment
March 14, 2023 Post.jpg
March 14, 2023 Post-2.jpg
March 14, 2023 Post-3.jpg
March 14, 2023 Post-4.jpg

Quick single light test.

Joshua Hubbell March 14, 2023

I’m recovering from a stomach bug so here is a quick post with a simple setup.


I like to go back, experiment, and practice with just one single light aspect. That way, if and when I need to utilize that light aspect I will be ready. Alternatively, if the situation comes up where I am looking for a light technique to add to a setup, but I am not quite sure which one, experimenting like this keeps my mental library informed. After all, you can only use lighting techniques you know and only as effectively as you have practiced them and understand them.


That stated, this is obviously a single light setup. My light is equipped with a snoot to condense the light down to a small area. The snoot also has a yellow gel on it. When experimenting with light I make sure to have my subject do different poses to be sure I see how the light works with it with my own eyes. I get very familiar with it when I do the processing.

Comment
March 7, 2023 Post.jpg
March 7, 2023 Post-2.jpg
March 7, 2023 Post-3.jpg
March 7, 2023 Post-5.jpg
March 7, 2023 Post-6.jpg
March 7, 2023 Post-7.jpg
March 7, 2023 Post-8.jpg
March 7, 2023 Post-9.jpg
March 7, 2023 Post-10.jpg
March 7, 2023 Post-11.jpg
March 7, 2023 Post.jpg March 7, 2023 Post-2.jpg March 7, 2023 Post-3.jpg March 7, 2023 Post-5.jpg March 7, 2023 Post-6.jpg March 7, 2023 Post-7.jpg March 7, 2023 Post-8.jpg March 7, 2023 Post-9.jpg March 7, 2023 Post-10.jpg March 7, 2023 Post-11.jpg

A few more tips from the parade.

Joshua Hubbell March 8, 2023

I ran out of space to mention a few things in the previous post so here is a little more. From an equipment standpoint, I’d highly recommend grabbing a neutral density filter to help bring down some of the harsh sunlight. What I mean is that parades usually take place midday, which is a tricky time to shoot because of the harsh sunlight. A neutral density filter can help with that. Just be sure to practice with it ahead of time using it in sunny areas and in shadowed areas to get a feel for what it does exactly.


Getting away from gear advice, understand the politics involved. Politicians are to parades like moths are to light – they just can’t resist them. If you know the local political people, you can know who is walking past your camera and work from there. Also, since these usually take place in political parts of town, take the opportunity to snap shots of buildings from locations you can’t normally be at. For example, I snapped a few shots in the middle of a road you’d be insane to try and stand in during a normal day.


 Also, don’t forget to keep an eye out for wild animals or strange graffiti. You never know what you will find and just go for what you can find.


Finally, consider that there are usually events after the parade. Seek them out and see what you can grab photos of. There will be crowds but if you were photographing during the parade then you already have some practice photographing around crowds. Just make sure you put away that ND filter if you go indoors.


#marylandphotographer #annearundelphotographer #photographytips

Comment
March 6, 2023 Post-2.jpg
March 6, 2023 Post-3.jpg
March 6, 2023 Post-8.jpg
March 6, 2023 Post-6.jpg
March 6, 2023 Post-5.jpg
March 6, 2023 Post-7.jpg
March 6, 2023 Post-9.jpg
March 6, 2023 Post-10.jpg
March 6, 2023 Post.jpg
March 6, 2023 Post-4.jpg
March 6, 2023 Post-2.jpg March 6, 2023 Post-3.jpg March 6, 2023 Post-8.jpg March 6, 2023 Post-6.jpg March 6, 2023 Post-5.jpg March 6, 2023 Post-7.jpg March 6, 2023 Post-9.jpg March 6, 2023 Post-10.jpg March 6, 2023 Post.jpg March 6, 2023 Post-4.jpg

St. Patrick's Parade in Annapolis

Joshua Hubbell March 6, 2023

I always say try things outside of your normal photography focus and this weekend I did just that – I photographed a parade. This is way out of my normal photography wheelhouse so here are a few tips I learned form doing this.


First, learn the parade route, the extra events, and understand lots of other people there meaning get there early. I arrived about an hour before the parade and parked at a garage I felt was away from the parade route and still just managed to get one of the last parking spots; get there early. As for knowing the parade route and the extra events, I already was a aware of that stuff but you can always look it up online.


Second, be mindful of the setting. People drink on Saint Patrick’s Day, so I knew there would be people drinking alcohol and some people might be drinking a little too much alcohol. On top of that, large crowds always have a thief or two walking around looking for easy targets not to mention photographing in public also has the chance of the occasional person who doesn’t understand or respect photographer rights popping up. My point is all these are situations where you could see your camera get damaged or go missing. Have fun but be mindful. Situational awareness goes a long way.


Finally, go for the obvious stuff – the parade, but look around too. You might luck out and see other things going on just roll with that. If all else fails, photograph dogs and buildings, you’ll see lots of them.

Comment
March 2, 2023 Post.jpg
March 2, 2023 Post-2.jpg
March 2, 2023 Post-3.jpg
March 2, 2023 Post-4.jpg
March 2, 2023 Post-7.jpg
March 2, 2023 Post-6.jpg
March 2, 2023 Post.jpg March 2, 2023 Post-2.jpg March 2, 2023 Post-3.jpg March 2, 2023 Post-4.jpg March 2, 2023 Post-7.jpg March 2, 2023 Post-6.jpg

A quick review working with young children.

Joshua Hubbell March 2, 2023

The short version of working with young children:


1)      Give them an area to explore.

2)      Keep the session quick.

3)      Know your route.


Starting with the first one and working from there, give these kids a place to explore. Kids are programmed to learn so they want to explore. If you give them something to explore they give you something to work with. Often, this is as simple as taking them someplace new or giving them a new take on an old place. In the case of these photos, this little lady is used to being behind that fence, not outside it – that’s why she’s pointing in the picture. It’s new to her so it feeds that curiosity.


Next, keep the session quick. Young kids tire out quick. When they get tired, they get frustrated. When they get frustrated, they get to crying. So, try to keep it shorter. How short? That is something you will have to gauge the kid on. Some can go longer and some need it done very quickly. Not to mention all the variables like time from the last nap, how recently they ate, and other things.


Finally, and this goes hand in hand with keeping the session quick but that is to know your route. Have a plan for where you are photographing your subject. You know you need to keep it quick, so what are 2 to 5 areas within a few seconds of each other in your immediate area? Have a plan for that so you can keep things quick but also keep things different with each step of the photo session.


Bonus tip:  Get down to their eye level for the photos. Things will work out so much better that way.

Comment
February 28, 2023 Post 1.jpg
February 28, 2023 Post 2.jpg

A quick break.

Joshua Hubbell February 28, 2023

Taking a quick rest. Posts will resume on Thursday.


To those who attempted to get tickets to this weekend’s show at Indian Creek School of Frozen Jr., word of mouth spread quick, and it sold out both Saturday and Sunday so you probably weren’t able to get them. That’s too bad too because you missed an amazing performance.


But good news, their upper school will be performing Shrek the Musical and if their middle school pulls off amazing performances you can rest assured their upper school does even better. They aren’t selling tickets yet but save the date for:


Thursday, April 27, 7:00 p.m

Friday, April 28, 7:00 p.m

Saturday, April 29, 3:00 p.m

Sunday, April 30, 3:00 p.m


You’ll likely get a reminder when I do another Tech/Dress rehearsal write up pending permission.

Comment
February 24, 2023 Post.jpg
February 24, 2023 Post-2.jpg
February 24, 2023 Post-4.jpg
February 24, 2023 Post-5.jpg
February 24, 2023 Post-6.jpg
February 24, 2023 Post-7.jpg
February 24, 2023 Post-8.jpg
February 24, 2023 Post-9.jpg
February 24, 2023 Post-11.jpg
February 24, 2023 Post-12.jpg
February 24, 2023 Post.jpg February 24, 2023 Post-2.jpg February 24, 2023 Post-4.jpg February 24, 2023 Post-5.jpg February 24, 2023 Post-6.jpg February 24, 2023 Post-7.jpg February 24, 2023 Post-8.jpg February 24, 2023 Post-9.jpg February 24, 2023 Post-11.jpg February 24, 2023 Post-12.jpg

More on Dress Rehearsals

Joshua Hubbell February 24, 2023

Once again, Indian Creek School are performing Frozen Jr. at their campus, if you missed the first two shows, then you missed some amazing shows but you are in luck because there are two more this Saturday and Sunday at 3 PM. The school does great performances, and this show meets that bar, if you need a break from everything I suggest checking out their show – you won’t be disappointed. For more information check out Indian Creek School’s website at: https://indiancreekschool.ludus.com/index.php?show_id=200433386


I noted bringing a step stool in my last post. The reason for that is you can get up closer to the performer’s level without being on stage. This will make it easier to line up some shots. I actually like to bring 2 with me so I can have them positioned on both sides so less movement is involved. That stated, make sure you know what the performers are doing during the whole performance. For Froze, I knew that Elsa would be walking through the front row. Since I knew when and where I could be sure the stools would be out of the way before that part of the show.


Speaking of which, always be thankful. You may be photographing the show, but the performers, tech and stage crew, directors, costumers, makeup artists, choreographers, and everyone else who adds to the show adds to the shot you are composing. So be nice to everyone. It is their theater, after all, and you are there by their invitation. Theater is a bunch of different arts coming together in the form of a bigger production – use your art to work in sync with them, not against them.


Finally, know the show, know the show, know the show, and know the show. You don’t have to memorize everyone’s lines but if you know the plot it is going to be easier get the shots you are trying to get. This is especially important if you have only one dress rehearsal to work with.

Comment
February 16,  2023 Quick Picks-4.jpg
February 16,  2023 Quick Picks-6.jpg
February 16,  2023 Quick Picks-10.jpg
February 16,  2023 Quick Picks-20.jpg
February 16,  2023 Quick Picks-23.jpg
February 16,  2023 Quick Picks-25.jpg
February 16,  2023 Quick Picks-26.jpg
February 16,  2023 Quick Picks-32.jpg
February 16,  2023 Quick Picks-33.jpg
February 16,  2023 Quick Picks-35.jpg
February 16,  2023 Quick Picks-4.jpg February 16,  2023 Quick Picks-6.jpg February 16,  2023 Quick Picks-10.jpg February 16,  2023 Quick Picks-20.jpg February 16,  2023 Quick Picks-23.jpg February 16,  2023 Quick Picks-25.jpg February 16,  2023 Quick Picks-26.jpg February 16,  2023 Quick Picks-32.jpg February 16,  2023 Quick Picks-33.jpg February 16,  2023 Quick Picks-35.jpg

Photographing a Dress Rehearsal: Frozen

Joshua Hubbell February 21, 2023

I’ve been photographing a dress rehearsal again. Don’t worry, I have permission to post these photos.


Up front, these are from Indian Creek School’s performance of Frozen Jr. which will be performed on their campus on February 22, 23, 25 and 26. I strongly encourage you to check out their website for more information on how to get tickets to check out their show – you are in for a great performance if you do.


Or just click here: https://indiancreekschool.ludus.com/index.php?show_id=200433386


Anyway, when photographing stuff going on stage, I try to focus on 3 things.


1)      Emotion.

2)      Interaction.

3)      Space.

Emotion is obvious. All performances are different, but if you take the time to learn the material ahead of time or at least watch the movie before the dress rehearsal you can have a pretty good idea what emotions will be happening and a general idea of when they will occur. Be ready and photograph those emotions. Keep in mind the performers may be speaking or singing while showing the emotion so be ready.


Interaction is also obvious but can be easy to lose if you become too focused on individual characters. Look for the character interactions and photograph that. It isn’t often that you can get someone getting hit with ice magic or photograph someone having a sword being swung at them but you can in plays. But also go for the regular character interactions or dancing.


Finally, for space, look for ways to give your subjects space. In musicals, especially during solo parts, I enjoy giving the subject space to sing into. This especially works well if they are using their arms in the performance.


Bonus tip: bring step stools if you have the audience section to yourself during the dress rehearsal.

Comment
February 14, 2023 Post.jpg
February 14, 2023 Post-8.jpg
February 14, 2023 Post-9.jpg
February 14, 2023 Post-6.jpg
February 14, 2023 Post-3.jpg
February 14, 2023 Post-5.jpg
February 14, 2023 Post-4.jpg
February 14, 2023 Post-7.jpg
February 14, 2023 Post BS-6.jpg
February 14, 2023 Post.jpg February 14, 2023 Post-8.jpg February 14, 2023 Post-9.jpg February 14, 2023 Post-6.jpg February 14, 2023 Post-3.jpg February 14, 2023 Post-5.jpg February 14, 2023 Post-4.jpg February 14, 2023 Post-7.jpg February 14, 2023 Post BS-6.jpg

Bring toys.

Joshua Hubbell February 14, 2023

Don’t ever be afraid to give your kid toys during a photo session. Kids play and if giving them toys gives them something to do then that’s great. As I always say, people look awesome doing something -especially something they like doing. Kids tend to like playing with toys so give them toys and let’s get some awesome photos of them playing. Toys can also work as an awesome ice breaker to get rid of those nervous jitters and get that smile out.


In other words, this is just another way to say that if you want great photos of your kids then let them be kids! Whether it is a formal dress event or just a nice day at the park, photos of your kids will be much more authentic if you just let them be themselves as opposed to someone you want them to be for that event. There may be a wedding, but your kids are still kids. There may be some sort of political inauguration with powerful men and women in every seat in the house and your kids are still kids. Let them be kids and that friendly chaos will give you photography gold at some point and give you photos worth having on your wall.

Comment
February 9, 2023 Post-7.jpg
February 9, 2023 Post GS-2.jpg
February 9, 2023 Post-5.jpg
February 9, 2023 Post-4.jpg
February 9, 2023 Post GS-3.jpg
February 9, 2023 Post-9.jpg
February 9, 2023 Post GS-11.jpg
February 9, 2023 Post-7.jpg February 9, 2023 Post GS-2.jpg February 9, 2023 Post-5.jpg February 9, 2023 Post-4.jpg February 9, 2023 Post GS-3.jpg February 9, 2023 Post-9.jpg February 9, 2023 Post GS-11.jpg

Let toddlers explore.

Joshua Hubbell February 9, 2023

I have been very busy so here is a quick session I did the other day. When working with kids, especially young kids, give them something to explore. In this case, I gave her some of my juggling gear. Generally, the more they can pick the items up and look at them from different angles the better it will work out for you. Within reason though, obviously I am not giving her my juggling machetes or juggling torches. Use your best judgement.


This shot was done with just two lights. The key light was just off to the side and equipped with a softbox that had a grid attached. The hair light was up above and had a snoot with a grid on. The trick with snoots and two year olds is that two year olds move around and snoots tend to cover a narrow area. So, keep your subject in mind when using a snoot.

Comment
February 7, 2023 Post.jpg
February 7, 2023 Post-2.jpg
February 7, 2023 Post-3.jpg
February 7, 2023 Post-7.jpg
February 7, 2023 Post-4.jpg
February 7, 2023 Post-5.jpg
February 7, 2023 Post-6.jpg
February 7, 2023 Post.jpg February 7, 2023 Post-2.jpg February 7, 2023 Post-3.jpg February 7, 2023 Post-7.jpg February 7, 2023 Post-4.jpg February 7, 2023 Post-5.jpg February 7, 2023 Post-6.jpg

Two light Low-Key

Joshua Hubbell February 7, 2023

Most times when I am demonstrating a low-key lighting setup, I am keeping it simple and demonstrating a single light low-key setup. But you can always add more lights. In these photos we did a two light low-key setup. The first set is of me but to be honest this lighting technique works better with an athlete or someone wearing hat. So, I brought in someone wearing a hat.


This is the bare bones of this technique, and it is worth practicing occasionally because you can build on it. You could throw in a key light and fill light and use this as a rim lighting or just add a key light. Regardless, it is useful to know how to do if you have the lights to pull it off. Once again, everything you practice, regardless of whether or not you use it consistently in your actual work, is stuff you can pull out when it’s moment arrives. If you have been practicing, it will come out with ease, if you haven’t you may stumble at that moment.


Anyway, obviously this was done with two lights. The only modifier were reflector dishes on each light. The lights were strobes, but I could have easily used speedlights instead. Each light was just off to the side and back to my subject and adjusted as needed from there to meet the need of each individual shot. Thankfully, with such simple modifiers moving things around was easy.

Comment
February 2, 2023 Post.jpg
February 2, 2023 Post-2.jpg
February 2, 2023 Post-3.jpg
February 2, 2023 Post-4.jpg
February 2, 2023 Post-5.jpg
February 2, 2023 Post-6.jpg
February 2, 2023 Post-7.jpg
February 2, 2023 Post-8.jpg
February 2, 2023 Post-10.jpg
February 2, 2023 Post-11.jpg
February 2, 2023 Post.jpg February 2, 2023 Post-2.jpg February 2, 2023 Post-3.jpg February 2, 2023 Post-4.jpg February 2, 2023 Post-5.jpg February 2, 2023 Post-6.jpg February 2, 2023 Post-7.jpg February 2, 2023 Post-8.jpg February 2, 2023 Post-10.jpg February 2, 2023 Post-11.jpg

Props and Wardrobe

Joshua Hubbell February 2, 2023

As always, props, props, props. You don’t need a lot of them, in this case its just a rocking chair from some grocery store that was acquired a long time ago, but even one good prop can go a long way in terms of giving your subject intrigue and something to do. After all, having something to do just makes for a better photos usually when it comes to people.


Next, of course, is fashion. I suggest working with the parents on this when it comes to kids. At least one parent will have nice set of cloths to work with but do take it a step further and tell them what you have in mind. That way you can coordinate your photo shoot with their wardrobe options. I guess the point I am trying to make is the communication aspect of photography extends well beyond what you are saying in your photos. Talk to everyone involved as information is key for everyone to do what they need to do.


This is a two-light setup. One strobe with a softbox and a grid up high aimed down at the subject – the key light. Then the kicker light – a speedlight in back just off to the side with no modifiers. Photography doesn’t have to be complicated or it can be extremely complicated, it really is a matter of what you are going for.

Comment
← NewerOlder →

Search Posts

Powered by Squarespace