• Graphite, Charcoal, Pastel
    • Oil Paintings
    • Military experience art
  • Artist Statement
    • Pets
    • Kid Photos
    • Family Photos
    • Couples
    • Travel and Nature
  • Photo Blog
  • Media
  • Contact
Menu

Single-Handed Arts, LLC

Fine Arts and Photography Services
  • Fine Art
    • Graphite, Charcoal, Pastel
    • Oil Paintings
    • Military experience art
  • Artist Statement
  • Photography
    • Pets
    • Kid Photos
    • Family Photos
    • Couples
    • Travel and Nature
  • Photo Blog
  • Media
  • Contact
×
October 4, 2023 Post-3.jpg
October 4, 2023 Post-1.jpg
October 4, 2023 Post-2.jpg
October 4, 2023 Post-4.jpg
October 4, 2023 Post-5.jpg
October 4, 2023 Post-3.jpg October 4, 2023 Post-1.jpg October 4, 2023 Post-2.jpg October 4, 2023 Post-4.jpg October 4, 2023 Post-5.jpg

A brief visit by an uninvited guest in the basement.

Joshua Hubbell October 4, 2023

Who is she? And what is she doing in the basement? And most importantly of all, when did this house have a basement?


This was a single light setup with a blue gel. I also wanted a very specific light shape so I made a “window” out of plexiglass and black background. I put the strobe on the other side and got to the stop of the stairs. Also, there is a strip or two of white poster board along the stairs to reflect a little light.

Comment
October 2, 2023 Post-1.jpg
October 2, 2023 Post-2.jpg
October 2, 2023 Post-1.jpg October 2, 2023 Post-2.jpg

Light and shadow practice.

Joshua Hubbell October 2, 2023

I’ve been doing some athlete photos lately and a specific look was requested. I already had an idea in mind, but this was some of my practice work for that. In these photos it is a two-light setup, though I ended up going with three lights for the actual photos. The major part is the back light which is high up behind the subject with the subject’s body hiding the light stand (though in one of the photos you can see a bit of it). This creates that light area around the front of the subject.


Actually, the major part of this photo is having strobes capable of high speed sync. This allows me to go faster with my shutter speed and really knocks out some of the ambient light. That’s important because these photos were taken outside, on a sunny day, around 3:30 PM. I knew this scenario was going to be similar to the times I’d be working with the athletes and that the sun would be the trickiest light to deal with. So, I set a scenario up where I could get rid of the sun.


Now, it didn’t totally eliminate the sunlight. I did have to do some processing trickery to finish things up, but this setup got me a good 85% of the way there, which is all I needed to make it look like this. Light and shadows are big parts of photography. The more you practice manipulating them, the more you will be able to work around seemingly impossible issues you encounter in your sessions.  


In the actual session, I made things even easier by finding a shady area. That got me even closer, I’d say about 95% of the way there.

Comment
September 22, 2023-1.jpg
September 22, 2023-3.jpg
September 22, 2023-4.jpg
September 22, 2023-6.jpg
September 22, 2023-8.jpg
September 22, 2023-9.jpg
September 22, 2023-10.jpg
September 22, 2023-12.jpg
September 22, 2023-14.jpg
September 22, 2023-21.jpg
September 22, 2023-1.jpg September 22, 2023-3.jpg September 22, 2023-4.jpg September 22, 2023-6.jpg September 22, 2023-8.jpg September 22, 2023-9.jpg September 22, 2023-10.jpg September 22, 2023-12.jpg September 22, 2023-14.jpg September 22, 2023-21.jpg

Photography off the boat.

Joshua Hubbell September 22, 2023

Excursions can be a great opportunity for photography. However, your time is limited as you need to be back on the ship before it leaves so careful planning can go a long way. Before you get on the cruise, study maps of the area and plan. Figure out where your ship will dock at and where you can go from there. If you have activities you’ve signed up for then plan around those but understand you will likely need to meet someplace before that scheduled time.


If you aren’t registering for any guided activities have a good time but a reasonable mindset – you won’t be the only person there and may have to work around a crowd. This is doable, but you will have a less stressful time if you accept that as a foregone conclusion. Also, not every whale watch tour or bear watch tour sees bears or whales so photograph what you can get.


Finally, explore the town. Juneau had a lot of cool things to photograph both in terms of natural beauty but also in terms of manmade beauty. Meanwhile, in Skagway, I immediately hiked to the Miners Graveyard and was able to get there before the tour groups arrived – I had the waterfall to myself for about 30 minutes, that’s 30 minutes of a waterfall without another human in the way. These locations your cruise stops at have things worthy of a photo, but you have to explore for them.

Comment
September 21, 2023 extra-1.jpg
September 21, 2023 extra-2.jpg
September 21, 2023 extra-3.jpg
September 21, 2023 extra-1.jpg September 21, 2023 extra-2.jpg September 21, 2023 extra-3.jpg

Quick addendum to yesterday's post.

Joshua Hubbell September 21, 2023

One quick addendum to yesterday’s post. I mainly worked off 3 decks in Glacier National Park. Way up on deck 17 (and 16), my stateroom balcony on deck 12, and deck 7 (and 6). I get the math but decks 17 and 16 are about the same perspective, as are decks 7 and 6.


When I wanted to make the mountains look towering or get wildlife photos then I worked from decks 6/7. When I wanted to see distance, more of the mountain, and get up to level then I worked from decks 16/17. When I wasn’t sure or things were getting crowded, I worked from deck 12.


Anyway, the other considerations for what deck I wanted depended on two other factors as well:


1)      How crowded was the location I was going to likely to be. If they just announced a location and I wasn’t there, going to the obvious deck and side was going to be crowded. There’d already be people there and it would be tricky to get a good spot.

2)      Could I get there in time? Usually the answer was yes, but sometimes I backed off to prep for the next location or adjust my gear.

It also helped to look at the route and know that the ship wasn’t on a looped course. It was a straight route to the Johns Hopkins Glacier and then turn around and back the same way. That means two chances at anything I wanted photos of as well as a different angle and different time of day.


#Marylandphotographer #annearundelphotographer #photographytips

Comment
September 7, 2023 extra-1.jpg
September 7, 2023 extra-2.jpg
September 7, 2023 extra-4.jpg
September 7, 2023 extra-8.jpg
September 7, 2023 extra-3.jpg
September 7, 2023 extra-5.jpg
September 7, 2023 extra-6.jpg
September 7, 2023 extra-7.jpg
September 7, 2023 extra-9.jpg
September 7, 2023 extra-10.jpg
September 7, 2023 extra-1.jpg September 7, 2023 extra-2.jpg September 7, 2023 extra-4.jpg September 7, 2023 extra-8.jpg September 7, 2023 extra-3.jpg September 7, 2023 extra-5.jpg September 7, 2023 extra-6.jpg September 7, 2023 extra-7.jpg September 7, 2023 extra-9.jpg September 7, 2023 extra-10.jpg

Photographing while on the Cruise Ship

Joshua Hubbell September 20, 2023

The cruise I was on spent time going through Glacier National Park. This involved bringing park rangers on board so they could give a guided tour over the intercom. It was really cool.


The first thing you need to consider is that you are on a moving object, so you must adjust for that movement. I did this by bumping up my shutter speed as if I were photographing a sporting event. I did initially see some tripods out but they quickly disappeared once those photographers realized that everyone on the cruise ship was going to be outside to see the park so it would be next to impossible to use a tripod. Personally, I like to be mobile anyway, so I didn’t even bring a tripod with me on this trip.


That brings us to location. The previous update I mentioned exploring the ship and really knowing what was accessible. This came in handy. For starters, shots from way up on deck 17 are going to look entirely different from shots on deck 8 or the stateroom balcony I had access to on deck 12. I was already aware of this as I had walked this ship numerous times every single day of the cruise. That stated, there was one other location I was aware of, thanks to exploring the ship, that most passengers were totally ignorant of – Deck 7 had exterior areas on either side of the life rafts.


So which deck do you use? All decks, but you look at the map ahead of time and plan accordingly. You try to be one step ahead of the tour and get to the side of the ship before the ship gets to the next major point of interest. For example, I knew the boat would have to turn around once we hit Johns Hopkins Glacier (named for Johns Hopkins University). So, I parked on the back exterior of the ship and was more than ready for an awesome front row view of the glacier.


Between all that I took shots of the mountains and of the wildlife. In all I saw seagulls, sea otters, and seals.


Next time, I’ll write some advice for excursions.

Comment
September 4, 2023-1.jpg
September 4, 2023-5.jpg
September 4, 2023-2.jpg
September 4, 2023-3.jpg
September 4, 2023-6.jpg
September 4, 2023-7.jpg
September 4, 2023-8.jpg
September 4, 2023-9.jpg
September 4, 2023-10.jpg
September 4, 2023-1.jpg September 4, 2023-5.jpg September 4, 2023-2.jpg September 4, 2023-3.jpg September 4, 2023-6.jpg September 4, 2023-7.jpg September 4, 2023-8.jpg September 4, 2023-9.jpg September 4, 2023-10.jpg

A mini one tying into yesterday’s post.

Joshua Hubbell September 19, 2023

Explore the ship during the day and then do it again at night. I wasn’t in a location at any point on the clear nights that I could see the aurora borealis, but I tried, and I was ready for it had I lucked out. But there are things to see out there at night. The cruise ship itself looks different at night not to mention the moon and the sky and the water. There are things to work with on a cruise ship at night when it comes to photography so get out there and try it.

Comment
September 3, 2023-4.jpg
September 3, 2023-1.jpg
September 3, 2023-2.jpg
September 3, 2023-3.jpg
September 3, 2023-5.jpg
September 3, 2023-7.jpg
September 3, 2023-9.jpg
September 3, 2023-10.jpg
September 3, 2023-6.jpg
September 3, 2023-8.jpg
September 3, 2023-4.jpg September 3, 2023-1.jpg September 3, 2023-2.jpg September 3, 2023-3.jpg September 3, 2023-5.jpg September 3, 2023-7.jpg September 3, 2023-9.jpg September 3, 2023-10.jpg September 3, 2023-6.jpg September 3, 2023-8.jpg

Cruise Photography Tips

Joshua Hubbell September 18, 2023

I was away on a cruise to Alaska. It was wonderful and I really got to try new things with my photography that I’d normally not be able to try. There were a few things that worked really well for me, and I will be sharing those tips this week and of course some of the photos. Many of these tips could easily work for just general travelling so if you aren’t cruising you can still get something out of these. That stated, normally, I do family, weddings, theater, or sports photography so this is stuff out of my normal wheelhouse.


With all that out of the way, let’s start by hitting you with something rough. Temper expectations. You are going to see a lot of amazing things and experience a lot of cool and unique things. However, Ansel Adams didn’t build an amazing nature photo portfolio by photographing from a cruise ship. He got out into nature. Don’t get me wrong – you will take great pictures, but they will be great pictures from a cruise ship. They will probably look a lot like all the great pictures taken from the ship the previous week and a lot like the great pictures taken from the ship the next week this cruise goes. Do take pictures, but just be realistic about what you can actually accomplish from a cruise ship.


Next up, let’s talk about preparation. Before you get on that boat, you need to know what weather you are likely to experience and prepare for that. I knew there was a high chance I’d experience rain and cold weather. So, I was prepared for that. I had a rain cover for my camera that could accommodate any lens I currently own and I had layered outfits planned with lots of pockets, so I didn’t have to open my camera bag 27 times in the rain. I also have salt packets in my bag to reduce moisture in it. This tip also means you need to know how to use all this weather gear you plan to have. Having a rain cover is pointless if you don’t know how to put it on your camera and operate your camera with it on.


Finally, use the first day on the ship to walk everywhere you can. You want to know the ship and take some establishing shots. You might also want to scope out a few areas for framing and usually you can get access to spaces you normally can’t on the first day. For example, you could walk all around the go-kart raceway and all over the laser tag area on the first day of my cruise. This provided sights you normally don’t see unless you are go-karting or playing laser tag.

Comment
August 28, 2023 Post-2.jpg
August 28, 2023 Post-3.jpg
August 28, 2023 Post-1.jpg
August 28, 2023 Post-5.jpg
August 28, 2023 Post-4.jpg
August 28, 2023 Post-7.jpg
August 28, 2023 Post-10.jpg
August 28, 2023 Post-11.jpg
August 28, 2023 Post-8.jpg
August 28, 2023 Post-9.jpg
August 28, 2023 Post-6.jpg
August 28, 2023 Post-2.jpg August 28, 2023 Post-3.jpg August 28, 2023 Post-1.jpg August 28, 2023 Post-5.jpg August 28, 2023 Post-4.jpg August 28, 2023 Post-7.jpg August 28, 2023 Post-10.jpg August 28, 2023 Post-11.jpg August 28, 2023 Post-8.jpg August 28, 2023 Post-9.jpg August 28, 2023 Post-6.jpg

Back to posting.

Joshua Hubbell August 28, 2023

Alright, let’s get this up and running again. I was a bit busy over the summer with photography work and am now just catching up.


I don’t normally try to push a photo session type but if you have multiple kids at different ages, I recommend a group session for them when one goes off to college or moves to go to trade school. It will be important for them once reality sets in for each of them how things are changing, which is usually not until it happens. It will also be important to you as a parent, of course.


When working on a session like this I make sure each sibling does an individual session with the exiting student and then a group photo of them all. And of course, everything in between too. Also, I try to loop a common interest or talent. In this case, juggling and just looking awesome was their common thread and they pulled it off extremely well.


Congratulations to my assistant and model. Good luck at college and I can’t wait to see what you accomplish next!

Comment
June 20, 2023 Post-4.jpg
June 20, 2023 Post-7.jpg
June 20, 2023 Post-5.jpg
June 20, 2023 Post-1.jpg
June 20, 2023 Post-2.jpg
June 20, 2023 Post-3.jpg
June 20, 2023 Post-6.jpg
June 20, 2023 Post-8.jpg
June 20, 2023 Post-4.jpg June 20, 2023 Post-7.jpg June 20, 2023 Post-5.jpg June 20, 2023 Post-1.jpg June 20, 2023 Post-2.jpg June 20, 2023 Post-3.jpg June 20, 2023 Post-6.jpg June 20, 2023 Post-8.jpg

Photographing a Kendo Tournament

Joshua Hubbell June 20, 2023

I’ve been busy processing, so I haven’t had much chance to showcase a write up. However, this past weekend I went out to the Baltimore-Annapolis Kendo Tournament and took some photos. These are only from my last card of that day as my PC is overwhelmed with raw photos from 3 other projects right now but it is more than enough to write about.


Get permission. Don’t just head to an event like this and start snapping shots. Make sure the people running the event know you will be there and what you will be doing. When you show up, take some time to look around and understand what is acceptable. For example, you will notice no one in any of these photos as any shoes on so obviously I had no shoes on either. Or better yet, do some research on etiquette ahead of time.


As for capturing the action, this art moves slowly and then suddenly fast, especially with the higher ranked contenders. There may be brief moments of two individuals barely moving followed by a burst of sudden action. You really have to go with your gut on this as to when to start photographing. If you wait for the movement to start, you will likely miss the most important part of the strike entirely. It’s tricky but it gets easier as you spend more time with it. Also, a step stool doesn’t hurt so you can get over the crowds. Gear wise it was me, a 70-200mm lens, and a step stool.


If you are more interested in the content of the photos rather than how to take these photos, and are 12 years old or older, I suggest you get in contact with the Baltimore-Annapolis Kendo Club. They are very welcoming and would love to hear from you. You can find more information at https://www.facebook.com/bakendo and their main page at https://www.baltimoreannapoliskendo.org/ (check out their “Getting Started” tab)

Comment
June 1, 2023 Post.jpg
June 1, 2023 Post-2.jpg
June 1, 2023 Post-4.jpg
June 1, 2023 Post-3.jpg
June 1, 2023 Post-5.jpg
June 1, 2023 Post-6.jpg
June 1, 2023 Post.jpg June 1, 2023 Post-2.jpg June 1, 2023 Post-4.jpg June 1, 2023 Post-3.jpg June 1, 2023 Post-5.jpg June 1, 2023 Post-6.jpg

Dramatic Prom Dresses

Joshua Hubbell June 1, 2023

Once it got dark, we left the park and headed outside my studio. There I set up my fog machine and 2 strobes. The key light had my octagon softbox again. The backlight is where the magic happens for this though. I took my other strobe and put a gel on it and then aimed it at my subject. Once I laid down the fog like I wanted I’d take my subject’s picture. The light would hit the fog and light everything up and you get a really awesome shot.


It isn’t that easy though. Two things must be managed at the same time. First, your subject has to be between your light and your camera. That sounds easy, but remember, there is a wall of fog between your subject and that light, so it isn’t that easy to see. I ended up using a strip of paper to mark where I needed to stand.


The next problem was the fog itself. Once the machine puts it out, you need to move because even light wind will carry it all away. So, you need to figure out how much you want out and how much time you have once it is out. Now, I love my fog machine, but it is as cheap as they come, so it only puts out fog for about 10 seconds and then needs a minute to cool down. The short answer is you figure it out by trying it several times. Practice.

Comment
May 31, 2023 Post.jpg
May 31, 2023 Post-2.jpg
May 31, 2023 Post-3.jpg
May 31, 2023 Post-5.jpg
May 31, 2023 Post-4.jpg
May 31, 2023 Post-6.jpg
May 31, 2023 Post-7.jpg
May 31, 2023 Post-8.jpg
May 31, 2023 Post.jpg May 31, 2023 Post-2.jpg May 31, 2023 Post-3.jpg May 31, 2023 Post-5.jpg May 31, 2023 Post-4.jpg May 31, 2023 Post-6.jpg May 31, 2023 Post-7.jpg May 31, 2023 Post-8.jpg

Prom Dress Photos in the Park

Joshua Hubbell May 31, 2023

Continuing from the previous post, when we got done with the studio, we headed to Kinder Farm Park and made good use of the weather and location.


Once again, your local parks are great for a photo session and often are available for one too. If you are doing this commercially you need to get a permit. Even if you are not doing it commercially, if someone could mistake you for doing it commercially you probably want to get a permit. Thankfully, permits are free in Anne Arundel County and only cost the time to send the email. If this is the case for you too, I recommend you be specific in your request and play with an open hand. For example, I like to move with an external flash, so I always make that clear in permit requests.


We made good use of the cloudy weather by making the sun appear. By that I mean I put orange gels on my strobe and used it as sunlight. I find a single orange gel doesn’t work well enough and usually stack two of the oranges to make this happen. Your milage may vary depending on your gels and your external light.


After a nice walk in the park, it started to get dark, so we headed to another location to do another session. More on that next post.

Comment
May 30, 2023 Post-8.jpg
May 30, 2023 Post.jpg
May 30, 2023 Post-2.jpg
May 30, 2023 Post-3.jpg
May 30, 2023 Post-4.jpg
May 30, 2023 Post-5.jpg
May 30, 2023 Post-6.jpg
May 30, 2023 Post-7.jpg
May 30, 2023 Post-8.jpg May 30, 2023 Post.jpg May 30, 2023 Post-2.jpg May 30, 2023 Post-3.jpg May 30, 2023 Post-4.jpg May 30, 2023 Post-5.jpg May 30, 2023 Post-6.jpg May 30, 2023 Post-7.jpg

Prom Dress Sessions 1 of 3

Joshua Hubbell May 30, 2023

This weekend was amazing. I got to do some really cool photo sessions with three young women in their prom dresses. So, the next three posts are going to be built around that. This will be three different ways to do cool things with a prom outfit photo session. For the first one, I kept it close to home by doing it in my home studio.


For the studio session, I wanted to make use of color, because prom is about bright colorful outfits, especially for the girls. So, I matched a gel to each dress and used it as a backlight for that subject. Then I used a strobe equipped with an octagon softbox for a key light. For the group shots I threw in an additional light on the side as a fill light. Truth be told, I can’t recall if it was a long box or another octagon softbox, but I know it had a grid on it.


Not everything went perfectly, the red light wasn’t spaced far enough away from the other two in the group shots and basically just disappeared, but we rolled with it. The main point was to get some colors out there and that happened. When something doesn’t work during a session you have to ask yourself two questions really fast: how long will this take to fix and is it needed? In this case I decided it’d take too long, and it wasn’t needed. After that, you just move on.


In this case, it really helps that I had awesome subjects supported by their awesome moms on set.  It kept things fun and fun makes for great photos. But the fun didn’t end at the studio. When we got done, we packed up and moved on to our next location. More on that in my next post.

Comment
May 24, 2023 The Moon.jpg
May 24, 2023 The Moon-2.jpg
May 24, 2023 The Moon-3.jpg
May 24, 2023 The Moon.jpg May 24, 2023 The Moon-2.jpg May 24, 2023 The Moon-3.jpg

The Moon.

Joshua Hubbell May 25, 2023

Still in the midst of a lot of photography work.


But since the moon is out, and I think I’ve got it done okay, here is another shot of the moon. There are lots of ways to photograph the moon, balancing your shutter speed/ISO/F-stop any number of ways. This time I am using a tripod. Tripods are great for countless number of photography projects.


Using a tripod allowed me to reduce my shutter speed by a significant amount, meaning I could bring my ISO down and open up my aperture. Just be sure to watch out for that button shake when you take the photo. Ideally, you will use some sort of remote or set your camera to a time delay to account for that shake. Or just be really careful when pushing that button.


Finally, be careful with reducing the shutter speed to low. The moon is moving faster through the sky then you realize and you just might get a blurry image from it moving too quickly if your shutter speed is too slow.  

Comment
May 23, 2023 Post.jpg
May 23, 2023 Post-2.jpg
May 23, 2023 Post-3.jpg
May 23, 2023 Post-4.jpg
May 23, 2023 Post.jpg May 23, 2023 Post-2.jpg May 23, 2023 Post-3.jpg May 23, 2023 Post-4.jpg

Birthday Candles in the Dark

Joshua Hubbell May 23, 2023

I am still rather busy, so sorry for the slow down of photography tips.


Birthdays can be tricky, especially if you are doing it in the evening or going for the candles in the dark room look. But this is where your understanding of your camera, ISO, F-stop, and shutter speed all come into play. If you understand those things then you should be able to pull off some decent birthday cake shots.


But before that, take a moment to look around and scout the best angles as well as look for foreground and background things to remove. I am talking about trash cans or maybe the table needs another wipe down. Also look for the best angle. Usually, the person or people hosting the party won’t mind adjusting a little to help you get that shot. A little though, don’t push your luck too far. Find out where they want to have the cake and work from there.


Finally, know you will be working in the dark and with a low light. That means higher ISO, wider F-stop, and slower shutter speed. That also means less movement on your end. You want to keep that camera steady. A tripod might come to mind but that may not be realistic depending on the number of people around. Your mileage will very as not all brands are uniform thus a good understanding of your gear is what matters the most.

Comment
May 15, 2023 Post.jpg
May 15, 2023 Post-2.jpg
May 15, 2023 Post-4.jpg
May 15, 2023 Post-5.jpg
May 15, 2023 Post-6.jpg
May 15, 2023 Post-7.jpg
May 15, 2023 Post-8.jpg
May 15, 2023 Post-9.jpg
May 15, 2023 Post-10.jpg
May 15, 2023 Post.jpg May 15, 2023 Post-2.jpg May 15, 2023 Post-4.jpg May 15, 2023 Post-5.jpg May 15, 2023 Post-6.jpg May 15, 2023 Post-7.jpg May 15, 2023 Post-8.jpg May 15, 2023 Post-9.jpg May 15, 2023 Post-10.jpg

Making golden hour

Joshua Hubbell May 15, 2023

More practice with making my own golden hour. I needed my backdrop travel ready, so I did some outside work. For this sort of trick, you want to experiment with CTO (Color Temperature Orange) gels. Remember, you can stack gels so if that orange isn’t orange enough, stack another orange on it. Usually gel packs have at least 2 orange colors, if not more.


For light setup, you really want trees or tall plants, so if you are working this on property you leave on it really helps to do a poor job at the yard work, especially around fences or the property line. Obviously, you need a light stand tripod for your light. I am using a fancy outdoor strobe for this, but you can do this with a speedlight too – you just will likely need to have the speedlight closer as it isn’t as powerful.


A few other things to keep in mind. You will be shooting with a light behind your subjects so either plan for that shadow or bring another light/reflector for the front of your subjects. Speaking of your subjects, remember they can be a variable in all this depending on the age so plan accordingly. With children and babies, it’s better to move on to the next pose or location than to keep trying something they just don’t want to do. You can either waste time trying to understand why, or you can spend that time taking pictures with other poses/locations; it is your call.


Finally, dogs are great. My dog is especially great and especially when she decides to stand in front of my shot. That happens, just roll with it. If photography has taught me anything, it is that something will get in the way of your shot at some point. You can have all sorts of reactions, or you can just move on to the step you will ultimately move on to; adjust and take the next shot. One option wastes time and other saves time, choose wisely.

Comment
May 12, 2023 Post-2.jpg
May 12, 2023 Post.jpg

Art showing!

Joshua Hubbell May 12, 2023

Luis is having an art show at MICA today between 5:30pm and 8:30 at 1305 W Mt Royal Ave, Baltimore, MD 21217 in the Main building (the building is called the Main building). His work will be on display until Monday with a few pieces for sale. He will be there to talk and answer questions today so stop by and see some great art by a great artist.

Comment
May 10, 2023 Post.jpg
May 10, 2023 Post-2.jpg
May 10, 2023 Post-3.jpg
May 10, 2023 Post-4.jpg
May 10, 2023 Post-5.jpg
May 10, 2023 Post-6.jpg
May 10, 2023 Post-7.jpg
May 10, 2023 Post-8.jpg
May 10, 2023 Post.jpg May 10, 2023 Post-2.jpg May 10, 2023 Post-3.jpg May 10, 2023 Post-4.jpg May 10, 2023 Post-5.jpg May 10, 2023 Post-6.jpg May 10, 2023 Post-7.jpg May 10, 2023 Post-8.jpg

Joshua Hubbell May 10, 2023

And back. Shrek the Musical left me with several thousand photos to go through and I’ve just now finished processing them. My condolences if you missed the show but congratulations to the cast and crew for making a show that sold out – it was amazing!


Anyway, here are a few photos I took a few weekends ago. These are shots without a strobe – which is perfectly fine. Just be sure to understand the lighting when you choose to take them (which is a trick statement as you should always understand the lighting whenever you take pictures; strobe or no strobe). These were taken at golden hour, which means lots of shade when around trees.


As for working with a toddler, that’s still an age to let them walk around and explore but you can still give basic directions. Sit here or stand here work well, but only for a few seconds as they tend to keep on the move. Take advantage of this exploration though when they look in a direction you need or look at a flower or something. It doesn’t hurt to have a parent help with directions too.  

Comment
April 27, 2023 Post.jpg
April 27, 2023 Post-2.jpg
April 27, 2023 Post-4.jpg
April 27, 2023 Post-7.jpg
April 27, 2023 Post-8.jpg
April 27, 2023 Post-9.jpg
April 27, 2023 Post-10.jpg
April 27, 2023 Post-11.jpg
April 27, 2023 Post-13.jpg
April 27, 2023 Post.jpg April 27, 2023 Post-2.jpg April 27, 2023 Post-4.jpg April 27, 2023 Post-7.jpg April 27, 2023 Post-8.jpg April 27, 2023 Post-9.jpg April 27, 2023 Post-10.jpg April 27, 2023 Post-11.jpg April 27, 2023 Post-13.jpg

More Dress Rehearsal Tips

Joshua Hubbell April 27, 2023

Once again, Indian Creek School is performing Shrek the Musical. Performances are on:

April 27, 2023 at 7:00 PM

April 28, 2023 at 7:00 PM

April 29, 2023 at 3:00 PM

April 29, 2023 at 3:00 PM

You can get your tickets at: https://indiancreekschool.ludus.com/index.php?show_id=200436295


Tickets are selling out fast, so get yours soon.


Access and movement. Those are two things that are going to heavily impact your photo session and the more you know about both the better you can manage a dress rehearsal photo session.


Starting with access, when photographing a dress rehearsal, you want to know what space you have access to. Will you be confined to a seat? The entire audience seating location? The stage? All of these will impact where you can shoot from. But you can alter that further by simply bringing a step stool. If you are in the audience seating a step stool will bring you up to the cast level when they are on stage, making for better shots. Just be sure to position it strategically because moving a step stool mid performance can be tricky.


That leaves movement. Not just your movement, but also the movement of the cast. Musicals tell a story with dialogue, singing, and dancing. You will want to try and anticipate the movement so you can be where you need to get the photos you have in mind. Will the cast walk in the audience section followed by a spotlight? Will they do a fast tap dance? Will they have a music number that involves dancers jumping in the area? All these movements require different settings and angles to capture in an amazing manner.

It helps if there is more than one dress rehearsal, failing that it helps if you have watched a stage performance version of the show you are photographing. Failing that too, read a plot summary and talk to someone about this specific performance – that is not ideal and not something I have ever tried but if you have nothing else that is better than nothing.

Comment
April 25, 2023 Post-2.jpg
April 25, 2023 Post-7.jpg
April 25, 2023 Post-5.jpg
April 25, 2023 Post-3.jpg
April 25, 2023 Post.jpg
April 25, 2023 Post-4.jpg
April 25, 2023 Post-6.jpg
April 25, 2023 Post-8.jpg
April 25, 2023 Post-2.jpg April 25, 2023 Post-7.jpg April 25, 2023 Post-5.jpg April 25, 2023 Post-3.jpg April 25, 2023 Post.jpg April 25, 2023 Post-4.jpg April 25, 2023 Post-6.jpg April 25, 2023 Post-8.jpg

Shrek the Musical at Indian Creek!

Joshua Hubbell April 25, 2023

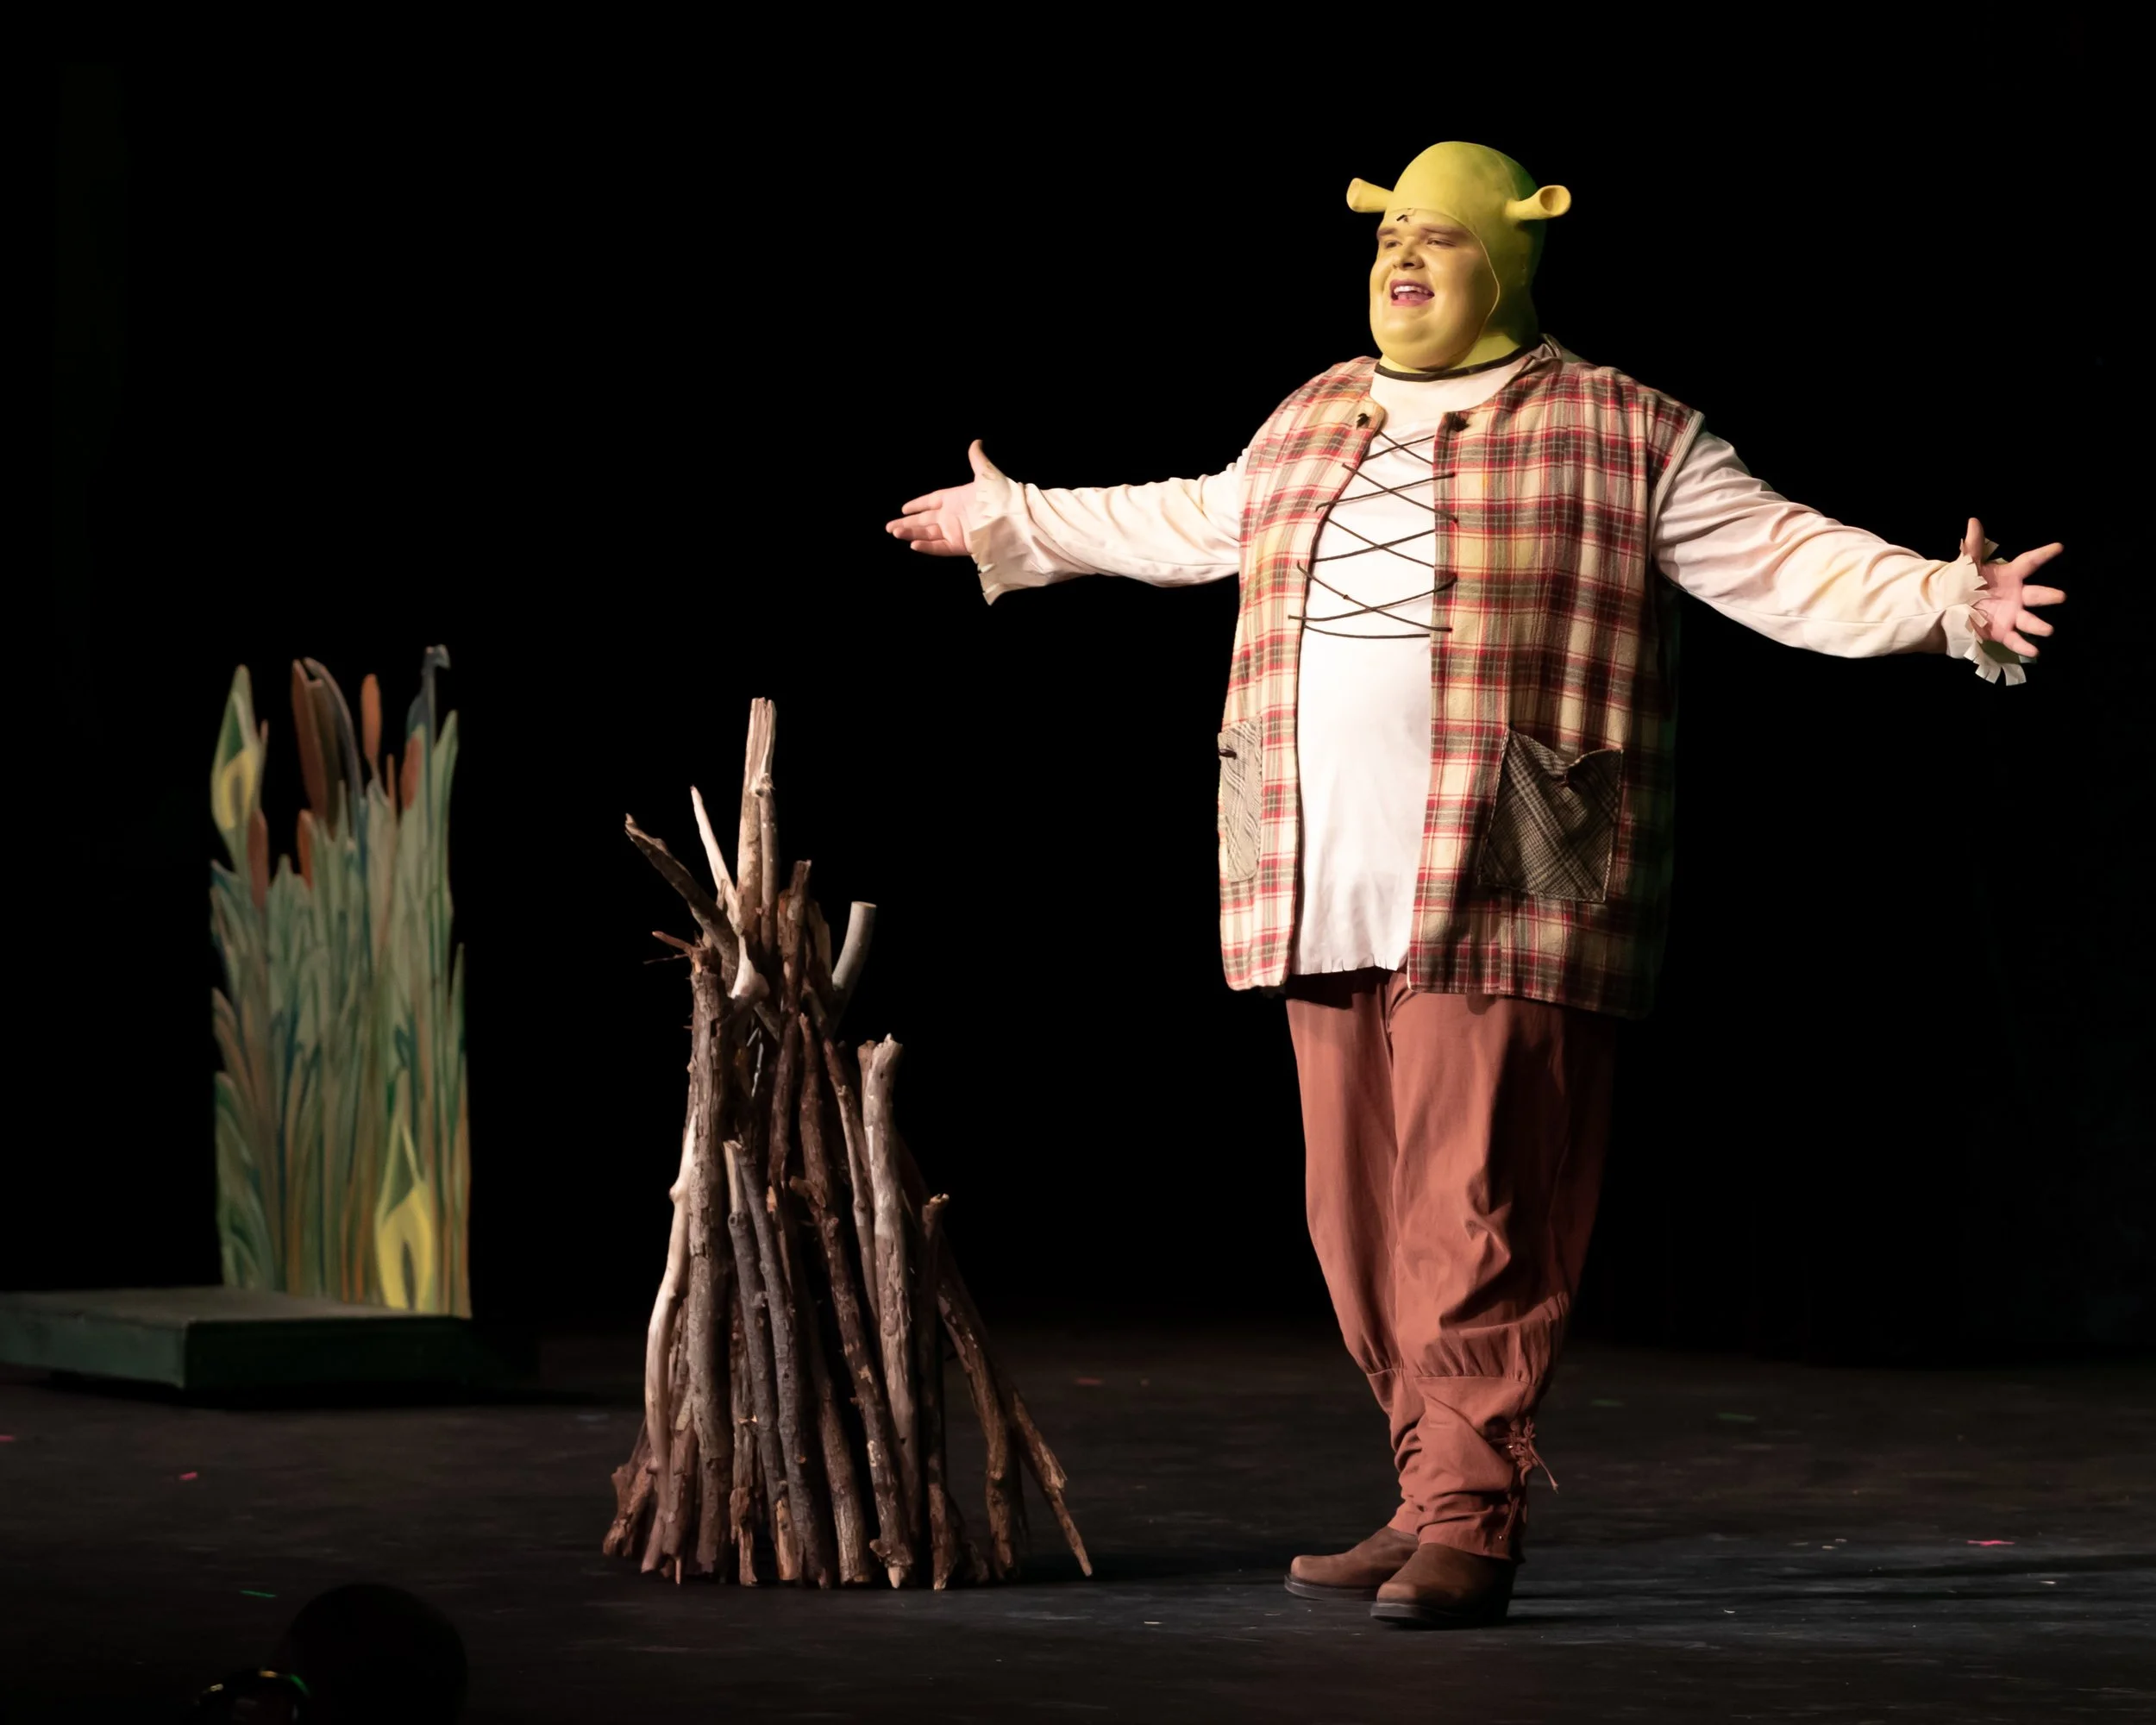
And it’s dress rehearsal time again at Indian Creek School. This time they are performing Shrek the Musical. Performances are on:


April 27, 2023 at 7:00 PM

April 28, 2023 at 7:00 PM

April 29, 2023 at 3:00 PM

April 29, 2023 at 3:00 PM

You can get your tickets at: https://indiancreekschool.ludus.com/index.php?show_id=200436295


Their shows are selling out fast these days so if you plan to go, I’d recommend buying tickets sooner rather than later. Plus, this show has a really cool surprise that I think is a secret so I’ll share those photos next week. YOU WON’T WANT TO MISS THIS SHOW!


This show has been absolute fun to photograph. There are three tips I can give for photographing a show like this:


1)      Negative space – I overuse negative space but it works, especially with musical stage performances. Position yourself in such a way that your subject can speak or sing into an empty space. Thankfully, most places keep their theaters dark while a performance is going on so angling for that void is easier. Bonus if you can get both of their eyes but don’t sweat it if you fail to do that – just be sure to get that void.

2)      Dancing can be tricky – Dancing is tricky. Focus on understanding your shutter speed, aperture, ISO ratio so that you can get a shutter speed with reasonable ISO and aperture. What you are going for depends on if you want to freeze the action (faster shutter speed) or blur the movement (slower shutter).

3)      Know the performance – Every place performs it differently but if you can go in having seen it before or at least have a summary of the plot you will know generally what to expect and which angles to follow based on the characters on stage.


And a bonus tip; be dressed to move fast. Musicals are fast and even the slow ones tend to be fast. I wear jogging shoes and cargo shorts as that helps me hold batteries and memory cards and helps me move at a faster pace.

Comment
April 14, 2023 Post.jpg
April 14, 2023 Post-2.jpg
April 14, 2023 Post-5.jpg
April 14, 2023 Post-3.jpg
April 14, 2023 Post-4.jpg
April 14, 2023 Post-6.jpg
April 14, 2023 Post-7.jpg
April 14, 2023 Post-8.jpg
April 14, 2023 Post.jpg April 14, 2023 Post-2.jpg April 14, 2023 Post-5.jpg April 14, 2023 Post-3.jpg April 14, 2023 Post-4.jpg April 14, 2023 Post-6.jpg April 14, 2023 Post-7.jpg April 14, 2023 Post-8.jpg

Spring

Joshua Hubbell April 14, 2023

It’s well enough into spring that trees and grass are changing color. Obviously, now’s a great time to start taking outdoor photos. Remember, golden hour is a great time to take photos but if you can’t time that right or are close enough then find some shade. The sun should light up the background for you. If you want to go a step further, then get an off-camera flash to bring your subject out.


When working with younger subjects remember to keep it quick and keep it fun. Otherwise, you will get tantrum town. Keep quick by having a general plan of what poses you want to try. Don’t expect to cover every pose or that every pose you know will work, but a few of them should work if you have practiced enough. As for keeping it fun, that just takes trial and error but eventually you figure something out that works consistently.


This was a two-light setup. The sun being the backlight and my strobe with an octagon soft box being the key light. The advantage of my strobe is that I could do high speed sync with it, this allows me to up my shutter speed. Without it, the best you can do is around 1/200, which is fine for subjects that stay put. In this case my subject wanted to move around so being able to get up to 1/400th worked better.

Comment
← NewerOlder →

Search Posts

Powered by Squarespace