• Graphite, Charcoal, Pastel
    • Oil Paintings
    • Military experience art
  • Artist Statement
    • Pets
    • Kid Photos
    • Family Photos
    • Couples
    • Travel and Nature
  • Photo Blog
  • Media
  • Contact
Menu

Single-Handed Arts, LLC

Fine Arts and Photography Services
  • Fine Art
    • Graphite, Charcoal, Pastel
    • Oil Paintings
    • Military experience art
  • Artist Statement
  • Photography
    • Pets
    • Kid Photos
    • Family Photos
    • Couples
    • Travel and Nature
  • Photo Blog
  • Media
  • Contact
×
March 20, 2024 Post-1.jpg
March 20, 2024 Post-2.jpg
March 20, 2024 Post-3.jpg
March 20, 2024 Post-4.jpg
March 20, 2024 Post-5.jpg
March 20, 2024 Post-6.jpg
March 20, 2024 Post-7.jpg
March 20, 2024 Post-8.jpg
March 20, 2024 Post-9.jpg
March 20, 2024 Post-10.jpg
March 20, 2024 Post-1.jpg March 20, 2024 Post-2.jpg March 20, 2024 Post-3.jpg March 20, 2024 Post-4.jpg March 20, 2024 Post-5.jpg March 20, 2024 Post-6.jpg March 20, 2024 Post-7.jpg March 20, 2024 Post-8.jpg March 20, 2024 Post-9.jpg March 20, 2024 Post-10.jpg

Flour Dance

Joshua Hubbell March 22, 2024

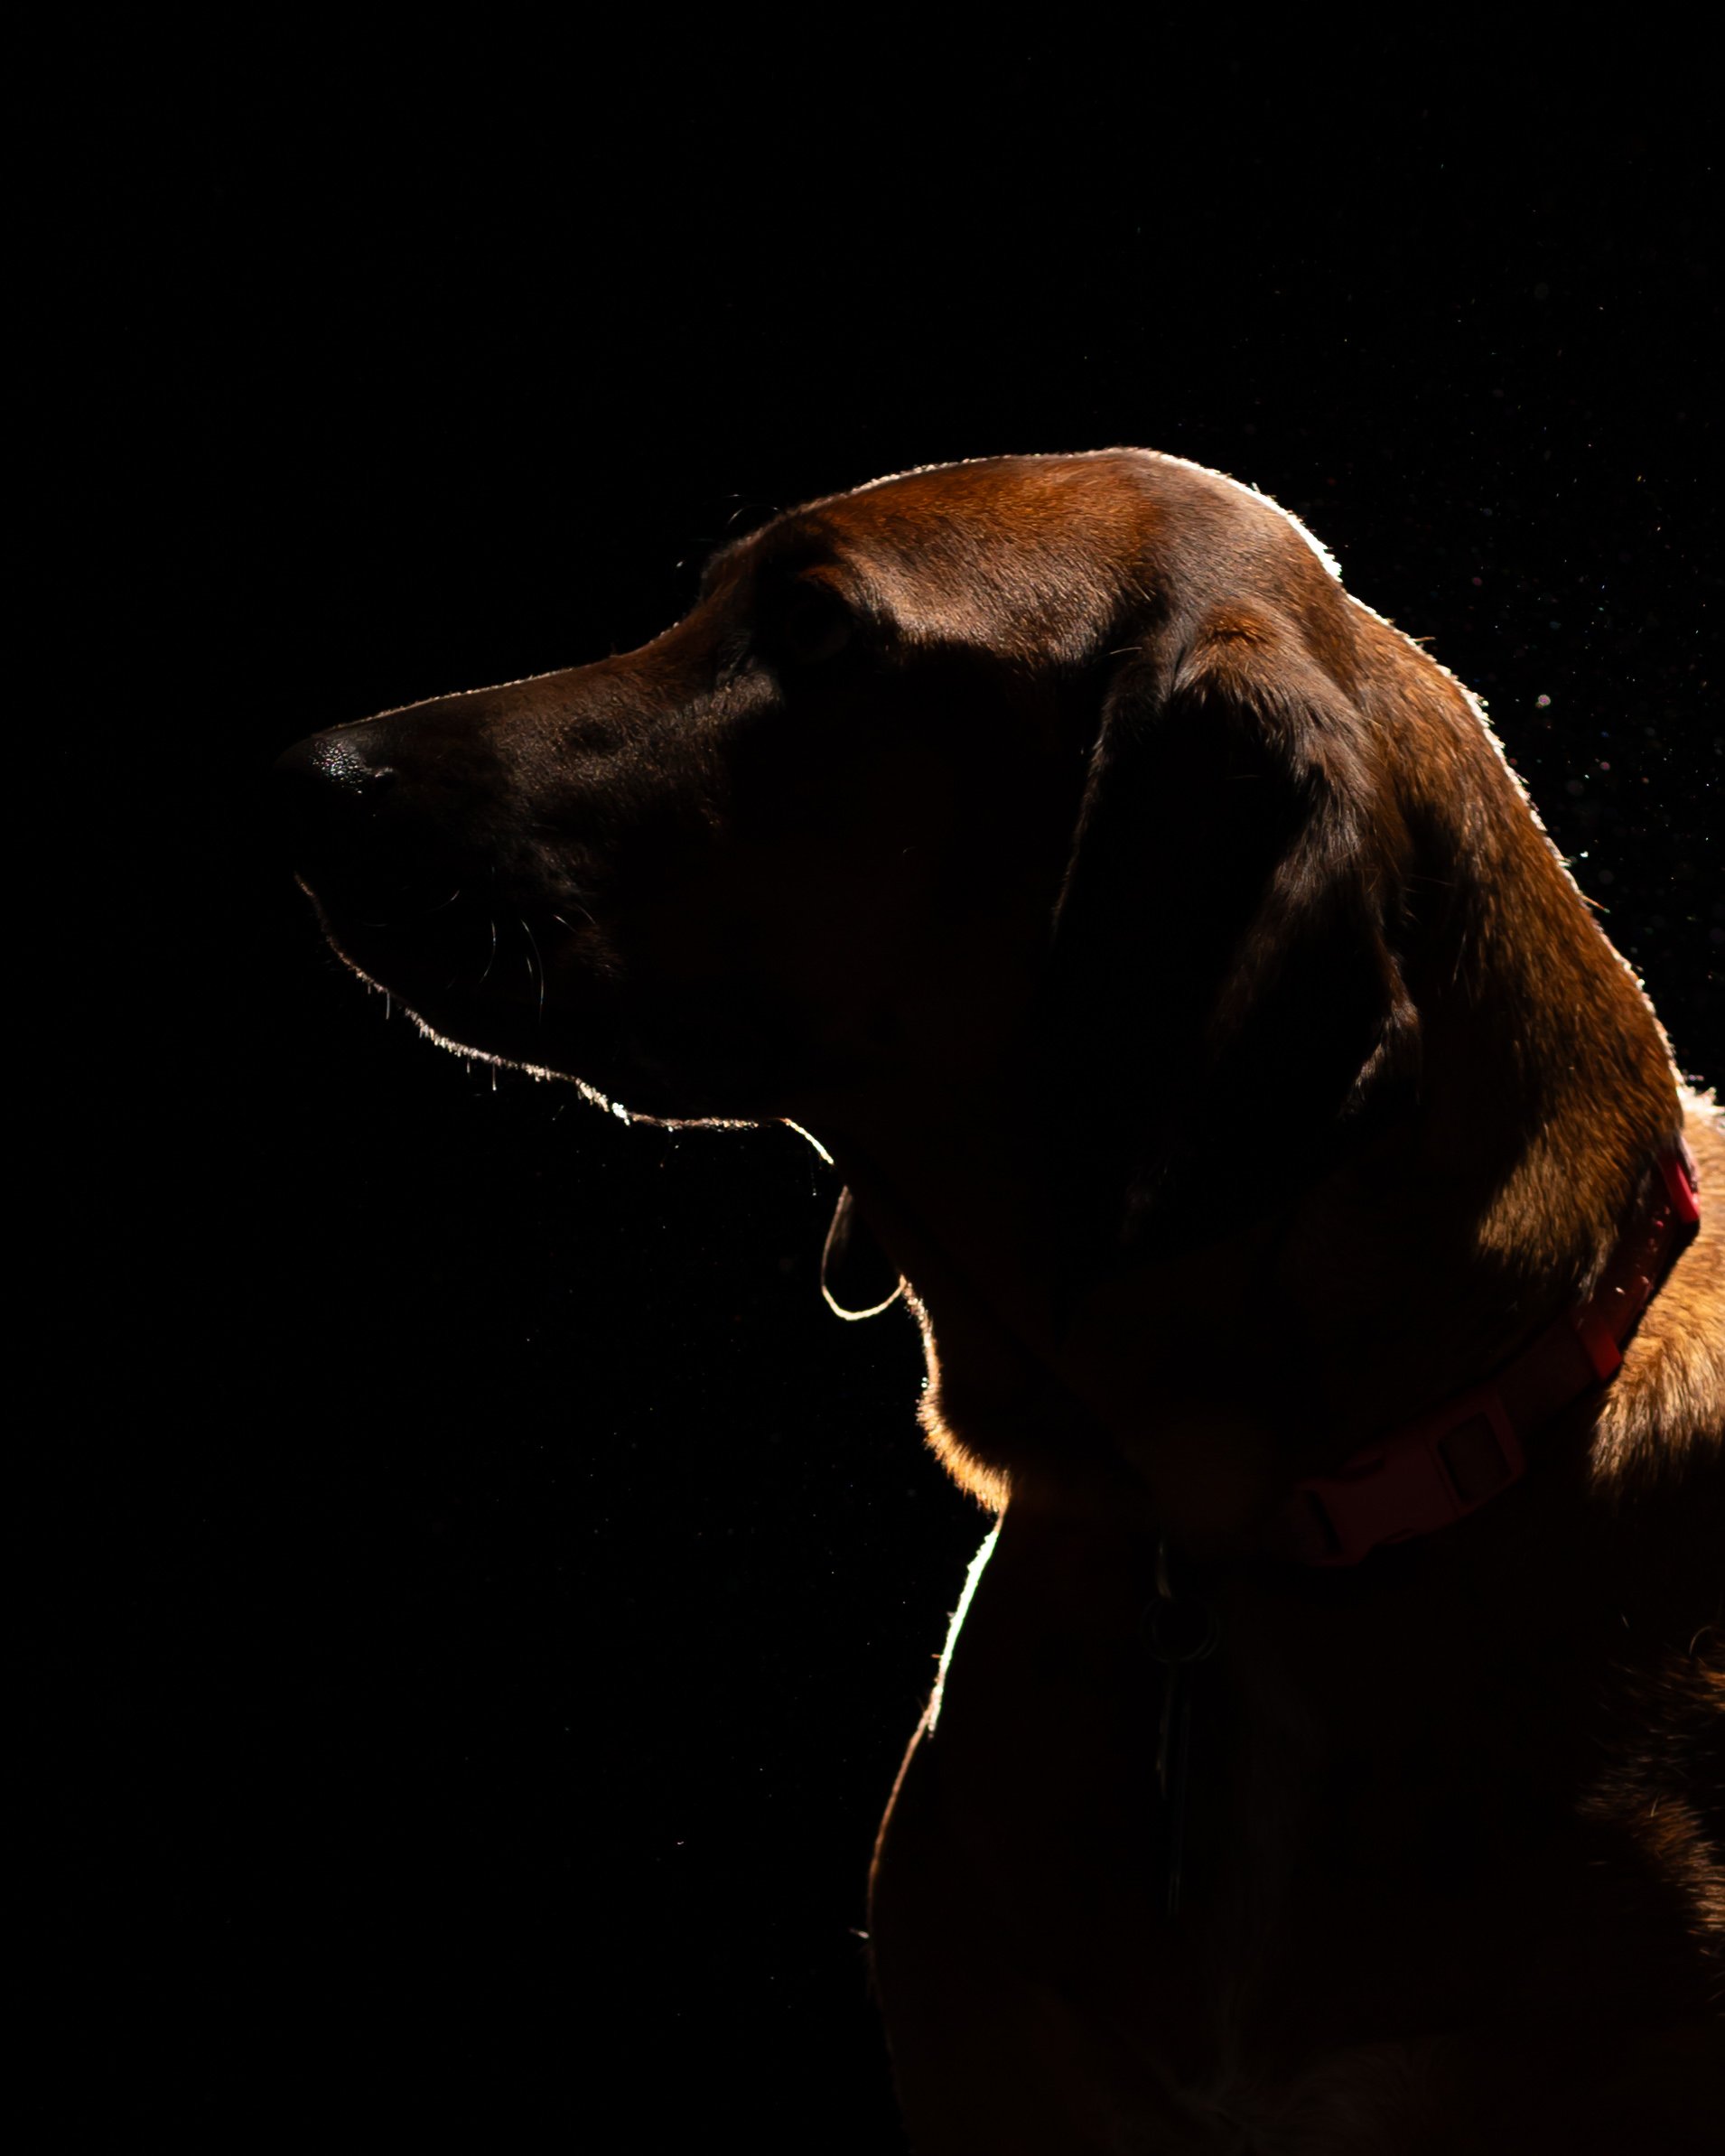
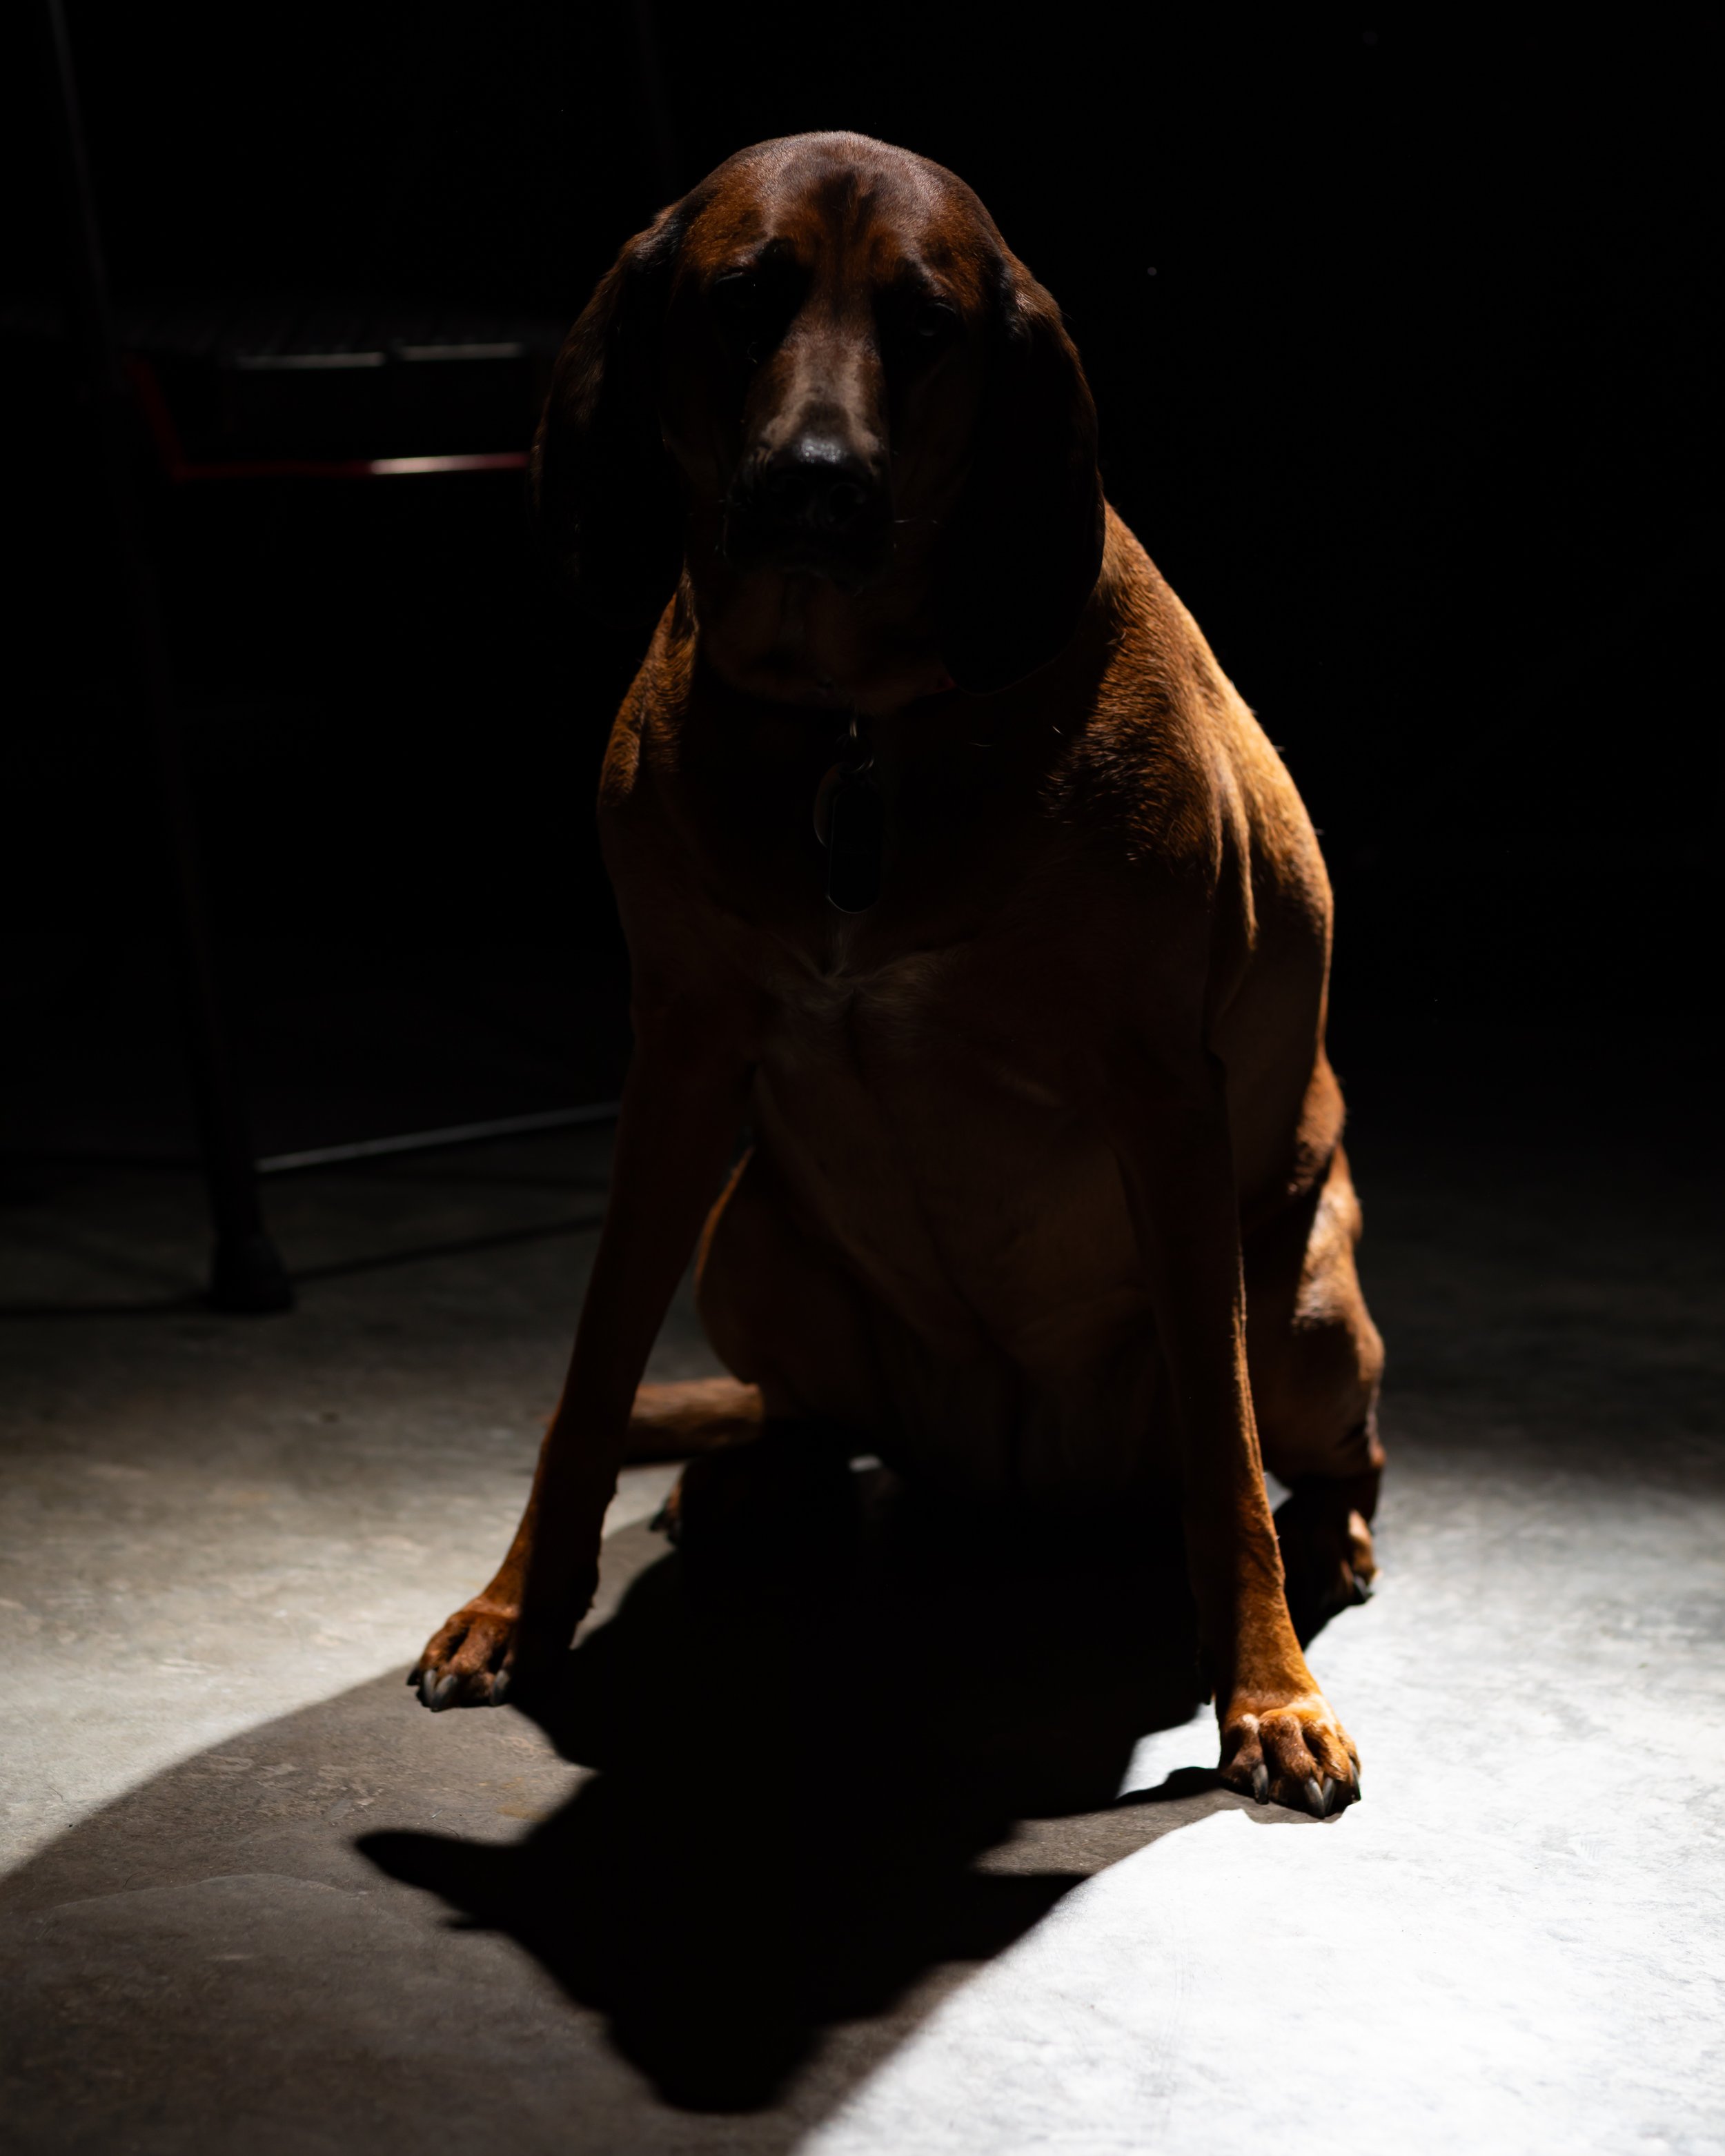
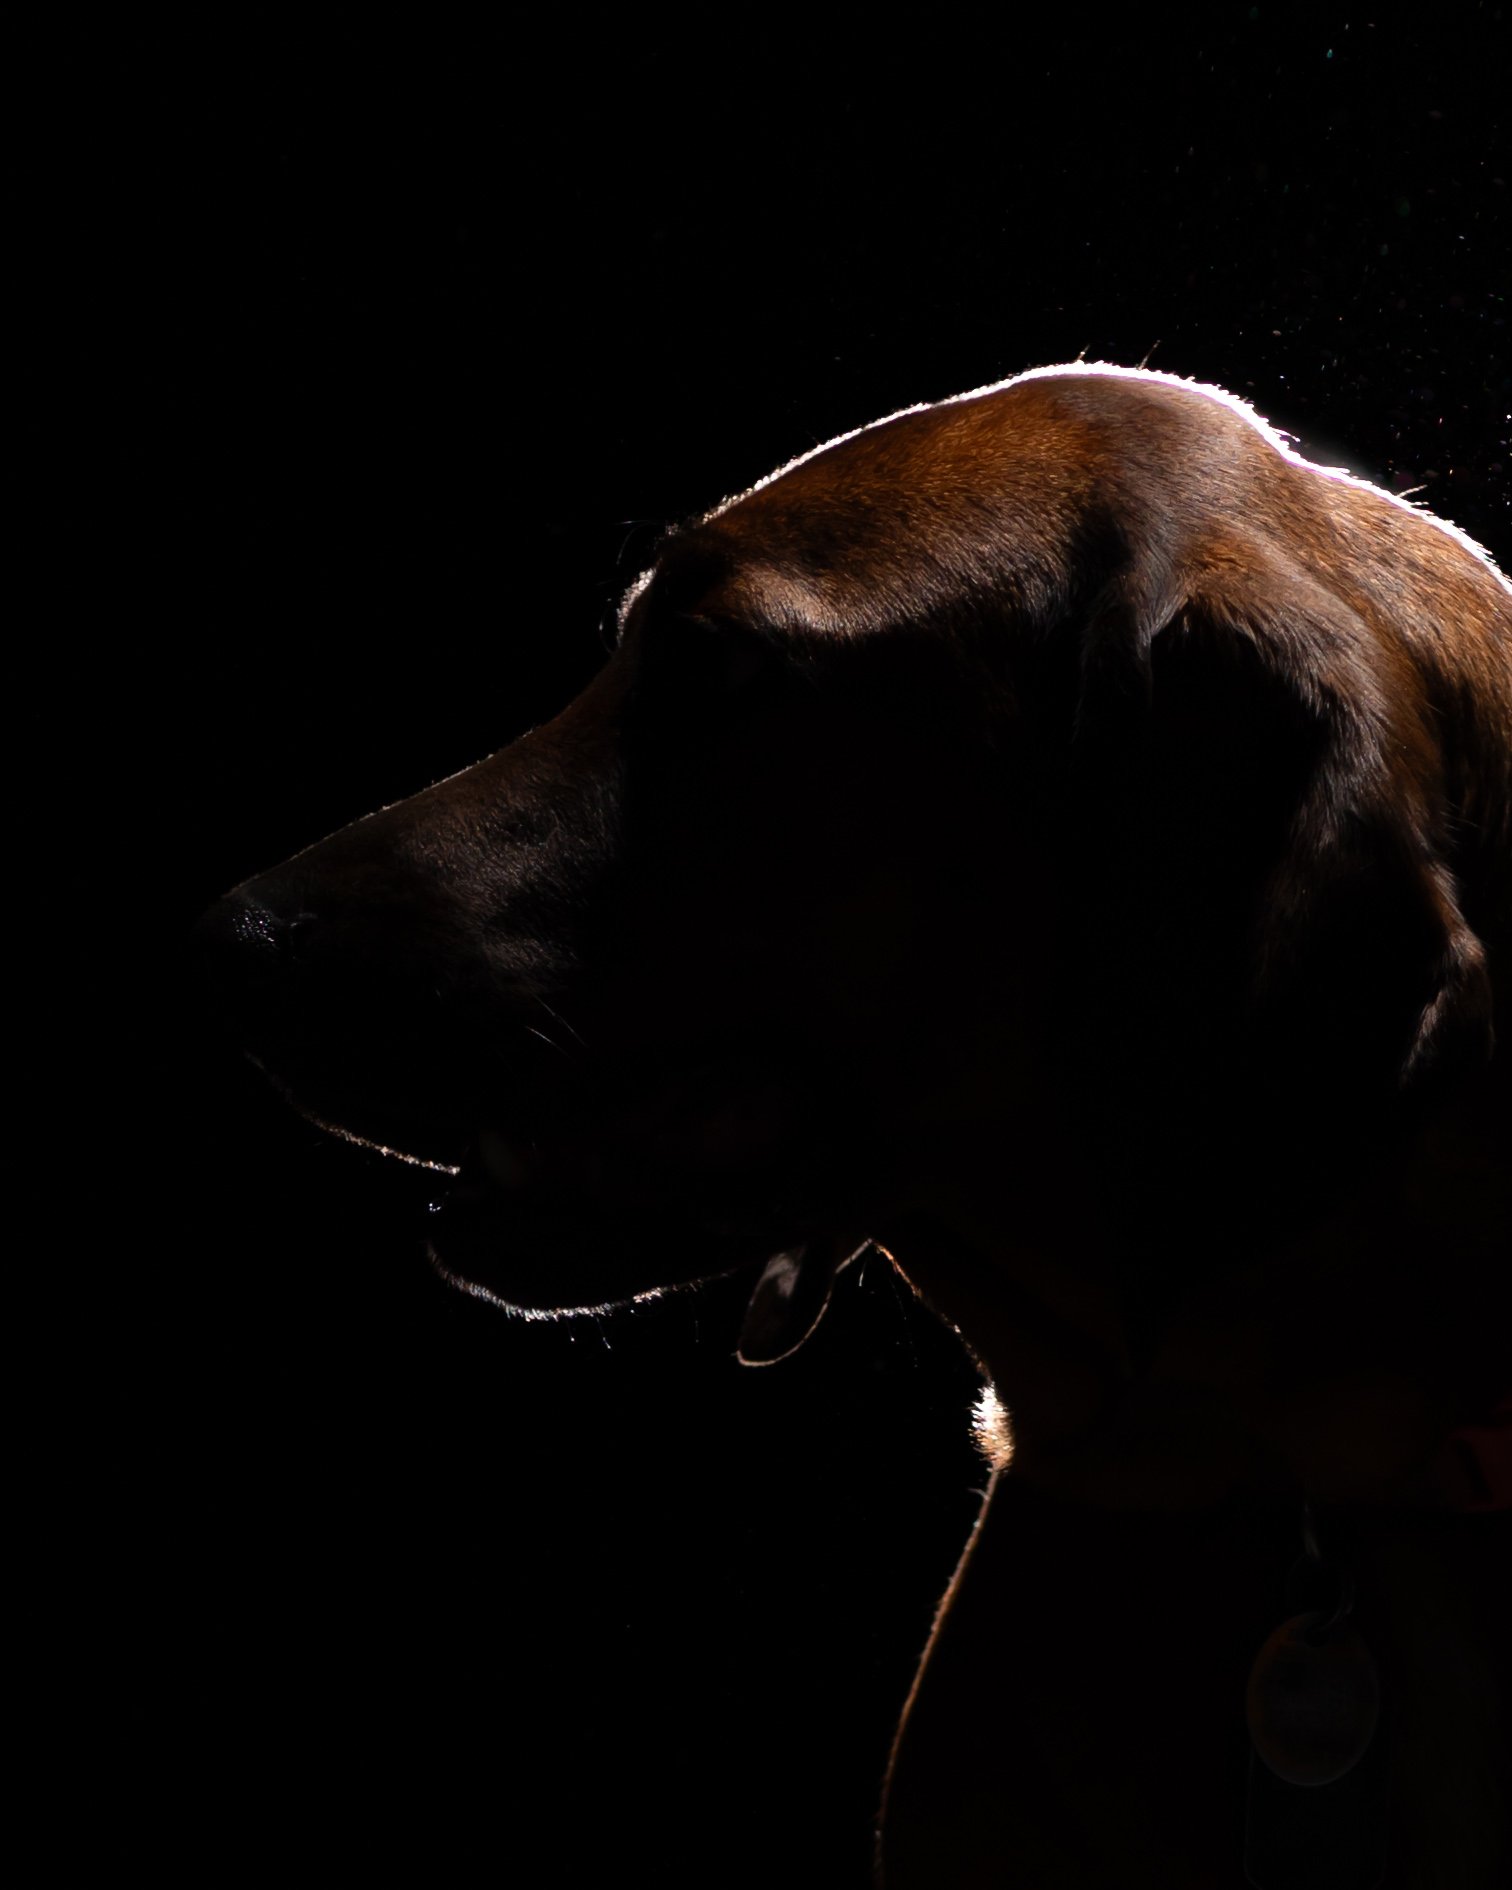
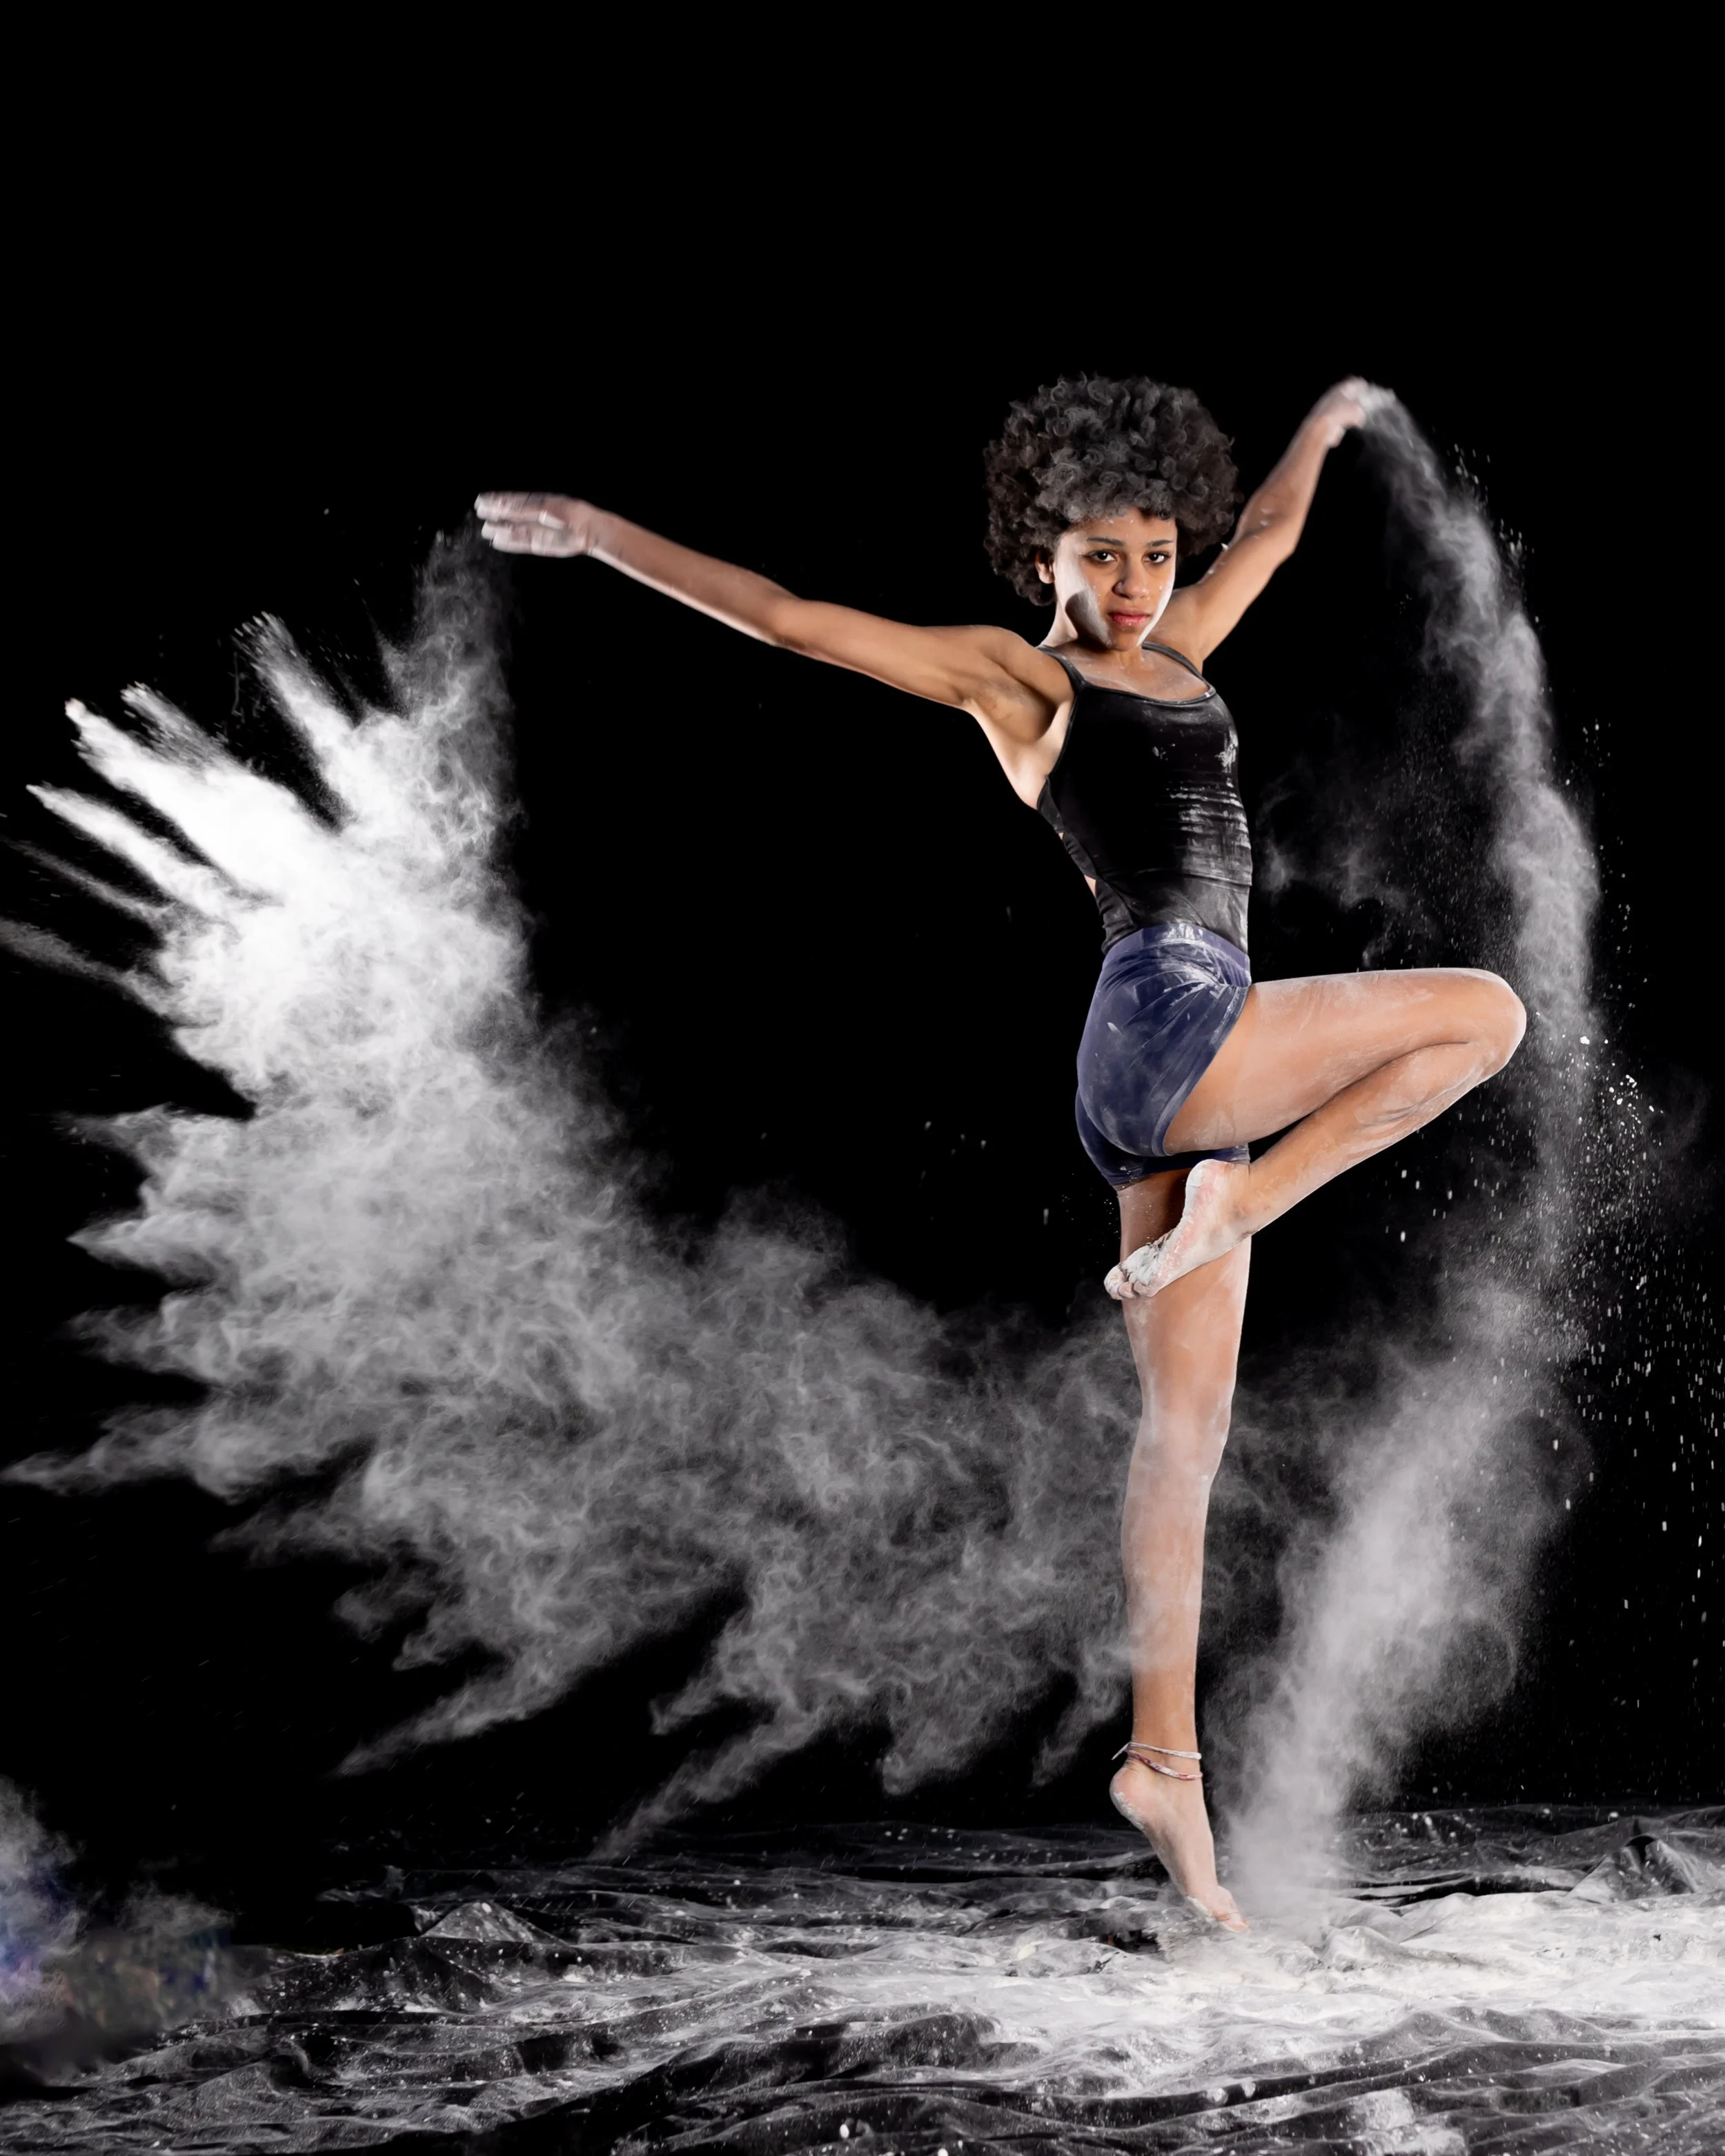
Dance is awesome to photograph, but sometimes you want to kick it up a notch. So, we added flour. Two lights in the back will light it up. The real trick is training the subject to spread it. It takes a few tries to get the hang of it so get one of those giant bags from BJs or Costco or someplace.


I prefer dancers because usually they come with motions in mind. Then you work back and forth together to get down something that works with the flour. As for the color, that’s just some lightroom magic. Since the flour is white it is pretty easy to change the color of it. Gymnasts would likely be a good combination too with this sort of photography session.


One last note: in case you didn’t notice this sort of photography is MESSY. It’s messy for the backdrop, the ground drop, and the subject. Expect flour to get everywhere and plan accordingly. I prefer to do this outside in the grass but expect to have flour hanging around your yard until the next moderate rain.


If you are interested in a flour photography session, contact me and we will work it out.

Comment
March 22, 2024 Post-1.jpg
March 22, 2024 Post-2.jpg
March 22, 2024 Post-3.jpg
March 22, 2024 Post-4.jpg
March 22, 2024 Post-5.jpg
March 22, 2024 Post-6.jpg
March 22, 2024 Post-1.jpg March 22, 2024 Post-2.jpg March 22, 2024 Post-3.jpg March 22, 2024 Post-4.jpg March 22, 2024 Post-5.jpg March 22, 2024 Post-6.jpg

Holding Fire

Joshua Hubbell March 20, 2024

Note: I am an experienced fire juggler who has looked into fire eating (surprise to all my friends who may not have been aware of that, it’s been that way for about 15 years at this point). This is all done with care, consideration, and experience. Don’t just go grab a lighter and some gas and try this. I am using butane bubbles here with water as a barrier.  That is, they burn quickly, and the water protects whatever is on fire. Also, lots of help on set with several means to put any fire out.


I’ve been doing some sports media day photo sessions lately. It’s been great. But there is always a push to do something more. So, fire. I haven’t actually got anyone willing to try it under the right conditions, so I keep testing. I have set myself on fire so many times at this point. Then I practiced a few poses and then I set up the shot I had in mind. That is, someone holding a lacrosse stick that contains a burning ball. Fun fact, that fire goes for like 3 seconds and then it’s out.


And if you are seeing this on my business site then you see just how much help I had. Thank you to Luis and Christa for setting me on fire and looking awesome while doing it. If you are ever wondering if the people in your life are good for you just ask yourself this question: would they set me on fire? If the answer is no, then you probably got your answer. Mine were more than delighted to set me on fire, which is why I consider them family.


Anyway, if you are interested in a sports session, with or without fire, let me know. I got openings and cool ideas that don’t involve fire too.

Comment
March 18, 2024 Post-1.jpg
March 18, 2024 Post-2.jpg
March 18, 2024 Post-3.jpg
March 18, 2024 Post-4.jpg
March 18, 2024 Post-5.jpg
March 18, 2024 Post-6.jpg
March 18, 2024 Post-7.jpg
March 18, 2024 Post-8.jpg
March 18, 2024 Post-9.jpg
March 18, 2024 Post-10.jpg
March 18, 2024 Post-1.jpg March 18, 2024 Post-2.jpg March 18, 2024 Post-3.jpg March 18, 2024 Post-4.jpg March 18, 2024 Post-5.jpg March 18, 2024 Post-6.jpg March 18, 2024 Post-7.jpg March 18, 2024 Post-8.jpg March 18, 2024 Post-9.jpg March 18, 2024 Post-10.jpg

St. Patrick's Day Parade

Joshua Hubbell March 18, 2024

Don’t do what I did for these parade photos.


What you want to do is arrive about an hour to an hour and a half before the parade, if not earlier. This is for two reasons. First, you need parking time. Plan on lots of people planning to see the parade and that means parking might take time to figure out. Second, you want to survey the area. This will allow you to find the best locations to move to and also get a general idea about which areas along the route will likely be more crowded.


What I did was show up thirty minutes before the parade, offset the time sink by parking further away for $20 and booking it to the parade route. Fortunately, I am familiar with downtown Annapolis and the parade, so I had a few ideas of where to be. Not everything was the same, but I knew enough to adjust. If I wasn’t familiar with the area and the parade, then I would have been sunk.


I used my 70-200mm lens for this. It worked well for the areas I was operating in. Straight on photos didn’t work out but I was able to get a spot on the edge and catch them as they paraded towards me. I stood and kneeled to line up shots as needed depending on the crowd.

Comment
February 27, 2024 Post-5.jpg
February 27, 2024 Post-1.jpg
February 27, 2024 Post-2.jpg
February 27, 2024 Post-3.jpg
February 27, 2024 Post-4.jpg
February 27, 2024 Post-6.jpg
February 27, 2024 Post-5.jpg February 27, 2024 Post-1.jpg February 27, 2024 Post-2.jpg February 27, 2024 Post-3.jpg February 27, 2024 Post-4.jpg February 27, 2024 Post-6.jpg

Low-Key Dog

Joshua Hubbell February 27, 2024

It feels like it’s been forever since I did any work with my dog and low key work so here is two in one.

A good but, time consuming, trick for dogs is walking them before the session. A tired dog will be more prone to listen to commands it has been taught. An energized dog will be more prone to be excited about anything and everything. On that note, be sure to carefully place any distractions on your set because that is likely the direction your dog is going to look and even try to walk to. And, as always, treats go a long way.

This was a single light setup. I was mostly going for rim lighting, but she had other ideas, so I went with that. I was still able to get that side head shot I was looking for plus a few other variations. That’s what I like about low key lighting, even if it doesn’t go according to plan you should still be able to get something you can use out of it. Also, notice how the light wraps around a little.

Comment
January 22, 2024 Post.JPG
January 22, 2024 Post-2.JPG
January 22, 2024 Post-3.JPG
January 22, 2024 Post-4.JPG
January 22, 2024 Post-5.JPG
January 22, 2024 Post-6.JPG
January 22, 2024 Post-7.JPG
January 22, 2024 Post.JPG January 22, 2024 Post-2.JPG January 22, 2024 Post-3.JPG January 22, 2024 Post-4.JPG January 22, 2024 Post-5.JPG January 22, 2024 Post-6.JPG January 22, 2024 Post-7.JPG

More Snow Photos

Joshua Hubbell January 23, 2024

Snow usually leaves two options; take photos while it is snowing or wait for the sun to come back and get them then. It’s a preference thing. The sun will give you some golden glow, but cloudy snowy days will give you a more even lighting and, well, snow in the air. Of course, you can always do both and you should, but I like the lighting better with clouds and snow in the air. Also, I find the shady areas tend to look blue on sunny days when snow is involved.


For kids, just let them play. They should provide all the action you need for decent photos. Occasionally, you can throw out a “look this way” but otherwise let them do their thing. Believe it or not, kids will figure out how to play in the snow. And if they are having fun, you should be able to pull out some amazing photos from their activities. All that stated, one piece of advice I’d recommend is that you wipe their faces off before they go outside. Don’t worry about hair prep too much unless it is distractingly unruly, but kids are wild, so let their hair be a little wild too.


Once again, these had a high shutter speed to freeze the snowflakes in the air. I went with a higher ISO and a lower f-stop number to compensate for that. I’d recommend practicing with a lower f-stop number if you are going to try that because it can be tricky. Fortunately, it is a digital age so practice can be plentiful.

Comment
January 16, 2024 Post-2.JPG
January 16, 2024 Post.JPG
January 16, 2024 Post-3.JPG
January 16, 2024 Post-4.JPG
January 16, 2024 Post-5.JPG
January 16, 2024 Post-6.JPG
January 16, 2024 Post-10.JPG
January 16, 2024 Post-8.JPG
January 16, 2024 Post-9.JPG
January 16, 2024 Post-7.JPG
January 16, 2024 Post-2.JPG January 16, 2024 Post.JPG January 16, 2024 Post-3.JPG January 16, 2024 Post-4.JPG January 16, 2024 Post-5.JPG January 16, 2024 Post-6.JPG January 16, 2024 Post-10.JPG January 16, 2024 Post-8.JPG January 16, 2024 Post-9.JPG January 16, 2024 Post-7.JPG

Let it snow… with dogs!

Joshua Hubbell January 16, 2024

Snow is a wonderful opportunity to take pictures. That stated, keep in mind a few things to watch out for. For starters, your batteries aren’t that great in cold weather. They will drain much faster in cold weather so plan accordingly. Next up when snow melts it turns to water and cameras and water don’t mix well. Will your camera survive? Probably but why risk it. Instead, protect your camera with your coat or better yet have a rain cover ready. Speaking of which, watch out for snow fall from trees. It piles up on those top branches and will fall on you and your camera so be aware of your surroundings.


As for these photos, if you want to freeze snow in the air, then the same principle is in play as if you want to freeze rain in the air – get that shutter speed up. That’s something you should be doing anyway if you are photographing high energy dogs. As for getting good photos of your dogs, try this: do research and understand your dog’s breed. If they are high energy, then go for high energy. If they are laid back and slow moving, then go for slow moving.


These photos were taken at 1/1000 for shutter speed. I sacrificed my F-stop and ISO for that. Redbones move fast so getting a good focus was a challenge and you have no idea how many bad photos I took to get these but that’s all part of the craft.

Comment
Jan 12, 2024 Post.JPG
Jan 12, 2024 Post-2.JPG
Jan 12, 2024 Post-3.JPG
Jan 12, 2024 Post-4.JPG
Jan 12, 2024 Post-5.JPG
Jan 12, 2024 Post.JPG Jan 12, 2024 Post-2.JPG Jan 12, 2024 Post-3.JPG Jan 12, 2024 Post-4.JPG Jan 12, 2024 Post-5.JPG

A girl and her dog.

Joshua Hubbell January 12, 2024

Working with kids and dogs is like taking a canoe down a river. Sure, you have some control, but you are ultimately going wherever that river is going. So be patient and be flexible.  


When working with pets that have black fur remember that you will want to bring that fur out. In this case I had a black background too. So, we rolled with the red dress, and I positioned my lights in a way that would bring the subjects out – especially that black fur and separate them from the background. As for posing, I kind of let them lead the way. There is no way to get a great big English Mastiff to do anything he doesn’t want to do so I sort of let him be. As for the toddler, toddlers are kind of like tornadoes – great to see but there is a trail of destruction behind them. So instead of trying to control things I just offered suggestions like “hug your dog,” “give your dog a kiss,” and “tell your dog a secret.” Kids love getting pictures with their pets and often these subtle suggestions are taken well.    


That stated, make sure things being done are safe for the child and safe for the pet. If your kid starts doing something you know the pet isn’t going to like – intervene! Or better yet, avoid that idea ever being considered in the first place. Remember, as the photographer, you have to guide the session. You can’t control every direction but if you know what directions you want to avoid it is much easier to redirect away from them.


I have a few bookings open, contact me if you need any photography work done.

Comment
January 10, 2024 Post.JPG
January 10, 2024 Post-2.JPG
January 10, 2024 Post-3.JPG
January 10, 2024 Post-4.JPG
January 10, 2024 GS Post.JPG
January 10, 2024 GS Post-2.JPG
January 10, 2024 GS Post-3.JPG
January 10, 2024 GS Post-4.JPG
January 10, 2024 Post.JPG January 10, 2024 Post-2.JPG January 10, 2024 Post-3.JPG January 10, 2024 Post-4.JPG January 10, 2024 GS Post.JPG January 10, 2024 GS Post-2.JPG January 10, 2024 GS Post-3.JPG January 10, 2024 GS Post-4.JPG

More with the Guitar

Joshua Hubbell January 10, 2024

Building on the previous post, you don’t have to keep it in one spot. Try different locations out and really experiment. Here we moved to a basement stairwell and scuffed up the walls a little plus the light positioning made some of the paint stand out. It changed the tone of the session entirely despite doing the same time poses. I had her do the same exploration with the guitar and guided her from there.


This one was done with a single light, no modifier. It was placed high up pointing downwards. Obviously, the shadows were invited for this one. Then at the end I switched them over to grayscale.

Comment
January 8,  2024 Post.JPG
January 8,  2024 Post-2.JPG
January 8,  2024 Post-3.JPG
January 8,  2024 Post-4.JPG
January 8,  2024 Post-5.JPG
January 8,  2024 Post-6.JPG
January 8,  2024 Post.JPG January 8,  2024 Post-2.JPG January 8,  2024 Post-3.JPG January 8,  2024 Post-4.JPG January 8,  2024 Post-5.JPG January 8,  2024 Post-6.JPG

Guitar session.

Joshua Hubbell January 8, 2024

There is a certain nobility that comes along with a musical instrument which is why I enjoy photographing people holding instruments. They are great props and if the person knows how to play the instrument it becomes that much more magical. In way, it acts as a two-subject photo.


These photos were done with two lights. The key is a light with a snoot way up and aimed down at the girl. The second hair light is just a raw light. You can see it in most of the photos.


As for posing, mostly it was just her playing with the guitar. “Look here,” “look up towards the light (with some warning that it was a light),” and “look at the guitar.” She really liked this session (and the next one which I will follow up with on Wednesday). Posing with an item in the hands is always so much easier than posing without something which is why I recommend it so often. And the more interest or curiosity your subject has in the item, the better the session will go.


Contact me if you wish to book any sessions. I have a few openings in January and, of course, senior season starts in April.

Comment
January 3, 2024 Post.JPG
January 3, 2024 Post-2.JPG
January 3, 2024 Post-3.JPG
January 3, 2024 Post-4.JPG
January 3, 2024 Post.JPG January 3, 2024 Post-2.JPG January 3, 2024 Post-3.JPG January 3, 2024 Post-4.JPG

Joshua Hubbell January 3, 2024

Another Low Key Lighting Session. I keep gravitating back to them because I am trying to figure something out, something beyond what I currently know. It is just within reach, but I didn’t quite get it yet. I will keep trying.


In the meantime, let’s pull something out of this session. The key lighting for these is a speedlite with a snoot up high and aimed down. Very controlled. The first picture is just that light. But even if it is low key, that doesn’t mean we can’t bring it out a little. So, the rest included another speedlite with a snoot aimed at the backdrop.


The 2nd picture had the back light a little too far away. The third picture is better, but I positioned myself away from the light too much so an eye has too much shadow. For the final one I turned my head so more light could reach my face.


That’s really the key take away with low key lighting; knowing you can move the light to the subject or move the subject to the light. Also, as always, what is “correct” is really dependent with what you are trying to get – it is all subjective.

Comment

Remote switches are pretty useful for photography selfies. Also, it is kind of amusing to use camera to photograph another camera.

Happy New Year and let's get this back on track.

Joshua Hubbell January 1, 2024

Happy New Year! I have a feeling this is going to be a wonderful year for photography. Now let me get these photography posts back on track now that I’ve semi sorted the studio space I have access to.


I will start with low hanging fruit, a 2-light setup.  For this photo I used, well, two lights. The key light has an octagon softbox on it and the hair light is just a speedlight with a snoot on it without the grid. The octagon softbox is just to my side and the snoot is up, back at angle to me, pointed down at my head.


When I call it “low hanging fruit” don’t take that to mean this setup isn’t useful. It is actually VERY useful and one of the 3 setups that can be used for most basic photography jobs – assuming you understand your lights, how light works, and how shadows work. That all takes practice. You can read all the books in the world about this stuff but rarely will it ever be tailored to your specific situation so its better you practice with what you have.


With all that out of the way, once again happy new year and I currently have some availability open for photography work.

Comment
November 6, 2023 Post.JPG
November 6, 2023 Post-2.JPG
November 6, 2023 Post-3.JPG
November 6, 2023 Post-5.JPG
November 6, 2023 Post-6.JPG
November 6, 2023 Post-8.JPG
November 6, 2023 Post-9.JPG
November 6, 2023 Post-10.JPG
November 6, 2023 Post.JPG November 6, 2023 Post-2.JPG November 6, 2023 Post-3.JPG November 6, 2023 Post-5.JPG November 6, 2023 Post-6.JPG November 6, 2023 Post-8.JPG November 6, 2023 Post-9.JPG November 6, 2023 Post-10.JPG

The Play That Goes Wrong - Dress rehearsals

Joshua Hubbell November 6, 2023

Indian Creek School is performing The Play That Goes Wrong, a hilarious comedy about a play that goes wrong. From what I’ve seen so far, this is a show to see. If you want to see an entertaining show, check out their performances on November 10, 11, and 12. To purchase tickets go to: https://indiancreekschool.ludus.com/index.php?show_id=200441017


I photographed the Tech and Dress rehearsals, so it’s tech and dress rehearsal tip time. As always, I highly recommend understanding what you are photographing. This means you have homework as you have to do some research on the performance. Know that every director will have their own approach to the performance at hand, but it will still follow the script for the most part so if you at least know what the general plot is you will be better prepared for it. In this case, I watched the play online and read up on it online as well.  


 As for gear, I used my 70-200mm lens. The lens choice depends entirely on the theater.  A smaller theater I might use a 50 mm or even a 35mm. I also brought along two step stools to help me get to stage level. That stated, I didn’t use them for every shot and if you do follow this tactic then be mindful of them being in the way of the performance.


Finally, remember you are a guest in the workspace of other artists. Never assume anything and know that your job is to make these artists look great for their part of the performance. If that isn’t your attitude, then you probably shouldn’t be doing this type of photography.

Comment
October 10, 2023 Post-1.JPG
October 10, 2023 Post-2.JPG
October 10, 2023 Post-3.JPG
October 10, 2023 Post-4.JPG
October 10, 2023 Post-6.JPG
October 10, 2023 Post-5.JPG
October 10, 2023 Post-7.JPG
October 10, 2023 Post-8.JPG
October 10, 2023 Post-9.JPG
October 10, 2023 Post-10.JPG
October 10, 2023 Post-1.JPG October 10, 2023 Post-2.JPG October 10, 2023 Post-3.JPG October 10, 2023 Post-4.JPG October 10, 2023 Post-6.JPG October 10, 2023 Post-5.JPG October 10, 2023 Post-7.JPG October 10, 2023 Post-8.JPG October 10, 2023 Post-9.JPG October 10, 2023 Post-10.JPG

Sylvia Publicity Photos

Joshua Hubbell October 10, 2023

These are some of the publicity photos I took for the Compass Rose Theatre production of Sylvia, which is currently running until October 29, 2023. Check out their website at https://www.compassrosetheater.org/ to purchase tickets, and you should purchase tickets because they have a great cast and a great show.  


When doing publicity photos, you want to arrive early. Not only do you want to get a feel for the set, as even if you are familiar with the stage the set is pretty much always changing, but also to get a feel free the people involved. Namely, any producers or directors who might be on set as well as the actors. How these people interact with each other will give you a good indication as to how to approach the human element during the whole session. Usually this is self-explanatory but if you can’t get a read on someone then play it safe and cautiously.


Also remember that while you are there to do photography this is the territory of other artists – you are merely a guest in it. Treat it with respect and always ask permission.


As for the photos themselves, keep in mind that the people in charge of publicity have ideas as to what they want. Some are more specific than others. You are bringing your skills and equipment to help give them the best visualization of that result as well as to give them the best alternative options to it. The general overall goal is to give a good idea of what the show is about, what kind of show it is, and what the characters are about.

Comment
October 4, 2023 Post-3.jpg
October 4, 2023 Post-1.jpg
October 4, 2023 Post-2.jpg
October 4, 2023 Post-4.jpg
October 4, 2023 Post-5.jpg
October 4, 2023 Post-3.jpg October 4, 2023 Post-1.jpg October 4, 2023 Post-2.jpg October 4, 2023 Post-4.jpg October 4, 2023 Post-5.jpg

A brief visit by an uninvited guest in the basement.

Joshua Hubbell October 4, 2023

Who is she? And what is she doing in the basement? And most importantly of all, when did this house have a basement?


This was a single light setup with a blue gel. I also wanted a very specific light shape so I made a “window” out of plexiglass and black background. I put the strobe on the other side and got to the stop of the stairs. Also, there is a strip or two of white poster board along the stairs to reflect a little light.

Comment
October 2, 2023 Post-1.jpg
October 2, 2023 Post-2.jpg
October 2, 2023 Post-1.jpg October 2, 2023 Post-2.jpg

Light and shadow practice.

Joshua Hubbell October 2, 2023

I’ve been doing some athlete photos lately and a specific look was requested. I already had an idea in mind, but this was some of my practice work for that. In these photos it is a two-light setup, though I ended up going with three lights for the actual photos. The major part is the back light which is high up behind the subject with the subject’s body hiding the light stand (though in one of the photos you can see a bit of it). This creates that light area around the front of the subject.


Actually, the major part of this photo is having strobes capable of high speed sync. This allows me to go faster with my shutter speed and really knocks out some of the ambient light. That’s important because these photos were taken outside, on a sunny day, around 3:30 PM. I knew this scenario was going to be similar to the times I’d be working with the athletes and that the sun would be the trickiest light to deal with. So, I set a scenario up where I could get rid of the sun.


Now, it didn’t totally eliminate the sunlight. I did have to do some processing trickery to finish things up, but this setup got me a good 85% of the way there, which is all I needed to make it look like this. Light and shadows are big parts of photography. The more you practice manipulating them, the more you will be able to work around seemingly impossible issues you encounter in your sessions.  


In the actual session, I made things even easier by finding a shady area. That got me even closer, I’d say about 95% of the way there.

Comment
September 22, 2023-1.jpg
September 22, 2023-3.jpg
September 22, 2023-4.jpg
September 22, 2023-6.jpg
September 22, 2023-8.jpg
September 22, 2023-9.jpg
September 22, 2023-10.jpg
September 22, 2023-12.jpg
September 22, 2023-14.jpg
September 22, 2023-21.jpg
September 22, 2023-1.jpg September 22, 2023-3.jpg September 22, 2023-4.jpg September 22, 2023-6.jpg September 22, 2023-8.jpg September 22, 2023-9.jpg September 22, 2023-10.jpg September 22, 2023-12.jpg September 22, 2023-14.jpg September 22, 2023-21.jpg

Photography off the boat.

Joshua Hubbell September 22, 2023

Excursions can be a great opportunity for photography. However, your time is limited as you need to be back on the ship before it leaves so careful planning can go a long way. Before you get on the cruise, study maps of the area and plan. Figure out where your ship will dock at and where you can go from there. If you have activities you’ve signed up for then plan around those but understand you will likely need to meet someplace before that scheduled time.


If you aren’t registering for any guided activities have a good time but a reasonable mindset – you won’t be the only person there and may have to work around a crowd. This is doable, but you will have a less stressful time if you accept that as a foregone conclusion. Also, not every whale watch tour or bear watch tour sees bears or whales so photograph what you can get.


Finally, explore the town. Juneau had a lot of cool things to photograph both in terms of natural beauty but also in terms of manmade beauty. Meanwhile, in Skagway, I immediately hiked to the Miners Graveyard and was able to get there before the tour groups arrived – I had the waterfall to myself for about 30 minutes, that’s 30 minutes of a waterfall without another human in the way. These locations your cruise stops at have things worthy of a photo, but you have to explore for them.

Comment
September 21, 2023 extra-1.jpg
September 21, 2023 extra-2.jpg
September 21, 2023 extra-3.jpg
September 21, 2023 extra-1.jpg September 21, 2023 extra-2.jpg September 21, 2023 extra-3.jpg

Quick addendum to yesterday's post.

Joshua Hubbell September 21, 2023

One quick addendum to yesterday’s post. I mainly worked off 3 decks in Glacier National Park. Way up on deck 17 (and 16), my stateroom balcony on deck 12, and deck 7 (and 6). I get the math but decks 17 and 16 are about the same perspective, as are decks 7 and 6.


When I wanted to make the mountains look towering or get wildlife photos then I worked from decks 6/7. When I wanted to see distance, more of the mountain, and get up to level then I worked from decks 16/17. When I wasn’t sure or things were getting crowded, I worked from deck 12.


Anyway, the other considerations for what deck I wanted depended on two other factors as well:


1)      How crowded was the location I was going to likely to be. If they just announced a location and I wasn’t there, going to the obvious deck and side was going to be crowded. There’d already be people there and it would be tricky to get a good spot.

2)      Could I get there in time? Usually the answer was yes, but sometimes I backed off to prep for the next location or adjust my gear.

It also helped to look at the route and know that the ship wasn’t on a looped course. It was a straight route to the Johns Hopkins Glacier and then turn around and back the same way. That means two chances at anything I wanted photos of as well as a different angle and different time of day.


#Marylandphotographer #annearundelphotographer #photographytips

Comment
September 7, 2023 extra-1.jpg
September 7, 2023 extra-2.jpg
September 7, 2023 extra-4.jpg
September 7, 2023 extra-8.jpg
September 7, 2023 extra-3.jpg
September 7, 2023 extra-5.jpg
September 7, 2023 extra-6.jpg
September 7, 2023 extra-7.jpg
September 7, 2023 extra-9.jpg
September 7, 2023 extra-10.jpg
September 7, 2023 extra-1.jpg September 7, 2023 extra-2.jpg September 7, 2023 extra-4.jpg September 7, 2023 extra-8.jpg September 7, 2023 extra-3.jpg September 7, 2023 extra-5.jpg September 7, 2023 extra-6.jpg September 7, 2023 extra-7.jpg September 7, 2023 extra-9.jpg September 7, 2023 extra-10.jpg

Photographing while on the Cruise Ship

Joshua Hubbell September 20, 2023

The cruise I was on spent time going through Glacier National Park. This involved bringing park rangers on board so they could give a guided tour over the intercom. It was really cool.


The first thing you need to consider is that you are on a moving object, so you must adjust for that movement. I did this by bumping up my shutter speed as if I were photographing a sporting event. I did initially see some tripods out but they quickly disappeared once those photographers realized that everyone on the cruise ship was going to be outside to see the park so it would be next to impossible to use a tripod. Personally, I like to be mobile anyway, so I didn’t even bring a tripod with me on this trip.


That brings us to location. The previous update I mentioned exploring the ship and really knowing what was accessible. This came in handy. For starters, shots from way up on deck 17 are going to look entirely different from shots on deck 8 or the stateroom balcony I had access to on deck 12. I was already aware of this as I had walked this ship numerous times every single day of the cruise. That stated, there was one other location I was aware of, thanks to exploring the ship, that most passengers were totally ignorant of – Deck 7 had exterior areas on either side of the life rafts.


So which deck do you use? All decks, but you look at the map ahead of time and plan accordingly. You try to be one step ahead of the tour and get to the side of the ship before the ship gets to the next major point of interest. For example, I knew the boat would have to turn around once we hit Johns Hopkins Glacier (named for Johns Hopkins University). So, I parked on the back exterior of the ship and was more than ready for an awesome front row view of the glacier.


Between all that I took shots of the mountains and of the wildlife. In all I saw seagulls, sea otters, and seals.


Next time, I’ll write some advice for excursions.

Comment
September 4, 2023-1.jpg
September 4, 2023-5.jpg
September 4, 2023-2.jpg
September 4, 2023-3.jpg
September 4, 2023-6.jpg
September 4, 2023-7.jpg
September 4, 2023-8.jpg
September 4, 2023-9.jpg
September 4, 2023-10.jpg
September 4, 2023-1.jpg September 4, 2023-5.jpg September 4, 2023-2.jpg September 4, 2023-3.jpg September 4, 2023-6.jpg September 4, 2023-7.jpg September 4, 2023-8.jpg September 4, 2023-9.jpg September 4, 2023-10.jpg

A mini one tying into yesterday’s post.

Joshua Hubbell September 19, 2023

Explore the ship during the day and then do it again at night. I wasn’t in a location at any point on the clear nights that I could see the aurora borealis, but I tried, and I was ready for it had I lucked out. But there are things to see out there at night. The cruise ship itself looks different at night not to mention the moon and the sky and the water. There are things to work with on a cruise ship at night when it comes to photography so get out there and try it.

Comment
September 3, 2023-4.jpg
September 3, 2023-1.jpg
September 3, 2023-2.jpg
September 3, 2023-3.jpg
September 3, 2023-5.jpg
September 3, 2023-7.jpg
September 3, 2023-9.jpg
September 3, 2023-10.jpg
September 3, 2023-6.jpg
September 3, 2023-8.jpg
September 3, 2023-4.jpg September 3, 2023-1.jpg September 3, 2023-2.jpg September 3, 2023-3.jpg September 3, 2023-5.jpg September 3, 2023-7.jpg September 3, 2023-9.jpg September 3, 2023-10.jpg September 3, 2023-6.jpg September 3, 2023-8.jpg

Cruise Photography Tips

Joshua Hubbell September 18, 2023

I was away on a cruise to Alaska. It was wonderful and I really got to try new things with my photography that I’d normally not be able to try. There were a few things that worked really well for me, and I will be sharing those tips this week and of course some of the photos. Many of these tips could easily work for just general travelling so if you aren’t cruising you can still get something out of these. That stated, normally, I do family, weddings, theater, or sports photography so this is stuff out of my normal wheelhouse.


With all that out of the way, let’s start by hitting you with something rough. Temper expectations. You are going to see a lot of amazing things and experience a lot of cool and unique things. However, Ansel Adams didn’t build an amazing nature photo portfolio by photographing from a cruise ship. He got out into nature. Don’t get me wrong – you will take great pictures, but they will be great pictures from a cruise ship. They will probably look a lot like all the great pictures taken from the ship the previous week and a lot like the great pictures taken from the ship the next week this cruise goes. Do take pictures, but just be realistic about what you can actually accomplish from a cruise ship.


Next up, let’s talk about preparation. Before you get on that boat, you need to know what weather you are likely to experience and prepare for that. I knew there was a high chance I’d experience rain and cold weather. So, I was prepared for that. I had a rain cover for my camera that could accommodate any lens I currently own and I had layered outfits planned with lots of pockets, so I didn’t have to open my camera bag 27 times in the rain. I also have salt packets in my bag to reduce moisture in it. This tip also means you need to know how to use all this weather gear you plan to have. Having a rain cover is pointless if you don’t know how to put it on your camera and operate your camera with it on.


Finally, use the first day on the ship to walk everywhere you can. You want to know the ship and take some establishing shots. You might also want to scope out a few areas for framing and usually you can get access to spaces you normally can’t on the first day. For example, you could walk all around the go-kart raceway and all over the laser tag area on the first day of my cruise. This provided sights you normally don’t see unless you are go-karting or playing laser tag.

Comment
← NewerOlder →

Search Posts

Powered by Squarespace