• Graphite, Charcoal, Pastel
    • Oil Paintings
    • Military experience art
  • Artist Statement
    • Pets
    • Kid Photos
    • Family Photos
    • Couples
    • Travel and Nature
  • Photo Blog
  • Media
  • Contact
Menu

Single-Handed Arts, LLC

Fine Arts and Photography Services
  • Fine Art
    • Graphite, Charcoal, Pastel
    • Oil Paintings
    • Military experience art
  • Artist Statement
  • Photography
    • Pets
    • Kid Photos
    • Family Photos
    • Couples
    • Travel and Nature
  • Photo Blog
  • Media
  • Contact
×
IG - Novemeber 1, 2021 Post-6.jpg
IG - Novemeber 1, 2021 Post.jpg
IG - Novemeber 1, 2021 Post-2.jpg
IG - Novemeber 1, 2021 Post-3.jpg
IG - Novemeber 1, 2021 Post-5.jpg
IG - Novemeber 1, 2021 Post-4.jpg
IG - Novemeber 1, 2021 Post-7.jpg
IG - Novemeber 1, 2021 Post-6.jpg IG - Novemeber 1, 2021 Post.jpg IG - Novemeber 1, 2021 Post-2.jpg IG - Novemeber 1, 2021 Post-3.jpg IG - Novemeber 1, 2021 Post-5.jpg IG - Novemeber 1, 2021 Post-4.jpg IG - Novemeber 1, 2021 Post-7.jpg

A Girl and Her Puppy II

Joshua Hubbell November 1, 2021

October was awesome, a big thanks to every single person who sat in front of my camera or gave me space to practice my craft or both in October – you all are awesome! On that note, let’s start November off right with more puppy photos because every month should start with puppy photos or kitten photos or puppy and kitten photos. And this would be a good time to put my constant reminder about working with animals:


When working with animals, be patient and kind. Our pets just want people to be happy, but they don’t know how to make that happen. Throw in a camera and maybe photography lights and you have a setting they just completely do not understand. So, give them a break and just sort of go where they lead you – they are trying the best they can. Besides, if you get all upset, they will pick that up and then good luck getting anything other than worry out of them.


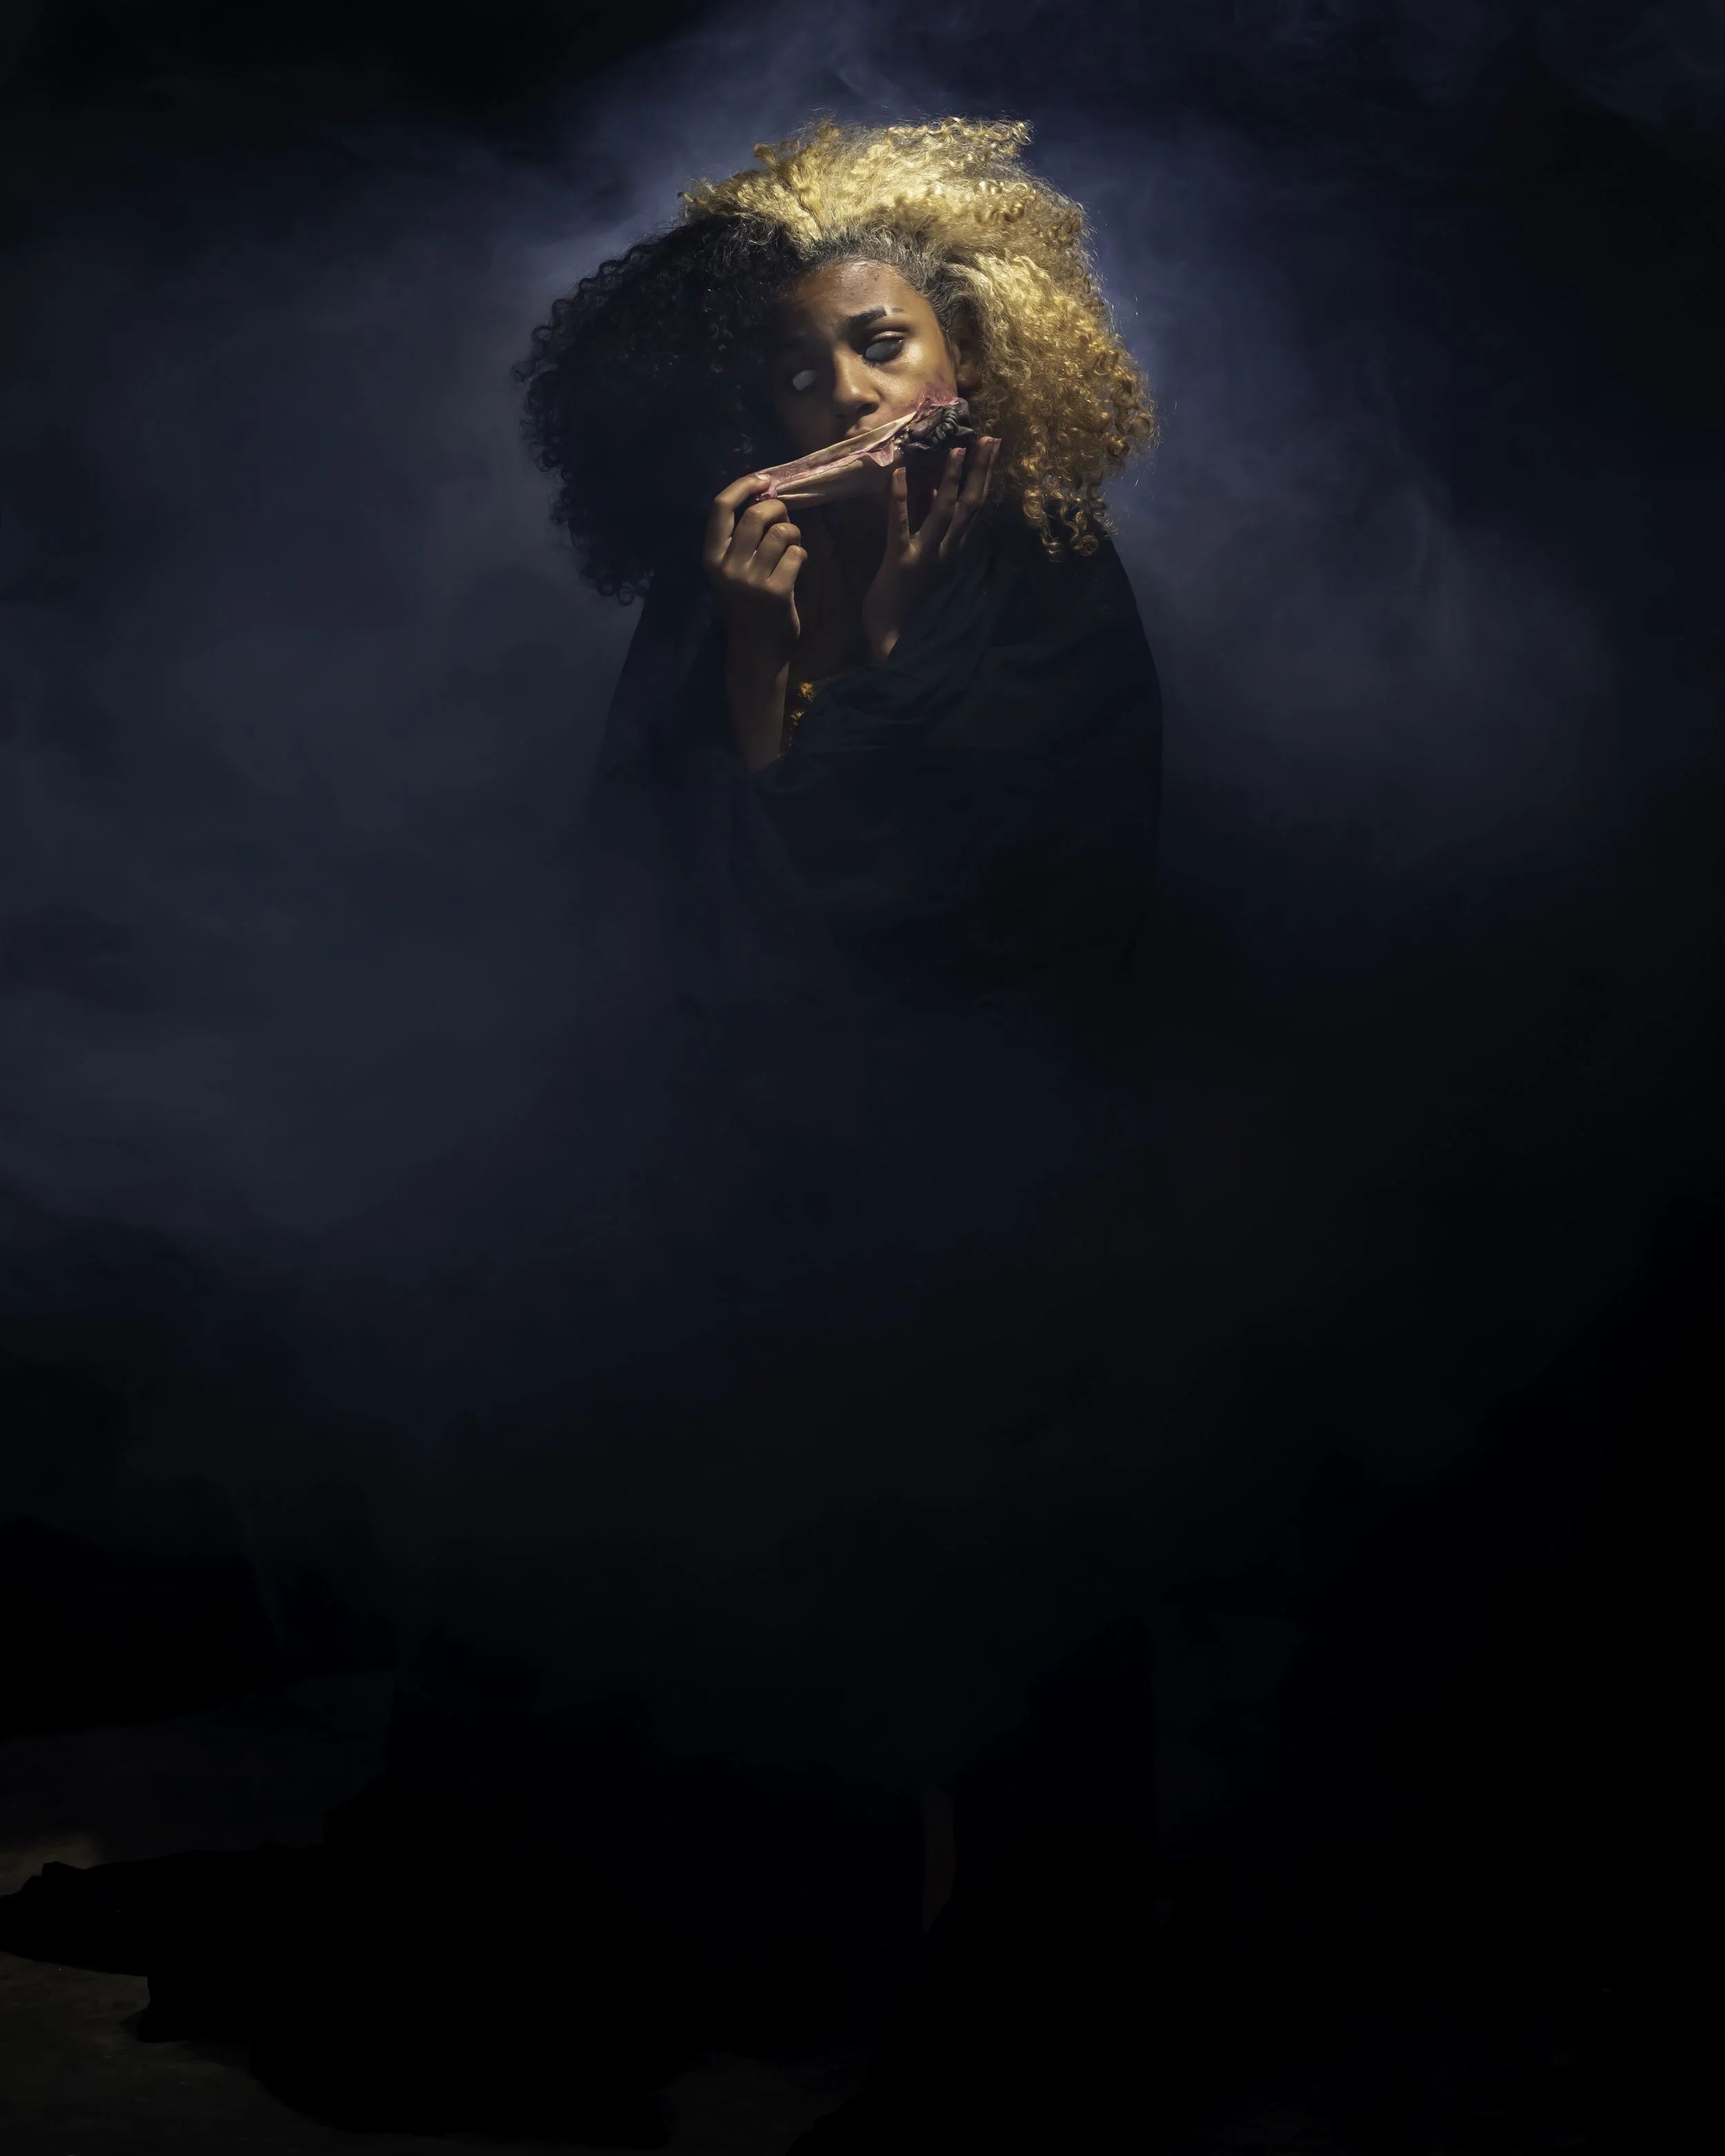
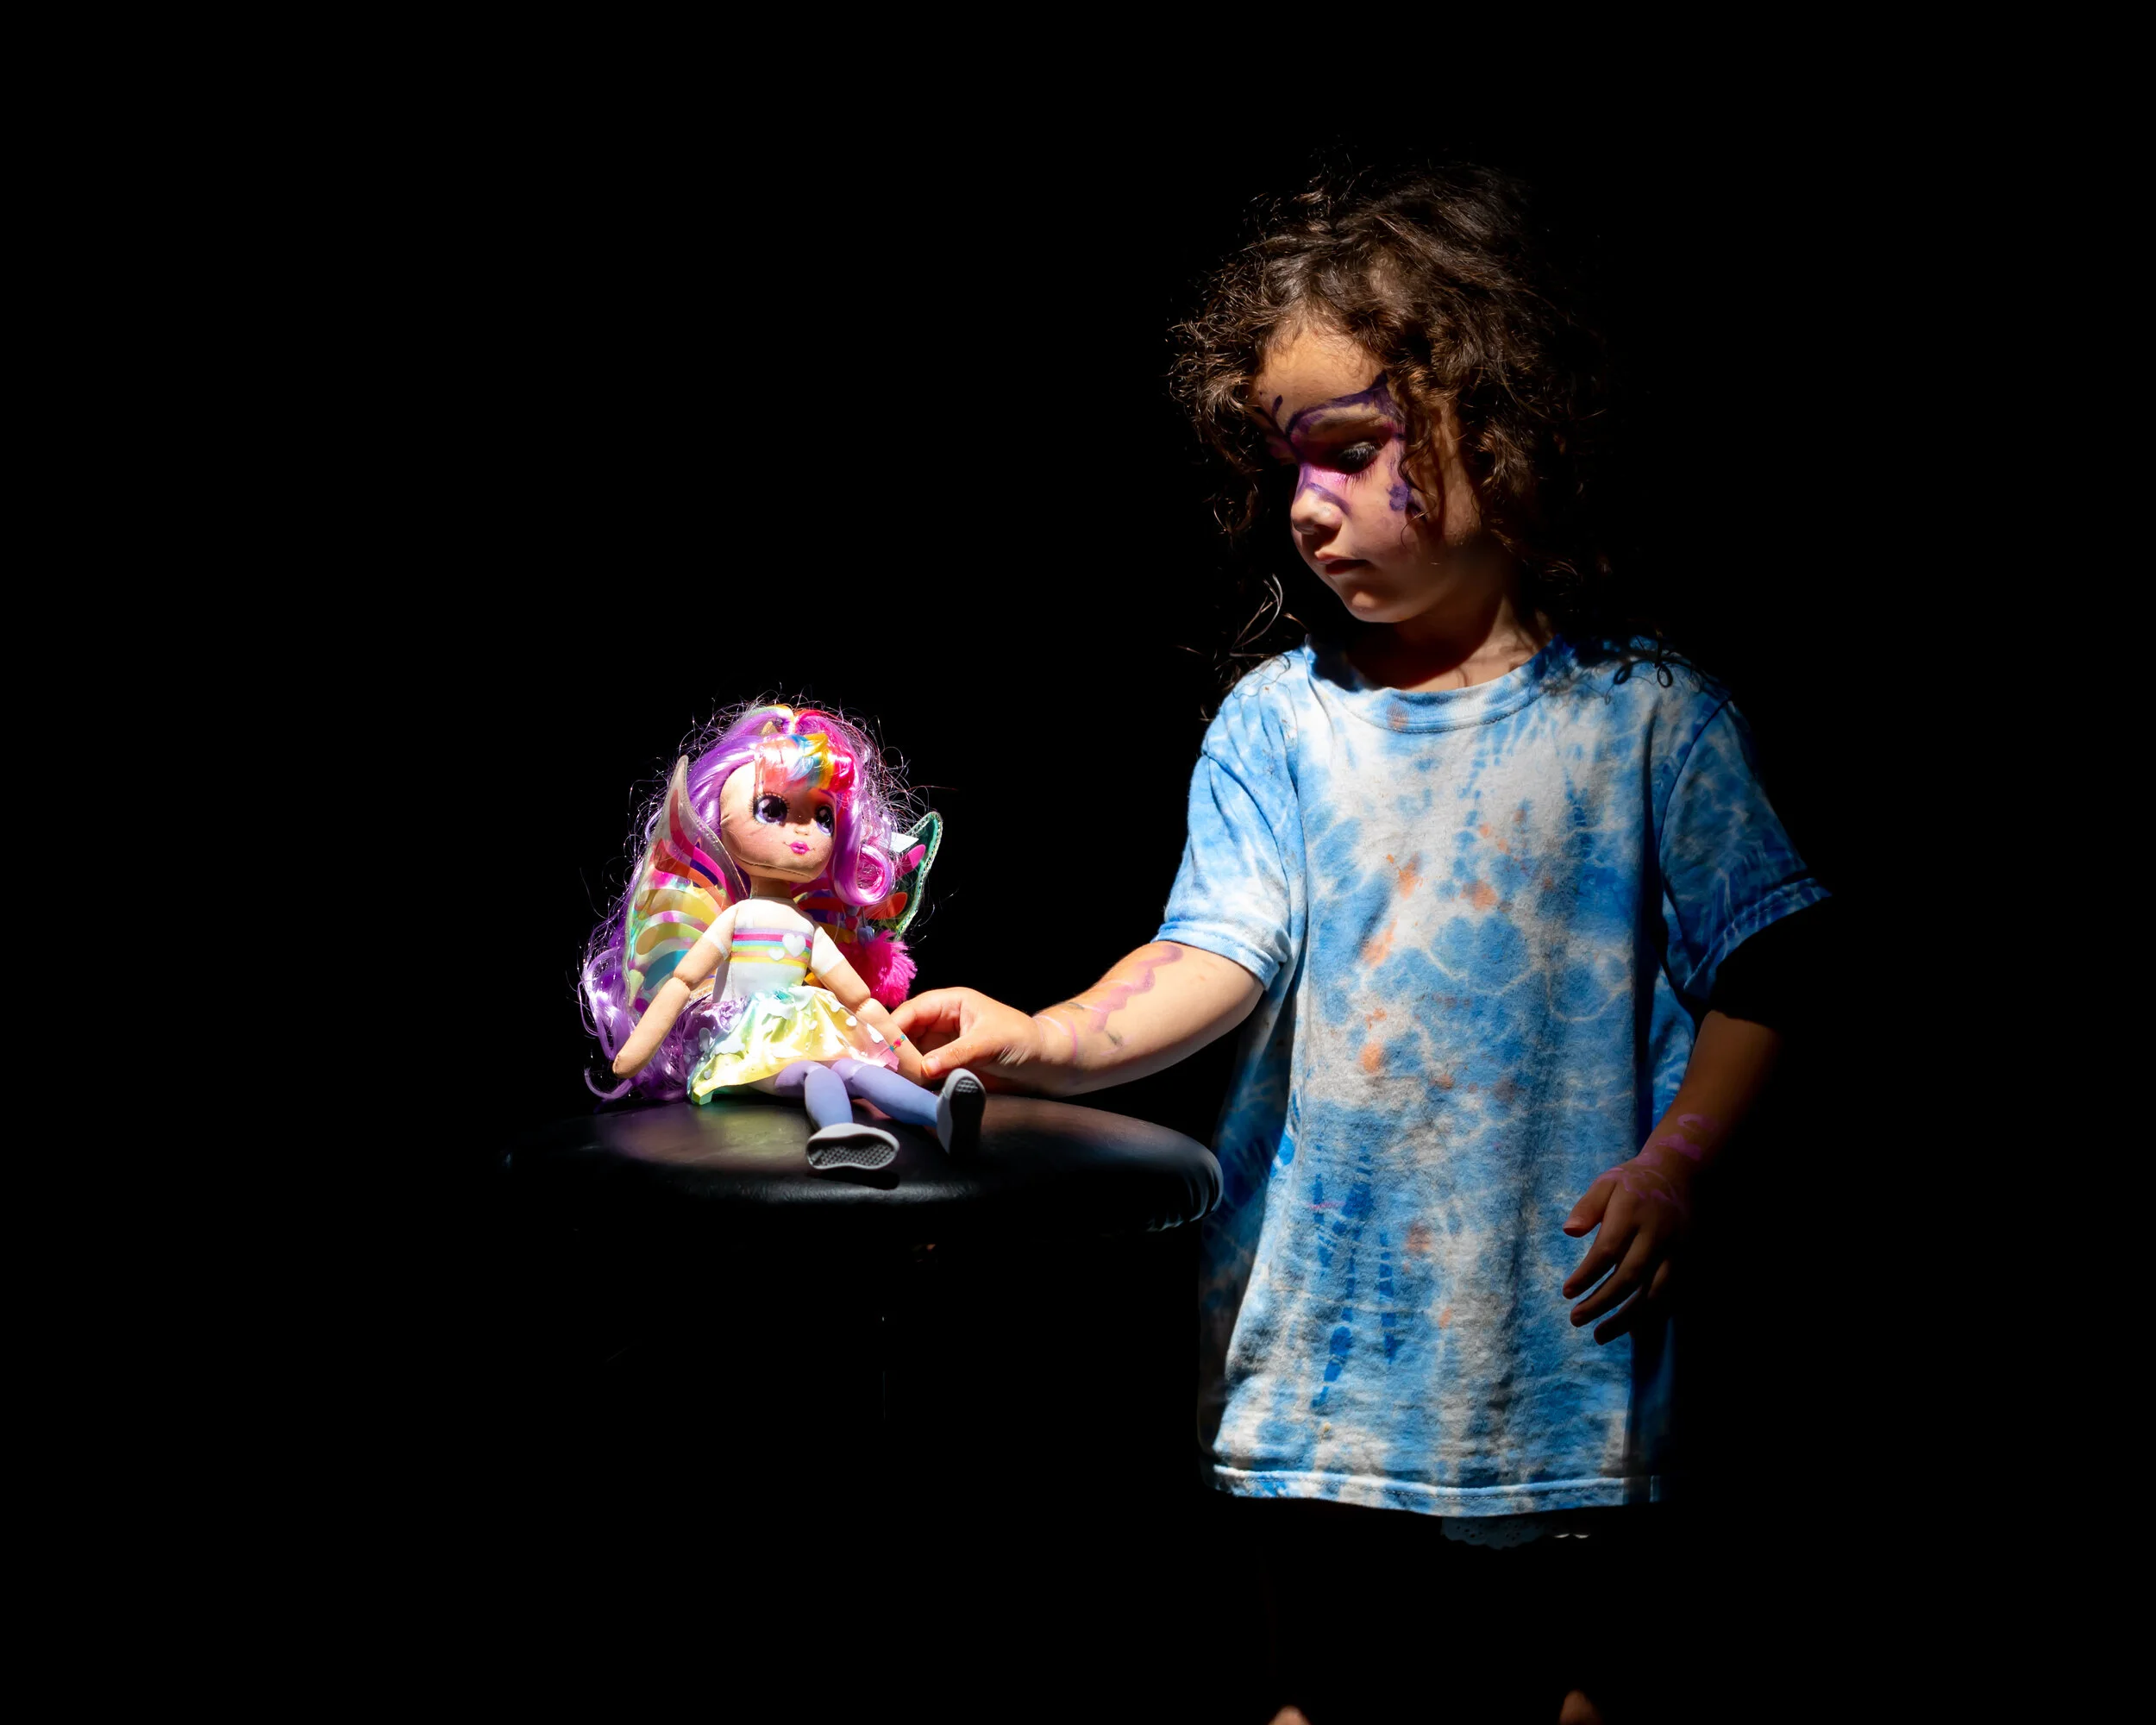
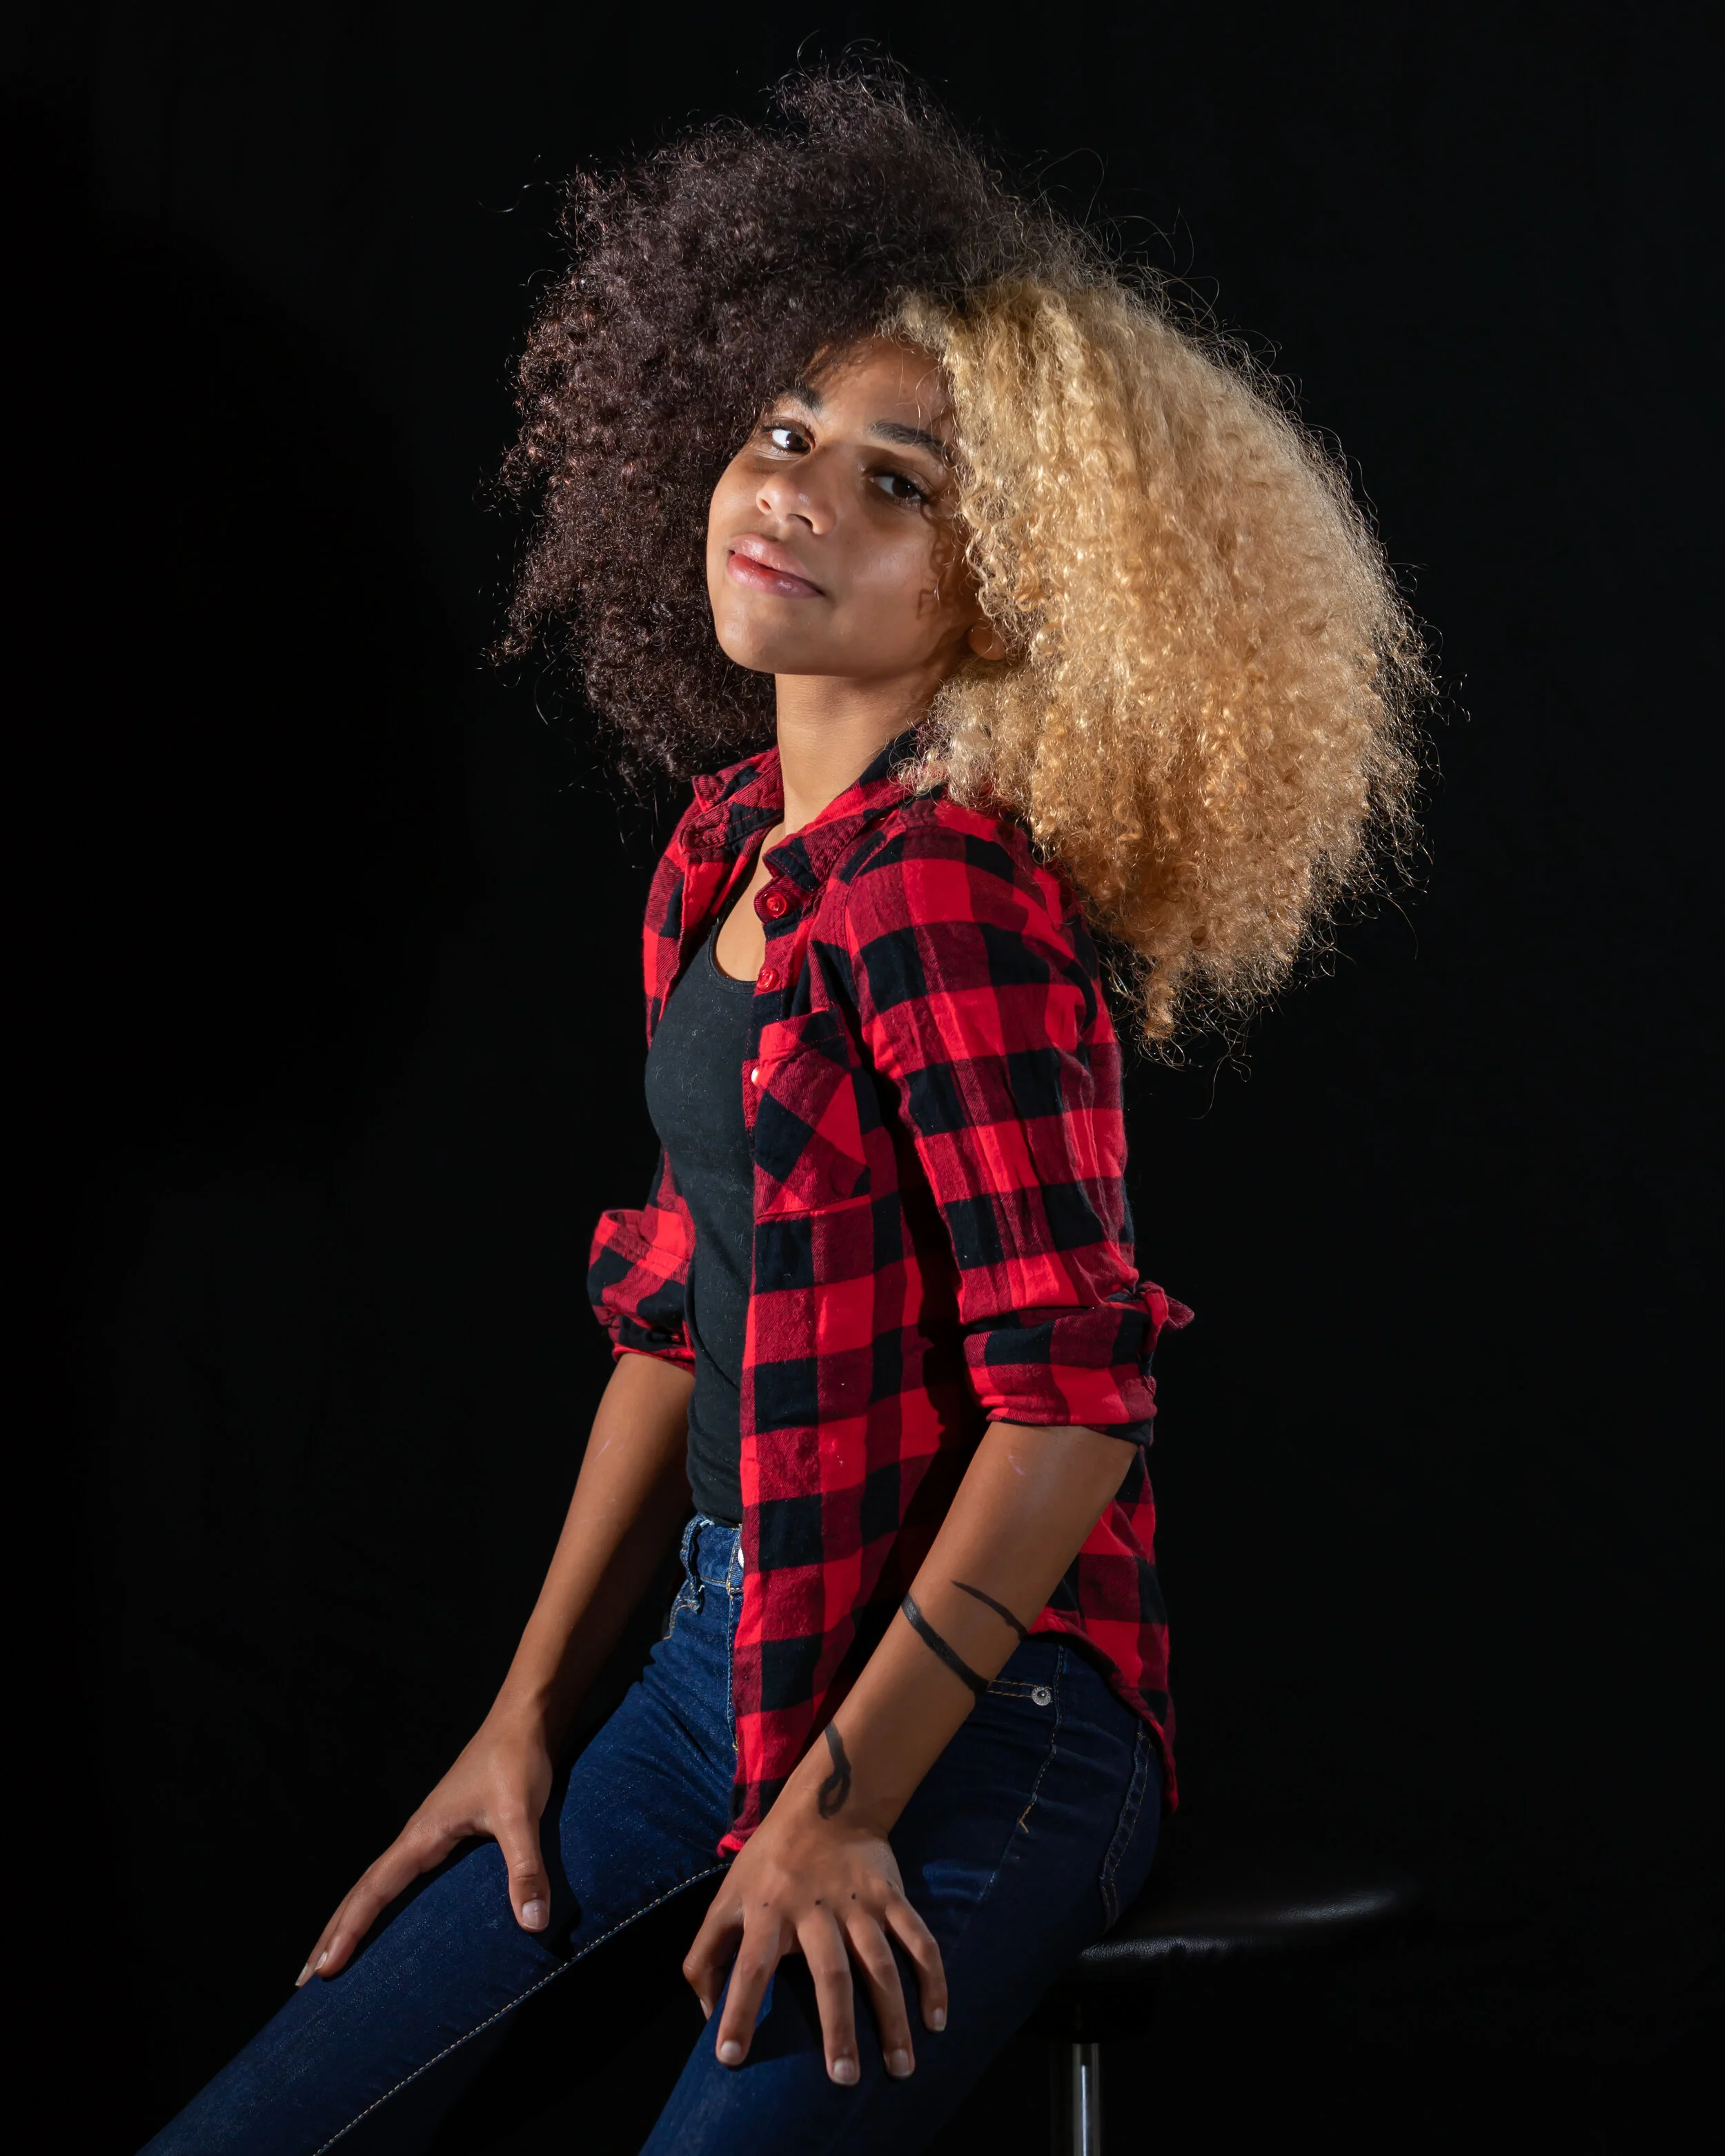
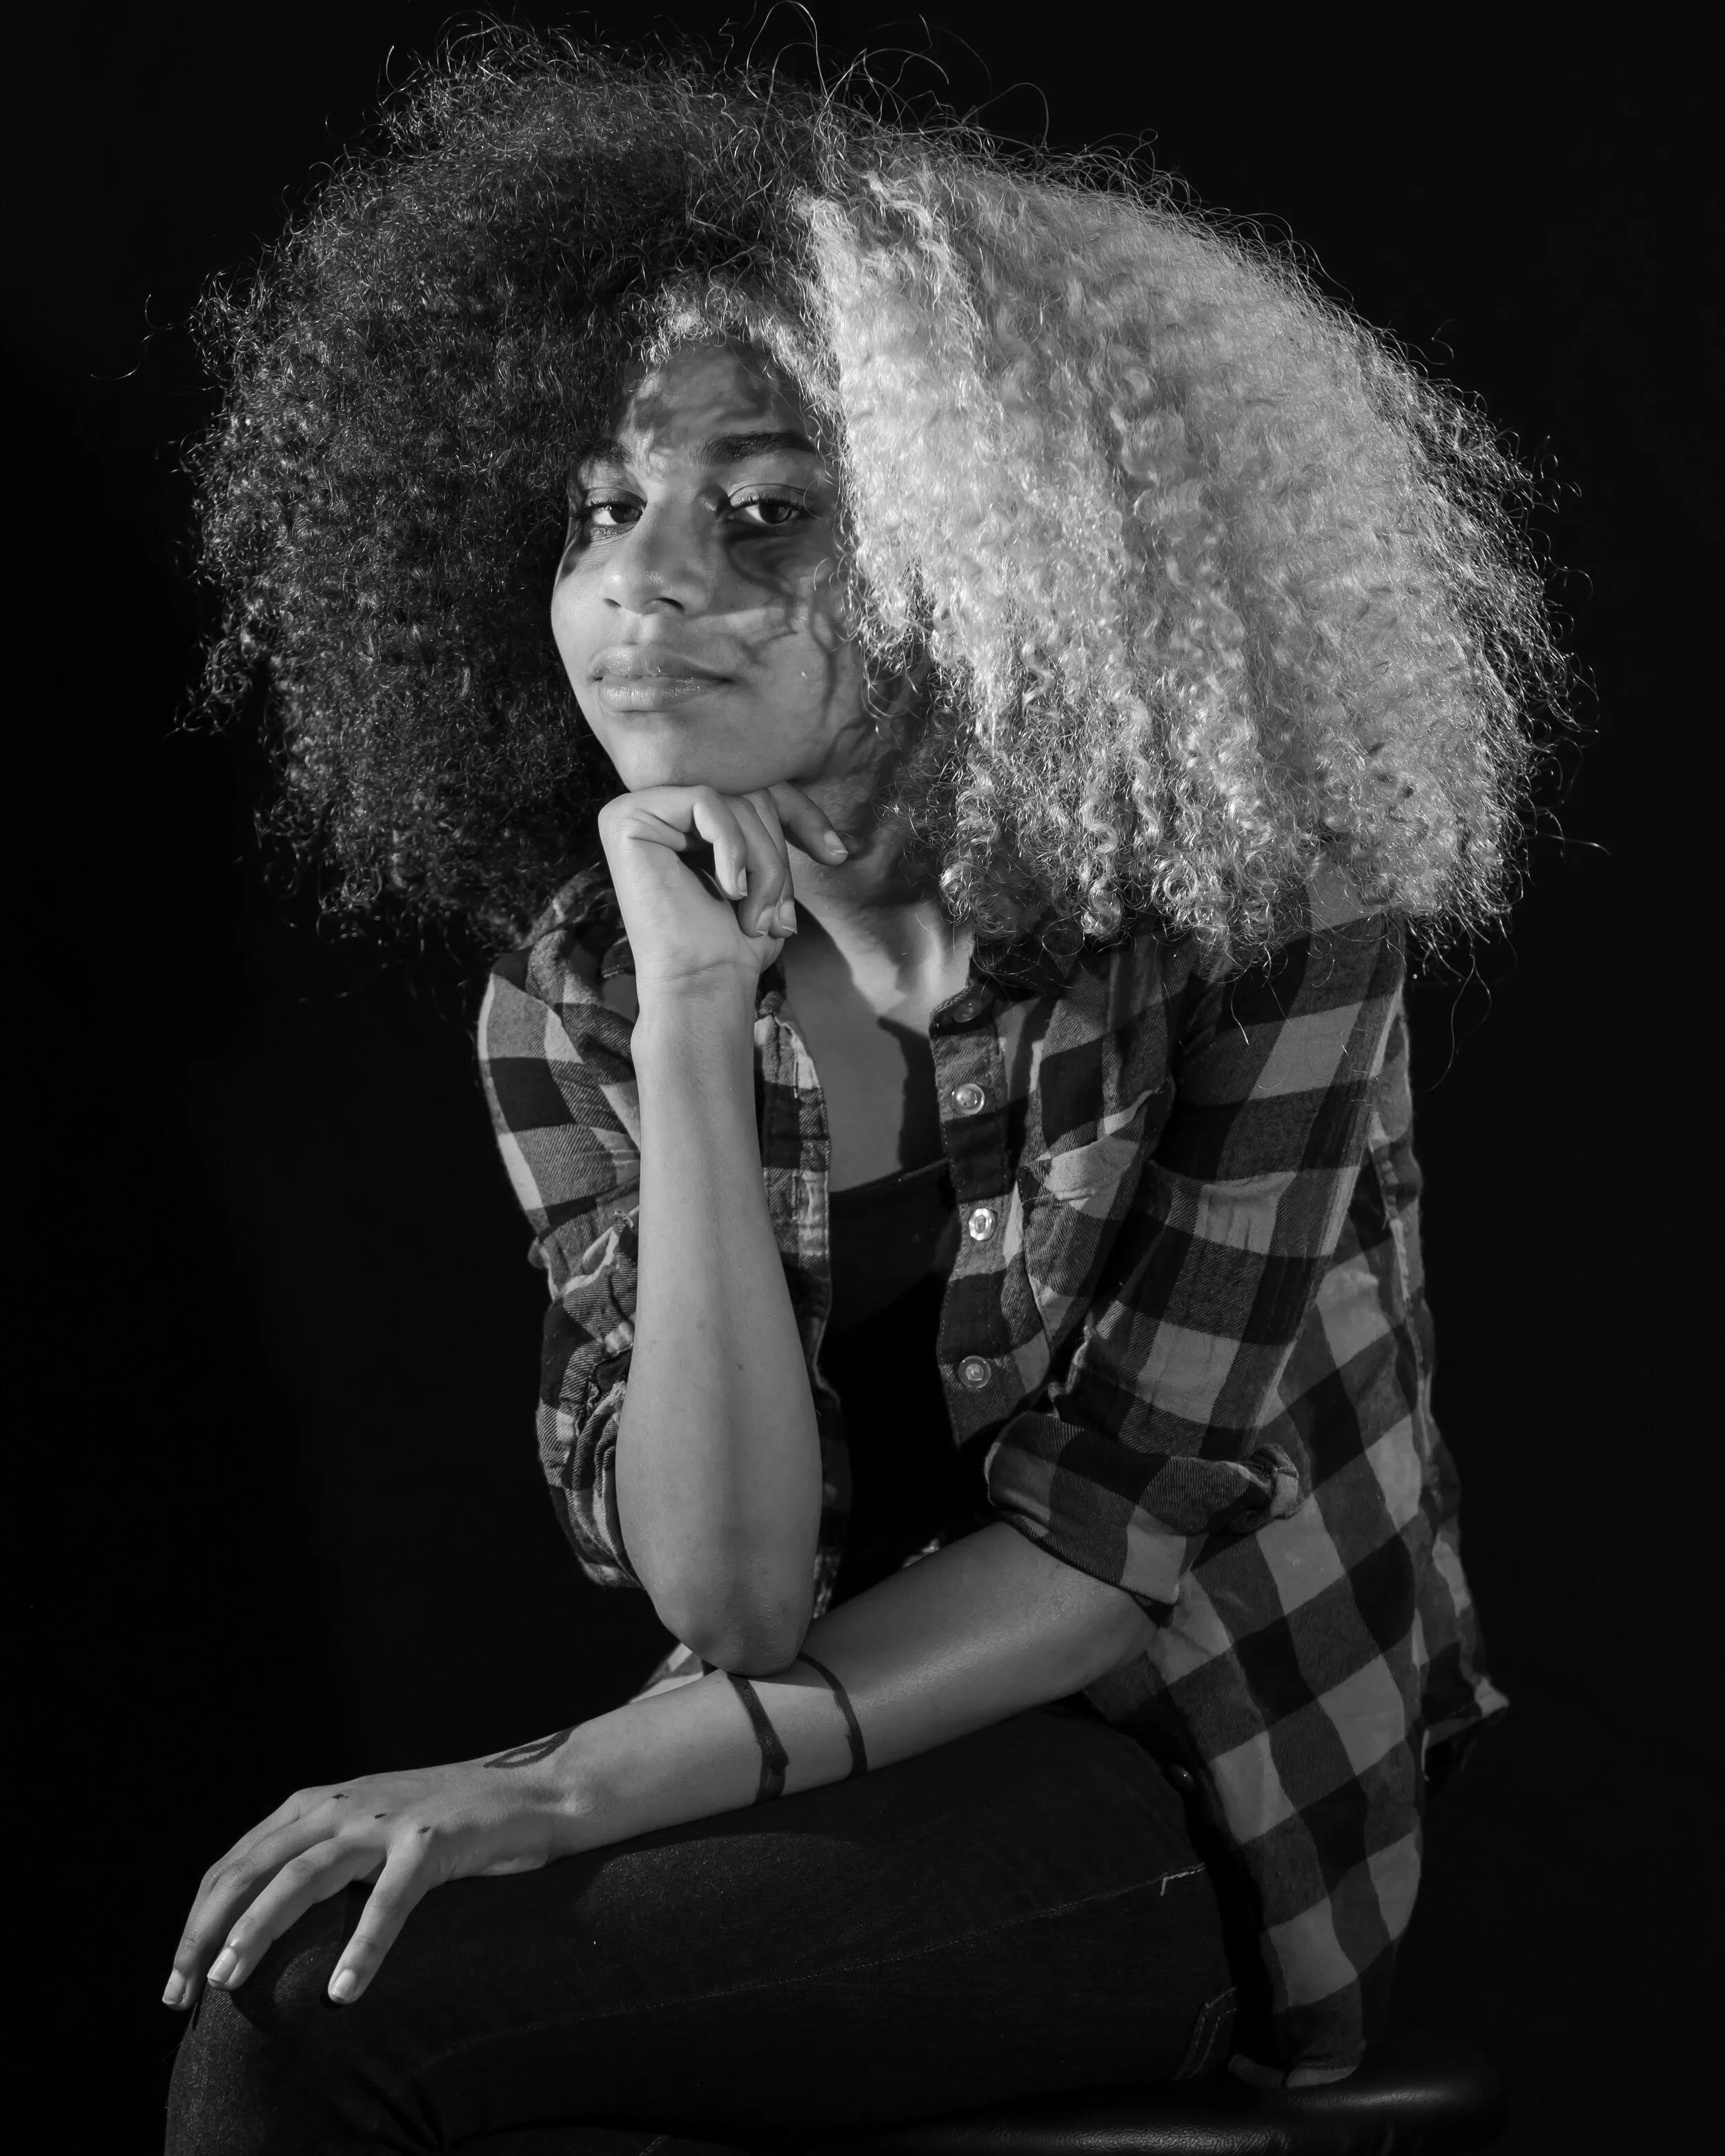
Anyway, for this shot I went with a quieter setup. Just two strobes with grids on either side of the models. One strobe was the key light and was brighter and the other light was just a very subtle fill light set low. This set up is great for melodramatic shots or calm shots where you really want to “paint” with light and shadow. One side note – if you don’t have another strobe or speedlight you can get a similar effect with the white side of a photography reflector though I’d recommend an assistant for adjustment as you zero in the exact angle or something you can adjust easily that will hold the reflector.

Tags Photography Tips
Comment
October 28, 2021 Cannibal-8.jpg
October 28, 2021 Cannibal-11.jpg
October 28, 2021 Cannibal-14.jpg
October 28, 2021 Cannibal-15.jpg
October 28, 2021 Cannibal-16.jpg
October 28, 2021 Cannibal-20.jpg
October 28, 2021 Cannibal-25.jpg
October 28, 2021 Cannibal-21.jpg
October 28, 2021 Cannibal-22.jpg
October 28, 2021 Cannibal-23.jpg
October 28, 2021 Cannibal-28.jpg
October 28, 2021 Cannibal-31.jpg
October 28, 2021 Cannibal-36.jpg
October 28, 2021 Cannibal-8.jpg October 28, 2021 Cannibal-11.jpg October 28, 2021 Cannibal-14.jpg October 28, 2021 Cannibal-15.jpg October 28, 2021 Cannibal-16.jpg October 28, 2021 Cannibal-20.jpg October 28, 2021 Cannibal-25.jpg October 28, 2021 Cannibal-21.jpg October 28, 2021 Cannibal-22.jpg October 28, 2021 Cannibal-23.jpg October 28, 2021 Cannibal-28.jpg October 28, 2021 Cannibal-31.jpg October 28, 2021 Cannibal-36.jpg

Playing Dice Games With Cannibals.

Joshua Hubbell October 29, 2021

He kept losing but he kept going back to play her game. He needed the food she promised if he won but he should have known you don’t play games with cannibals, especially not games of chance. Losses against her came at a high cost. She needed him to keep his arm so she could keep playing against him. She took an ear this time. His consultation prize wasn’t worth it.


This has been a great October. If you enjoyed our horror sessions then check back next October for those, but next month keep an eye out – we will be trying to recreate a classic painting in between featuring photography tips and tricks. And of course, if you want any family photography work or wedding photography work just send us an email.


In the meantime, this photo session was a little more careful with the setup. For lighting, we kept it mostly low with two strobes hooked up to softboxes with grids on to heavily control the lighting. Additionally, there was a speedlight overhead with a snoot and a grid on – again, to heavily control the light and keep a small circle of light on the table. Remember, in photography light and shadows are your brushes and what you do with them is how you will communicate your work.


As for props, the main one was the cut ear. Obviously, we didn’t cut our model’s ear off. We did create a mold cast of his ear with alginate and then used white resin mixed with mica powder for color. The mica powder went terrible. I don’t think I mixed enough in, and it ended up looking pink, so I ended up painting it – poorly. Thankfully it didn’t have to look good as I’d be burying it in blood it just had to look gnarly and mangled, which my shoddy fabrication skills really helped make happen on accident. Proving yet again that incompetence can very much result in success if you pour enough blood on it.

Tags Horror Photography, 2021
Comment
IG - October 27, 2021 Post.jpg
IG - October 27, 2021 Post-2.jpg
IG - October 27, 2021 Post-3.jpg
IG - October 27, 2021 Post-4.jpg
IG - October 27, 2021 Post-5.jpg
IG - October 27, 2021 Post-6.jpg
IG - October 27, 2021 Post.jpg IG - October 27, 2021 Post-2.jpg IG - October 27, 2021 Post-3.jpg IG - October 27, 2021 Post-4.jpg IG - October 27, 2021 Post-5.jpg IG - October 27, 2021 Post-6.jpg

Testing a new backdrop holder.

Joshua Hubbell October 27, 2021

Of course, you need a camera and a lens to do photography, but I find my biggest quality of life issues are from the smaller pieces. For example, my life got so much easier when I upgraded my remote triggers and receivers. That got me a reliable, trigger wire-free setup that I know will work every time. Well now I’ve upgraded my backdrop holder (I should probably find out what they are actually called but you know what I am talking about). And it was worth it. No longer am I asking, “will this hold my backdrops?” It definitely is and doing so extremely well. 


Anyway, for this test run I just grabbed whoever and had them do a pose and went with the chaos – which turned out well. As I always say, when something unexpected happens you tend to want to go with that. In the case of the four-year-old, I told her to stand at an angle with her arms crossed and her legs shoulder width apart and she came out with a much better interpretation of what I had in mind, so we rolled with that.


By the way, I believe she was Sally from the Nightmare Before Christmas for some Halloween related event just before this session.


The set up for this session involves one speed light in back for a hair light and two strobes up front with octagon softboxes up front. No grids this time.

Tags gear test, backdrop test
Comment
IG - October 25, 2021 Post.jpg
IG - October 25, 2021 Post-2.jpg
IG - October 25, 2021 Post-3.jpg
IG - October 25, 2021 Post-4.jpg
IG - October 25, 2021 Post-5.jpg
IG - October 25, 2021 Post.jpg IG - October 25, 2021 Post-2.jpg IG - October 25, 2021 Post-3.jpg IG - October 25, 2021 Post-4.jpg IG - October 25, 2021 Post-5.jpg

Planned Tech Crew Session Set Up

Joshua Hubbell October 25, 2021

I don’t post my work from my volunteering for theatre photography with a school, but I can show you our test set up. The goal when working with the tech crew is to make others realize that while the subject may be young, they are trained in a skill that is a bit more complex than normal skill and deserve the respect that comes with knowing that complex skill. You can train a chicken to play tic tac toe, you can’t train a chicken to operate stage lights and effects.


Part of it involves a little trickery, as I know we can’t get access to the tech crew equipment, but I do have access to my equipment, and they do have access to some easy to grab items, so I mix and match everything. For starters, for this year’s set up, I plan on using one of my strobes that conveniently had the stickers fall off, but it sure does look like a stage light to the untrained (or basically everyone who has never actually seen a stage light up close). I plan to also have the tech crew bring any headsets, clipboards, or scripts they may need with their job with them. It adds to the professional look and having a tool of your trade, even if it may seem insignificant to you, makes it easier to relax and do the photo.


For the shot itself I go with a speedlight up high in back pointed down as a hair light, a strobe just off to front with a square softbox and a grid on as the key light, and a strobe just off to the side with a long softbox and a grid as a fill light. I throw in the previously started strobe and a step ladder for props/seating and the rest sort of works itself out. A lot of poses can be pulled out of this set up which is good because tech crews tend to be somewhere between 5 and 10 people.

Comment

The Moon!

Joshua Hubbell October 22, 2021

Another quick post as I have processing work for a client and that has a majority of my focus right now.


The moon!


A full (or full-ish) moon is a great way to practice learning the photography trinity – shutter speed, aperture, and ISO settings on your camera as the moon is a great way to practice what you may know about them and see a clear effect as you adjust them. It is also a great opportunity to dip your feet in the manual mode settings on your camera. Do keep in mind that the moon and the night sky moves faster then you realize though and you will get motion blur if you set that shutter speed too low. But that’s all the more reason to practice with the moon – so you experience that too.


After that you can get into the finer details of getting trees or clouds in front of the moon. Clouds take patience though. And just building from there. The sky’s the limit so to speak.


Also photographing the moon introduces you to truly understanding your subject as much as possible. For example, the moon has phases, and getting the phase you want to photograph will require research. Furthermore, understanding how the light involved works can help you decide on better photography settings.  Finally, the moon moves around in the sky, so you might need to know where the moon is and where it is heading or you might find it’s nowhere to be found in the sky when you go to photograph depending on the time of year.


I’d recommend starting with a tripod as well until you get a handle on them, though keep in mind I rather dislike using tripods and often get mine out only to have an argument with it. Not to imply tripods are bad – they are amazing tools, just not usually with my photography style at this point in time. They make great paper weights too.

Tags Photography Tips, moon
Comment
October 17, 2021 - 1.jpg
October 17, 2021 - 2BW.jpg
October 17, 2021 - 3.jpg
October 17, 2021 - 4BW.jpg
October 17, 2021 - 5.jpg
October 17, 2021 - 1.jpg October 17, 2021 - 2BW.jpg October 17, 2021 - 3.jpg October 17, 2021 - 4BW.jpg October 17, 2021 - 5.jpg

Do projects to push your skill and improve!

Joshua Hubbell October 20, 2021

Out for a walk one night, she was worrying about the greater philosophies of life. It was with great relief when she realized that she never, in fact, existed in the first place. At this point in time, something else took her place and proceeded to peel away the skin that hid its existence.


Shots like these are why I do shots like these; so much was learned in creating this. The more you learn the more you have in your toolbox and the more you can pull out of that toolbox when it comes to working with clients. This took a bit of prosthetic creation but also some photoshop touch ups. This is also why you see other photographers doing various projects seeming for no reason at all. It isn’t just to showcase skill but also to push their skill into new areas.


When you become stagnant in your craft is when you are in the most danger of giving up on it. Stagnation leads to boredom, boredom leads to distractions, and distractions leads to giving up.


This shot also included a 3-light setup, all speedlites. One speedlite overhead as a key light, one behind as a hair light, and one just off to the side as a fill light. We also used some fog to bring that backlight out some.

Tags Horror Photography
Comment
IG - October 18, 2021 Post.jpg
IG - October 18, 2021 Post-2.jpg
IG - October 18, 2021 Post-3.jpg
IG - October 18, 2021 Post-4.jpg
IG - October 18, 2021 Post-5.jpg
IG - October 18, 2021 Post-6.jpg
IG - October 18, 2021 Post-7.jpg
IG - October 18, 2021 Post-8.jpg
IG - October 18, 2021 Post.jpg IG - October 18, 2021 Post-2.jpg IG - October 18, 2021 Post-3.jpg IG - October 18, 2021 Post-4.jpg IG - October 18, 2021 Post-5.jpg IG - October 18, 2021 Post-6.jpg IG - October 18, 2021 Post-7.jpg IG - October 18, 2021 Post-8.jpg

A Girl and Her Puppy

Joshua Hubbell October 18, 2021

And now for the scariest thing of all: a toddler with a puppy. Actually, the horror photo for this week needs more time to bake. Check back Wednesday. In the meantime, here’s a puppy photo shoot.


That background wasn’t the intended background. I wanted a red background but since the red backdrop was sitting pretty in a box at some other location, I went with what I had. But nothing ever goes according to plan and part of photography is just rolling with what plays out. This is especially true for 4-year-olds and puppies and even more true when you mix 4 year olds and puppies.


Obviously with a 4-year-old and a puppy, posing was out the window. However, the scenario can still be manipulated. For example, the rocking chair controlled the direction the action would take place in. Putting the puppy in the child’s lap gave two scenarios – a calm puppy resting in a lap or a puppy on the move leaving a lap. In these scenarios, don’t try to control the chaos just try to guide it along in a direction that you can work with.


We followed this all up with a 1-year-old mastiff with the 4-year-old and for some reason it ended up looking like she and her dog were about to drop their next rap album.


This worked out well. I used a 3-light setup. Two strobes: one with a rectangle softbox and a grid aimed at their faces at an angle (key light) and the other with a long softbox and a grid aimed at them directly to their left (fill light). Finally, a third speedlight up at an angle behind them on a boom stand (hairlight).

Tags photography tips
Comment
IG - October 15, 2021 Post.jpg
IG - October 15, 2021 Post-2.jpg
IG - October 15, 2021 Post-3.jpg
IG - October 15, 2021 Post-4.jpg
IG - October 15, 2021 Post-5.jpg
IG - October 15, 2021 Post-6.jpg
IG - October 15, 2021 Post.jpg IG - October 15, 2021 Post-2.jpg IG - October 15, 2021 Post-3.jpg IG - October 15, 2021 Post-4.jpg IG - October 15, 2021 Post-5.jpg IG - October 15, 2021 Post-6.jpg

Babies.

Joshua Hubbell October 15, 2021

Another quick one as I have two major photo sessions coming up. Babies!


I find that most babies tend to give an angry Winston Churchill look, which is fine if you are trying to win World War II, but for family photos you will need to use some tricks. However, you need to keep in mind that all places are new to babies, that’s just the nature of babies and time. There are some things you can do to improve your odds though.


For starters, have patience. You don’t just show up to a party and start talking to people, you get a feel for the area first and then start a conversation. While babies don’t really talk, they do still need time to warm up. Be patient but be ready. You may only have a few seconds to get the shot you won’t when the facial expression is there.


Also trust the baby’s family. Odds are the parents know how to get a laugh or a smile depending on how old the baby is. A few months, they absolutely will know how to get a smile or a laugh. A few weeks, maybe not so much. It never hurts to ask though.


If all else fails, try every funny sound you can make. I find this works a lot like hot and cold. Based off the look you get you are either getting hot and closer to a smile or cold and further from a smile. You will see what I mean if you try it yourself.

Comment
October 2, 2021 Bella and the dog blessing-2.jpg
October 2, 2021 Bella and the dog blessing-5.jpg
October 2, 2021 Bella and the dog blessing-13.jpg
October 2, 2021 Bella and the dog blessing-14.jpg
October 2, 2021 Bella and the dog blessing-19.jpg
October 2, 2021 Bella and the dog blessing-2.jpg October 2, 2021 Bella and the dog blessing-5.jpg October 2, 2021 Bella and the dog blessing-13.jpg October 2, 2021 Bella and the dog blessing-14.jpg October 2, 2021 Bella and the dog blessing-19.jpg

Props and Movement

Joshua Hubbell October 13, 2021

Another quick post, this time with refresh pointers.


Props and movement.


Never be afraid to use a prop, they give the hands something to do while at the same time adding to the content of the photo. The trick is to use a prop that makes sense for what you are trying to do. For example, these were taken in October so it makes sense to have a pumpkin of some sort.


Then there is movement. I always try to have my subjects moving in some fashion or another. It helps make the poses look more natural. Instead of having the muscles clinched up because the subject is trying to “freeze” for a photo, I have their muscles being natural as they do what they do best – control movement.


However, when you take props and mix them in with movement, you or your subject sometimes get ideas for other possible poses you can do so it usually ends up paying off having both.

Tags Photography Tips, October
Comment
October 9, 2021 Mouthless Horror.jpg
October 9, 2021 Mouthless Horror-4.jpg
October 9, 2021 Mouthless Horror-9.jpg
October 9, 2021 Mouthless Horror-19.jpg
October 9, 2021 Mouthless Horror-14.jpg
October 9, 2021 Mouthless Horror-20.jpg
October 9, 2021 Mouthless HorrorBW-21.jpg
October 9, 2021 Mouthless Horror.jpg October 9, 2021 Mouthless Horror-4.jpg October 9, 2021 Mouthless Horror-9.jpg October 9, 2021 Mouthless Horror-19.jpg October 9, 2021 Mouthless Horror-14.jpg October 9, 2021 Mouthless Horror-20.jpg October 9, 2021 Mouthless HorrorBW-21.jpg

The Mouthless Horror

Joshua Hubbell October 11, 2021

He was told it was from another reality. That he could only look at it but that he mustn’t touch it. They warned him it would change him in horrible ways if he touched it. He did not listen. Now he’ll never speak about it.


This is a more complex shot then usual with 2 tricks being used. There are 4 lights involved with 3 on in any shot. The two strobes were consistent for general lighting of the subject. One strobe up front with a honeycomb grid over a long soft box and one over head with a honeycomb grid to create a circle of light around the subject and the items.


The tricks occurred with the speedlites. For the first trick we put one speedlite in the box with the crystal ball but under one layer of the sheet. This made the ball appear to be glowing from the box. If you do this, be careful. Flashes get hot when they go off, and a sheet can catch fire if you go too fast with this. However, this will make something in a box or other item appear to be glowing.


The other trick was lining a light up with a purple gel perfectly with the crystal ball. This would make the light shine through it and make the ball appear to glow. The color could be any color gel we had. However, the light in the background had to be aligned with the ball perfectly or it wouldn’t work. Good exercise for verbal command practice. The light was also equipped with a snoot and a grid to help constrict where it went.


The mouth disappearing was done with prosthetics we made. I’ll post a “how to” later. This may not be an effect you want to recreate but the technique can be easily adjusted for other ideas and is worth knowing.


Tags Photography Tips, Horror Photography
Comment
September 30, 2021 Vivian-3.jpg
September 30, 2021 Vivian-5.jpg
September 30, 2021 Vivian-6.jpg
September 30, 2021 Vivian-7.jpg
September 30, 2021 Vivian-9.jpg
September 30, 2021 Vivian-3.jpg September 30, 2021 Vivian-5.jpg September 30, 2021 Vivian-6.jpg September 30, 2021 Vivian-7.jpg September 30, 2021 Vivian-9.jpg

Have them walk towards you!

Joshua Hubbell October 8, 2021

This is a standard photographer trick, but it works well. Simply have your subject move towards you. This will get the subject to look more natural and make your pictures have a sense of movement which ups the odds of getting some decent results. Generally, you want your subject to move past you, so have them walk towards you and then direct them to which side they should go.


For these photos she was running at me again. As you can see, she offers up a various different looks which is fine – that means I have various different looks to work with during the processing phase. I generally focus on the eyes when this sort of setup happens. You will also want to understand your camera’s autofocus settings. For example, mine has a setting that will keep refocusing as the subject moves closer so long as I keep the subject constant (I keep my camera on the person I am photographing as they move).


Anyways, unspeakable things come our way on Monday. Have a good weekend.

Comment
September 26, 2021 Vivian.jpg
September 26, 2021 Vivian-2.jpg
September 26, 2021 Vivian BW-2.jpg
September 26, 2021 Vivian BW-4.jpg
September 26, 2021 Vivian-4.jpg
September 26, 2021 Vivian-6.jpg
September 26, 2021 Vivian.jpg September 26, 2021 Vivian-2.jpg September 26, 2021 Vivian BW-2.jpg September 26, 2021 Vivian BW-4.jpg September 26, 2021 Vivian-4.jpg September 26, 2021 Vivian-6.jpg

Joshua Hubbell October 6, 2021

I’m short of time at the time of typing this up so this will be quick.


3 quick and easy tips or a review of 3 quick easy tips:


1)      If you want some dramatic lighting, position the sun so your subject’s head eclipses it. Keep in mind that if your subject moves much you can expect to be looking directly at the sun so coordinate carefully.


2)      Focus on the eyes. Poets write whole poems about the eyes for a reason.


3)      Get down or up to your subject’s level. What level? See number 2 here; eye level.


Bonus tip: a simple background often converts well to grayscale.

Tags Photography Tips, photography advice
Comment
October 3, 2021 Gouged eyes-2.jpg
October 3, 2021 Gouged eyes-6.jpg
October 3, 2021 Gouged eyes-8.jpg
October 3, 2021 Gouged eyes-9.jpg
October 3, 2021 Gouged eyes-10.jpg
October 3, 2021 Gouged eyes-11.jpg
October 3, 2021 Gouged eyes-16.jpg
October 3, 2021 Gouged eyes-17.jpg
October 3, 2021 Gouged eyes-18.jpg
October 3, 2021 Gouged eyes-2.jpg October 3, 2021 Gouged eyes-6.jpg October 3, 2021 Gouged eyes-8.jpg October 3, 2021 Gouged eyes-9.jpg October 3, 2021 Gouged eyes-10.jpg October 3, 2021 Gouged eyes-11.jpg October 3, 2021 Gouged eyes-16.jpg October 3, 2021 Gouged eyes-17.jpg October 3, 2021 Gouged eyes-18.jpg

Gouged eye fun!

Joshua Hubbell October 4, 2021

Yay, it’s October! Let’s start your week off with some gouged eyes! Our friend here made the mistake of trusting a random sign he found in the street and didn’t bother to call until after he did the deed. Unfortunately, he has no way to put the eyes back now. Hopefully your week goes better then his.


We made resin eyes for this. I’ll track down the videos we followed and post them later. My SFX assistant also used a modelling wax and scar blood for this plus SFX blood. Originally, her and I argued about using liquid latex as I wanted to minimize photoshopping out exposed areas until she pointed out the point of this exercise is to challenge my abilities at photo processing and photography as it is to challenge her abilities at special effects. She was right, so we went with her approach, and it worked out.


I shot most of these photos by the way. Blind as the SFX was over my eyes. I had my remote hooked up and palmed it. The one thing I did forget was to set my camera to a 2 second delay so I could push the button and quickly hide the remote. I had the music playing loud so I couldn’t actually hear my assistant moving around – she had fun with it.


We used a three-light set up, one strobe up front with a softbox and a grid. One strobe off to the side with a grid. One speedlight over head on a boom stand. In hindsight I should have had the lamp in the background on the other side of me and on so it would give the illusion of the light coming from it. I forgot about it, but it turned out fine.


#Marylandphotographer #annearundelphotographer #horrorphotography

Tags Horror Photography
Comment
IG - October 1, 2021.jpg
IG - October 1, 2021-2.jpg
IG - October 1, 2021-3.jpg
IG - October 1, 2021-4.jpg
IG - October 1, 2021-5.jpg
IG - October 1, 2021-6.jpg
IG - October 1, 2021.jpg IG - October 1, 2021-2.jpg IG - October 1, 2021-3.jpg IG - October 1, 2021-4.jpg IG - October 1, 2021-5.jpg IG - October 1, 2021-6.jpg

Soccer Session

Joshua Hubbell October 1, 2021

A quick post as we have been busy preparing for a photo session for this weekend.


Here we were doing soccer photos at night. We did these at the tail end of blue hour so I could manipulate my settings to get a darker background. Truth be told, I was trying to get rid of the fence entirely, but I kept having to move things closer to it due the lens I choose to use, but I am happy its still there. What I am not happy with are the leaves which I should have taken more time to deal with but that’s how it goes – you learn from your mistakes and move forward.


For posing, whenever you have props you need to have your subject interact with them. Fortunately, she plays soccer, so this was now problem. As always, think giraffe – long neck, chin down slightly. Remember, if you do try this and don’t have hi-speed sync you will have to keep the shutter speed higher than 1/250 or you will get light sync.


This is a two-light setup, one light at the side with a long soft box and one light overhead with a snout. Originally, we did this in a garage, but I realized the solid floor really looked out of sync with the soccer theme, so we moved it outside a week later and did it again. I am happy we did that.


Overall, we got what we were going for here.


Keep an eye or two out for our next photo session.

Tags Soccer, Photography Tips
Comment

Why there was a gap in this business blog.

Joshua Hubbell September 29, 2021

Thanks to everyone who supported me through this.


This video is pretty much the only other thing I am going to do on this. It happened and now I want to move on as I intend for “survived kidney cancer” to be more of a footnote in my life rather than a defining event of my life. That doesn’t mean I will refuse questions on it, but don’t expect much else about it from me unless something comes up.


One other note, I don’t do videos that often but I am paying for video processing tools so I might as well get to using them. Hopefully the quality will improve as I learn more about videography and video processing tools.

Tags kidney cancer, video
Comment
IG - September 27, 2021 Post.jpg
IG - September 27, 2021 Post-2.jpg
IG - September 27, 2021 Post-4.jpg
IG - September 27, 2021 Post-3.jpg
IG - September 27, 2021 Post-5.jpg
IG - September 27, 2021 Post-6.jpg
IG - September 27, 2021 Post-7.jpg
IG - September 27, 2021 Post.jpg IG - September 27, 2021 Post-2.jpg IG - September 27, 2021 Post-4.jpg IG - September 27, 2021 Post-3.jpg IG - September 27, 2021 Post-5.jpg IG - September 27, 2021 Post-6.jpg IG - September 27, 2021 Post-7.jpg

Blue Hour

Joshua Hubbell September 27, 2021

Say you went too long on golden hour and ran out of time. You don’t have to pack it up and go home yet, you just have to understand what comes next: blue hour. Blue hour is that period between golden hour and night when the sun is down, but some light is still there, a sort of blue light that gets darker until it is night. This is blue hour, and you can photograph during it, sort of.


There are a few catches to blue hour with the first being that the light will give your photos a blueish or cold look to them. Next, you need to understand that blue hour in the morning, things will start dark and only get brighter and blue hour in the evening things will start bright and only get darker – the time it takes depends on the time of year. Finally, the light tends to be weaker during blue hour, so expect to open your aperture up wide or at least have a lens that can do so.


If all else fails, you can always go black and white with photos taken during this time.


For these photos, this toddler wanted me to photograph her as she danced around with her fairy wings. It was getting dark out but as I always say – the best time to do photography work with children is when they want pictures taken of them. So, we went out and took a few photos.

Tags Photography Tips, Blue Hour
Comment
September 19, 2021 Vivian and Bella-7.jpg
September 19, 2021 Vivian and Bella-8.jpg
September 19, 2021 Vivian and Bella-9.jpg
September 19, 2021 Vivian and Bella-11.jpg
September 19, 2021 Vivian and Bella-13.jpg
September 19, 2021 Vivian and Bella-14.jpg
September 19, 2021 Vivian and Bella-7.jpg September 19, 2021 Vivian and Bella-8.jpg September 19, 2021 Vivian and Bella-9.jpg September 19, 2021 Vivian and Bella-11.jpg September 19, 2021 Vivian and Bella-13.jpg September 19, 2021 Vivian and Bella-14.jpg

Reading isn’t enough, you need to experiment with your craft to improve at it.

Joshua Hubbell September 24, 2021

I tell people all the time that the first “trick” to being a good photographer is to go out into the world and do photography. The second “trick” is to take everything you’ve read or learned about photography and experiment with it.


If you don’t try what you learn and experiment with it, you will never come to understand the nuance of it. For example, speedlights are not exactly like strobes, but if you practice with them enough you can mimic the effects of a strobe with a speedlight. The same goes for pretty much every other piece of photography equipment. The different brands of lenses out there are similar in function, but they are not duplicates. There are minor differences that you will want to learn about.


Furthermore, experimentation can really help with inspiration in two ways:


1) It helps you understand how to better put the pieces together once inspiration hits. Afterall, if you already learned how to utilize that light technique or that focus technique your inspiration calls for, you aren’t suddenly wasting time, or worse, muddying the vision as you struggle to make that technique appear. You already know how to make those pieces fit so they slide right in to form those parts of the picture.


2) Oftentimes experimentation can result in being the inspiration itself. I can’t tell you how many times I’ve worked with my lights and said to myself “hey, this setup would really work well with this idea!” and suddenly a whole other session is being planned.


And this applies to any craft, if you want to succeed, you need to go beyond just reading – you need to experiment with what you learned about.


These photos were from an experimentation session. I have two lights, one strobe off to the side with a long softbox to bring out the subject’s face and a speedlight overhead to get that stage light look. I wasn’t even planning to photograph the toddler, but she came out when I was finished setting up and I just went with it. I got a few ideas from this session so I’m glad I went with it.

Tags Photography Tips
Comment
September 22, 2021 Post.jpg
September 22, 2021 Post-2.jpg
September 22, 2021 Post-3.jpg
September 22, 2021 Post-4.jpg
September 22, 2021 Post-5.jpg
September 22, 2021 Post-6.jpg
September 22, 2021 Post-7.jpg
September 22, 2021 Post.jpg September 22, 2021 Post-2.jpg September 22, 2021 Post-3.jpg September 22, 2021 Post-4.jpg September 22, 2021 Post-5.jpg September 22, 2021 Post-6.jpg September 22, 2021 Post-7.jpg

Photographing a Sports Event… Without Photographing the Sports Event.

Joshua Hubbell September 22, 2021

I was at a middle school soccer game yesterday. I was there primarily to photograph my niece while she was on the field and I did that, however I am not a fan of posting pictures of other people’s kids so you won’t see them. But this is a good opportunity to give a few pointers about sports events when you can’t really photograph them.


The thing about sporting events is that they do fall into a category where I think special gear is needed. For example, if you are doing anything that has a large field you are going to want to use a telephoto lens that can cover that distance. Furthermore, the gear you need will be tailored to the sport so oftentimes you won’t be getting that perfect shot you want.


But you aren’t hosed for photography if you don’t have the gear for it. When you are at a sporting event and feel the desire to photograph simply turn around. There is always something going on in the audience that you can photograph. In this case, my other nieces were up to stuff. One was running back and forth and looking around. This was perfect opportunity to get her picture. The other was up on her mom’s shoulder – a great photo chance. Failing that you can always get the crowd cheering or, I guess, jeering.


The point is, sporting events are great because there are pretty much always other stories playing out nearby if you can’t photograph the story you want due to gear issues. That stated, strangers generally dislike random people photographing them and not all sporting arenas/locations allow you to do that sort of photography so be aware of the rules and laws involved.

Tags Photography Tips, Sports Photography
Comment
September 20, 2021 Post.jpg
September 20, 2021 Post-2.jpg
September 20, 2021 Post-3.jpg
September 20, 2021 Post-4.jpg
September 20, 2021 Post-5.jpg
September 20, 2021 Post-6.jpg
September 20, 2021 Post.jpg September 20, 2021 Post-2.jpg September 20, 2021 Post-3.jpg September 20, 2021 Post-4.jpg September 20, 2021 Post-5.jpg September 20, 2021 Post-6.jpg

3 Speedlights Work

Joshua Hubbell September 20, 2021

Okay, I am trying to do a write up on a wonderful wedding I shot before my surgery, but I keep going too long with it. Apparently, I have a lot to say. Stay tuned as I will figure out how to get it all down to size that works for a business blog / social media post. In the meantime, here is this:


I volunteered my photography services to a school for their theatre productions this year. I’ve mentioned before this is my favorite type of photography because it always pushes me to my creative limits while the performance, special effects, costumes, direction, and tech operations usually inspire my creativity in some form or another for the photo sessions I do. So not only do I get the satisfaction of helping others, I also get creative boost from it and very good photography practice in.


Anyway, tech rehearsal is something I am hoping to start with. For one, well tech crew generally don’t like to be seen, it does give them visual proof that they were in fact there and they are an essential part to a theatre production and deserve the credit. But aside from that, you are thrown into very challenging lighting situations however if you can solve those you can get some interesting photos.


Usually, I do tech rehearsals there are two types of photos taking place:

1) Headshots for the credits board or screen.

2) Tech crew at work photos.

For the photos here, my model and I were testing with a 3 speedlight setup. Tech crew generally must start sooner than performers so getting set up quick and getting their headshots out of the way sooner goes a long way towards helping them. Also, I try to have a variation of poses. School kids working on a production want to be taken seriously, and tech crew is serious work, so I try to approach tech crew photos like I would any professional. Besides, people working always works good and people working with lights or behind a sound board always offers up something unique.


Also, it helps to run through lights since it’s been a little while since I last worked with them.

Tags photography tips, theatre photography
Comment
113A4670-Edit.jpg
September 11, 2021 Kinder Farm Park Vivian and Bella BW-5.jpg
September 11, 2021 Kinder Farm Park Vivian and Bella-7.jpg
September 11, 2021 Kinder Farm Park Vivian and Bella-10.jpg
September 11, 2021 Kinder Farm Park Vivian and Bella BW-11.jpg
September 11, 2021 Kinder Farm Park Vivian and Bella-15.jpg
113A4670-Edit.jpg September 11, 2021 Kinder Farm Park Vivian and Bella BW-5.jpg September 11, 2021 Kinder Farm Park Vivian and Bella-7.jpg September 11, 2021 Kinder Farm Park Vivian and Bella-10.jpg September 11, 2021 Kinder Farm Park Vivian and Bella BW-11.jpg September 11, 2021 Kinder Farm Park Vivian and Bella-15.jpg

Time is the most valuable asset you have.

Joshua Hubbell September 16, 2021

Slightly shorter post. I was messing around with a polarized lens filter (mainly because I made a mistake and ordered a polarized lens filter as opposed to an ND filter). We were at Kinder Farm Park for these and yes, my youngest niece did do her own lipstick, how could you tell?


Anyway, I wanted to touch on editing in photoshop. It is always an option and is a very versatile tool. For example, I edited out some sun flare on a few of these photos. But there are two catches to this:


1) Photoshop is only as useful as you know how to use it and know how to do so effectively (and there is always more to know about it).

2) It takes time to do photoshop edits.


I think that’s something a lot of photographers or even small businesspeople in general or even just regular people forget: time is the most valuable asset and the easiest squandered asset you will ever have. You can invest money in something and get back more money in return, you can’t invest time in something and get back more time in return. So photoshop edits need to be balanced within reason.


Or better yet, try to get the photo done well enough so you don’t need to do much in photoshop at all.

Comment
← NewerOlder →

Search Posts

Powered by Squarespace