• Graphite, Charcoal, Pastel
    • Oil Paintings
    • Military experience art
  • Artist Statement
    • Pets
    • Kid Photos
    • Family Photos
    • Couples
    • Travel and Nature
  • Photo Blog
  • Media
  • Contact
Menu

Single-Handed Arts, LLC

Fine Arts and Photography Services
  • Fine Art
    • Graphite, Charcoal, Pastel
    • Oil Paintings
    • Military experience art
  • Artist Statement
  • Photography
    • Pets
    • Kid Photos
    • Family Photos
    • Couples
    • Travel and Nature
  • Photo Blog
  • Media
  • Contact
×
IG - December 6, 2021 Post.jpg
IG - December 6, 2021 Post-2.jpg
IG - December 6, 2021 Post-3.jpg
IG - December 6, 2021 Post-4.jpg
IG - December 6, 2021 Post-5.jpg
IG - December 6, 2021 Post-6.jpg
IG - December 6, 2021 Post.jpg IG - December 6, 2021 Post-2.jpg IG - December 6, 2021 Post-3.jpg IG - December 6, 2021 Post-4.jpg IG - December 6, 2021 Post-5.jpg IG - December 6, 2021 Post-6.jpg

4 Light Test

Joshua Hubbell December 6, 2021

Yet another quick post but good news, I am almost caught up on my processing work.


Never underestimate how long processing may take you, especially if you want to do it right. At this point I try to do it in 4 passes. First pass gets the best of each series of shots. The second pass crops as needed. Third pass gets the colors down. Fourth pass reviews everything. And then I usually throw in a fifth pass because I always have this awful feeling I’ve screwed everything up and I am just not seeing it. That’s yet another reason I like doing self-photos from time to time. If I screw things up with my own photos, I will be more likely to see it the next time I work on someone else’s photos. At least that’s the theory.


Anyway, these are the results of a 4 light setup. Two strobes with grids, a speedlight with a snoot and grid acting as a hair light, and a speedlight directly behind my head acting as a rim light. Mainly I was just experimenting. I have another series of character shots for a theater shoot coming up in about 2 months and I am starting zero in on setup for it. It’s kind of like a game of Battleship. I have a general idea of where the final result is, but I need to keep experimenting with my lights until I get a hit. Then I just work from there. I’m at the hit area but still need to figure out which direction to take the lighting. For the record, this wasn’t it. It’s close though and I am getting an idea as to where I am going to take it.

Comment
IG - December 3, 2021 Post-4.jpg
IG - December 3, 2021 Post-2.jpg
IG - December 3, 2021 Post-5.jpg
IG - December 3, 2021 Post-6.jpg
IG - December 3, 2021 Post-8.jpg
IG - December 3, 2021 Post-11.jpg
IG - December 3, 2021 Post-12.jpg
IG - December 3, 2021 Post-13.jpg
IG - December 3, 2021 Post.jpg
IG - December 3, 2021 Post-4.jpg IG - December 3, 2021 Post-2.jpg IG - December 3, 2021 Post-5.jpg IG - December 3, 2021 Post-6.jpg IG - December 3, 2021 Post-8.jpg IG - December 3, 2021 Post-11.jpg IG - December 3, 2021 Post-12.jpg IG - December 3, 2021 Post-13.jpg IG - December 3, 2021 Post.jpg

Mother and Baby Session

Joshua Hubbell December 3, 2021

A few indoor photos of a mother with her baby and one annoyed cat. Remember, you don’t need strobes or speedlights to do photography. All of these were taken indoors utilizing only the window and the sunlight coming through it. For these photos I knew I had to work quickly and keep movements to a minimum. You generally don’t want to push anyone around but especially not babies because you are going to lose every time. So, I kept the photo session around one set of windows and moved myself to different angles.


As always, assume parents understand their babies and work with them to get that smile, but also just go with it some. Everything is new to babies, so they look around with wonder. Capture that too.

Tags Photography Tips
Comment
IG - December 1, 2021 Post-2.jpg
IG - December 1, 2021 Post-3.jpg
IG - December 1, 2021 Post-4.jpg
IG - December 1, 2021 Post.jpg
IG - December 1, 2021 Post-5.jpg
IG - December 1, 2021 Post-2.jpg IG - December 1, 2021 Post-3.jpg IG - December 1, 2021 Post-4.jpg IG - December 1, 2021 Post.jpg IG - December 1, 2021 Post-5.jpg

Simply moving can solve many of your "problems."

Joshua Hubbell December 1, 2021

Another quick post as I have lots of processing still to do, but I am getting it done.


I recently had a wonderful photo session in Annapolis with an amazing family. We walked all over downtown Annapolis taking photos when we got to the docks and suddenly a person in red was doing stretches in the back, this particular situation is one of the things I love about photography because it’s not the problem it seems to be. For starters, let me be clear – this person had every right to be there and good for him for exercising! Yes, him being there posed a problem for the shot framing but not a big problem, actually he posed an easily fixed problem.


Sure, I could go into Photoshop and spend minutes or even hours editing him, or I could go into Lightroom and attempt to carefully use the heal brush and make him disappear, but why do all that work? Instead, I merely moved around so he was positioned directly behind my subjects. And with that simple movement the person in red was gone. No time is spent editing him out in processing so I can focus on other things when I am doing processing and I didn’t have to ask him to move for the shot. Never underestimate what your feet and movement can do to quietly solve your problems. You can save hours in the processing phase if you carefully consider your positioning during the actual photo shoot.

Tags Photography Tips
Comment
IG - November 29, 2021 Post-3.jpg
IG - November 29, 2021 Post.jpg
IG - November 29, 2021 Post-2.jpg
IG - November 29, 2021 Post-4.jpg
IG - November 29, 2021 Post-5.jpg
IG - November 29, 2021 Post-6.jpg
IG - November 29, 2021 Post-7.jpg
IG - November 29, 2021 Post-3.jpg IG - November 29, 2021 Post.jpg IG - November 29, 2021 Post-2.jpg IG - November 29, 2021 Post-4.jpg IG - November 29, 2021 Post-5.jpg IG - November 29, 2021 Post-6.jpg IG - November 29, 2021 Post-7.jpg

More Pet Tips

Joshua Hubbell November 29, 2021

I hope everyone had a great Thanksgiving. More pet photos. Let me get the standard tip out of the way first:


Be patient when photographing your pets. They don’t know what a camera is and they have no concept of what a picture is. Getting frustrated with them because they won’t frame into your picture correctly will just upset them and make them afraid whenever you get your camera out. Now these dogs in these pictures are starting to understand that my camera out means the treat train is arriving very soon. If you do pet photography correctly then the pets you photograph often will come to associate great things with your camera and start to pose every time.


With that out of the way, let’s get into trickier pets – pets with dark or black fur. Dark fur can pose numerous problems because it is easy to have your sensor over adjust and suddenly you got a silhouette of a dog. There are several ways you can address this issue, but you have to put a little more thought into things. Thankfully, every trick you learn to use when working with dark fur will help your photography out tremendously and will help you out in low light situations.


Anyway, the three easy approaches are this:

1) Consider your background – if you put a black dog in white snow, your scenario changes drastically. Granted you don’t always have snow, but you have greenery or other colors to play off of and help utilize the dog’s fur to make it the center of attention.

2) Use a flash to help give the dog some depth. Darker color absorbs light, which is why your camera sometimes goes overboard in trying to figure out how to deal with animals with dark fur. If you throw some light in up front that will help the sensor in your camera find that depth.

3) Processing tools. This is the easiest but does add an extra step in your workflow. You can use the shadows slider in most photo processing tools to help counter what your camera’s sensor is doing. Just be sure you are shooting in RAW format when you take the pictures. Processing tools love photos in RAW or your camera’s equivalent of RAW.


Anyway, all these were shot using light from a window. Processing tools were used to add depth to the cat and dog. Also, the cat isn’t in some sort of kitty lockup, that’s just a play area for kids so the dogs don’t mistake the toys for chew toys.

Tags Pet Photography, Photography Tips
Comment
November 26, 2021 Post.jpg
November 26, 2021 Post-2.jpg
November 26, 2021 Post-3.jpg
November 26, 2021 Post-4.jpg
November 26, 2021 Post-5.jpg
November 26, 2021 Post-6.jpg
November 26, 2021 Post-7.jpg
November 26, 2021 Post.jpg November 26, 2021 Post-2.jpg November 26, 2021 Post-3.jpg November 26, 2021 Post-4.jpg November 26, 2021 Post-5.jpg November 26, 2021 Post-6.jpg November 26, 2021 Post-7.jpg

More Low Key Lighting

Joshua Hubbell November 26, 2021

Here is another low key lighting setup that builds on the setup in the previous post. This time we used the overhead speedlight with a snoot and a grid and we added a speedlight on the side with a cheap small soft box. This was done because we threw in an umbrella and if we just used the overhead light, it would likely block out most of the light. By adding the light on the side, we are able to still light our subject while still getting that overhead light.


To be perfectly honest, most light that appears to have a single light overhead usually has a second equal or weaker light down lower off to the side or up front to help soften or outright remove those downward shadows the eye sockets, forehead, and nose produce from an overhead light. Emphasis on the “most,” sometimes those shadows are what you are going for and in those cases you obviously wouldn’t use that lower light.


This time our model was dress up a bit more and despite her begging me for this photo session she wasn’t interested in smiling. So, I went for a serious look and rolled with that. She and I both liked the end result.

Tags Photography Tips, Low Key Lighting
Comment
IG - November 24, 2021 Post.jpg
IG - November 24, 2021 Post-2.jpg
IG - November 24, 2021 Post-3.jpg
IG - November 24, 2021 Post-4.jpg
IG - November 24, 2021 Post-5.jpg
IG - November 24, 2021 Post-6.jpg
IG - November 24, 2021 Post-7.jpg
IG - November 24, 2021 Post.jpg IG - November 24, 2021 Post-2.jpg IG - November 24, 2021 Post-3.jpg IG - November 24, 2021 Post-4.jpg IG - November 24, 2021 Post-5.jpg IG - November 24, 2021 Post-6.jpg IG - November 24, 2021 Post-7.jpg

Low Key Lighting

Joshua Hubbell November 24, 2021

Some low-key lighting practice work here. It is a style I enjoy playing around with though I am far from mastering this technique. In this setup I was using a single speed light aimed down. I used a snoot for some and no snoot for others. I also generally prefer this style in black and white, but I included a few in color.


The things to consider with low key lighting are obvious and not obvious at all. For starters, you have to consider shadow and light, those will be the two main factors in your photos. Where you put the shadows and where your put the light will impact how your picture connects with the person viewing it. But you also have to consider smaller details. For example: what color will you make the light? Or what background, even if lacks visibility, will you use. What clothing is involved? Seated or standing? Leaning forward or sitting back?


Low key lighting reduces what can be seen in the photo and in doing so it ups the importance or value of what can be seen and in doing so means you need to consider what is being seen when you are setting up your shot.


Anyway, in case I forget, Happy Thanksgiving tomorrow.

Tags Low Key Lighting, Photography Tips
Comment
IG - November 23 Post.jpg
IG - November 23 Post-2.jpg
IG - November 23 Post-3.jpg
IG - November 23 Post-4.jpg
IG - November 23 Post-5.jpg
IG - November 23 Post.jpg IG - November 23 Post-2.jpg IG - November 23 Post-3.jpg IG - November 23 Post-4.jpg IG - November 23 Post-5.jpg

Utilizing Seats.

Joshua Hubbell November 23, 2021

Another quick post as I am swamped with processing work, which is a good problem to have.


Seats! You’ve seen me use stools and chairs and, in these photos, we are using an antique bench that came from an old fancy cruise ship. The “what” your subjects sit on is not as important as how you utilize it. Obviously, you can go for the main use and shoot straight on to the seat, but don’t discount other approaches, especially if you can move and adjust the seat. For example, we put the bench at an angle and worked from there. In fact, I meant to turn the bench around, so the back was facing the camera and have my subject look back, but I got sidetracked on the dogs.


On that note, two of my repeat reminders:


1) Be patient with pets on your photo session set. They don’t know what you are doing. They have no concept of what a camera or a photo is. They just want you to be happy and getting angry at them will just make them upset and you can pretty much just end your photo session at that point.


2) When working with younger children you can save a lot of processing time and touch up work if you remember to wash their face, especially if they have eaten recently.


Anyway, this was a two strobe light setup. Each light had an octagon softbox. I originally thought about having a back light, but I liked the way the background looked without a back light.

Tags Photography Tips, Pet Photography
Comment
IG - November 17 Post.jpg
IG - November 17 Post-2.jpg
IG - November 17 Post-4.jpg
IG - November 17 Post-6.jpg
IG - November 17 Post-7.jpg
IG - November 17 Post.jpg IG - November 17 Post-2.jpg IG - November 17 Post-4.jpg IG - November 17 Post-6.jpg IG - November 17 Post-7.jpg

Joshua Hubbell November 17, 2021

This was a wonderful wedding engagement shoot that I shot back in October. And again, I didn’t want to post these photos next to horror photos, so I am posting them a month or so later. But this was a lot of fun because they brought their dogs. Pets on scene usually just makes everyone involved happier. The clients tend to be happier and more relaxed because most people like their pets and I like animals, so I was happier too. This was an exciting session.


The thing I love about pets is that they look around. They look at you, they look at me. If you time it right, you can utilize pets looking around to bring the viewer in and make the picture more intriguing. You can use the direction the pets are looking at to act as a sort of leading line. Your eyes will ask “what is that dog looking at?” and then go in that direction on the photo. Or you can use the pets looking at your camera to connect with the person viewing the photo and pull them into it. Either way, using a pet to bring the viewer in is a happier way to do so as opposed to using just some random item as a leading line.


Don’t get me wrong, I love leading lines and try to incorporate them into my work often, probably too much. But if I can use a pet that just happens to have the right look in the right direction – I will got with that every time because animals make me smile.


All in all, this was a wonderful evening at Downs Park. And we shot it during golden hour. I did have a speed light for some of it but quickly just reverted to my camera. I also had a ND filter I kept putting on and taking off depending on the angle.

Tags Photography Tips
Comment
IG - November 15, 2021 Post.jpg
IG - November 15, 2021 Post-2.jpg
IG - November 15, 2021 Post-3.jpg
IG - November 15, 2021 Post-4.jpg
IG - November 15, 2021 Post-5.jpg
IG - November 15, 2021 Post-6.jpg
IG - November 15, 2021 Post.jpg IG - November 15, 2021 Post-2.jpg IG - November 15, 2021 Post-3.jpg IG - November 15, 2021 Post-4.jpg IG - November 15, 2021 Post-5.jpg IG - November 15, 2021 Post-6.jpg

Homecoming

Joshua Hubbell November 15, 2021

I did these Homecoming photos last month, but I didn’t want to post them along horror photos, so I held them until now. Also, I got permission to use these photos. I’m a firm believer of getting permission before you use photo work you did for a client even if you may not legally need permission because the reputation you can get from potentially annoying clients after the fact just isn’t worth whatever you may be trying to do. After all, it’s what your clients aren’t telling you that kills your business.


Anyway, working with teens can be challenging as they tend to be more self-conscious and generally don’t want to be around adults, especially for a photo session, but that is all kind of different for Homecoming and Prom. For Homecoming and Prom, they have planned up to this moment and they want pictures of where they are. Furthermore, they usually have their friends or dates involved which tends to put them in a good mood. In other words, when it comes to Homecoming and Prom, the photo session is something they likely want, and their friends make it something fun.


Two things I do in process is edit out acne (something I didn’t have to do in these pictures) and consider social media. We’ve all been teenagers so we know how big a deal acne is for them and modern photo processing tools offers numerous ways to edit out acne. Also, consider social media. Teens use social media all the time, so if you can include some photos that are proper dimensions for the various social media sites out there you are really helping out the teenagers you are photographing.


These photos were taken on a raining night, so I brought my equipment and setup studio in a garage My backdrop started off as a peach color, but it just wasn’t working out and fortunately I always bring other backdrops and I always have black, black is a good fall back color if nothing else is working. This was a three-light set up with 2 strobes with soft boxes and grids as the key and fill lights and a speedlight as a hair light.


For posing, don’t be afraid to use hands and arms to get depth. Also, you can have your subject lean in some. You can lock knees and unlock knees and all sorts of things. Honestly, posing comes down to practice. Practice by yourself in the mirror and practice with a model. The more you practice posing the better you get and the more creative you end up being.

Tags Photography Tips, Homecoming
Comment
IG - November 10, 2021 Post.jpg
IG - November 10, 2021 Post-3.jpg
IG - November 10, 2021 Post-2.jpg
IG - November 10, 2021 Post-4.jpg
IG - November 10, 2021 Post-5.jpg
IG - November 10, 2021 Post-6.jpg
IG - November 10, 2021 Post-7.jpg
IG - November 10, 2021 Post.jpg IG - November 10, 2021 Post-3.jpg IG - November 10, 2021 Post-2.jpg IG - November 10, 2021 Post-4.jpg IG - November 10, 2021 Post-5.jpg IG - November 10, 2021 Post-6.jpg IG - November 10, 2021 Post-7.jpg

A few more quick tips.

Joshua Hubbell November 10, 2021

I am smack dab in the middle of processing dress rehearsal photos so another quick post. This time some tips for working with younger kids, in this case a four-year-old but these tricks could work with any kid that is able to walk and maybe even younger. Some of these are repeats, but I am very much for repetition. You repeat things until you get them done solid and then you repeat them even more.


1)      If they aren’t feeling like a smile, then don’t make them smile. Worst case scenario is that you end up needing to work in some framing or some shadows and grayscaling the photo so it matches the tone of the mood. This way you end up with a much better moody photo then you could ever end up attempting to force a smile which at best will have a clear as day fake smile and at worst a child in tears.


2)      Try a different angle if the shoot is feeling too generic. On our nature walk, we stopped by a small playground. Instead of settling for a straight on shoot on the playground, I walked around to the other side. This resulted in a more energetic shot and a different take on a playground shot. But…..


3)      Sometimes settling for a generic shot isn’t that bad. Once I got her on the slide, I asked her to stop and took the photo. She shot me a serious look and I just went with it.


Bonus tip. Most of my photography tips have a theme: just roll with it. You can and should plan your photo sessions but understand even the best plans reach a point where something isn’t going exactly to plan and you just have to go with it and play through. Photography is all about the unexpected and by embracing the unexpected your photos will be more interesting.


Anyway, I’m not sure I will have anything posted Friday. If not, things will resume Monday of next week.

Tags Photography Tips
Comment
IG - Nov 8 2021 Post.jpg
IG - Nov 8 2021 Post-2.jpg
IG - Nov 8 2021 Post-3.jpg
IG - Nov 8 2021 Post-4.jpg
IG - Nov 8 2021 Post-5.jpg
IG - Nov 8 2021 Post.jpg IG - Nov 8 2021 Post-2.jpg IG - Nov 8 2021 Post-3.jpg IG - Nov 8 2021 Post-4.jpg IG - Nov 8 2021 Post-5.jpg

Tying up loose ends for October.

Joshua Hubbell November 8, 2021

I kept writing “I’ll tell you all how I did this effect in a later post” and never got back to you on that. So here we go.


One major point for all of these effects before we get started; I didn’t need perfect, I just needed close enough. Any mistakes in production I could hide with setup or processing. If you plan to make any of these effects for costumes that you will display live, you likely won’t have the leisure of shot framing and processing to hide mistakes that I did for photography. Keep that in mind as you go over this.


For the fake eyeballs, check out these YouTube videos:


EASY DIY Realistic Resin Eyes by Monster Tutorials

Link: https://www.youtube.com/watch?v=oOIWkK0-7PY


Note: I purchased the exact stuff he recommends at Michaels, but I suspect Hobby Lobby has it as well – Michaels was just closer to the location I was making them. I skipped the yellowing part. I did experience failures and do expect to make a few attempts before you see success. The good news is, once you get the mold worked out mistakes aren’t as much trouble since you can just make more eyes to attempt things.


Even then, my end products didn’t come out as good as his, but it didn’t matter for my photoshoot as the eyes were small and you never really got a close look at them.


Also, I had to try 4 different printers before I found one that worked with his technique so keep that in mind.

Bonus tip on the eyes postproduction: I discovered fake severed eyes put on a small plate and strategically placed in certain rooms seems to keep people out of places you don’t want them to go.


How to create a fake eye by ellimacs sfx makeup

Link: https://www.youtube.com/watch?v=48zY3p_-i88


Note: I didn’t really use this one so much as got inspired by it. I glued yarn on the little stub on the back of the eyes created in the first video to make those thick veins or whatever coming from the eye and sort of did my own spin on it by drenching them in fake blood.


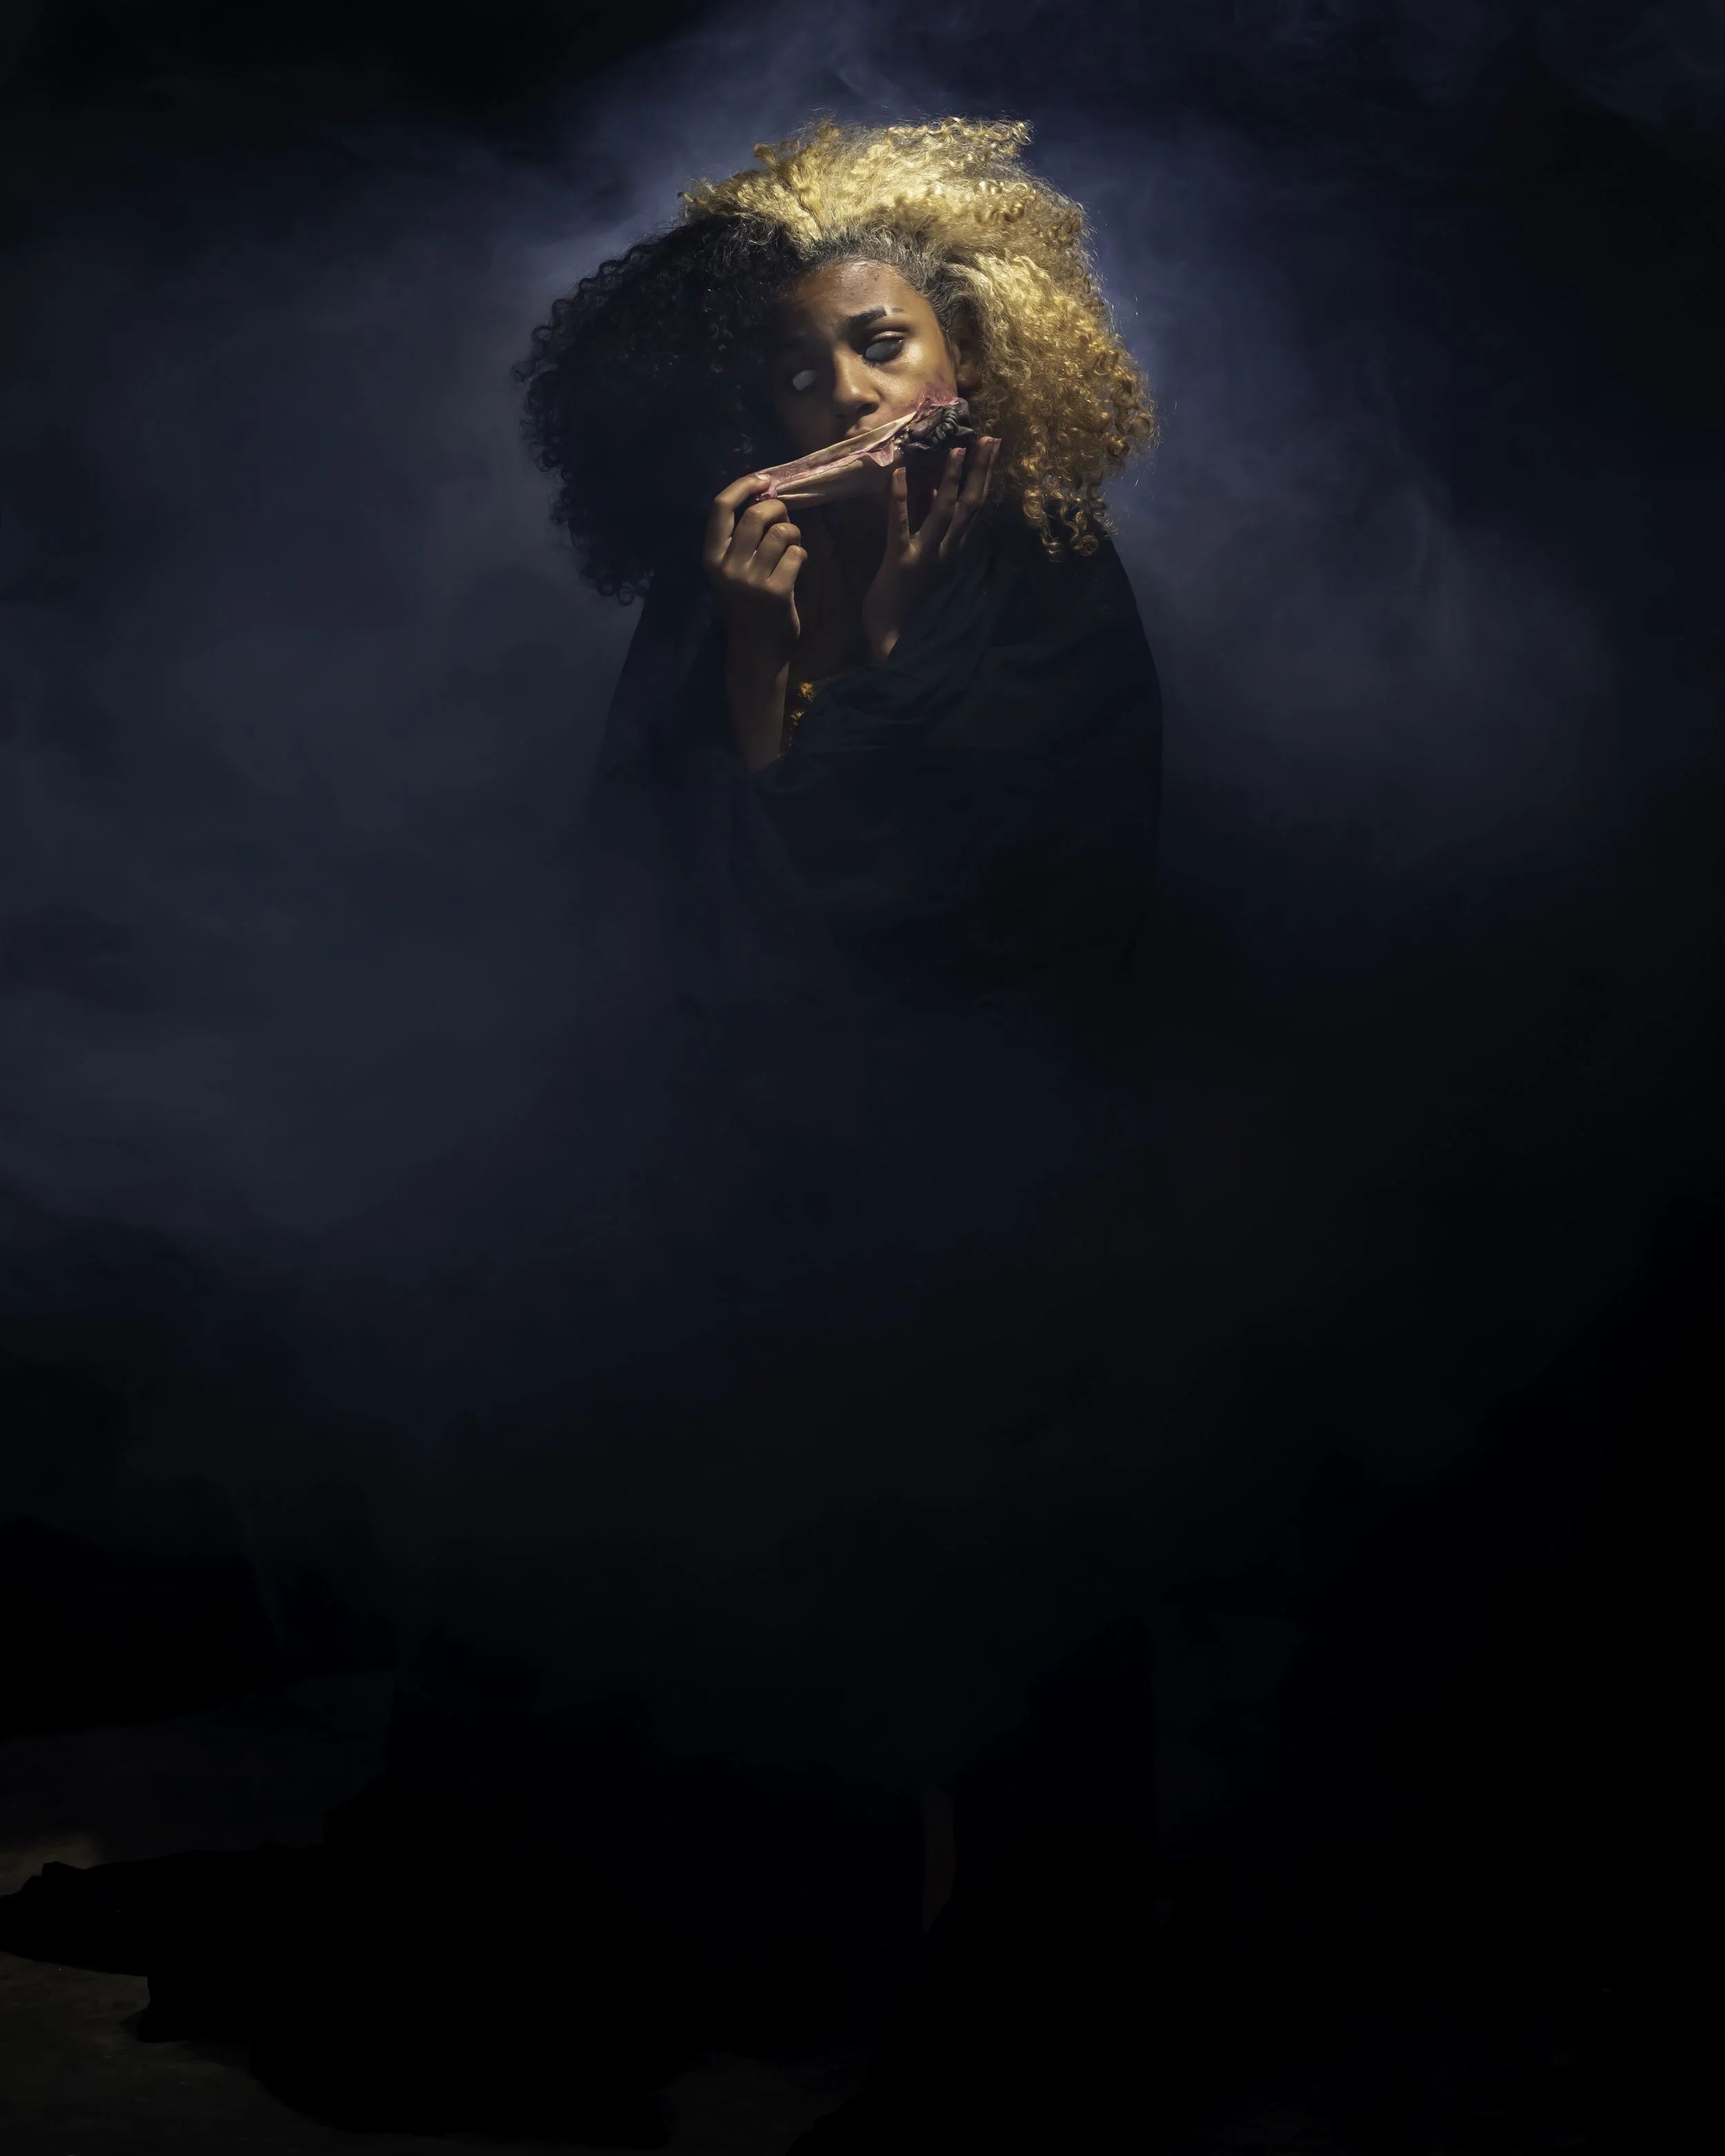
For dissolving mouth:

I think I wrote it in the post but for review, the glowing orb was stupid easy. I just got a crystal ball and placed directly between a speedlight and my camera and voila – glowing orb of mystery.


For the dissolving mouth, I melted some monster clay, let it dry, and painted layers of liquid latex on it. Liquid latex needs to air dry, so I recommend a hairdryer with a cool air button to speed things along. DO NOT PAINT LIQUID LATEX OVER A NOT TOTALLY DRY LAYER or you will have a bad day when you go to peel it and liquid latex spills all over. Speaking of peeling, make sure you have a brush and baby powder to brush on to the dried latex skin as you peel it up or it will stick to itself. After that my sfx assistant applied it to my face and applied makeup to match it. I also did some processing work on it as well.


For the pupil-less face peeling monstrosity character:


I can’t recall which video I used but I did look up a video on how to remove pupils using adobe photoshop. There are lots of them out there so you shouldn’t have a problem finding one.


The other effects were a mix of the fake skin we made for the dissolving mouth, except now on a paper plate rather than on monster clay, and making a bizarre shaped object out of monster clay and molding it as we did with the fake eyes. My sfx assistant painted the prosthetic and applied it to her face using liquid latex as glue which worked just okay, but I do wish we had more time at the time to research stronger methods of sticking it to her face.


Finally, for the cannibal, or should I say the ear.

I watched every video I came across on youtube that I could find for making ear molds. This was tricky as a lot of videos focused on inside the ear for headphones and for hearing aids. You want to make the mold out of alginate which means you will be very limited on the number of times you can cast with it. Also keep in mind, I kind of cheated. The person who’s ear I was making a mold of hears with a cochlear implant and no longer has an ear canal on the ear I was molding making the stakes much lower for potential damage.  


When I went to cast with the alginate mold, I added mica powder to get the cast to match my model’s skin tone. I did not use remotely enough mica powder and this resulted in a pink ear so I painted it close to his skin tone.


The cast itself didn’t turn out that great and looked gnarly, but that was okay because I needed the ear to look like a cannibal had just cut it off so gnarly worked for this project. Furthermore, any major mistakes I could hide with fake blood.


And that’s all my notes. If you attempt any of these, give yourself leeway for mistakes and learning, especially if you are going for a live costume and not a photo session.


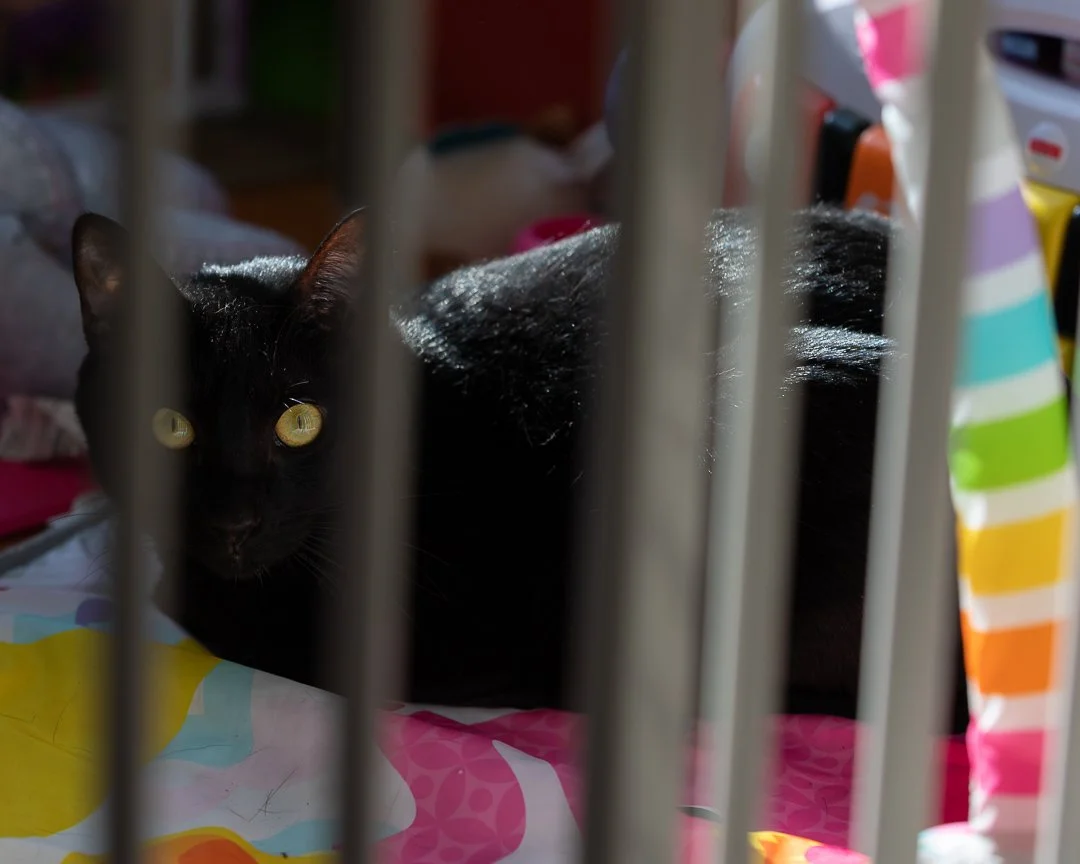
Also, the included photos are outtakes from some of the projects of a certain toddler peaking around. She hated the eyes, she hated the mouth, she hated the face peeling, but oddly enough she was intrigued by the cannibal. I’m not sure if that’s a good thing or a bad thing.

Comment
IG - November 5, 2021 Post.jpg
IG - November 5, 2021 Post-2.jpg
IG - November 5, 2021 Post-3.jpg
IG - November 5, 2021 Post-4.jpg
IG - November 5, 2021 Post-5.jpg
IG - November 5, 2021 Post-6.jpg
IG - November 5, 2021 Post-7.jpg
IG - November 5, 2021 Post.jpg IG - November 5, 2021 Post-2.jpg IG - November 5, 2021 Post-3.jpg IG - November 5, 2021 Post-4.jpg IG - November 5, 2021 Post-5.jpg IG - November 5, 2021 Post-6.jpg IG - November 5, 2021 Post-7.jpg

Indoor Pet Photography Tips

Joshua Hubbell November 5, 2021

I have a big weekend I’m prepping for so a kind of quick post this week.


A few more tips on photographing pets, but this time indoors.


First for indoors, when working indoors and just going with a camera remember that you have access to one of the brightest lights around – the sun. Use your windows to let a little light in. If you pay attention to how the sun shines through your windows you can time when to take the photo with the specific type of light you want. You may have to move stuff around, but that secret can stay between you and your pet, especially if the shot ends up looking great.


As for pets, again, when indoors, wait for nap time. A lot of energy outside is manageable. A lot of energy indoors is a challenge. However, if you take the photo when it’s nap time you get a much calmer subject to work with and that means you can get your camera closer without making your pet nervous. That also means they might look at your camera more.


And once again, and as always, be patient. Your pets just want you to be happy. They don’t know what a camera is, nor do they know what a photo is, but if you get frustrated with them during a photo session, I guarantee they will start to fear your camera. However, if you keep it upbeat and happy, even if they aren’t doing what you want them to do, they will stay upbeat and happy whenever you get that camera out and that’s most of the way to an amazing photo of your pet.

Tags Photography Tips, Pet Photography
Comment
IG - November 3, 2021 Post.jpg
IG - November 3, 2021 Post-2.jpg
IG - November 3, 2021 Post-3.jpg
IG - November 3, 2021 Post-4.jpg
IG - November 3, 2021 Post-5.jpg
IG - November 3, 2021 Post-6.jpg
IG - November 3, 2021 Post-7.jpg
IG - November 3, 2021 Post-8.jpg
IG - November 3, 2021 Post.jpg IG - November 3, 2021 Post-2.jpg IG - November 3, 2021 Post-3.jpg IG - November 3, 2021 Post-4.jpg IG - November 3, 2021 Post-5.jpg IG - November 3, 2021 Post-6.jpg IG - November 3, 2021 Post-7.jpg IG - November 3, 2021 Post-8.jpg

You can learn a lot from a costume session.

Joshua Hubbell November 3, 2021

Halloween is passed, but one last one post regarding Halloween to get a few more tips out. First off, I always recommend trying at least one costume photo session. It doesn’t have to be a carefully planned out and carefully put together costume, the exercise is the point. Trust me, you will get some ideas from doing such a session that will carry over into your other sessions.


Here my subject has a costume on (Cruella). Right off the bat there are three things that came to my mind – Cruella is a villain, my subject has a dress, and my subject has a pearl necklace. All three of those topics offer posing options and posing options make for more interesting photos and a better photo session. We started off with a standard pose and worked from there.


After the first set of poses I told her to laugh like a villain. This threw her off at first, but I demonstrated (never ask your models to do something you aren’t willing to do yourself) with an over-the-top villain laugh making sure she saw my hands and arms out. Then she went for it and those shots turned out great. From there we added in touching and grabbing her pearl necklace while laughing.


When it comes to jewlery, glasses, hair, or essentially anything around the face, just think what people do when they have those things. Your every day regular person touches their face too much and if they have anything near or on the face, they will touch those items as well. So just think about that, think about how people might touch those items, and work from there – you will come up with something that makes sense. Then we moved on to her clothing. We had her twirl, because she had a dress that can twirl, and it looked great. When having a subject twirl in a dress remember to tell them to look at the camera as they do the twirl and try to time your shot carefully. She also did a shot or two adjusting her gloves.


So, if you are looking for poses take a second and see what your subject has on. They have more poses on them then you realize. One final note: white clothing bounces light. Keep that in mind when you add white articles of clothing, especially in a speedlight/strobe situation.

Tags Photography Tips, Posing Tips
Comment
IG - Novemeber 1, 2021 Post-6.jpg
IG - Novemeber 1, 2021 Post.jpg
IG - Novemeber 1, 2021 Post-2.jpg
IG - Novemeber 1, 2021 Post-3.jpg
IG - Novemeber 1, 2021 Post-5.jpg
IG - Novemeber 1, 2021 Post-4.jpg
IG - Novemeber 1, 2021 Post-7.jpg
IG - Novemeber 1, 2021 Post-6.jpg IG - Novemeber 1, 2021 Post.jpg IG - Novemeber 1, 2021 Post-2.jpg IG - Novemeber 1, 2021 Post-3.jpg IG - Novemeber 1, 2021 Post-5.jpg IG - Novemeber 1, 2021 Post-4.jpg IG - Novemeber 1, 2021 Post-7.jpg

A Girl and Her Puppy II

Joshua Hubbell November 1, 2021

October was awesome, a big thanks to every single person who sat in front of my camera or gave me space to practice my craft or both in October – you all are awesome! On that note, let’s start November off right with more puppy photos because every month should start with puppy photos or kitten photos or puppy and kitten photos. And this would be a good time to put my constant reminder about working with animals:


When working with animals, be patient and kind. Our pets just want people to be happy, but they don’t know how to make that happen. Throw in a camera and maybe photography lights and you have a setting they just completely do not understand. So, give them a break and just sort of go where they lead you – they are trying the best they can. Besides, if you get all upset, they will pick that up and then good luck getting anything other than worry out of them.


Anyway, for this shot I went with a quieter setup. Just two strobes with grids on either side of the models. One strobe was the key light and was brighter and the other light was just a very subtle fill light set low. This set up is great for melodramatic shots or calm shots where you really want to “paint” with light and shadow. One side note – if you don’t have another strobe or speedlight you can get a similar effect with the white side of a photography reflector though I’d recommend an assistant for adjustment as you zero in the exact angle or something you can adjust easily that will hold the reflector.

Tags Photography Tips
Comment
October 28, 2021 Cannibal-8.jpg
October 28, 2021 Cannibal-11.jpg
October 28, 2021 Cannibal-14.jpg
October 28, 2021 Cannibal-15.jpg
October 28, 2021 Cannibal-16.jpg
October 28, 2021 Cannibal-20.jpg
October 28, 2021 Cannibal-25.jpg
October 28, 2021 Cannibal-21.jpg
October 28, 2021 Cannibal-22.jpg
October 28, 2021 Cannibal-23.jpg
October 28, 2021 Cannibal-28.jpg
October 28, 2021 Cannibal-31.jpg
October 28, 2021 Cannibal-36.jpg
October 28, 2021 Cannibal-8.jpg October 28, 2021 Cannibal-11.jpg October 28, 2021 Cannibal-14.jpg October 28, 2021 Cannibal-15.jpg October 28, 2021 Cannibal-16.jpg October 28, 2021 Cannibal-20.jpg October 28, 2021 Cannibal-25.jpg October 28, 2021 Cannibal-21.jpg October 28, 2021 Cannibal-22.jpg October 28, 2021 Cannibal-23.jpg October 28, 2021 Cannibal-28.jpg October 28, 2021 Cannibal-31.jpg October 28, 2021 Cannibal-36.jpg

Playing Dice Games With Cannibals.

Joshua Hubbell October 29, 2021

He kept losing but he kept going back to play her game. He needed the food she promised if he won but he should have known you don’t play games with cannibals, especially not games of chance. Losses against her came at a high cost. She needed him to keep his arm so she could keep playing against him. She took an ear this time. His consultation prize wasn’t worth it.


This has been a great October. If you enjoyed our horror sessions then check back next October for those, but next month keep an eye out – we will be trying to recreate a classic painting in between featuring photography tips and tricks. And of course, if you want any family photography work or wedding photography work just send us an email.


In the meantime, this photo session was a little more careful with the setup. For lighting, we kept it mostly low with two strobes hooked up to softboxes with grids on to heavily control the lighting. Additionally, there was a speedlight overhead with a snoot and a grid on – again, to heavily control the light and keep a small circle of light on the table. Remember, in photography light and shadows are your brushes and what you do with them is how you will communicate your work.


As for props, the main one was the cut ear. Obviously, we didn’t cut our model’s ear off. We did create a mold cast of his ear with alginate and then used white resin mixed with mica powder for color. The mica powder went terrible. I don’t think I mixed enough in, and it ended up looking pink, so I ended up painting it – poorly. Thankfully it didn’t have to look good as I’d be burying it in blood it just had to look gnarly and mangled, which my shoddy fabrication skills really helped make happen on accident. Proving yet again that incompetence can very much result in success if you pour enough blood on it.

Tags Horror Photography, 2021
Comment
IG - October 27, 2021 Post.jpg
IG - October 27, 2021 Post-2.jpg
IG - October 27, 2021 Post-3.jpg
IG - October 27, 2021 Post-4.jpg
IG - October 27, 2021 Post-5.jpg
IG - October 27, 2021 Post-6.jpg
IG - October 27, 2021 Post.jpg IG - October 27, 2021 Post-2.jpg IG - October 27, 2021 Post-3.jpg IG - October 27, 2021 Post-4.jpg IG - October 27, 2021 Post-5.jpg IG - October 27, 2021 Post-6.jpg

Testing a new backdrop holder.

Joshua Hubbell October 27, 2021

Of course, you need a camera and a lens to do photography, but I find my biggest quality of life issues are from the smaller pieces. For example, my life got so much easier when I upgraded my remote triggers and receivers. That got me a reliable, trigger wire-free setup that I know will work every time. Well now I’ve upgraded my backdrop holder (I should probably find out what they are actually called but you know what I am talking about). And it was worth it. No longer am I asking, “will this hold my backdrops?” It definitely is and doing so extremely well. 


Anyway, for this test run I just grabbed whoever and had them do a pose and went with the chaos – which turned out well. As I always say, when something unexpected happens you tend to want to go with that. In the case of the four-year-old, I told her to stand at an angle with her arms crossed and her legs shoulder width apart and she came out with a much better interpretation of what I had in mind, so we rolled with that.


By the way, I believe she was Sally from the Nightmare Before Christmas for some Halloween related event just before this session.


The set up for this session involves one speed light in back for a hair light and two strobes up front with octagon softboxes up front. No grids this time.

Tags gear test, backdrop test
Comment
IG - October 25, 2021 Post.jpg
IG - October 25, 2021 Post-2.jpg
IG - October 25, 2021 Post-3.jpg
IG - October 25, 2021 Post-4.jpg
IG - October 25, 2021 Post-5.jpg
IG - October 25, 2021 Post.jpg IG - October 25, 2021 Post-2.jpg IG - October 25, 2021 Post-3.jpg IG - October 25, 2021 Post-4.jpg IG - October 25, 2021 Post-5.jpg

Planned Tech Crew Session Set Up

Joshua Hubbell October 25, 2021

I don’t post my work from my volunteering for theatre photography with a school, but I can show you our test set up. The goal when working with the tech crew is to make others realize that while the subject may be young, they are trained in a skill that is a bit more complex than normal skill and deserve the respect that comes with knowing that complex skill. You can train a chicken to play tic tac toe, you can’t train a chicken to operate stage lights and effects.


Part of it involves a little trickery, as I know we can’t get access to the tech crew equipment, but I do have access to my equipment, and they do have access to some easy to grab items, so I mix and match everything. For starters, for this year’s set up, I plan on using one of my strobes that conveniently had the stickers fall off, but it sure does look like a stage light to the untrained (or basically everyone who has never actually seen a stage light up close). I plan to also have the tech crew bring any headsets, clipboards, or scripts they may need with their job with them. It adds to the professional look and having a tool of your trade, even if it may seem insignificant to you, makes it easier to relax and do the photo.


For the shot itself I go with a speedlight up high in back pointed down as a hair light, a strobe just off to front with a square softbox and a grid on as the key light, and a strobe just off to the side with a long softbox and a grid as a fill light. I throw in the previously started strobe and a step ladder for props/seating and the rest sort of works itself out. A lot of poses can be pulled out of this set up which is good because tech crews tend to be somewhere between 5 and 10 people.

Comment

The Moon!

Joshua Hubbell October 22, 2021

Another quick post as I have processing work for a client and that has a majority of my focus right now.


The moon!


A full (or full-ish) moon is a great way to practice learning the photography trinity – shutter speed, aperture, and ISO settings on your camera as the moon is a great way to practice what you may know about them and see a clear effect as you adjust them. It is also a great opportunity to dip your feet in the manual mode settings on your camera. Do keep in mind that the moon and the night sky moves faster then you realize though and you will get motion blur if you set that shutter speed too low. But that’s all the more reason to practice with the moon – so you experience that too.


After that you can get into the finer details of getting trees or clouds in front of the moon. Clouds take patience though. And just building from there. The sky’s the limit so to speak.


Also photographing the moon introduces you to truly understanding your subject as much as possible. For example, the moon has phases, and getting the phase you want to photograph will require research. Furthermore, understanding how the light involved works can help you decide on better photography settings.  Finally, the moon moves around in the sky, so you might need to know where the moon is and where it is heading or you might find it’s nowhere to be found in the sky when you go to photograph depending on the time of year.


I’d recommend starting with a tripod as well until you get a handle on them, though keep in mind I rather dislike using tripods and often get mine out only to have an argument with it. Not to imply tripods are bad – they are amazing tools, just not usually with my photography style at this point in time. They make great paper weights too.

Tags Photography Tips, moon
Comment
October 17, 2021 - 1.jpg
October 17, 2021 - 2BW.jpg
October 17, 2021 - 3.jpg
October 17, 2021 - 4BW.jpg
October 17, 2021 - 5.jpg
October 17, 2021 - 1.jpg October 17, 2021 - 2BW.jpg October 17, 2021 - 3.jpg October 17, 2021 - 4BW.jpg October 17, 2021 - 5.jpg

Do projects to push your skill and improve!

Joshua Hubbell October 20, 2021

Out for a walk one night, she was worrying about the greater philosophies of life. It was with great relief when she realized that she never, in fact, existed in the first place. At this point in time, something else took her place and proceeded to peel away the skin that hid its existence.


Shots like these are why I do shots like these; so much was learned in creating this. The more you learn the more you have in your toolbox and the more you can pull out of that toolbox when it comes to working with clients. This took a bit of prosthetic creation but also some photoshop touch ups. This is also why you see other photographers doing various projects seeming for no reason at all. It isn’t just to showcase skill but also to push their skill into new areas.


When you become stagnant in your craft is when you are in the most danger of giving up on it. Stagnation leads to boredom, boredom leads to distractions, and distractions leads to giving up.


This shot also included a 3-light setup, all speedlites. One speedlite overhead as a key light, one behind as a hair light, and one just off to the side as a fill light. We also used some fog to bring that backlight out some.

Tags Horror Photography
Comment
IG - October 18, 2021 Post.jpg
IG - October 18, 2021 Post-2.jpg
IG - October 18, 2021 Post-3.jpg
IG - October 18, 2021 Post-4.jpg
IG - October 18, 2021 Post-5.jpg
IG - October 18, 2021 Post-6.jpg
IG - October 18, 2021 Post-7.jpg
IG - October 18, 2021 Post-8.jpg
IG - October 18, 2021 Post.jpg IG - October 18, 2021 Post-2.jpg IG - October 18, 2021 Post-3.jpg IG - October 18, 2021 Post-4.jpg IG - October 18, 2021 Post-5.jpg IG - October 18, 2021 Post-6.jpg IG - October 18, 2021 Post-7.jpg IG - October 18, 2021 Post-8.jpg

A Girl and Her Puppy

Joshua Hubbell October 18, 2021

And now for the scariest thing of all: a toddler with a puppy. Actually, the horror photo for this week needs more time to bake. Check back Wednesday. In the meantime, here’s a puppy photo shoot.


That background wasn’t the intended background. I wanted a red background but since the red backdrop was sitting pretty in a box at some other location, I went with what I had. But nothing ever goes according to plan and part of photography is just rolling with what plays out. This is especially true for 4-year-olds and puppies and even more true when you mix 4 year olds and puppies.


Obviously with a 4-year-old and a puppy, posing was out the window. However, the scenario can still be manipulated. For example, the rocking chair controlled the direction the action would take place in. Putting the puppy in the child’s lap gave two scenarios – a calm puppy resting in a lap or a puppy on the move leaving a lap. In these scenarios, don’t try to control the chaos just try to guide it along in a direction that you can work with.


We followed this all up with a 1-year-old mastiff with the 4-year-old and for some reason it ended up looking like she and her dog were about to drop their next rap album.


This worked out well. I used a 3-light setup. Two strobes: one with a rectangle softbox and a grid aimed at their faces at an angle (key light) and the other with a long softbox and a grid aimed at them directly to their left (fill light). Finally, a third speedlight up at an angle behind them on a boom stand (hairlight).

Tags photography tips
Comment
← NewerOlder →

Search Posts

Powered by Squarespace